2009 Hyundai Santa Fe turn signal
[x] Cancel search: turn signalPage 94 of 353
1
FEATURES OF YOUR HYUNDAI
83
OCM052075N
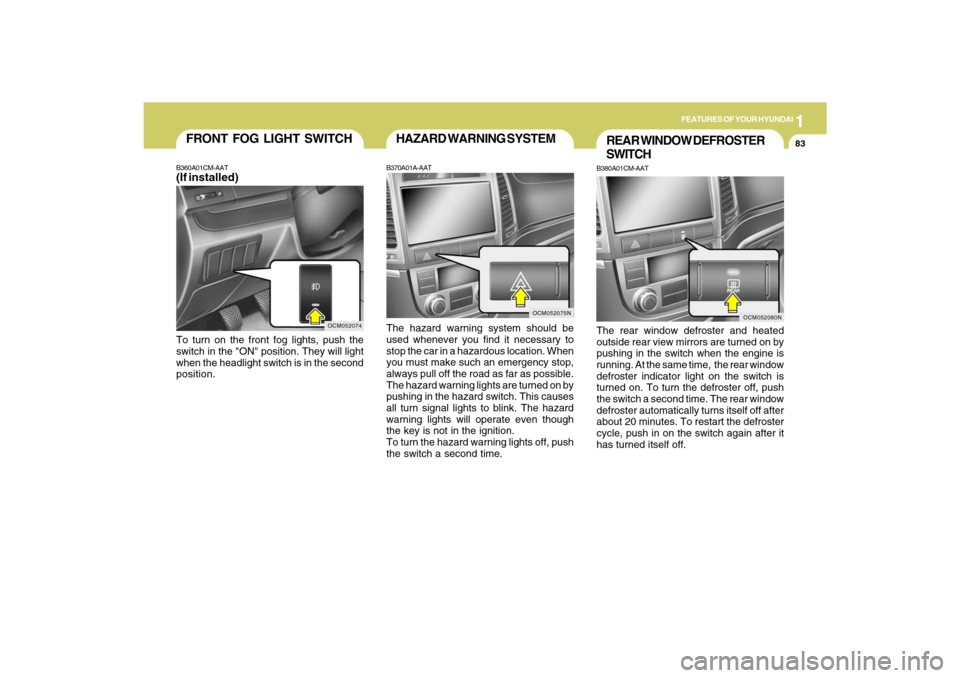
HAZARD WARNING SYSTEMB370A01A-AATThe hazard warning system should be
used whenever you find it necessary to
stop the car in a hazardous location. When
you must make such an emergency stop,
always pull off the road as far as possible.
The hazard warning lights are turned on by
pushing in the hazard switch. This causes
all turn signal lights to blink. The hazard
warning lights will operate even though
the key is not in the ignition.
To turn the hazard warning lights off, push
the switch a second time.
REAR WINDOW DEFROSTER
SWITCHB380A01CM-AATThe rear window defroster and heated
outside rear view mirrors are turned on by
pushing in the switch when the engine is
running. At the same time, the rear window
defroster indicator light on the switch is
turned on. To turn the defroster off, push
the switch a second time. The rear window
defroster automatically turns itself off after
about 20 minutes. To restart the defroster
cycle, push in on the switch again after it
has turned itself off.
OCM052080N
OCM052074
FRONT FOG LIGHT SWITCHB360A01CM-AAT(If installed)To turn on the front fog lights, push the
switch in the "ON" position. They will light
when the headlight switch is in the second
position.
Page 116 of 353
1
FEATURES OF YOUR HYUNDAI
105
1. Press and hold the
button for more
than 6 seconds. When the compass
memory is cleared a "C" will appear in
the display.
2. To calibrate the compass, drive the
vehicle in 2 complete circles at less than
5 MPH (8 Km/h) or until the compass
heading appears.
!
Integrated HomeLink
® Wireless
Control System
The HomeLink
® Wireless Control System
provides a convenient way to replace up to
three hand-held radio-frequency (RF)
transmitters with a single built-in device.
This innovative feature will learn the radio
frequency codes of most current transmit-
ters to operate devices such as gate op-
erators, garage door openers, entry door
locks, security systems, even home light-
ing. Both standard and rolling code-
equipped transmitters can be programmed
by following the outlined procedures.
CAUTION:
Before programming HomeLink
® to a
garage door opener or gate operator,
make sure that people and objects are
out of the way of the device to prevent
potential harm or damage. Do not use
HomeLink
® with any garage door opener
that lacks the safety stop and reverse
features as required by U.S. federal
safety standards (this includes any ga-
rage door opener model manufactured
before April 1, 1982). A garage door that
cannot detect an object - signaling the
door to stop and reverse - does not meet
current U.S. federal safety standards.
Using a garage door opener without these
features increases the risk of serious
injury or death.Programming HomeLink
®
NOTE:o When programming a garage door
opener, it is advised to park the ve-
hicle outside of the garage.
o It is recommended that a new battery
be placed in the hand-held transmit-
ter of the device being programmed
to HomeLink
® for quicker training and
accurate transmission of the radio-
frequency signal.
o Some vehicles may require the igni-
tion switch to be turned to the second
(or "accessories") position for pro-
gramming and/or operation of
HomeLink.
o In the event that there are still pro-
gramming difficulties or questions
after following the programming steps
listed below, contact HomeLink
® at:
www.homelink.com or 1-800-355-
3515.
Retain the original transmitter of the RF
device you are programming for use in
other vehicles as well as for future
HomeLink
® programming. It is also sug-
gested that upon the sale of the vehicle, the
programmed HomeLink
® buttons be
erased for security purposes.
CAUTION:
Be sure the area is free of traffic, pedes-
trians, and obstructions.
!
Additional HomeLink
® information can be
found at: www.homelink.com or by calling
1-800-355-3515.
Page 117 of 353

1FEATURES OF YOUR HYUNDAI
106
Standard Programming
To train most devices, follow these instruc-
tions:
1. For first-time programming, press and
hold the two outside buttons, HomeLink
®
Channel 1 and Channel 3 Buttons, until
the indicator light begins to flash (after
20 seconds). Release both buttons. Do
not hold the buttons for longer than 30
seconds.
2. Position the end of your hand-held trans-
mitter 1-3 inches (5-14 cm) away from
the HomeLink
® buttons while keeping
the indicator light in view.
3. Simultaneously press and hold both
the HomeLink® and hand-held trans-
mitter button. DO NOT release the but-
tons until step 4 has been completed.
4. While continuing to hold the buttons the
red Indicator Status LED will flash slowly
and then rapidly after HomeLink
® suc-
cessfully trains to the frequency signal
from the hand-held transmitter. Release
both buttons.5. Press and hold the just-trained
HomeLink
® button and observe the red
Status Indicator LED. If the indicator
light stays on constantly, programming
is complete and your device should
activate when the HomeLink
® button is
pressed and released.
6. To program the remaining two
HomeLink
® buttons, follow steps 2
through 5.
Rolling Code Programming
Rolling code devices which are "code-
protected" and manufactured after 1996
may be determined by the following:
o Reference the device owner's manual
for verification.
o The handheld transmitter appears to
program the HomeLink Universal Trans-
ceiver but does not activate the device.
o Press and hold the trained HomeLink
button. The device has the rolling code
feature if the indicator light flashes rap-
idly and then turns solid after 2 seconds.
To train rolling code devices, follow these
instructions:1. At the garage door opener receiver
(motor-head unit) in the garage, locate
the "learn" or "smart" button. This can
usually be found where the hanging
antenna wire is attached to the motor-
head unit. Exact location and color of
the button may vary by garage door
opener brand. If there is difficulty locat-
ing the training button, reference the
device owner's manual or please visit
our Web site at www.homelink.com.
2. Firmly press and release the "learn" or
"smart" button (which activates the "train-
ing light").
NOTE:There are 30 seconds in which to initiate
step3.
3. Return to the vehicle and firmly press,
hold for two seconds and then release
the desired HomeLink
® button. Repeat
the "press/hold/release" sequence a
second time to complete the program-
ming. (Some devices may require you
to repeat this sequence a third time to
complete the programming.)
Page 153 of 353
1FEATURES OF YOUR HYUNDAI
142
ANTENNA
OCM052140A B870D02FC-GAT
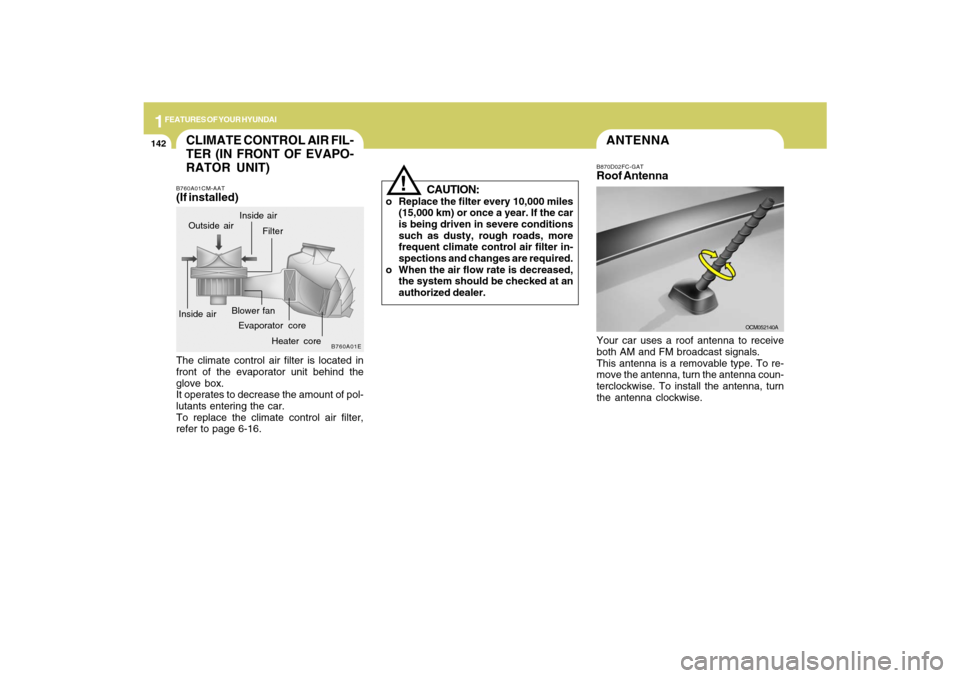
Roof AntennaYour car uses a roof antenna to receive
both AM and FM broadcast signals.
This antenna is a removable type. To re-
move the antenna, turn the antenna coun-
terclockwise. To install the antenna, turn
the antenna clockwise.
CAUTION:
o Replace the filter every 10,000 miles
(15,000 km) or once a year. If the car
is being driven in severe conditions
such as dusty, rough roads, more
frequent climate control air filter in-
spections and changes are required.
o When the air flow rate is decreased,
the system should be checked at an
authorized dealer.
!
CLIMATE CONTROL AIR FIL-
TER (IN FRONT OF EVAPO-
RATOR UNIT)B760A01CM-AAT(If installed)The climate control air filter is located in
front of the evaporator unit behind the
glove box.
It operates to decrease the amount of pol-
lutants entering the car.
To replace the climate control air filter,
refer to page 6-16.
B760A01E
Evaporator coreFilter
Heater core Outside air
Inside airInside airBlower fan
Page 168 of 353
1157157157157157157
FEATURES OF YOUR HYUNDAI
B445E02CM-AAT1. SCAN buttonStation scan function
Press the SCAN button for the tuner to
scan for radio signals in the selected fre-
quency band (AM or FM). Once the tuner
locks onto the signal of a transmitting sta-
tion, it plays that station for 5 seconds
before scanning for the next available sta-
tion in the selected frequency band.
If you want to keep listening to a particular
station and want to stop the scanning,
press the SCAN button again.
This function is useful for providing you
with a good overview of all the radio sta-
tions within range of your tuner.
Preset scan function
Press and hold the SCAN button for more
than 2 seconds. Each preset radio stations
will be automatically played for 5 seconds.
If you want to keep listening to a particular
preset station and want to stop the scan-
ning, press the SCAN button again.
2. SEEK '
∧ ∧∧ ∧
∧' and '
∨ ∨∨ ∨
∨' buttons
Automatic Station Selection function
Press the '
∧ ∧∧ ∧
∧' and '
∨ ∨∨ ∨
∨' buttons to scan up
and down the frequency range for the next
available radio station and automatically
lock on to that frequency.
The LCD screen displays the frequency of
the radio station transmitting a clear and
strong signal.
Use this function to search for a radio
station you want. If you like a particular
station, you can store it as one of 6 presets
using the Preset buttons described later.
NOTE:This function is not effective if you are
experiencing poor reception in your vi-
cinity.
3. TUNE KnobManual Station Selection
Rotate the knob clockwise or counter-clock-
wise to manually advance up or down the
frequency range. The Tune knob also gives
you fine-grain control which you can use to
manually fine-tune your frequency selec-
tion. This is useful if you are searching for
a radio signal which is not strong enough
for you to use the Automatic Station Selec-
tion functionNOTE:The speed at which you advance up or
down the frequency range depends on
how fast you turn the knob.
Page 192 of 353
1
FEATURES OF YOUR HYUNDAI
181
FEATURES OF YOUR HYUNDAI
181181181181
Adjusting the LCD Display
Press the DISP button on the RSE control
panel to adjust the LCD display. To adjust
the brightness, select Brightness, then,
press the < REW (dimmer) or FWD >
(brighter) buttons. The next time the RSE
is turned on, the LCD display will return to
the brightness level it was adjusted to
when last used. Brightness can be ad-
justed regardless of whether the RSE is
playing an audio or video source.
While the RSE is playing a video signal,
press DISP and then press the
∧ ∧∧ ∧
∧ NEXT or
∨ ∨∨ ∨
∨ PREV buttons to cycle through other
LCD display adjustments including
SCREEN SIZE, CONTRAST, CHROMA
and HUE. With any of these settings dis-
played, press the < REW or FF > buttons to
adjust the settings.
To close the LCD display, pull the bottom
edge towards you and push it up until it
clicks and locks into the stow-away posi-
tion.
Cleaning the LCD Display
If the LCD display becomes dusty or dirty,
clean it by wiping gently with a soft, dry,
clean cloth. Do not use chemical cleanser
to clean the screen.Loading a Disc
To load a disc in the player, insert it part
way into the loading slot. The player will
automatically grip the disc and pull it the
rest of the way in.
Disc Protection
The player has an Auto-Reload Disc Pro-
tection feature to protect discs from acci-
dental damage. If a disc is not removed
within 12 seconds after being ejected, it
will be pulled back into the player. The disc
will not begin playing.
Audio via Vehicle Speakers
To hear the audio from the RSE through
the vehicle's speakers, the RSE must be
selected by the radio CD/AUX button in the
front of the vehicle. Regardless of whether
RSE audio is selected for the vehicle
speakers or not, when the RSE audio is
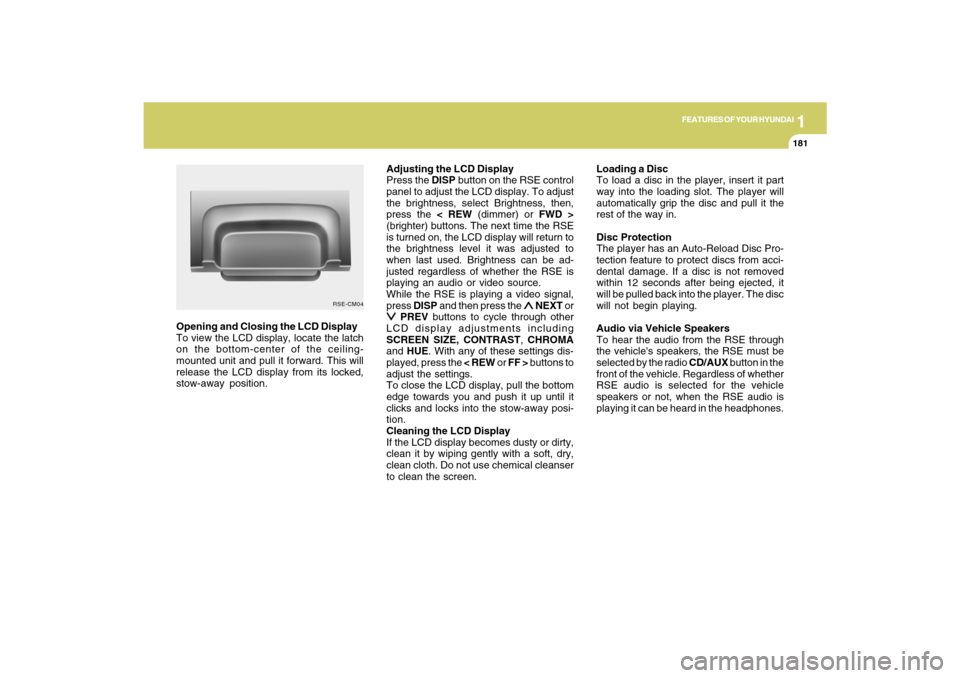
playing it can be heard in the headphones. Opening and Closing the LCD Display
To view the LCD display, locate the latch
on the bottom-center of the ceiling-
mounted unit and pull it forward. This will
release the LCD display from its locked,
stow-away position.
RSE-CM04
Page 194 of 353
1
FEATURES OF YOUR HYUNDAI
183
FEATURES OF YOUR HYUNDAI
183183183183
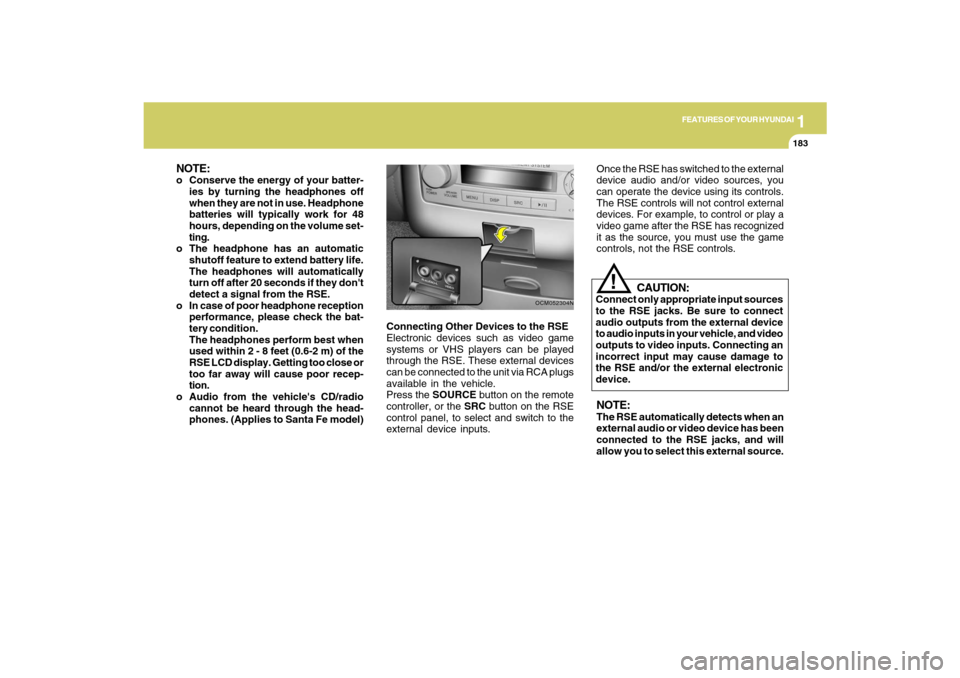
Connecting Other Devices to the RSE
Electronic devices such as video game
systems or VHS players can be played
through the RSE. These external devices
can be connected to the unit via RCA plugs
available in the vehicle.
Press the SOURCE button on the remote
controller, or the SRC button on the RSE
control panel, to select and switch to the
external device inputs.
OCM052304N
Once the RSE has switched to the external
device audio and/or video sources, you
can operate the device using its controls.
The RSE controls will not control external
devices. For example, to control or play a
video game after the RSE has recognized
it as the source, you must use the game
controls, not the RSE controls.NOTE:The RSE automatically detects when an
external audio or video device has been
connected to the RSE jacks, and will
allow you to select this external source.
CAUTION:
Connect only appropriate input sources
to the RSE jacks. Be sure to connect
audio outputs from the external device
to audio inputs in your vehicle, and video
outputs to video inputs. Connecting an
incorrect input may cause damage to
the RSE and/or the external electronic
device.
!
NOTE:o Conserve the energy of your batter-
ies by turning the headphones off
when they are not in use. Headphone
batteries will typically work for 48
hours, depending on the volume set-
ting.
o The headphone has an automatic
shutoff feature to extend battery life.
The headphones will automatically
turn off after 20 seconds if they don't
detect a signal from the RSE.
o In case of poor headphone reception
performance, please check the bat-
tery condition.
The headphones perform best when
used within 2 - 8 feet (0.6-2 m) of the
RSE LCD display. Getting too close or
too far away will cause poor recep-
tion.
o Audio from the vehicle's CD/radio
cannot be heard through the head-
phones. (Applies to Santa Fe model)
Page 240 of 353
2
DRIVING YOUR HYUNDAI
30
C190F01CM-AATTrailer or Vehicle Towing Tips1. Before towing, check hitch and safety
chain connections as well as proper
operation of the trailer running lights,
brake lights, and turn signals.
2. Trailer towing requires more fuel than
normal conditions.
3. To maintain engine braking efficiency,
do not tow a trailer with the transaxle in
fifth gear (manual transaxle).
4. Always secure items in the trailer to
prevent load shift while driving.
5. Check the condition and air pressure of
all tires on the trailer and your car. Low
tire pressure can seriously affect the
handling. Also check the spare tire.
6. The vehicle/trailer combination is more
affected by crosswind and buffeting.
When being passed by a large vehicle,
keep a constant speed and steer straight
ahead. If there is too much wind buffet-
ing, slow down to get out of the other
vehicle's air turbulence.7. When parking your car and trailer, es-
pecially on a hill, be sure to follow all the
normal precautions. Turn your front
wheel into the curb, set the parking
brake firmly, and put the transaxle in 1st
or Reverse (manual) or Park (automatic).
In addition, place wheel chocks at each
of the trailer's tires.
8. If the trailer has electric brakes, start
your vehicle and trailer moving, and
then apply the trailer brake controller by
hand to be sure the brakes are working.
This lets you check your electrical con-
nection at the same time.
9. During your trip, check occasionally to
be sure that the load is secure, and that
the lights and any trailer brakes are still
working.
10. Avoid jerky starts, sudden accelera-
tion or sudden stops.
11. Avoid sharp turns and rapid lane
changes.
12. Avoid holding the brake pedal down
too long or too frequently. This could
cause the brakes to overheat, resulting
in reduced braking efficiency.
!
WARNING:
o Improperly loading your vehicle and
trailer can seriously affect its steer-
ing and braking performance causing
a crash which could cause serious
injury or death.
o Towing a trailer affects vehicle han-
dling and braking.
o Drive more slowly when towing a trailer
and allow more distance when brak-
ing.
o Be careful when driving in slippery
and windy conditions.
o Be careful when turning and while
driving up and down hills.