2009 Hyundai Getz Oil manual
[x] Cancel search: Oil manualPage 72 of 191
FEATURES OF YOUR HYUNDAI 1- 61
!
CAUTION:
Driving with the hand brake applied will cause excessive brake pad (or lining) and brake rotor wear.! Releasing the hand brake To release the hand brake, first apply the foot brake and pull up the handbrake lever slightly. Secondly, depress the release button and lower the hand brake lever while holding the button.
WARNING:
o The transaxle gear shift lever should be in neutral position with the hand brake fully engaged when the vehicle is being transported on a car carrier. During transpor- tation the vehicle should be loadedon a flat deck and not on an incline position of the car carrier.
o Whenever leaving vehicle or park- ing always set the hand brake asfar as possible and fully engage the vehicle's transaxle into the parkposition. Vehicles not fully engaged in park with the hand brake set are at riskfor moving inadvertently and in- juring yourself or others.
Applying the hand brake To engage the hand brake, first apply the foot brake and then without press-ing the release button in, pull the hand brake lever up as far as possible. In addition it is recommended that whenparking the vehicle on a gradient, the shift lever should be positioned in the appropriate low gear on manual transaxlevehicles or in the P (Park) position on automatic transaxle vehicles.
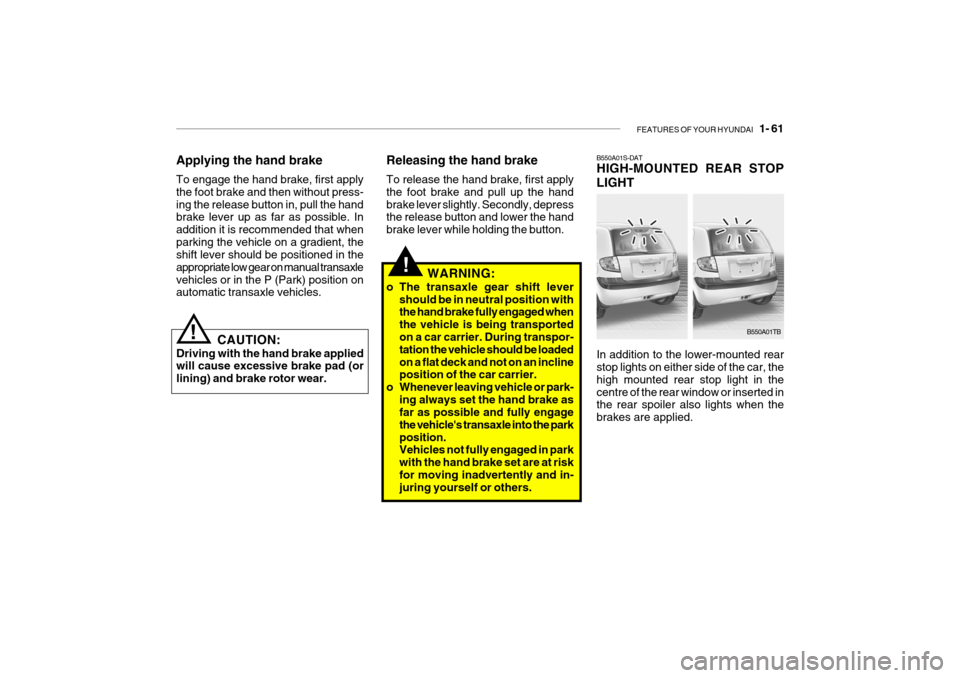
In addition to the lower-mounted rearstop lights on either side of the car, the high mounted rear stop light in thecentre of the rear window or inserted in the rear spoiler also lights when the brakes are applied.
B550A01S-DAT HIGH-MOUNTED REAR STOP LIGHT
B550A01TB
Page 98 of 191
DRIVING YOUR HYUNDAI 2- 3
!
C020A03S-DAT BEFORE STARTING THE EN- GINE Before you start the engine, you should always:
1. Look around the vehicle to be sure
there are no flat tyres, puddles of oil or water or other indications of pos- sible trouble.
2. After entering the car, check to be sure the parking brake is engaged.
3. Check that all windows, and lights are clean.
4. Check that the interior and exterior
mirrors are clean and in position.
5. Check your seat, seatback and headrest to be sure they are in theirproper positions.
6. Lock all the doors.
7. Fasten your seat belt and be sure
that all other occupants have fas- tened theirs.
8. Turn off all lights and accessories
that are not needed.
9. When you turn the ignition switch to "ON' check that all appropriatewarning lights are operating andthat you have sufficient fuel.
10.Check the operation of warning lights
and all bulbs when key is in the "ON"position. WARNING:
Always wear appropriate shoes whenoperating your vehicle. Unsuitable shoes (high heels, ski boots, etc.) may interfere with yourability to use the brake and accelera- tor pedal, and the clutch (if installed). C030A01A-GAT COMBINATION IGNITION SWITCHTo Start the Engine
o If your Hyundai is equipped with a
manual transaxle, place the shift lever in neutral and depress theclutch pedal fully.
o If your Hyundai has an automatic
transaxle, place the shift lever in "P"(park).
o To start the engine, insert the igni-
tion key and turn it to the "START"position. Release it as soon as the engine starts. Do not hold the key in the "START" position for more than15 seconds.
NOTE: For safety, the engine will not start if the shift lever is not in "P" or "N"Position (Automatic transaxle).
!WARNING:
When you intend to park or stop the vehicle with the engine on, be care- ful not to depress the accelerator pedal for a long period of time. It mayoverheat the engine or exhaust sys- tem and cause fire.
Page 118 of 191
3- 2 WHAT TO DO IN AN EMERGENCY
HTB165
D010B02A-AAT If Engine Doesn't Turn Over or Turns Over Slowly 2. Check the battery connections to be
sure they are clean and tight.
3. Turn on the interior light. If the light dims or goes out when you operate the starter, the battery is discharged.
4. Check the starter connections to be sure they are securely tightened.
5. Do not push or pull the vehicle to
start it. See instructions for "Jump Starting".
D010C01A-DAT If Engine Turns Over Normally but Does Not Start 4 If engine still refuses to start, call a
Hyundai dealer or seek other quali- fied assistance.
D010D01A-AAT If the Engine Stalls While Driv- ing
1. Reduce your speed gradually, keep- ing a straight line. Move cautiously off the road to a safe place.
2. Turn on your emergency flashers.
3. Try to start the engine again. If your vehicle will not start, contact aHyundai dealer or seek other quali-fied assistance.
D010A01A-AAT IF THE ENGINE WILL NOT START
!
HTB221
CAUTION:
If the engine will not start, do not push or pull the car to start it. This could result in a collision or causeother damage. In addition, push or pull starting may cause the cata- lytic converter to be overloaded andcreate a fire hazard.
F020100AUN If the engine stalls at a crossroad or crossing If the engine stalls at a crossroad or crossing, set the shift lever in the N(Neutral) position and then push the vehicle to a safe place. If your vehicle has a manual transaxle not equippedwith the ignition lock switch, the vehicle can move forward by shifting to the 2(second) or 3(third) gear and then turn-ing the starter without depressing the clutch pedal.
1. If your car has an automatic
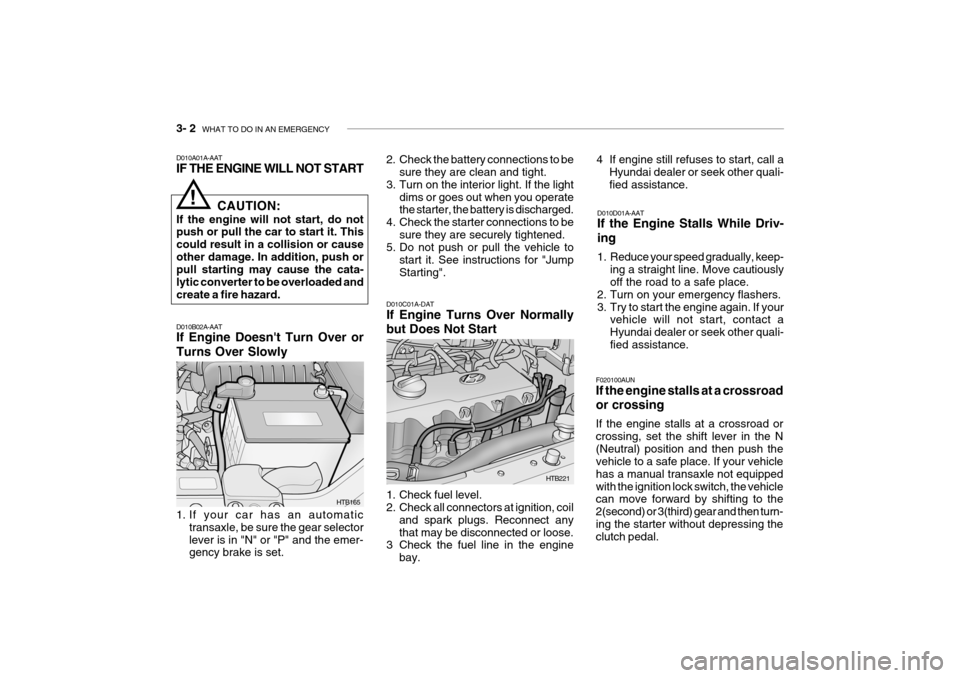
transaxle, be sure the gear selector lever is in "N" or "P" and the emer- gency brake is set. 1. Check fuel level.
2. Check all connectors at ignition, coil
and spark plugs. Reconnect any that may be disconnected or loose.
3 Check the fuel line in the engine
bay.
Page 135 of 191

5- 2 VEHICLE MAINTENANCE REQUIREMENTS
F010C01A-DAT
Specified Scheduled Proce- dures
These are the procedures such as
inspections, adjustments and replace- ments that are listed in the mainte- nance charts starting on page 5-4. These procedures must be performedat the intervals shown in the mainte- nance schedule to assure that your warranty remains in effect. Althoughit is strongly recommended that they be performed by the factory-trained or distributor-trained technicians atyour Hyundai dealer, these proce- dures may be performed at any quali- fied service facility. It is suggestedthat genuine Hyundai service parts be used for any required repairs or replacements. Other parts of equiva-lent quality such as engine oil, engine coolant, manual or auto transaxle oil, brake fluid and so on which are notsupplied by Hyundai Motor Company or its distributor may be used without affecting your warranty coverage butyou should always be sure these are equivalent
F010A01A-DAT
MAINTENANCE INTERVALS Service requirements
To ensure that you receive satisfying
operation from your Hyundai, certain maintenance procedures must be per- formed. Although careful design and engineering have reduced these to aminimum, those that are required are of the utmost importance.
It is your responsibility to have these
maintenance procedures performed to comply with the terms of the war-ranties covering your new Hyundai. The Service Passport supplied with your new vehicle provides further in-formation about these warranties. F010E02S-DAT
Do-It-Yourself Maintenance
See page (6-1 ~ 6-31).
F010D01A-DAT
General Checks
These are the regular checks youshould perform each time you drive your Hyundai or you fill the fuel tank. A list of these items will be found onpage 6-4. F010F02A-DAT
A Few Tips
Whenever you have your Hyundai serviced, keep copies of the servicerecords in your glovebox. This will help ensure that you have documen- tation when required. This is espe-cially important when an emergency service is not performed at an authorised Hyundai dealer.
F010B01A-AAT Maintenance Requirements The maintenance required for your Hyundai can be divided into three main areas:
o Specified scheduled procedures
o General checks
o Do-it-yourself maintenance to the quality of the original Hyundai
parts. Your Service Passport providesfurther information about your war-ranty coverage.
Page 138 of 191

VEHICLE MAINTENANCE REQUIREMENTS 5- 5
1 23456789
101112131415
Note : FOR THE FIRST TIME, REPLACE THE COOLANT AT 96,000 KM OR 60 MONTHS.
AFTER THAT, REPLACE IT EVERY 45,000 KM OR 24 MONTHS.
F030C06TB-DAT R : Replace I : Inspect and, after inspection, clean, adjust, repair or replace if necessary
GENERAL MAINTENANCE COOLING SYSTEMCOOLANTMANUAL TRANSAXLE OILAUTOMATIC TRANSAXLE FLUIDBRAKE HOSES AND LINESBRAKE FLUIDREAR BRAKE DRUMS/LININGS, PARKING BRAKEBRAKE PADS, CALIPERS AND ROTORSEXHAUST PIPE AND MUFFLERSUSPENSION MOUNTING BOLTSSTEERING GEAR BOX, LINKAGE & BOOTS/LOWER ARM BALL JOINTPOWER STEERING PUMP, BELT AND HOSESDRIVE SHAFTS AND BOOTSAIR CONDITIONING REFRIGERANT
AIR CONDITIONER FILTER (FOR EVAPORATOR AND BLOWER UNIT)
120
96
I I IIII I IIIII I
R
105
84
I I II I IIII I
R
90 72
75 60
6048
I I
R I II I IIIII I
R
I I I I I I I II I
R
II I IIIII I IIII
R
45 36
3024
I I II I IIII I
R
II IIII I IIII I I
R
15 12
I I II I IIII I
R
KILOMETERS X 1000 MONTHS
NO. DESCRIPTION
See Note
Page 139 of 191

5- 6 VEHICLE MAINTENANCE REQUIREMENTS
SEVERE DRIVING CONDITIONS
A - Repeatly driving short distance of less than 8km in normal
temperature or less than 16km in freezing temperature
B - Extensive engine idling or low speed driving for long dis- tances
C - Driving on rough, dusty, muddy, unpaved, graveled or salt- spread roads
D - Driving in areas using salt or other corrosive materials or in
very cold weather R R RR
I I I I
R RR
ENGINE OIL AND FILTER AIR CLEANER FILTER SPARK PLUGSTIMING BELT BRAKE PADS, CALIPERS AND ROTORS REAR BRAKE DRUMS/LININGS/PADS,PARKING BRAKE STEERING GEAR BOX, LINKAGE & BOOTS/LOWER ARM BALL JOINTDRIVESHAFTS AND BOOTS MANUAL TRANSAXLE OIL AUTOMATIC TRANSAXLE FLUID
AIR CONDITIONER FILTER (For Evaporator and Blower unit)
F040A01TB-DAT
MAINTENANCE UNDER SEVERE USAGE CONDITIONS
The following items must be serviced more frequently on cars normally used under severe driving conditions. Refer tothe chart below for the appropriate maintenance intervals. R : Replace I : Inspect and, after inspection, clean, adjust, repair or replace if necessary
MAINTENANCE ITEM
EVERY 7,500 KM OR 6 MONTHS MORE FREQUENTLY MORE FREQUENTLYEVERY 60,000 KM OR 48 MONTHS MORE FREQUENTLY MORE FREQUENTLY MORE FREQUENTLY EVERY 15,000 KM OR 12 MONTHS EVERY 100,000 KM EVERY 40,000 KMMORE FREQUENTLY A, B, C, D, E, F, G, H, I, K C, E B, HD, E, F, G, I C, D, G, H C, D, G, H C, D, E, F C, D, E, F C, D, E, G, H, I, J A, C, E, F, G, H, IC, E
MAINTENANCE
INTERVALS DRIVING
CONDITION
MAINTENANCE
OPERATION
E - Driving in sandy areas
F - Driving in heavy traffic area over 32°C
G - Driving on uphill, downhill, or mountain road
H - Towing a Trailer, or using a camper, or roof rack
I - Driving as a patrol car, taxi, other commercial use
or vehicle towing
J - Driving over 170 Km/h
K - Frequently driving in stop-and-go conditions
Page 142 of 191

VEHICLE MAINTENANCE REQUIREMENTS 5- 9
F070L01A-AAT
o Suspension Mounting Bolts
Check the suspension connections
for looseness or damage. Retighten to the specified torque. F070M01Y-AAT
o Steering Gear Box, Linkage &
Boots / Lower Arm Ball Joint, Upper Arm Ball Joint
With the vehicle stopped and engine off, check for excessive free-play inthe steering wheel.Check the linkage for bends or dam-age. Check the dust boots and balljoints for deterioration, cracks, or dam- age. Replace any damaged parts. F070N01A-AAT
o Power Steering Pump, Belt
and Hoses
Check the power steering pump and
hoses for leakage and damage. Re- place any damaged or leaking partsimmediately. Inspect the power steer- ing belt for evidence of cuts, cracks, excessive wear, oiliness and propertension. Replace or adjust it if neces- sary. F070P01A-AAT
o Driveshafts and Boots
Check the drive shafts, boots and clamps for cracks, deterioration, or damage. Replace any damaged parts and, if necessary, repack the grease. F070Q01A-AAT
o Air Conditioning Refrigerant Check the air conditioning lines and connections for leakage and damage. Check air conditioning performance according to the relevant shop manualif necessary.
F070J01A-AAT
o Brake Pads, Calipers and
Rotors
Check the pads for excessive wear,
discs for run out and wear, and cali-pers for fluid leakage.
F070K01A-AAT
o Exhaust Pipe and Muffler
Visually inspect the exhaust pipes,
muffler and hangers for cracks, dete-rioration, or damage. Start the engineand listen carefully for any exhaust gas leakage. Tighten connections or replace parts as necessary.
Page 143 of 191

6. Do-It-Yourself Maintenance
Engine compartment ........................................................................ 6-2
General checks ................................................................................ 6-3
Checking the engine oil .................................................................... 6-4
Checking the engine coolant ............................................................ 6-6
Changing the air cleaner filter ........................................................... 6-7
Filling the washer reservoir .............................................................. 6-9Checking the transaxle oil (manual)............................................... 6-10
Checking the transaxle fluid (Automatic)....................................... 6-11
Checking the brakes ...................................................................... 6-13
Air conditioning care ....................................................................... 6-14
Checking drive belts ...................................................................... 6-18
Checking and replacing fuses ........................................................ 6-18
Checking the battery ...................................................................... 6-20
Checking electric cooling fans ....................................................... 6-22
Power steering fluid level ............................................................... 6-22
Replacement of bulbs .................................................................... 6-24
Fuse panel description ................................................................... 6-30
6