2009 Hyundai Azera Leak
[x] Cancel search: LeakPage 10 of 335

F9
1. Panel Brightness Control Knob (Rheostat Switch) ........1-87
2. Electronic Stability Control (ESC) Switch (If Installed) ...2-11
3. Power Adjustable Pedals Switch (If Installed) ................2-10
4. Steering Wheel Tilt & Telescopic Lever .......................1-117
5. Hood Release Lever .....................................................1-113
6. Cigarette Lighter .............................................................1-87
7. Front Ashtray ...................................................................1-88
CAUTION:
When installing a container of liquid air freshener inside the vehicle, do not place it near the instrument cluster
nor on the instrument panel surface. If there is any leakage from the air freshener onto these areas
(Instrument cluster, instrument panel or air ventilator), it may damage these parts. If the liquid from the air
freshener does leak onto these areas, wash them with water immediately.
!
8. Front Seat Warmer Switches (If Installed) ......................1-24
9. Rear Window Curtain Switch (If Installed) ....................1-117
10. Passenger's Seat Belt Warning Light .............................1-68
11. Digital Clock ....................................................................1-87
12. "PASSENGER AIR BAG OFF" Indicator .........................1-51
13. Hazard Warning Switch ..................................................1-86
14. Power Outlet ...................................................................1-88
Page 12 of 335

F11
1. Fuse Box .........................................................................6-19
2. Instrument Cluster ...........................................................1-60
3. Parking Brake Pedal .....................................................1-107
4. Brake Pedal ....................................................................2-10
5. Accelerator Pedal ...........................................................2-10
6. Multi-Function Light/Front Fog Light Switch ......... 1-80, 1-82
7. Audio Remote Control Switch (If Installed) ...................1-121
8. Horn and Driver's Front Airbag ........................... 1-117, 1-44
9. Cruise Control Switch ...................................................1-118
CAUTION:
When installing a container of liquid air freshener inside the vehicle, do not place it near the instrument cluster
nor on the instrument panel surface. If there is any leakage from the air freshener onto these areas
(Instrument cluster, instrument panel or air ventilator), it may damage these parts. If the liquid from the air
freshener does leak onto these areas, wash them with water immediately.
!
10. Windshield Wiper/Washer Switch ..................................1-83
11. Audio System (If Installed) ............................................1-139
12. Passenger's Front Airbag ...............................................1-44
13. Heating/Air Conditioning Control Panel .......................1-125
14. Glove Box ........................................................................1-96
15. Accessory Box ................................................................1-97
16. Shift Lever ......................................................................... 2-6
17. Drink Holder ....................................................................1-89
18. Center Console ...............................................................1-97
Page 63 of 335
1FEATURES OF YOUR HYUNDAI50
!
o The SRS can function only when the
ignition key is in the "ON" position. If
the SRS "AIRBAG" warning light does
not illuminate, or continuously re-
mains on after illuminating for about 6
seconds when the ignition key is
turned to the "ON" position, or after
the engine is started, comes on while
driving, the SRS is not working prop-
erly. If this occurs, have your vehicle
immediately inspected by your
Hyundai dealer.
o Before you replace a fuse or discon-
nect a battery terminal, turn the igni-
tion key to the "LOCK" position and
remove the ignition key. Never re-
move or replace the airbag related
fuse(s) when the ignition key is in the
"ON" position. Failure to heed this
warning will cause the SRS "AIRBAG"
warning light to illuminate.
WARNING:
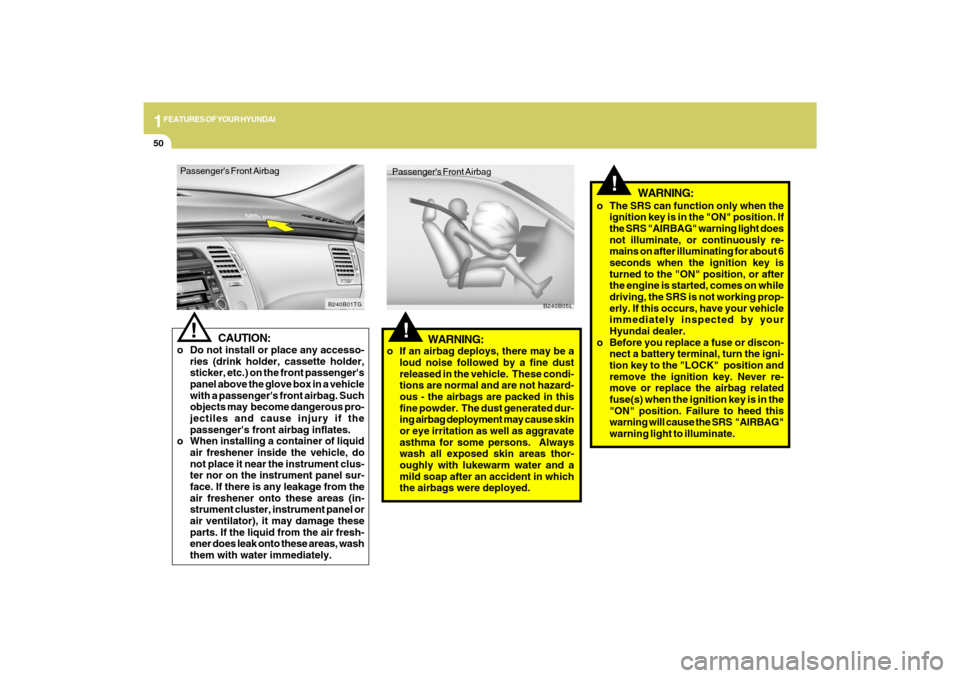
Passenger's Front Airbag
CAUTION:
o Do not install or place any accesso-
ries (drink holder, cassette holder,
sticker, etc.) on the front passenger's
panel above the glove box in a vehicle
with a passenger's front airbag. Such
objects may become dangerous pro-
jectiles and cause injury if the
passenger's front airbag inflates.
o When installing a container of liquid
air freshener inside the vehicle, do
not place it near the instrument clus-
ter nor on the instrument panel sur-
face. If there is any leakage from the
air freshener onto these areas (in-
strument cluster, instrument panel or
air ventilator), it may damage these
parts. If the liquid from the air fresh-
ener does leak onto these areas, wash
them with water immediately.
!
B240B01TG
!Passenger's Front Airbag
B240B05L
WARNING:
o If an airbag deploys, there may be a
loud noise followed by a fine dust
released in the vehicle. These condi-
tions are normal and are not hazard-
ous - the airbags are packed in this
fine powder. The dust generated dur-
ing airbag deployment may cause skin
or eye irritation as well as aggravate
asthma for some persons. Always
wash all exposed skin areas thor-
oughly with lukewarm water and a
mild soap after an accident in which
the airbags were deployed.
Page 124 of 335
1
FEATURES OF YOUR HYUNDAI
111
HIGH-MOUNTED REAR
STOP LIGHTB550A02Y-AATIn addition to the lower-mounted rear stop
lights on either side of the car, the high
mounted rear stop light in the center of the
rear window also lights when the brakes
are applied.
B550A01TG-A
!
WARNING:
o Gasoline vapors are dangerous. Be-
fore refueling, always stop the engine
and never smoke or allow sparks and
open flames near the filler area.
o Never operate your vehicle without a
filler cap properly installed, flammable
vapors and gasoline could leak out in
dangerous situations such as a colli-
sion or rollover. If the filler cap must
be replaced, only use genuine Hyundai
replacement parts.
HTG2023
REMOTE FUEL-FILLER LID
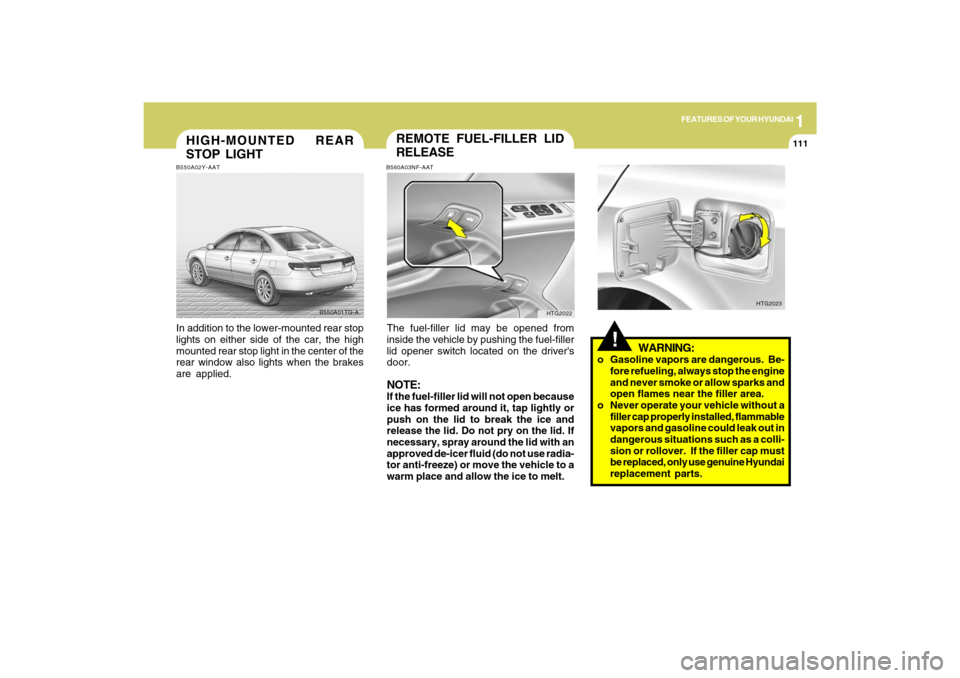
RELEASEB560A03NF-AATThe fuel-filler lid may be opened from
inside the vehicle by pushing the fuel-filler
lid opener switch located on the driver's
door.NOTE:If the fuel-filler lid will not open because
ice has formed around it, tap lightly or
push on the lid to break the ice and
release the lid. Do not pry on the lid. If
necessary, spray around the lid with an
approved de-icer fluid (do not use radia-
tor anti-freeze) or move the vehicle to a
warm place and allow the ice to melt.
HTG2022
Page 205 of 335
2
DRIVING YOUR HYUNDAI
2
WARNING: ENGINE EXHAUST CAN BE DANGEROUS!
C010A03A-AATEngine exhaust fumes can be extremely dangerous. If, at any time, you smell exhaust fumes inside the vehicle, open the
windows immediately.
o Do not inhale exhaust fumes.
Exhaust fumes contain carbon monoxide, a colorless, odorless gas that can cause unconsciousness and death by
asphyxiation.
o Be sure the exhaust system does not leak.
The exhaust system should be checked whenever the vehicle is raised to change the oil or for any other purpose. If you
hear a change in the sound of the exhaust or if you drive over something that strikes the underneath side of the car, have
the exhaust system checked as soon as possible by your Hyundai dealer.
o Do not run the engine in an enclosed area.
Letting the engine idle in your garage, even with the garage door open, is a hazardous practice. Never run the engine
in your garage any longer than it takes to start the engine and back the car out.
o Avoid idling the engine for prolonged periods with people inside the car.
If it is necessary to idle the engine for a prolonged period with people inside the car, be sure to do so only in an open area
with the air intake set at "Fresh" and fan operating at one of the higher speeds so fresh air is drawn into the interior.
If you must drive with the trunk lid open because you are carrying objects that make this necessary:
1. Close all windows.
2. Open side vents.
3. Set the air intake control at "Fresh", the air flow control at "Floor" or "Face" and the fan at one of the higher speeds.
To assure proper operation of the ventilation system, be sure the ventilation air intakes located just in front of the windshield
are kept clear of snow, ice, leaves or other obstructions.
!
Page 235 of 335
34WHAT TO DO IN AN EMERGENCY
IF THE ENGINE OVERHEATS
!!
!
WARNING:
While the engine is running, keep hair,
hands and clothing away from moving
parts such as the fan and drive belts to
prevent injury.
5. If the water pump drive belt is broken or
engine coolant is leaking out, stop the
engine immediately and call the near-
est Hyundai dealer for assistance.
WARNING:
Do not remove the radiator cap when the
engine is hot. This can allow coolant to be
blown out of the opening and cause se-
rious burns.6. If you cannot find the cause of the over-
heating, wait until the engine tempera-
ture has returned to normal. Then, if
coolant has been lost, carefully add
coolant to the reservoir (page 6-7) to
bring the fluid level in the reservoir up to
the halfway mark.
7. Proceed with caution, keeping alert for
further signs of overheating. If over-
heating happens again, call a Hyundai
dealer for assistance.
CAUTION:
Serious loss of coolant indicates there is
a leak in the cooling system and this
should be checked as soon as possible
by a Hyundai dealer.
D030A01TG-AATIf your temperature gauge indicates over-
heating, you experience a loss of power, or
hear loud pinging or knocking, the engine
is probably too hot. If this happens, you
should:
1. Pull off the road and stop as soon as it
is safe to do so.
2. Place the gear selector lever in "P" and
set the parking brake. If the air condi-
tioning is on, turn it off.
3. If engine coolant is running out under
the car or steam is coming out from the
hood, stop the engine. Do not open the
hood until the coolant has stopped
running or the steaming has stopped. If
there is no visible loss of engine coolant
and no steam, leave the engine running
and check to be sure the engine cooling
fan is operating. If the fan is not running,
turn the engine off.
4. Check to see if the water pump drive belt
is missing. If it is not missing, check to
see that it is tight. If the drive belt seems
to be satisfactory, check for coolant
leaking from the radiator, hoses or un-
der the car. (If the air conditioning had
been in use, it is normal for cold water
to be draining from it when you stop).
Page 246 of 335
3
WHAT TO DO IN AN EMERGENCY
15
D060J02O-AATAfter Changing Wheels
If you have a tire gauge, remove the
valve cap and check the air pressure. If
the pressure is lower than recom-
mended, drive slowly to the nearest
service station and inflate to the correct
pressure. If it is too high, adjust it until
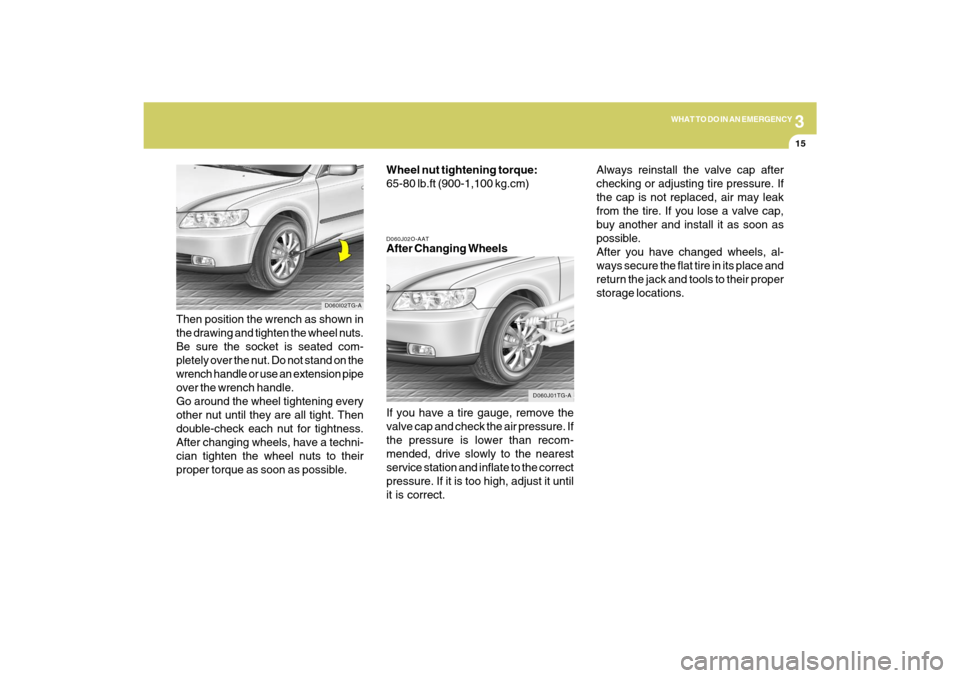
it is correct. Then position the wrench as shown in
the drawing and tighten the wheel nuts.
Be sure the socket is seated com-
pletely over the nut. Do not stand on the
wrench handle or use an extension pipe
over the wrench handle.
Go around the wheel tightening every
other nut until they are all tight. Then
double-check each nut for tightness.
After changing wheels, have a techni-
cian tighten the wheel nuts to their
proper torque as soon as possible.Wheel nut tightening torque:
65-80 lb.ft (900-1,100 kg.cm)
D060I02TG-A
D060J01TG-A
Always reinstall the valve cap after
checking or adjusting tire pressure. If
the cap is not replaced, air may leak
from the tire. If you lose a valve cap,
buy another and install it as soon as
possible.
After you have changed wheels, al-
ways secure the flat tire in its place and
return the jack and tools to their proper
storage locations.
Page 253 of 335

4
CORROSION PREVENTION AND APPEARANCE CARE4
Use a clean sponge or cloth, rinse it fre-
quently and don't damage the finish by
rubbing too hard. For stubborn spots,
dampen them frequently and remove them
a little at a time.
To clean whitewall tires, use a stiff brush or
soapy steel-wool scouring pad.
To clean plastic wheel covers, use a clean
sponge or soft cloth and water.
To clean cast aluminum alloy wheels, use
a mild soap or neutral detergent. Do not
use abrasive cleaners. Protect the bare-
metal surfaces by cleaning, polishing and
waxing. Because aluminum is subject to
corrosion, be sure to give aluminum alloy
wheels special attention in winter. If you
drive on salted roads, clean the wheels
thoroughly afterwards.
After washing, be sure to rinse thoroughly.
If soapy water dries on the finish, streaking
will result.
When the weather is warm and the humid-
ity low, you may find it necessary to rinse
each section immediately after washing to
avoid streaking.
WASHING AND WAXING
E020E01A-AATDon't Neglect the InteriorMoisture can collect under the floor mats
and carpeting to cause corrosion. Check
under the mats periodically to be sure the
carpeting is dry. Use particular care if you
carry fertilizers, cleaning materials or
chemicals in the car.
These should be carried only in proper
containers and any spills or leaks should
be cleaned up, flushed with clean water
and thoroughly dried.
E030A02A-AATWashing Your HyundaiNever wash your car when the surface is
hot from being in the sun. Always wash
your car in the shade.
Wash your car frequently. Dirt is abrasive
and can scratch the paint if it is not re-
moved. Air pollution or acid rain may dam-
age the paint and trim through chemical
action if pollutants are allowed to remain in
contact with the surface. If you live near the
ocean or in an area where road salts or
dust control chemicals are used, you
should pay particular attention to the un-
derside of the car. Start by rinsing the car
to remove dust and loose dirt. In winter, or
if you have driven through mud or muddy
water, be sure to thoroughly clean the
underside as well. Use a hard direct stream
of water to remove accumulations of mud
or corrosive materials. Use a good quality
car-washing solution and follow the
manufacturer's directions on the package.
These are available at your Hyundai dealer
or auto parts outlet. Don't use strong house-
hold detergents, gasoline, strong solvents
or abrasive cleaning powders as these
may damage the finish.
E020D02A-AATKeep Paint and Trim in Good Condi-
tionScratches or chips in the finish should be
covered with "touch-up" paint as soon as
possible to reduce the possibility of corro-
sion. If bare metal is showing through, the
attention of a qualified body and paint
shop is recommended.
Bird droppings : Bird droppings are highly
corrosive and may damage painted sur-
faces in just a few hours. Always remove
bird droppings as soon as possible.