2009 Hyundai Azera glove box
[x] Cancel search: glove boxPage 109 of 335
1FEATURES OF YOUR HYUNDAI96
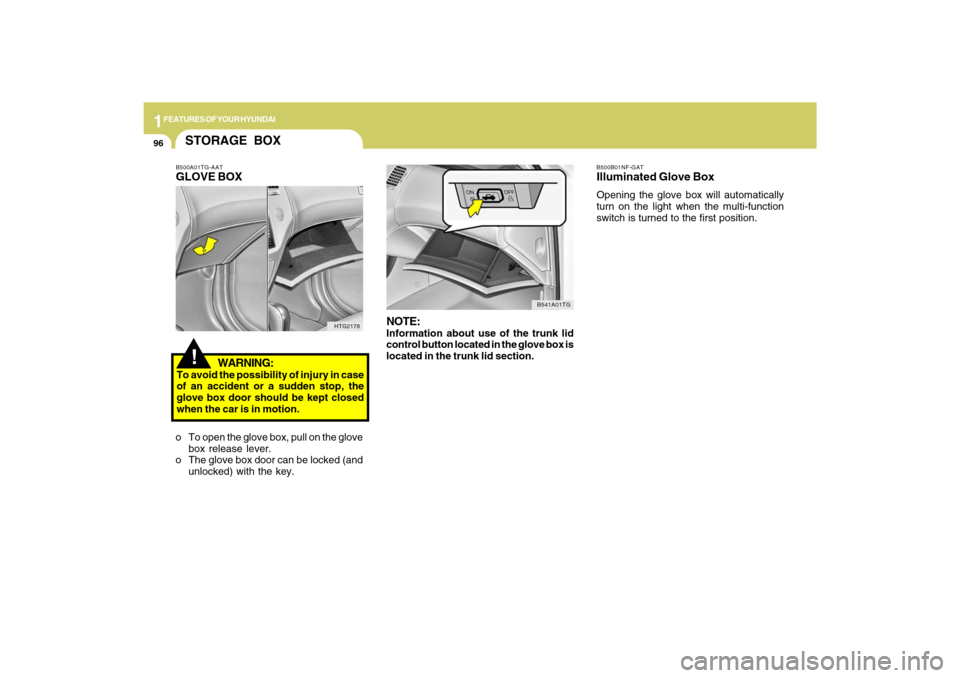
B500B01NF-GATIlluminated Glove BoxOpening the glove box will automatically
turn on the light when the multi-function
switch is turned to the first position.
NOTE:Information about use of the trunk lid
control button located in the glove box is
located in the trunk lid section.
B541A01TG
!STORAGE BOXB500A01TG-AATGLOVE BOX
WARNING:To avoid the possibility of injury in case
of an accident or a sudden stop, the
glove box door should be kept closed
when the car is in motion.
o To open the glove box, pull on the glove
box release lever.
o The glove box door can be locked (and
unlocked) with the key.
HTG2178
Page 121 of 335
1FEATURES OF YOUR HYUNDAI
108
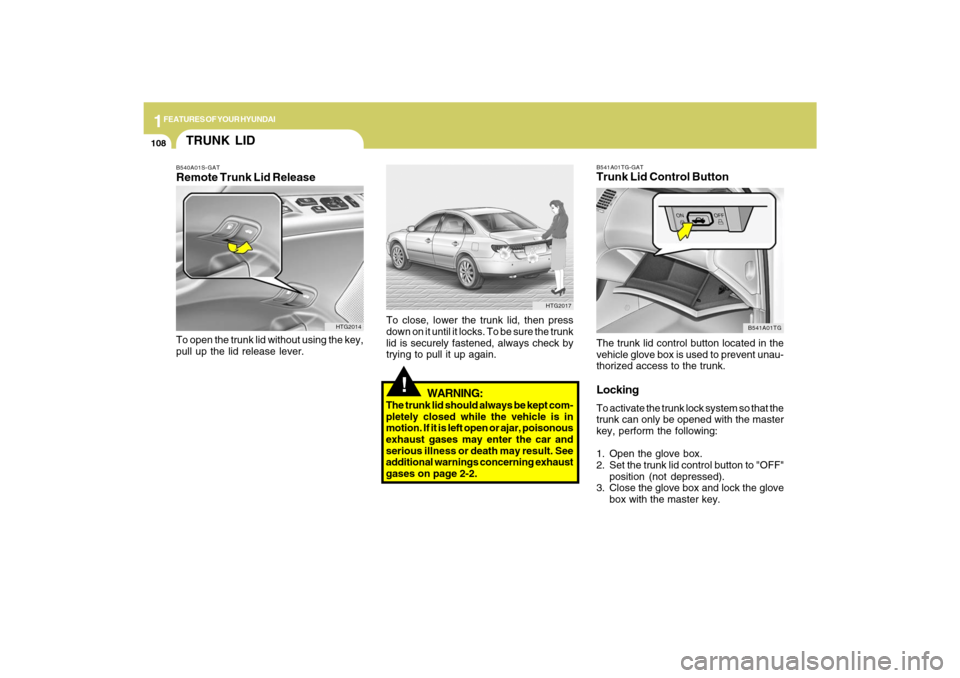
B541A01TG-GATTrunk Lid Control ButtonThe trunk lid control button located in the
vehicle glove box is used to prevent unau-
thorized access to the trunk.LockingTo activate the trunk lock system so that the
trunk can only be opened with the master
key, perform the following:
1. Open the glove box.
2. Set the trunk lid control button to "OFF"
position (not depressed).
3. Close the glove box and lock the glove
box with the master key.
B541A01TG
!
WARNING:
The trunk lid should always be kept com-
pletely closed while the vehicle is in
motion. If it is left open or ajar, poisonous
exhaust gases may enter the car and
serious illness or death may result. See
additional warnings concerning exhaust
gases on page 2-2.To close, lower the trunk lid, then press
down on it until it locks. To be sure the trunk
lid is securely fastened, always check by
trying to pull it up again.
HTG2017
TRUNK LIDB540A01S-GATRemote Trunk Lid ReleaseTo open the trunk lid without using the key,
pull up the lid release lever.
HTG2014
Page 122 of 335
1
FEATURES OF YOUR HYUNDAI
109
!
When leaving the key with a parking lot
attendant or valet, perform steps 1 to 3
above and leave the sub key with the
attendent. Sub key can start the engine
and operate door locks only.ReleasingTo release the trunk lock feature, open the
glove box with master key and set the trunk
lid control button to "ON" position (de-
pressed). In this position the trunk will
open with trunk lid release lever or trans-
mitter. The trunk can never be opened with
the sub key.
WARNING:
Doors and trunk should be kept locked
and keys be kept out of the reach of
children. Parents also should teach their
children about the dangers of playing in
trunks.
!
WARNING:
o If a person becomes locked in the
trunk, push the emergency trunk re-
lease handle on the inside panel of the
trunk to open the trunk lid.
o Keep cars locked and keys out of the
reach of children. HYUNDAI recom-
mends parents teach children about
the emergency trunk release lever in
their vehicle and how to open the trunk
lid if they are accidentally locked in
the trunk.
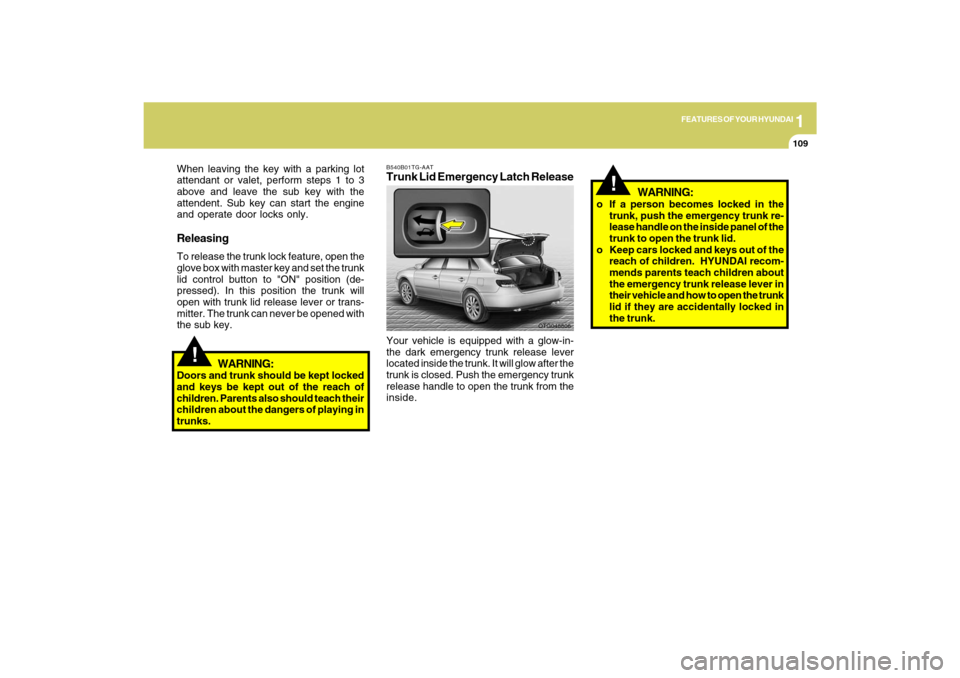
B540B01TG-AATTrunk Lid Emergency Latch ReleaseYour vehicle is equipped with a glow-in-
the dark emergency trunk release lever
located inside the trunk. It will glow after the
trunk is closed. Push the emergency trunk
release handle to open the trunk from the
inside.
OTG048806
Page 259 of 335
5
VEHICLE MAINTENANCE REQUIREMENTS
3
SCHEDULED MAINTE-
NANCE REQUIREMENTSF020A02Y-AATo Inspection should be performed any
time a malfunction is experienced or
suspected.
o Receipts for all emission control system
services should be retained to demon-
strate compliance with conditions of the
emissions system warranty.
o After 120 months or 150,000 miles
(240,000 km), continue to follow the
prescribed maintenance intervals.
o For severe usage maintenance require-
ments, see page 5-6 of this section.
F010D02A-AATGeneral ChecksThese are the regular checks you should
perform when you drive your Hyundai or
you fill the fuel tank. A list of these items will
be found on page 6-3.F010E01A-AATDo-It-Yourself MaintenanceIf you are mechanically inclined, own a few
tools that are required and want to take the
time to do so, you can inspect and service
a number of items. For more information
about doing it yourself, see Section 6.
F010F01A-AATA Few Tipso Whenever you have your Hyundai ser-
viced, keep copies of the service records
in your glove box. This will help ensure
that you can document that the required
procedures have been performed to
keep your warranties in effect. This is
especially important when service is
not performed by an authorized
Hyundai dealer.
o If you choose to do your own mainte-
nance and repairs, you may find it
helpful to have an official Hyundai Shop
Manual. A copy of this publication may
be purchased at your Hyundai dealer's
parts department.
Page 282 of 335

6
DO-IT-YOURSELF MAINTENANCE
16
CHANGING THE CLIMATE
CONTROL AIR FILTERB145A01TG-AAT(For Evaporator and Blower Unit)The climate control air filter is located in the
upper portion of the blower fan.
It helps to decrease the amount of pollut-
ants entering the car.
1. Open the glove box.
2. Pull the glove box cylinder to unlock the
glove box retainer.
HTG2167 G140C01A-AAT
LubricationTo lubricate the compressor and the seals
in the system, the air conditioning should
be run for at least 10 minutes each week.
This is particularly important during cool
weather when the air conditioning system
is not otherwise in use.
AIR CONDITIONING CARE
!
G140A01A-AATKeeping the Condenser CleanThe air conditioning condenser (and en-
gine radiator) should be checked periodi-
cally for accumulation of dirt, dead insects,
leaves, etc. These can interfere with maxi-
mum cooling efficiency. When removing
such accumulations, brush or hose them
away carefully to avoid bending the cool-
ing fans.G140B01A-AATChecking the Air Conditioning Op-
eration1. Start the engine and let it run at a fast idle
for several minutes with the air condi-
tioning set at the maximum cold setting.
2. If the air coming out of the in-dash vents
is not cold, have the air conditioning
system inspected by your Hyundai
dealer.
CAUTION:
Running the air conditioning system for
extended periods of time with a low re-
frigerant level may damage the com-
pressor.
Page 283 of 335
6
DO-IT-YOURSELF MAINTENANCE
17
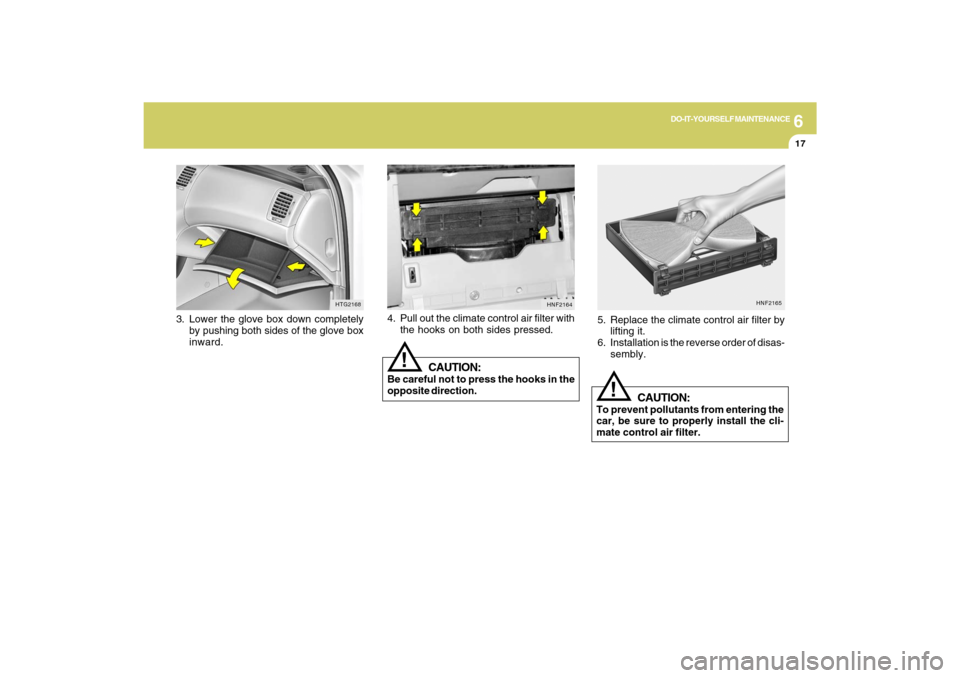
3. Lower the glove box down completely
by pushing both sides of the glove box
inward.
HTG2168
HNF2165
!
5. Replace the climate control air filter by
lifting it.
6. Installation is the reverse order of disas-
sembly.
CAUTION:
To prevent pollutants from entering the
car, be sure to properly install the cli-
mate control air filter.
4. Pull out the climate control air filter with
the hooks on both sides pressed.
CAUTION:
Be careful not to press the hooks in the
opposite direction.
!
HNF2164
Page 297 of 335
6
DO-IT-YOURSELF MAINTENANCE
31
G270K02TG
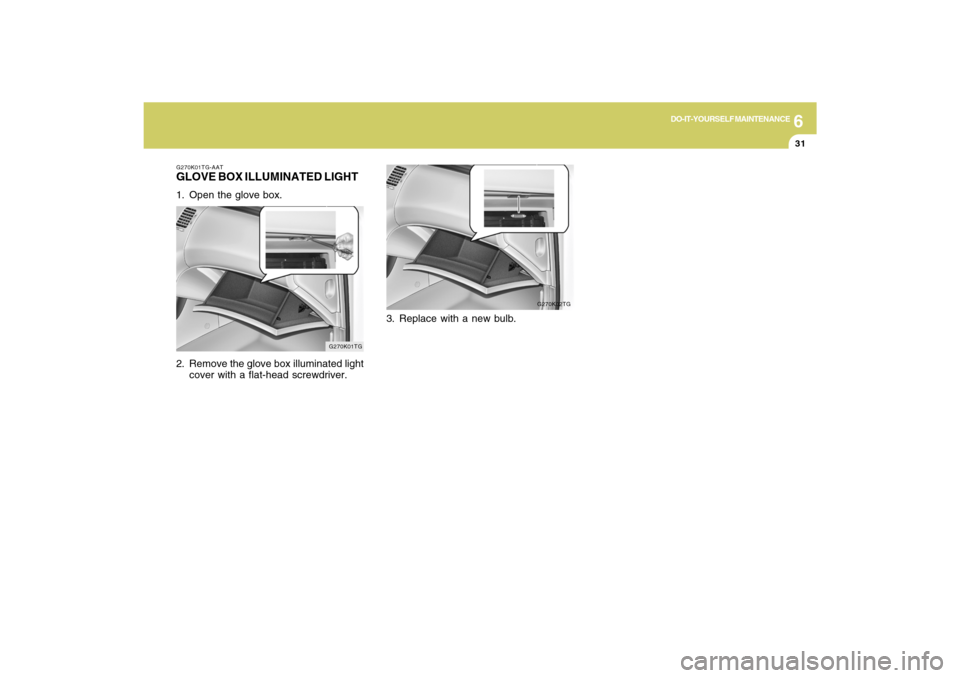
G270K01TG-AATGLOVE BOX ILLUMINATED LIGHT1. Open the glove box.
2. Remove the glove box illuminated light
cover with a flat-head screwdriver.
G270K01TG
3. Replace with a new bulb.
Page 331 of 335

10
INDEX
3
D
Defrosting/Defogging.......................................................1-133
Door
Central door locks ............................................................ 1-9
Door locks ......................................................................... 1-7
Door warning light ........................................................1-116
Locking and unlocking front door with a key .................. 1-7
Drink Holder .......................................................................1-89
Driving
Economical driving .........................................................2-15
Smooth cornering ...........................................................2-16
Winter driving ..................................................................2-16
E
Electronic Stability Control (ESC) System ........................2-11
Emission Control System ..................................................... 7-2
Engine
Before starting the engine ................................................ 2-3
Compartment.................................................................... 6-2
Coolant .............................................................................. 6-6
Coolant temperature gauge ...........................................1-74
If the engine overheats ..................................................... 3-4
Number............................................................................. 8-2
Oil ...................................................................................... 6-4
Starting.............................................................................. 2-5
Engine Exhaust Can Be Dangerous! .................................. 2-2F
Fan Speed Control Switch ...............................................1-127
Fog Light
Front ................................................................................1-82
Front Seats .........................................................................1-19
Active headrests .............................................................1-21
Adjustable headrests ......................................................1-20
Adjusting seat forward and rearward ............................1-19
Adjusting seatback angle ...............................................1-19
Seat cushion height adjustment ................................... 1-22
Seat warmer ....................................................................1-24
Fuel
Capacity............................................................................ 9-2
Gauge..............................................................................1-73
Recommendations............................................................ 1-2
Fuel Filler Lid
Remote release ............................................................1-111
Fuse Panel Description .....................................................6-33
Fuses..................................................................................6-18
G
General Checks ................................................................... 6-3
Glove Box ...........................................................................1-96
H
Hazard Warning System ....................................................1-86
Headlight
Replacement...................................................................6-25
Switch..............................................................................1-80