2009 Hyundai Accent charging
[x] Cancel search: chargingPage 10 of 232
YOUR VEHICLE AT A GLANCE
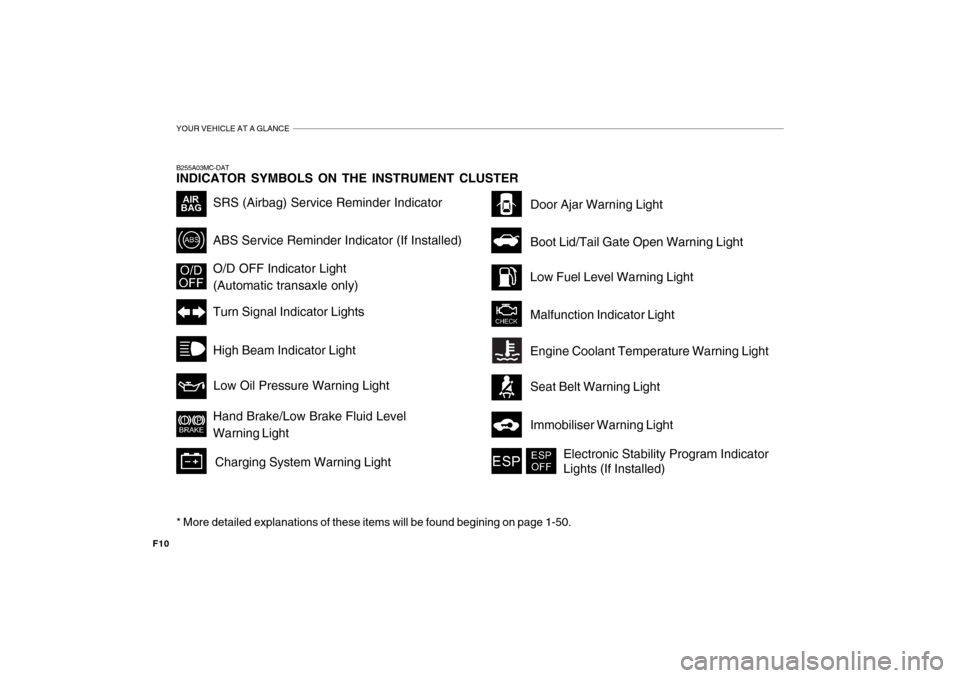
F10B255A03MC-DAT INDICATOR SYMBOLS ON THE INSTRUMENT CLUSTER * More detailed explanations of these items will be found begining on page 1-50.
Turn Signal Indicator Lights
SRS (Airbag) Service Reminder Indicator O/D OFF Indicator Light (Automatic transaxle only) High Beam Indicator Light
Low Oil Pressure Warning Light
ABS Service Reminder Indicator (If Installed)
Door Ajar Warning Light
Hand Brake/Low Brake Fluid Level Warning Light Charging System Warning Light Low Fuel Level Warning Light Malfunction Indicator Light
Immobiliser Warning Light
Boot Lid/Tail Gate Open Warning Light
Engine Coolant Temperature Warning Light Seat Belt Warning Light
Electronic Stability Program Indicator Lights (If Installed)
Page 58 of 232
1
FEATURES OF YOUR HYUNDAI
47
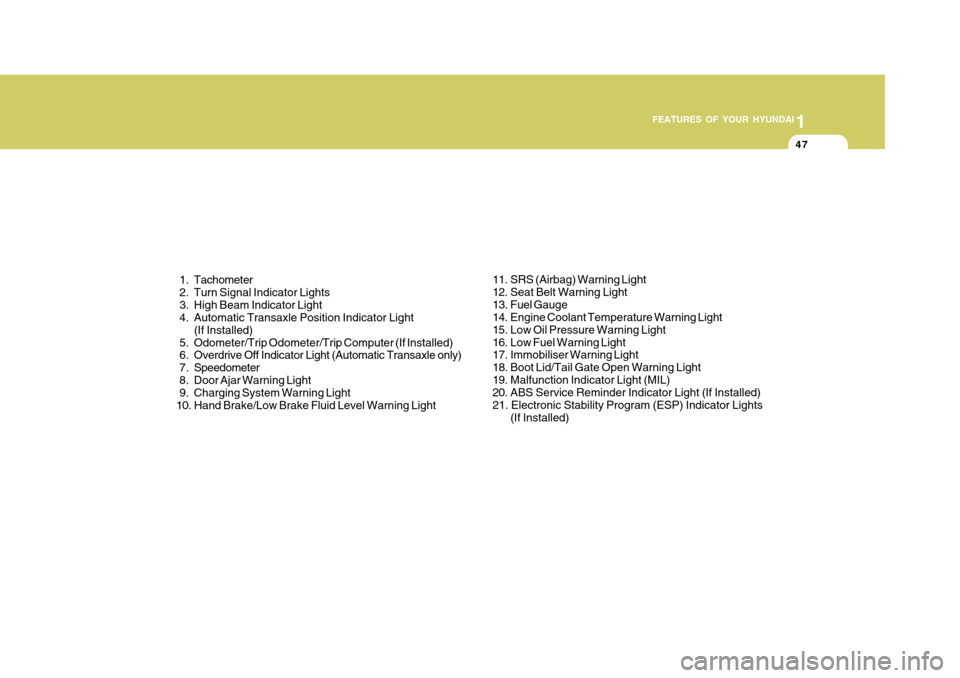
1. Tachometer
2. Turn Signal Indicator Lights
3. High Beam Indicator Light
4. Automatic Transaxle Position Indicator Light (If Installed)
5. Odometer/Trip Odometer/Trip Computer (If Installed)
6. Overdrive Off Indicator Light (Automatic Transaxle only)
7. Speedometer
8. Door Ajar Warning Light
9. Charging System Warning Light
10. Hand Brake/Low Brake Fluid Level Warning Light 11. SRS (Airbag) Warning Light
12. Seat Belt Warning Light
13. Fuel Gauge
14. Engine Coolant Temperature Warning Light
15. Low Oil Pressure Warning Light
16. Low Fuel Warning Light
17. Immobiliser Warning Light
18. Boot Lid/Tail Gate Open Warning Light
19. Malfunction Indicator Light (MIL)
20. ABS Service Reminder Indicator Light (If Installed) 21. Electronic Stability Program (ESP) Indicator Lights
(If Installed)
Page 60 of 232
1
FEATURES OF YOUR HYUNDAI
49
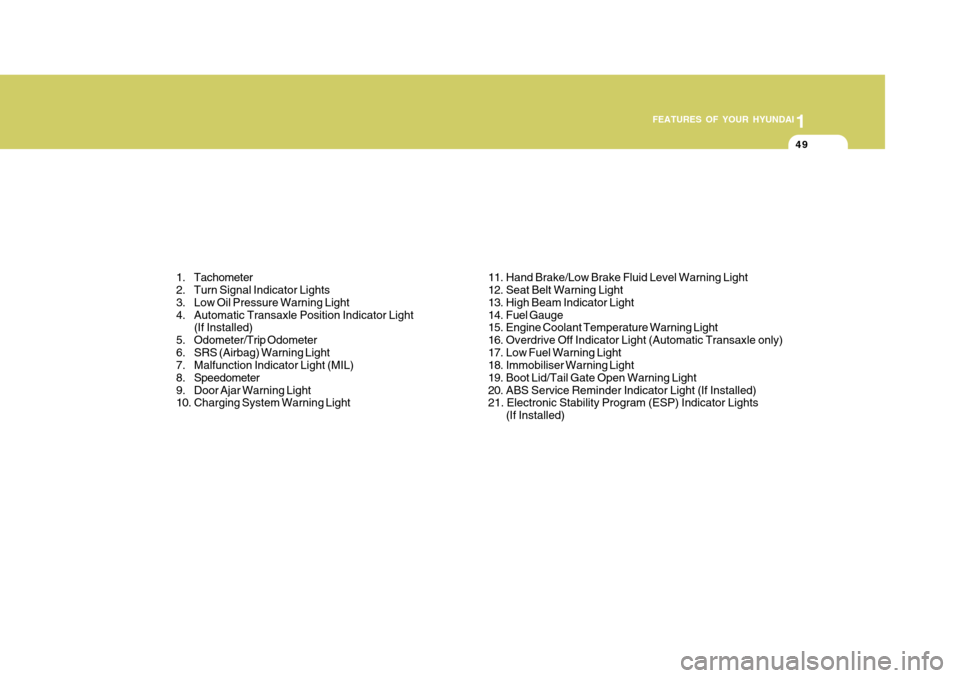
1. Tachometer
2. Turn Signal Indicator Lights
3. Low Oil Pressure Warning Light
4. Automatic Transaxle Position Indicator Light (If Installed)
5. Odometer/Trip Odometer
6. SRS (Airbag) Warning Light
7. Malfunction Indicator Light (MIL)
8. Speedometer
9. Door Ajar Warning Light
10. Charging System Warning Light 11. Hand Brake/Low Brake Fluid Level Warning Light
12. Seat Belt Warning Light
13. High Beam Indicator Light
14. Fuel Gauge
15. Engine Coolant Temperature Warning Light
16. Overdrive Off Indicator Light (Automatic Transaxle only)
17. Low Fuel Warning Light
18. Immobiliser Warning Light
19. Boot Lid/Tail Gate Open Warning Light
20. ABS Service Reminder Indicator Light (If Installed) 21. Electronic Stability Program (ESP) Indicator Lights
(If Installed)
Page 63 of 232
1FEATURES OF YOUR HYUNDAI
52
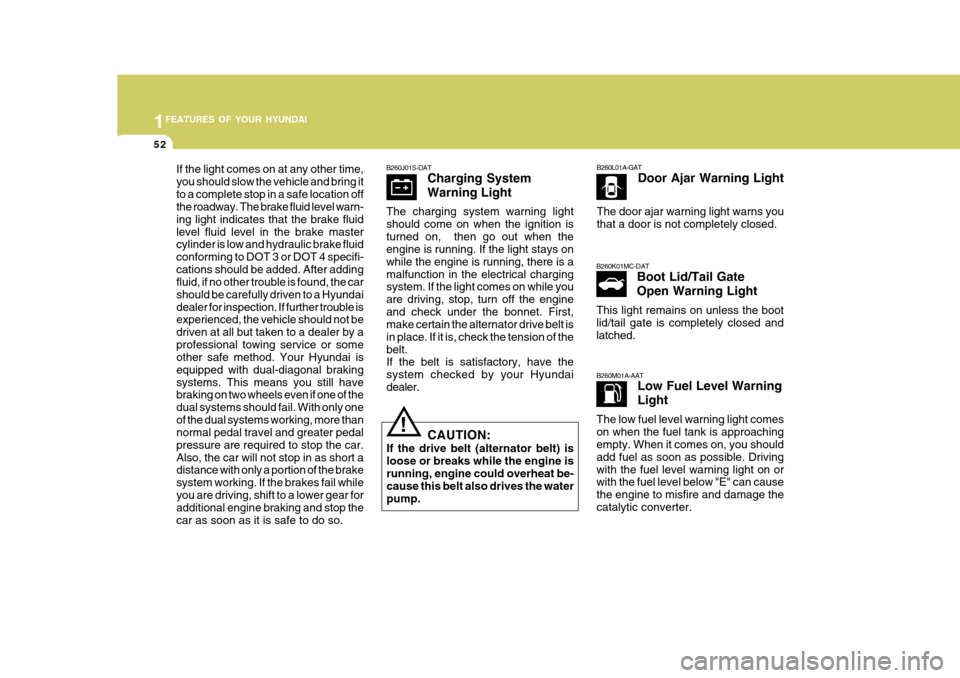
B260J01S-DATCharging System Warning Light
The charging system warning light should come on when the ignition isturned on, then go out when the engine is running. If the light stays on while the engine is running, there is amalfunction in the electrical charging system. If the light comes on while you are driving, stop, turn off the engineand check under the bonnet. First, make certain the alternator drive belt is in place. If it is, check the tension of thebelt. If the belt is satisfactory, have the system checked by your Hyundaidealer. B260M01A-AAT
Low Fuel Level Warning Light
The low fuel level warning light comes on when the fuel tank is approaching empty. When it comes on, you should add fuel as soon as possible. Drivingwith the fuel level warning light on or with the fuel level below "E" can cause the engine to misfire and damage thecatalytic converter.
! CAUTION:
If the drive belt (alternator belt) is loose or breaks while the engine isrunning, engine could overheat be- cause this belt also drives the water pump. B260L01A-GAT
Door Ajar Warning Light
The door ajar warning light warns youthat a door is not completely closed.
If the light comes on at any other time, you should slow the vehicle and bring itto a complete stop in a safe location off the roadway. The brake fluid level warn- ing light indicates that the brake fluidlevel fluid level in the brake master cylinder is low and hydraulic brake fluid conforming to DOT 3 or DOT 4 specifi-cations should be added. After adding fluid, if no other trouble is found, the car should be carefully driven to a Hyundaidealer for inspection. If further trouble is experienced, the vehicle should not be driven at all but taken to a dealer by aprofessional towing service or some other safe method. Your Hyundai is equipped with dual-diagonal brakingsystems. This means you still have braking on two wheels even if one of the dual systems should fail. With only oneof the dual systems working, more than normal pedal travel and greater pedal pressure are required to stop the car.Also, the car will not stop in as short a distance with only a portion of the brake system working. If the brakes fail whileyou are driving, shift to a lower gear for additional engine braking and stop the car as soon as it is safe to do so. B260K01MC-DAT
Boot Lid/Tail Gate Open Warning Light
This light remains on unless the boot lid/tail gate is completely closed andlatched.
Page 146 of 232
2
DRIVING YOUR HYUNDAI
19
2
DRIVING YOUR HYUNDAI
19
C160C01A-AAT Use High Quality Ethylene Gly- col Coolant Your Hyundai is delivered with high quality ethylene glycol coolant in the cooling system. It is the only type ofcoolant that should be used because it helps prevent corrosion in the cooling system, lubricates the water pump andprevents freezing. Be sure to replace or replenish your coolant in accor- dance with the maintenance schedulein Section 5. Before winter, have your coolant tested to assure that its freez- ing point is sufficient for the tempera-tures anticipated during the winter.
It should be noted that installing tyrechains on the tyre will provide a greaterdriving force, but will not prevent side skids. NOTE: Tyre chains are not legal in all states. Check state laws before fitting tyrechains.WINTER DRIVING
C160B01A-DAT Snowy or Icy Conditions To drive your vehicle in deep snow, it may be necessary to use snow tyres or to install tyre chains on your tyres. If snow tyre are needed, it is necessaryto select tyres equivalent in size and type to the original equipment tyres. Failure to do so may adversely affectthe safety and handling of your car. Furthermore, speeding, rapid accel- eration, sudden brake applications, andsharp turns are potentially very haz- ardous practices. During deceleration, use engine brak-ing to the fullest extent. Sudden brake applications on snowy or icy roads may cause skids to occur. You need to
keep sufficient distance between the vehicle in operation in front and your vehicle. Also, apply the brake gently.
C160A01A-DAT The more severe weather conditions of winter result in greater wear and other problems. To minimise the prob- lems of winter driving, you should fol-low these suggestions:
C160F02A-AAT Check Spark Plugs and Ignition System Inspect your spark plugs and replace them if necessary. Also check allignition wiring and components to be sure they are not cracked, worn or damaged in any way.
C160E01A-AAT Change to "Winter Weight" Oil if Necessary In some climates it is recommended that a lower viscosity "winter weight" oil be used during cold weather. See Section 9 for recommendations. If youaren't sure what weight oil you should use, consult your Hyundai dealer.
C160D01A-DAT Check Battery and Cables Winter puts additional burdens on the battery and charging system. Visuallyinspect the battery and cables as de- scribed in Section 6. The level of charge in your battery can be checked by yourHyundai dealer or a service station.
Page 151 of 232
2 DRIVING YOUR HYUNDAI
24
8. When parking your car and trailer,especially on a hill, be sure to follow all the normal precautions. Turn your front wheel into the curb, set the hand brake firmly, and put thetransaxle in 1st or Reverse (manual) or Park (automatic). In addition, place wheel chocks at each of thetrailer's tyres.
9. If the trailer has electric brakes,
drive your vehicle with the trailerattached, and then apply the trailer brakes by hand. This test confirms the operation of the trailer brakesand also checks your electrical con- nection at the same time.
10. During your trip, check occasionally to be sure that the load is secure,and that the lights and any trailer brakes are still working.
11.Avoid jerky starts, sudden accel- eration or sudden stops.
12.Avoid sharp turns and rapid lane changes.
13.Avoid holding the brake pedal down
too long or too frequently. This couldcause the brakes to overheat, re- sulting in reduced braking efficiency.
!WARNING:
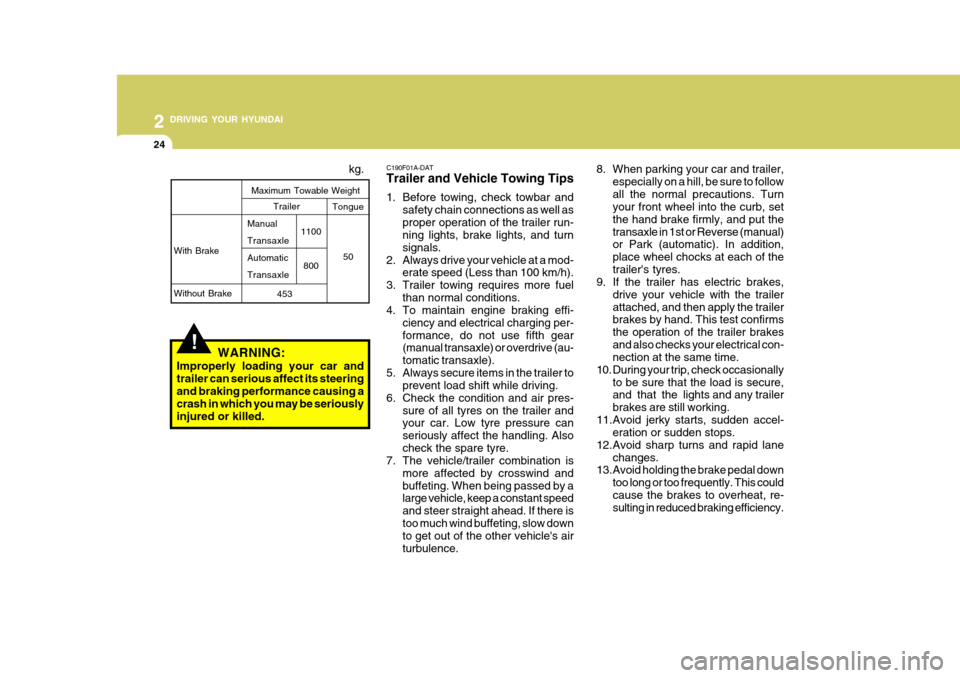
Improperly loading your car and trailer can serious affect its steeringand braking performance causing a crash in which you may be seriously injured or killed. kg.
With Brake Without Brake
Maximum Towable Weight
1100800
Trailer Tongue
50
453
Manual TransaxleAutomaticTransaxle C190F01A-DAT Trailer and Vehicle Towing Tips
1. Before towing, check towbar and
safety chain connections as well as proper operation of the trailer run- ning lights, brake lights, and turn signals.
2. Always drive your vehicle at a mod- erate speed (Less than 100 km/h).
3. Trailer towing requires more fuel than normal conditions.
4. To maintain engine braking effi-
ciency and electrical charging per-formance, do not use fifth gear (manual transaxle) or overdrive (au- tomatic transaxle).
5. Always secure items in the trailer to prevent load shift while driving.
6. Check the condition and air pres- sure of all tyres on the trailer and your car. Low tyre pressure can seriously affect the handling. Alsocheck the spare tyre.
7. The vehicle/trailer combination is
more affected by crosswind andbuffeting. When being passed by a large vehicle, keep a constant speed and steer straight ahead. If there istoo much wind buffeting, slow down to get out of the other vehicle's air turbulence.
Page 156 of 232
3 WHAT TO DO IN AN EMERGENCY
4IF THE ENGINE OVERHEATS
D030A01A-DAT If your temperature gauge indicates overheating, you experience a loss of power, or hear loud pinging or knock- ing, the engine is probably too hot. Ifthis happens, you should:
1. Pull off the road and stop as soon as it is safe to do so.
2. Place the gear selector lever in "P"
(automatic), or neutral (manual transaxle) and set the hand brake. If the air conditioning is on, turn it off.
3. If coolant is running out under the car or steam is coming out from thebonnet, stop the engine. Do not open the bonnet until the coolant hasstopped running or the steaming has stopped. If there is no visible loss of coolant and no steam, leave theengine running and check to be sure the engine cooling fan is operating. If the fan is not running, turn the engineoff.
4. Check to see if the water pump drive
belt is missing. If it is not missing,check to see that it is tight. If the drive belt seems to be satisfactory, check for coolant leaking from theradiator, hoses or under the car.
6. Carefully remove the jumper cables
in the reverse order of attachment.
If you do not know why your batterybecame discharged (because the lightswere left on, etc.), have the charging system checked by your Hyundai dealer.
3. Attach the clamps of the jumper
cable in the exact order shown in theillustration. That is, first, attach one clamp of the jumper cable to the positive (+) post or cable of thedischarged battery. Then attach the other end of the same cable to the positive (+) post or cable of thebooster battery. Next, using the other cable, attach one clamp to the negative (-) post or cable of thebooster battery. Then attach the other end of that cable to a solid metal part of the engine away fromthe battery. Do not connect the cable to any moving part.
4. Start the engine in the car with the booster battery and let it run for afew minutes. This will help to as- sure that the booster battery is fullycharged. During the jumping opera- tion, run the engine in this vehicle at about 2,000 rpm.
5. Start the engine in the car with the discharged battery using the normalstarting procedure. After the enginestarts, leave the jumper cables con- nected and let the engine run at fast idle or about 2,000 rpm for severalminutes.
Page 201 of 232
6 DO-IT-YOURSELF MAINTENANCE
20
!
o Never attempt to charge the bat-
tery when the battery cables are connected.
o The electrical ignition system works with high voltage.Never touch these componentswith the engine running or the ignition switched on.
!
G210B01Y-AAT Checking the Battery Keep the battery clean. Any evidence of corrosion around the battery postsor terminals should be removed using a solution of household baking soda and warm water. After the battery ter-minals are dry, cover them with a light coating of grease.
WARNING:
Always read the following instructions carefully when handling a battery.Keep lighted cigarettes and all other flames or sparks away from the battery.Hydrogen, which is a highly combustible gas, is always present in battery cells andmay explode if ignited. Keep batteries out of the reach of children becausebatteries contain highly cor- rosive SULFURIC ACID. Do not allow battery acid to con-tact your skin, eyes, cloth- ing or paint finish.
If any electrolyte gets into your eyes, flush your eyes with clean water for at least15 minutes and get immedi- ate medical attention. If pos- sible, continue to applywater with a sponge or cloth until medical attention is re- ceived.If electrolyte gets on your skin, thoroughly wash the contacted area.If you feel a pain or a burn- ing sensation, get medical attention immediately.Wear eye protection when charging or working near a battery.Always provide ventilation when working in an en- closed space.
o When lifting a plastic-cased bat- tery, excessive pressure on thecase may cause battery acid to leak, resulting in personal injury. Lift with a battery carrier or withyour hands on opposite corners.