2009 Hyundai Accent clutch
[x] Cancel search: clutchPage 130 of 232
2
DRIVING YOUR HYUNDAI
3
2
DRIVING YOUR HYUNDAI
3TO START THE ENGINEBEFORE STARTING THE EN- GINE
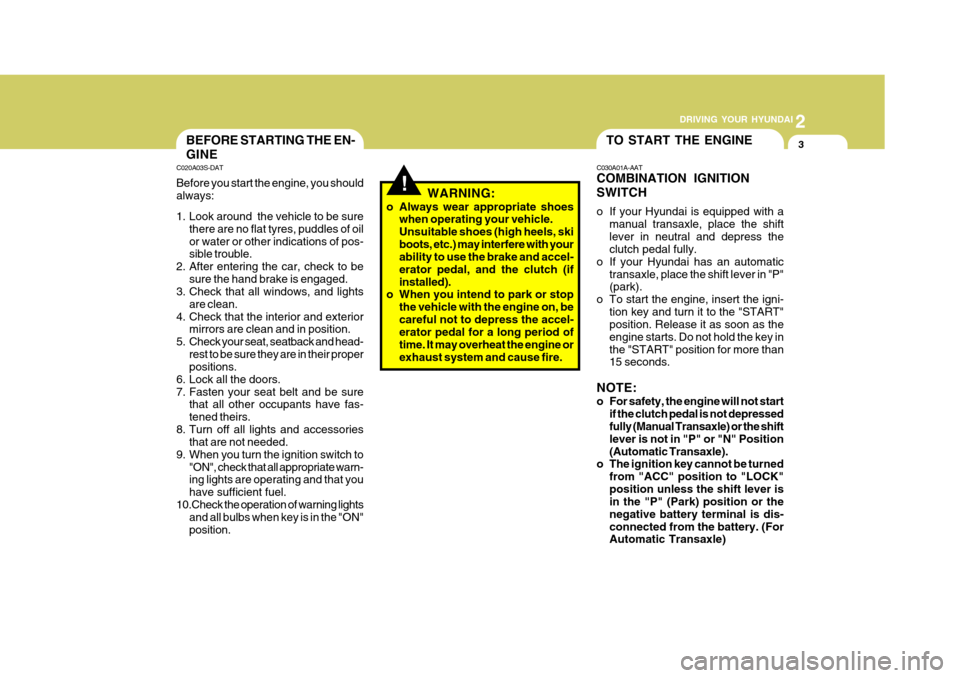
C020A03S-DAT Before you start the engine, you should always:
1. Look around the vehicle to be sure
there are no flat tyres, puddles of oil or water or other indications of pos- sible trouble.
2. After entering the car, check to be
sure the hand brake is engaged.
3. Check that all windows, and lights
are clean.
4. Check that the interior and exterior mirrors are clean and in position.
5. Check your seat, seatback and head- rest to be sure they are in their properpositions.
6. Lock all the doors.
7. Fasten your seat belt and be sure that all other occupants have fas-tened theirs.
8. Turn off all lights and accessories that are not needed.
9. When you turn the ignition switch to "ON", check that all appropriate warn- ing lights are operating and that you have sufficient fuel.
10.Check the operation of warning lights and all bulbs when key is in the "ON"position. C030A01A-AAT COMBINATION IGNITION SWITCH
o If your Hyundai is equipped with a
manual transaxle, place the shift lever in neutral and depress the clutch pedal fully.
o If your Hyundai has an automatic
transaxle, place the shift lever in "P"(park).
o To start the engine, insert the igni- tion key and turn it to the "START"position. Release it as soon as the engine starts. Do not hold the key inthe "START" position for more than 15 seconds.
NOTE:
o For safety, the engine will not start if the clutch pedal is not depressed fully (Manual Transaxle) or the shift lever is not in "P" or "N" Position(Automatic Transaxle).
o The ignition key cannot be turned
from "ACC" position to "LOCK"position unless the shift lever is in the "P" (Park) position or the negative battery terminal is dis-connected from the battery. (For Automatic Transaxle)
!WARNING:
o Always wear appropriate shoes when operating your vehicle. Unsuitable shoes (high heels, skiboots, etc.) may interfere with your ability to use the brake and accel- erator pedal, and the clutch (ifinstalled).
o When you intend to park or stop
the vehicle with the engine on, becareful not to depress the accel- erator pedal for a long period of time. It may overheat the engine orexhaust system and cause fire.
Page 132 of 232
2
DRIVING YOUR HYUNDAI
5
2
DRIVING YOUR HYUNDAI
5
!
!
STARTING
C050A01A-AAT
WARNING:
Never run the engine in a closed or poorly ventilated area any longer than is needed to move your car inor out of the area. The carbon mon- oxide gas emitted is odorless and can cause serious injury or death. C050B01A-AAT Normal Conditions: The Starting Procedure:
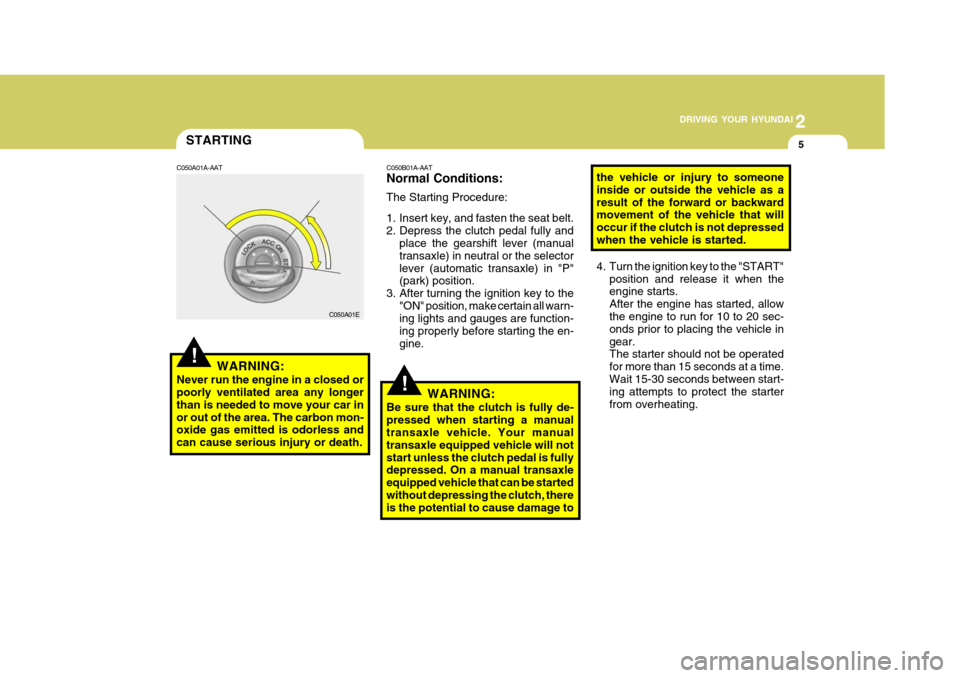
1. Insert key, and fasten the seat belt.
2. Depress the clutch pedal fully and
place the gearshift lever (manualtransaxle) in neutral or the selectorlever (automatic transaxle) in "P" (park) position.
3. After turning the ignition key to the "ON" position, make certain all warn-ing lights and gauges are function- ing properly before starting the en-gine.
WARNING:
Be sure that the clutch is fully de-pressed when starting a manual transaxle vehicle. Your manual transaxle equipped vehicle will notstart unless the clutch pedal is fully depressed. On a manual transaxle equipped vehicle that can be startedwithout depressing the clutch, there is the potential to cause damage to the vehicle or injury to someone inside or outside the vehicle as aresult of the forward or backward movement of the vehicle that will occur if the clutch is not depressedwhen the vehicle is started.
4. Turn the ignition key to the "START"
position and release it when the engine starts. After the engine has started, allowthe engine to run for 10 to 20 sec- onds prior to placing the vehicle in gear. The starter should not be operated for more than 15 seconds at a time.Wait 15-30 seconds between start- ing attempts to protect the starter from overheating.
C050A01E
Page 133 of 232
2 DRIVING YOUR HYUNDAI
6OPERATING THE MANUAL TRANSAXLE
NOTE:
o To shift into reverse, rest the leverin neutral for at least 3 seconds after your car is completelystopped. Then move the lever into the reverse position.
o During cold weather, shifting may be difficult until the transaxle lu-bricant has warmed up. This is normal and not harmful to thetransaxle.
o If you've come to a complete stop
and it's hard to shift into 1st orR(Reverse), put the shift lever in N(Neutral) position and release the clutch. Press the clutch pedalback down, and then shift into 1st or R(Reverse) gear position.
o Do not use the shift lever as a handrest during driving, as thiscan result in premature wear of the transaxle shift forks. CAUTION:
o Do not downshift more than 2 gears or downshift the gear when theengine is running at high speed(5,000 RPM or higher). Such down- shifting may damage the engine.
o When downshifting from fifth gear to fourth gear, caution should betaken not to inadvertently press the gear lever sideways in such amanner that second gear is en- gaged. Such a drastic downshift may cause the engine speed toincrease to the point that the ta- chometer will enter the red-zone. Such over-revving of the enginemay possibly cause engine dam- age.
!
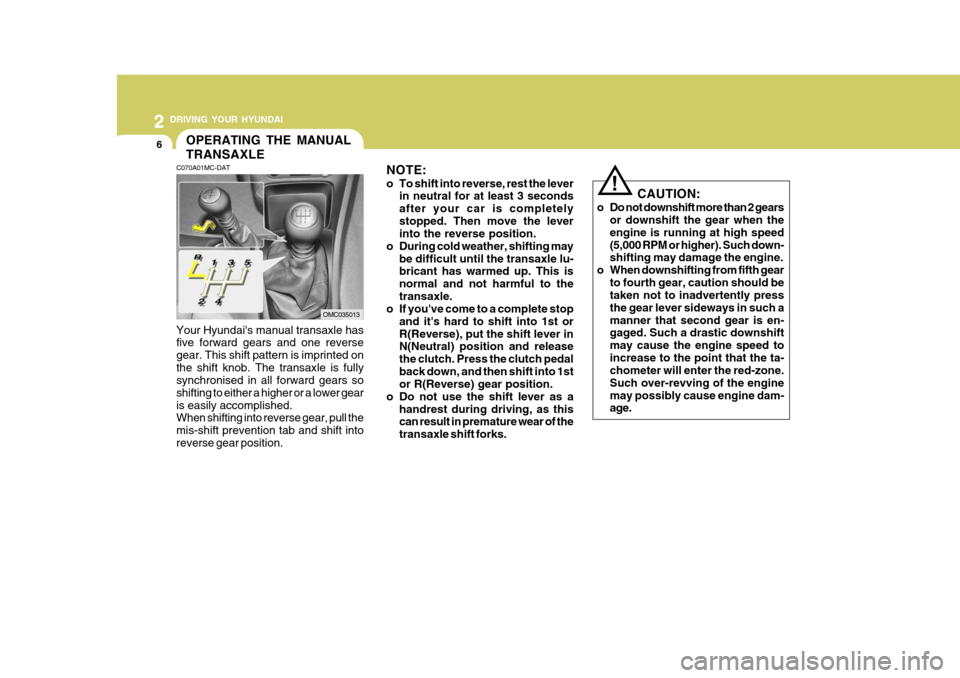
C070A01MC-DAT Your Hyundai's manual transaxle has five forward gears and one reverse gear. This shift pattern is imprinted onthe shift knob. The transaxle is fully synchronised in all forward gears so shifting to either a higher or a lower gearis easily accomplished. When shifting into reverse gear, pull the mis-shift prevention tab and shift intoreverse gear position.
OMC035013
Page 134 of 232

2
DRIVING YOUR HYUNDAI
7
2
DRIVING YOUR HYUNDAI
7
C070D02O-AAT Good Driving Practices
o Never take the car out of gear and coast down a hill. This is extremely hazardous. Always leave the car in gear.
o Don't "ride" the brakes. This can cause them to overheat and mal-function. Instead, when you are driv- ing down a long hill, slow down andshift to a lower gear. When you do this, engine braking will help slow the car.
o Slow down before shifting to a lower gear. This will help avoid over-rev-ving the engine, which can causedamage.
o Slow down when you encounter
cross winds. This gives you muchbetter control of your car.
o Be sure the car is completely stopped
before you attempt to shift into re-verse. The transaxle can be dam- aged if you do not. To shift into reverse, depress the clutch, movethe shift lever to neutral, wait three seconds, then shift to the reverse position.
o Exercise extreme caution when driving on a slippery surface. Beespecially careful when braking,
C070E03A-DAT RECOMMENDED SHIFT POINTS
1-2 2-33-4 4-5
Shift
from-to Recommended
20 km/h 40 km/h 55 km/h 75 km/h
The shift points as shown above are recommended for optimum fuel economy and performance.
C070B01A-DAT Using the Clutch The clutch should be pressed all the way to the floor before shifting, thenreleased slowly. The clutch pedal should fully return to the original posi- tion. Do not rest your foot on the clutchpedal while driving. This can cause unnecessary wear. Do not partially engage the clutch to hold the car on anincline. This causes unnecessary wear. Use the hand brake to hold the car on an incline. Do not operate the clutchpedal rapidly and repeatedly.
Page 182 of 232
Engine Compartment .................................................... 6-2
General Checks ........................................................... 6-3
Maintenance Precautions ............................................. 6-4
Checking the Engine Oil ............................................... 6-4
Checking and Changing the Engine Coolant ................ 6-7
Changing the Air Cleaner Filter ..................................... 6-8
Checking the Transaxle Oil (Manual) ..........................6-11
Checking the Transaxle Fluid (Automatic)..................6-11
Checking the B rakes ................................................... 6-13
Checking the Clutch Fluid ............................................ 6-14
Air Conditioning Care ................................................... 6-15
Changing the Climate Control Air Filter........................ 6-16
Checking and Replacing Fuses .................................. 6-17
Checking the Battery ................................................... 6-19
Power Steering Fluid Level .......................................... 6-21
Headlight Aiming Adjustment ....................................... 6-22
Replacement of Light Bulbs ......................................... 6-24
Bulb Wattage ............................................................... 6-29
Fuse Panel Description ............................................... 6-30
DO-IT-YOURSELF MAINTENANCE
6
6
Page 183 of 232
6 DO-IT-YOURSELF MAINTENANCE
2ENGINE COMPARTMENT
G010B01MC-DAT
CAUTION:
When inspecting or servicing the engine, you should handle tools and other heavy objects carefully so that the plastic rocker cover of the engine is not damaged.
!
OMC059036R
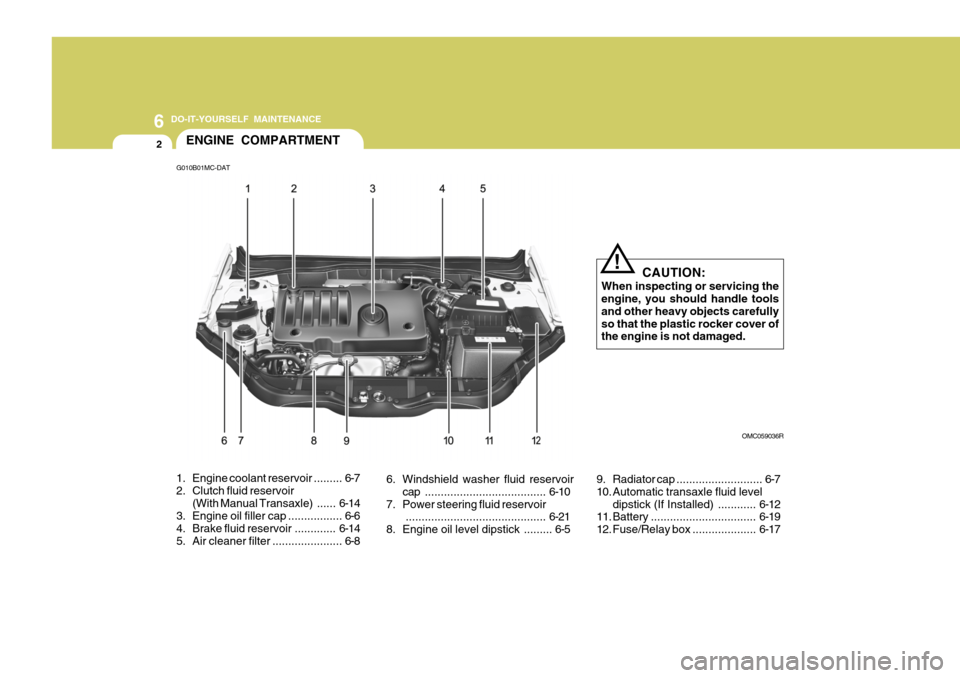
1. Engine coolant reservoir ......... 6-7
2. Clutch fluid reservoir (With Manual Transaxle) ...... 6-14
3. Engine oil filler cap ................. 6-6
4. Brake fluid reservoir ............. 6-14
5. Air cleaner filter ...................... 6-8 6. Windshield washer fluid reservoir
cap ...................................... 6-10
7. Power steering fluid reservoir ............................................ 6-21
8. Engine oil level dipstick ......... 6-5 9. Radiator cap
........................... 6-7
10. Automatic transaxle fluid level dipstick (If Installed) ............ 6-12
11. Battery ................................. 6-19
12. Fuse/Relay box .................... 6-17
Page 184 of 232
6
DO-IT-YOURSELF MAINTENANCE
3GENERAL CHECKS
G020A01A-AAT Engine Compartment The following should be checked regu- larly:
o Engine oil level and condition
o Transaxle fluid level and condition
o Brake fluid level
o Clutch fluid level
o Engine coolant level
o Windshield washer fluid level
o Accessory drive belt condition
o Engine coolant hose condition
o Fluid leaks (on or below compo- nents)
o Power steering fluid level
o Battery condition
o Air cleaner filter condition G020C01A-DAT Vehicle Interior The following should be checked each time when the vehicle is driven:
o Lights operation
o Windshield wiper operation
o Horn operation
o Demister, heating system operation
(and air conditioning, if installed)
o Steering operation and condition
o Mirror condition and operation
o Turn signal light operation
o Accelerator pedal operation
o Brake operation, including hand
brake
o Manual transaxle operation, includ- ing clutch operation
o Automatic transaxle operation, in- cluding "Park" mechanism opera-tion
o Seat control condition and opera- tion
o Seat belt condition and operation
o Sunvisor operation If you notice anything that does not operate correctly or appears to befunctioning incorrectly, inspect it care- fully and seek assistance from your Hyundai dealer if service is needed.
G020B01A-DAT Vehicle Exterior The following should be checked monthly:
o Overall appearance and condition
o Wheel condition and wheel nut torque
o Exhaust system condition
o Light condition and operation
o Windshield glass condition
o Wiper blade condition
o Paint condition and body corrosion
o Fluid leaks
o Door and bonnet lock condition
o Tyre pressure and condition (includ-
ing spare tyre)
Page 195 of 232
6 DO-IT-YOURSELF MAINTENANCE
14
!
CHECKING THE CLUTCH FLUID
G120E02A-AAT Adding Brake Fluid
WARNING:
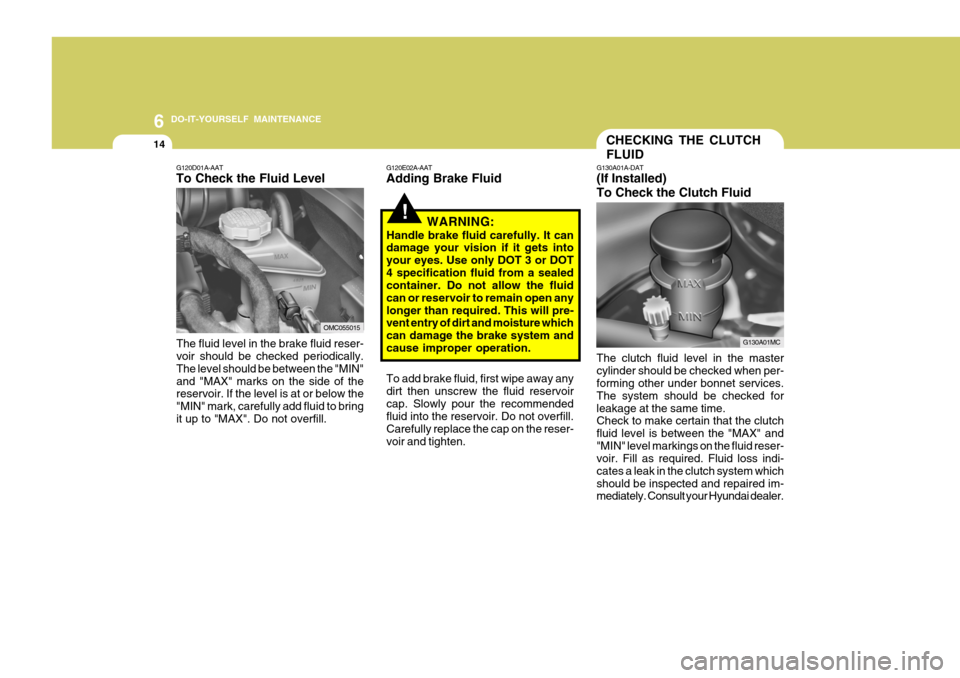
Handle brake fluid carefully. It can damage your vision if it gets into your eyes. Use only DOT 3 or DOT4 specification fluid from a sealed container. Do not allow the fluid can or reservoir to remain open anylonger than required. This will pre- vent entry of dirt and moisture which can damage the brake system and cause improper operation. To add brake fluid, first wipe away any dirt then unscrew the fluid reservoircap. Slowly pour the recommended fluid into the reservoir. Do not overfill. Carefully replace the cap on the reser-voir and tighten. G130A01A-DAT (If Installed) To Check the Clutch Fluid The clutch fluid level in the master cylinder should be checked when per- forming other under bonnet services. The system should be checked forleakage at the same time. Check to make certain that the clutch fluid level is between the "MAX" and"MIN" level markings on the fluid reser- voir. Fill as required. Fluid loss indi- cates a leak in the clutch system whichshould be inspected and repaired im- mediately. Consult your Hyundai dealer.
G120D01A-AAT To Check the Fluid Level
The fluid level in the brake fluid reser- voir should be checked periodically. The level should be between the "MIN"and "MAX" marks on the side of the reservoir. If the level is at or below the "MIN" mark, carefully add fluid to bringit up to "MAX". Do not overfill.
OMC055015
G130A01MC