Page 5 of 578

(f luid capacities and tire pressures)
(main controls)
(seat belts, SRS, and child protection)
(indicators, gauges, multi-inf ormation display, dashboard, and steering column)
(climate control, audio, steering wheel, rear entertainment, security, cruise control, and HomeLink) (fuel, vehicle break-in, and cargo loading)
(engine and transmission operation) (minder, f luid checking, minor services, and vehicle storage) (f lat tire, dead battery, overheating, and f uses)
(vehicle specif ications, tires, and emissions controls) (warranty and contact inf ormation)
(how to order)
Contents
........................................................................\
........................................................................
Index .I
Service Inf ormation Summary ........................................................................\
.......................
Your Vehicle at a Glance .3
............................................................
Driver and Passenger Saf ety .5
.......
Instruments and Controls .63
....
Features .189
.......................................................................
Bef ore Driving .397
........................................................................\
.................
Driving .413
.................................................
Maintenance .457
.........................................
T aking Care of the Unexpected .511
..............................................
T echnical Inf ormation .539
..................
Warranty and Customer Relations (U.S. and Canada only) .557
........................................................................\
..........
A uthorized Manuals (U.S. only) .561
1
�����—�����—�
���y�
�������������y���
�(�/���������y���������y
Owner's Identification Form
2010 Pilot Online Reference Owner's Manual
00X31-SZA-6002
\251 2008 American Honda Motor Co., Inc. - All Rights Reserved
2009 Pilot
Page 64 of 578
These labels are in the locations
shown. They warn you of potential
hazards that could cause serious
injury or death. Read these labels
caref ully.
If a label comes of f or becomes hard
to read (except for the U.S.
dashboard label which may be
removed by the owner), contact your
dealer f or a replacement.U.S. models only
U.S. models Canadian models
Saf ety L abels
60
RADIATOR CAP DASHBOARD
BATTERY LABEL
HOOD
�����—�����—�
���y�
�������������y���
�(�/���������y���������y
2009 Pilot
Page 72 of 578
The engine can be severely
damaged if this indicator f lashes
or stays on when the engine is
running. For more inf ormation,
see page .
You will also see a ‘‘CHECK
ENGINE OIL LEVEL’’ message
on the multi-information display
(see page ).If this indicator comes on when the
engine is running, the battery is not
being charged. For more inf ormation,
see page .
You will also see a ‘‘CHECK
CHARGING SYSTEM’’ message on
the multi-information display (see
page ).
For more inf ormation, see page
.
You will also see a ‘‘CHECK
EMISSION SYSTEM’’ message on
the multi-information display (see
page ). For more inf ormation, see
page .
525
93 525
93 526
93526
On Touring models On Touring models
On Touring models
L ow Oil Pressure
Indicator Charging System
IndicatorMalf unction Indicator
Lamp
Instrument Panel Indicators
68
�����—�����—�
���y�
�������������y���
�(�/���������y���������y
2009 Pilot
Page 136 of 578

These keys contain electronic
circuits that are activated by the
immobilizer system. They will not
work to start the engine if the
circuits are damaged.Protect the keys f rom direct
sunlight, high temperature, and
high humidity.
Donotdropthekeysorsetheavy
objects on them.
Keep the keys away f rom liquids.
If they get wet, dry them
immediately with a sof t cloth.
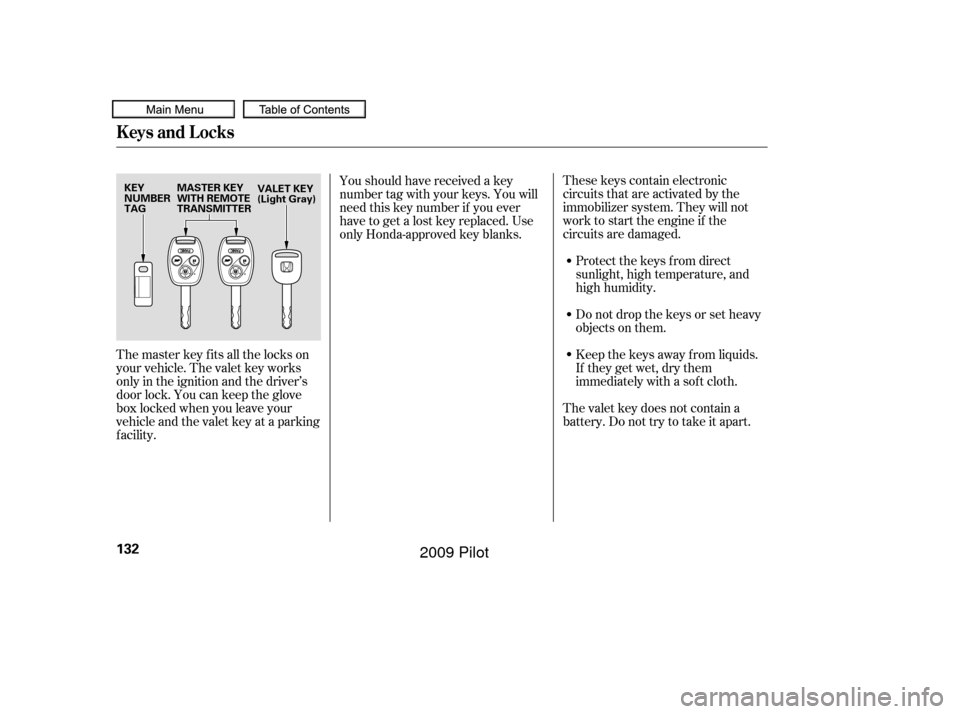
The master key fits all the locks on
your vehicle. The valet key works
only in the ignition and the driver’s
door lock. You can keep the glove
boxlockedwhenyouleaveyour
vehicle and the valet key at a parking
f acility. The valet key does not contain a
battery. Do not try to take it apart.
Youshouldhavereceivedakey
number tag with your keys. You will
need this key number if you ever
have to get a lost key replaced. Use
only Honda-approved key blanks.
Keys and Locks
132
KEY
NUMBER
TAG
MASTER KEY
WITH REMOTE
TRANSMITTER
VALET KEY
(Light Gray)
�����—�����—�
���y�
���������
���y���
�(�/���������y���
�����y
2009 Pilot
Page 148 of 578

Also check that passengers,
especially children, do not have their
hands on the edge of the tailgate or
on the tailgate sill. The auto reverse
featurestopsworkingwhenthe
tailgate is about to latch so the motor
can pull the tailgate shut.
If your vehicle’s battery is
disconnected, goes dead, or the f use
is removed while the tailgate is f ully
open, the power tailgate needs to be
reset. After connecting the battery
or installing the f use, close the
tailgate f ully by hand.
The power tailgate may not open or
close under the these conditions:The vehicle is parked on a steep
hill.
When the vehicle is swayed in a
strong wind.
The power tailgate has an auto-
reverse f eature. If it meets
resistance while opening or closing,
it will beep three times and reverse
direction. However, the tailgate may
not reverse immediately. Always
make sure passengers and objects
are clear of the tailgate before
opening or closing it.
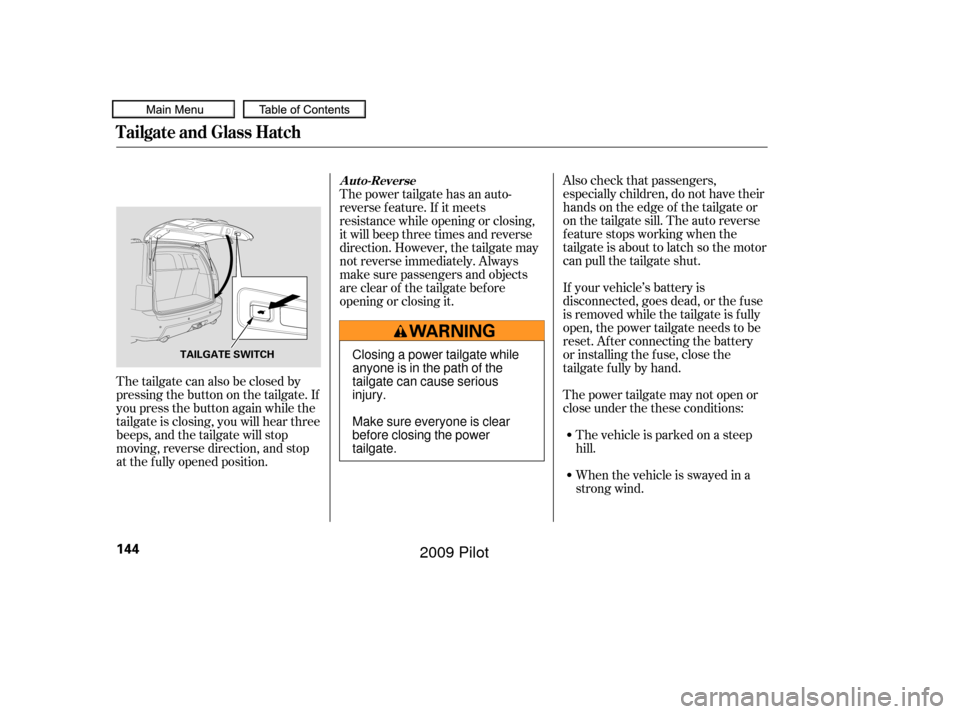
The tailgate can also be closed by
pressing the button on the tailgate. If
you press the button again while the
tailgate is closing, you will hear three
beeps, and the tailgate will stop
moving, reverse direction, and stop
at the f ully opened position.A ut o-Reverse
Tailgate and Glass Hatch
144
TAILGATE SWITCHClosing a power tailgate while
anyone is in the path of the
tailgate can cause serious
injury.
Make sure everyone is clear
before closing the power
tailgate.
�����—�����—�
���y�
�������������y���
�(�/���������y���
�����y
2009 Pilot
Page 154 of 578
Inside the transmitter, separate
the inner cover f rom the keypad
by releasing the two tabs on the
cover.
If it takes several pushes on the
button to lock or unlock the doors
and the tailgate, replace the battery
as soon as possible.
Battery type: CR1616
To replace the battery:Remove the screw at the base of
the transmitter with a small
Phillips-head screwdriver.
Separate the transmitter by prying
its middle seam with your
f ingernail. 3.
1.
2.
Remote Transmitter
Replacing the Transmitter
Battery
150
BATTERY
SCREW
�����—�����—�
���y�
�������������y���
�(�/���������y���
�����y
2009 Pilot
Page 155 of 578

�´
As required by the FCC:This device complies with Part 15 of theFCC rules. Operation is subject to thef ollowing two conditions: (1) This devicemay not cause harmf ul interf erence, and(2) this device must accept anyinterf erence received, includinginterf erence that may cause undesiredoperation.
Changes or modif ications not expresslyapproved by the party responsible f orcompliance could void the user’sauthority to operate the equipment.
This device complies with IndustryCanada Standard RSS-210.Operation is subject to the f ollowing twoconditions: (1) this device may not causeinterf erence, and (2) this device mustaccept any interf erence that may causeundesired operation of the device. On Touring modelsRemove the old battery, and insert
a new battery into the back of the
cover with the side f acing down.
Install the parts in reverse order. An improperly disposed of battery
can hurt the environment.
Always conf irm local regulations
for battery disposal.
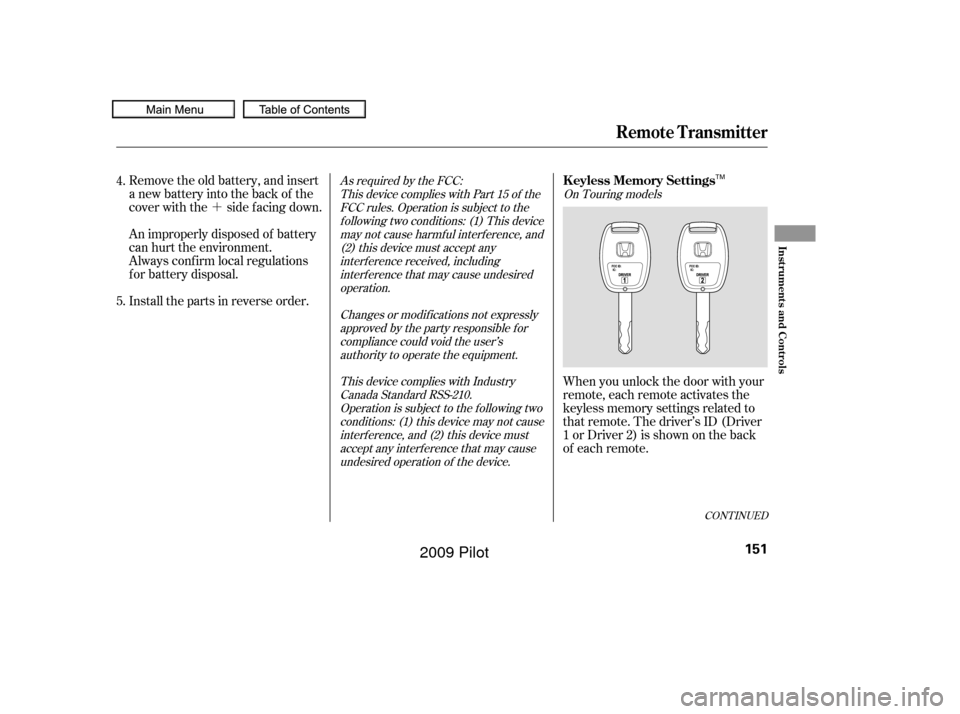
When you unlock the door with your
remote, each remote activates the
keyless memory settings related to
that remote. The driver’s ID (Driver
1orDriver2)isshownontheback
of each remote.
4.
5.
CONT INUED
Remote Transmitter
K eyless Memory Settings
Inst rument s and Cont rols
151
TM
�����—�����—�
���y�
�������������y���
�(�/���������y���
�����y
2009 Pilot
Page 167 of 578

�µ
CONT INUED
The windows will operate f or up to
10 minutes af ter you turn of f the
ignition switch. Opening either f ront
door cancels this f unction.To open either f ront
window f ully, push the window
switch f irmly down to the second
detent, then release it. The window
automatically goes down all the way.
To stop the window f rom going all
the way down, pull back on the
window switch briefly.
In the HI setting, the heater turns off
when the seat gets warm, and turns
back on after the seat’s temperature
drops.
In the LO setting, the heater runs
continuously. It does not cycle with
temperature changes.
Follow these precautions when using
the seat heaters:
Use the HI setting only to heat the
seats quickly, because it draws
large amounts of current f rom the
battery.
If the engine is lef t idling f or an
extended period, do not use the
seat heaters even on the LO
setting. It can weaken the battery,
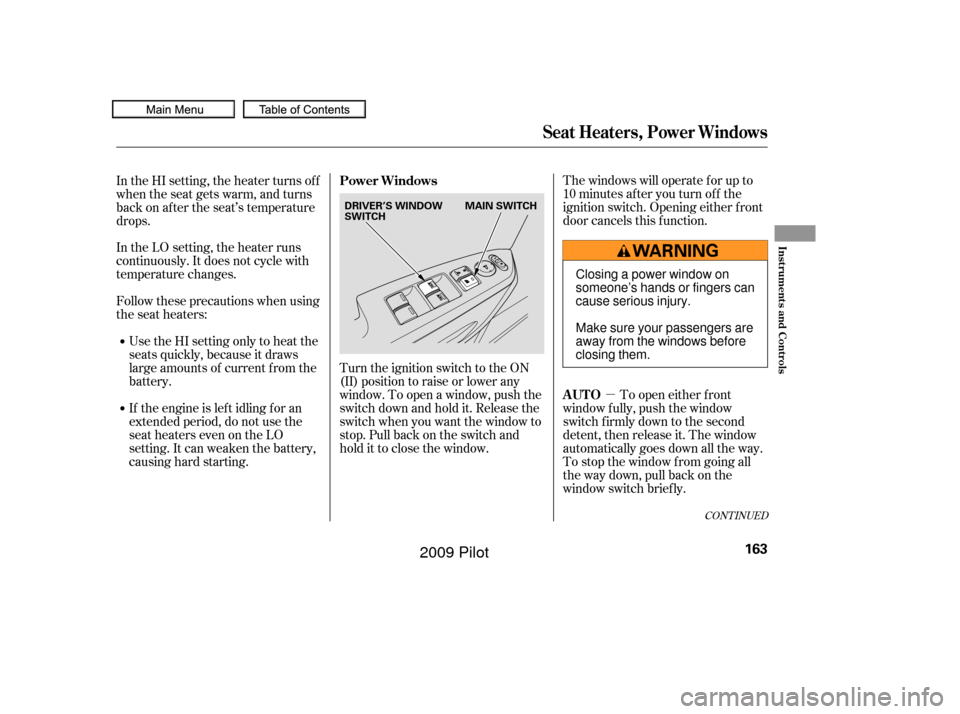
causing hard starting. Turn the ignition switch to the ON
(II) position to raise or lower any
window. To open a window, push the
switchdownandholdit.Releasethe
switch when you want the window to
stop. Pull back on the switch and
hold it to close the window.
AUTO
Power Windows
Seat Heaters, Power Windows
Inst rument s and Cont rols
163
DRIVER’S WINDOW
SWITCH
MAIN SWITCH
Closing a power window on
someone’s hands or fingers can
cause serious injury.
Make sure your passengers are
away from the windows before
closing them.
�����—�����—�
���y�
�������������y���
�(�/���������y���
�����y
2009 Pilot