Page 477 of 578

�Ì�Ì
�µ�µ
�Ì
Maintenance Minder
473
Maintenance Main Items
Replace engine oil
Replace engine oil and oil filter
Inspect front and rear brakes
Check parking brake adjustment
Inspect these items: Tie rod ends, steering gear box, and boots
Suspension components
Driveshaft boots
Brake hoses and lines (including ABS)
All fluid levels and condition of fluids
Exhaust system
Fuel lines and connections Maintenance Sub Items
Rotate tires
Replace air cleaner element
Replace dust and pollen filter
Inspect drive belt
Replace transmission and transfer fluid
Replace spark plugs
Replace timing belt and inspect water pump
Inspect valve clearance
Replace engine coolant
Replace VTM-4 rear differential fluid
Symbol
Symbol
A B 1
2
3
4
5
61
1
If the message, ‘‘SERVICE’’ does not appear more than 12 months after
the display is reset, change the engine oil every year.
See information on maintenance and emissions warranty on page .
Independent of the maintenance messages in the information display,
replace the brake fluid every 3 years.
Inspect idle speed every 160,000 miles (256,000 km).
Adjust the valves during services A, B, 1, 2, or 3 if they are noisy. 471
If you drive in dusty conditions, replace every 15,000
miles (24,000 km).
If you drive primarily in urban areas that have high
concentrations of soot in the air from industry and from
diesel-powered vehicles, replace every 15,000 miles
(24,000 km).
If you drive regularly in very high temperatures
(over 110°F, 43°C), in very low temperatures
(under 20°F, 29°C), or towing a trailer, replace every
60,000 miles (U.S.)/100,000 km (Canada).
Driving in mountainous areas at very low vehicle
speeds or trailer towing results in higher level of
mechanical (shear) stress to fluid. This requires
differential fluid changes more frequently than
recommended by the Maintenance Minder. If you
regularly drive your vehicle under these conditions,
have the differential fluid changed at 7,500 miles
(12,000 km), then every 15,000 miles (24,000 km).
:
1:
NOTE :Maintenance Schedule for Normal Conditions
�����—�����—�
���y�
������
������y���
�(�/���������y���������y
2009 Pilot
Page 481 of 578
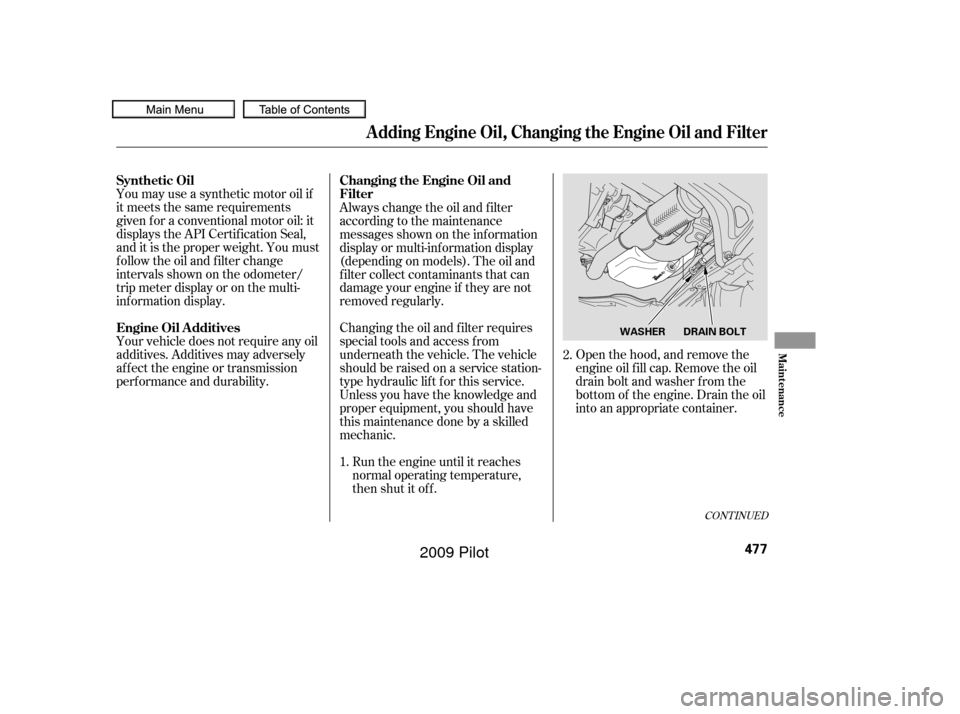
Open the hood, and remove the
engine oil f ill cap. Remove the oil
drain bolt and washer f rom the
bottom of the engine. Drain the oil
into an appropriate container.
You may use a synthetic motor oil if
it meets the same requirements
given f or a conventional motor oil: it
displays the API Certif ication Seal,
and it is the proper weight. You must
f ollow the oil and f ilter change
intervals shown on the odometer/
trip meter display or on the multi-
inf ormation display.
Your vehicle does not require any oil
additives. Additives may adversely
af f ect the engine or transmission
perf ormance and durability.
Always change the oil and f ilter
according to the maintenance
messages shown on the inf ormation
display or multi-inf ormation display
(depending on models). The oil and
f ilter collect contaminants that can
damage your engine if they are not
removed regularly.
Changing the oil and f ilter requires
special tools and access f rom
underneath the vehicle. The vehicle
should be raised on a service station-
type hydraulic lif t f or this service.
Unless you have the knowledge and
proper equipment, you should have
this maintenance done by a skilled
mechanic.
Run the engine until it reaches
normal operating temperature,
then shut it off.
1. 2.
CONT INUED
Synthetic Oil
Changing the Engine Oil and
Filter
Engine Oil A dditives
A dding Engine Oil, Changing the Engine Oil and Filter
Maint enance
477
WASHER DRAIN BOLT
�����—�����—�
���y�
������
������y���
�(�/���������y���������y
2009 Pilot
Page 486 of 578
Remove the dipstick (yellow loop)
f rom the transmission, and wipe it
with a clean cloth.Insert the dipstick all the way into
the transmission securely as
shown in the illustration.
Remove the dipstick and check
the f luid level. It should be
between the upper and lower
marks.
Check the f luid level with the engine
at normal operating temperature.
Park the vehicle on level ground.
Start the engine, let it run until the
radiator f an comes on, then shut
of f the engine. For accurate
results, wait about 60 seconds (but
no longer than 90 seconds) bef ore
doing step 2.
The transmission should be drained
and ref illed with new f luid when this
service is shown on the inf ormation
display or multi-inf ormation display
(depending on models).
1.
2.3.
4.
Automatic Transmission Fluid
482
DIPSTICKDIPSTICK
UPPER MARK
LOWER MARK
�����—�����—�
���y�
�������������y���
�(�/���������y���������y
2009 Pilot
Page 487 of 578
If the level is below the lower
mark, add f luid into the dipstick
hole to bring it to the level
between the upper and lower
marks.
Pour the f luid slowly and caref ully
so you do not spill any. Clean up
any spill immediately; it could
damage components in the engine
compartment.The transmission should be drained
and ref illed with new f luid when this
service is shown on a maintenance
message in the multi-inf ormation
display.
If you are not sure how to add f luid,
contact your dealer.
Always use Honda Genuine
ATF-Z1 (automatic transmission
f luid).
Insert the dipstick all the way back
into the transmission securely as
shown in the illustration.
Make sure the rubber cap on the
dipstick f its in the dipstick guide
and that you push the dipstick in
all the way.
5.
6.
Automatic Transmission Fluid
Maint enance
483
Use only Honda Genuine ATF-Z1
(Automatic Transmission Fluid). Do
not mix with other transmission f luids.
Using transmission f luid other than
Honda Genuine ATF-Z1 may cause
deterioration in transmission operation
and durability, and could result in
damage to the transmission.
Damage resulting f rom the use of
transmission f luid other than Honda
Genuine ATF-Z1 is not covered by the
Honda new vehicle warranty.
�����—�����—�
���y�
�������������y���
�(�/���������y���������y
2009 Pilot
Page 488 of 578
The rear dif f erential should be
drained and ref illed with new f luid
when this service is indicated by a
maintenance message on the
inf ormation display or multi-
inf ormation display. This service
may be needed more of ten under
certain driving conditions (see page). Always use Honda VTM-4
Dif f erential Fluid, and have your
dealer replace the rear differential
f luid.
Always use Hypoid gear oil GL4 or
GL5 with a viscosity of SAE 90 or
80W-90. Have the f luid replaced by
your dealer. The transf er assembly should be
drained and ref illed with new f luid
when this service is indicated by a
maintenance message on the
inf ormation display or multi-
inf ormation display.
473
4WD models only 4WD models only
Rear Differential Fluid, Transfer Assembly Fluid
Rear Dif f erential FluidTransf er Assembly Fluid
484
FILLER BOLT
CORRECT LEVEL
�����—�����—�
���y�
�������������y���
�(�/���������y���������y
2009 Pilot
Page 489 of 578
Always use Honda Heavy Duty
Brake Fluid DOT 3. If it is not
available, you should use only DOT 3
or DOT 4 f luid, f rom a sealed
container, as a temporary
replacement.
Using any non-Honda brake f luid can
cause corrosion and decrease the lif e
of the system. Have the brake
system f lushed and ref illed with
Honda Heavy Duty Brake Fluid
DOT 3 as soon as possible.
Brake f luid marked DOT 5 is not
compatible with your vehicle’s
braking system and can cause
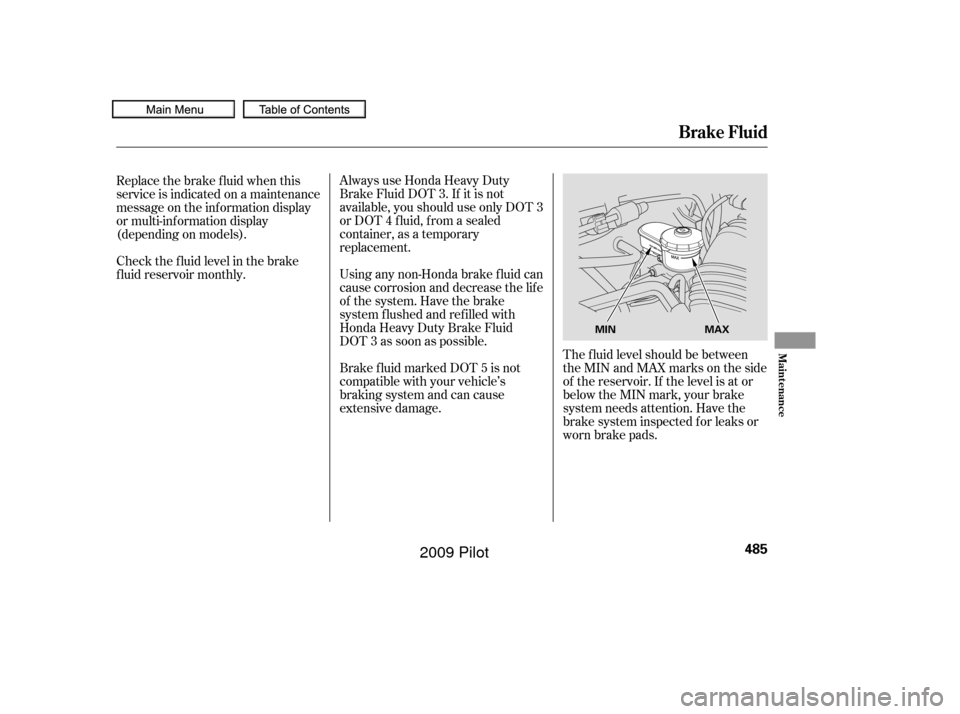
extensive damage.The f luid level should be between
theMINandMAXmarksontheside
of the reservoir. If the level is at or
below the MIN mark, your brake
system needs attention. Have the
brake system inspected f or leaks or
worn brake pads.
Replace the brake f luid when this
service is indicated on a maintenance
message on the inf ormation display
or multi-inf ormation display
(depending on models).
Check the f luid level in the brake
f luid reservoir monthly.
Brake Fluid
Maint enance
485
MAX
MIN
�����—�����—�
���y�
�������������y���
�(�/���������y���������y
2009 Pilot
Page 498 of 578
If your seat belts get dirty, use a sof t
brush with a mixture of mild soap
and warm water to clean them. Do
not use bleach, dye, or cleaning
solvents. Let the belts air-dry bef ore
you use the vehicle.
This f ilter removes the dust and
pollenthatisbroughtinfromthe
outside through the heating and
cooling system/climate control
system.
Have your dealer replace the filter
when this service is indicated by a
maintenance message on the
inf ormation display or multi-
inf ormation display (depending on
the models). It should be replaced
every 15,000 miles (24,000 km) if you
drive primarily in urban areas that
have high concentrations of soot in
the air, or if the flow from the
heating and cooling system/climate
control system becomes less than
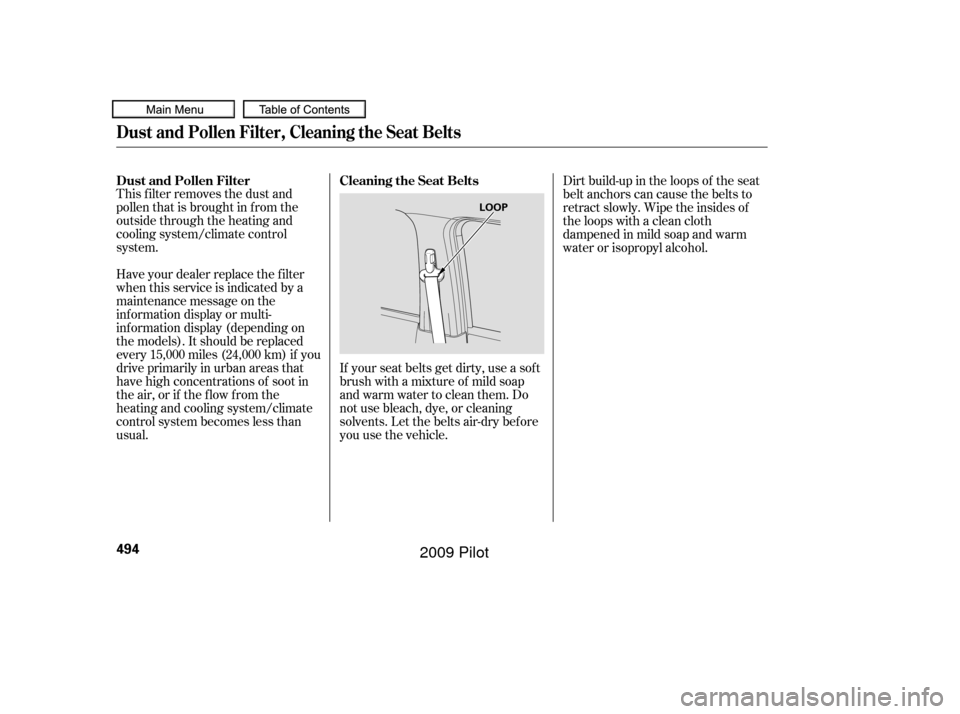
usual. Dirt build-up in the loops of the seat
belt anchors can cause the belts to
retract slowly. Wipe the insides of
the loops with a clean cloth
dampened in mild soap and warm
water or isopropyl alcohol.
Cleaning the Seat Belts
Dust and Pollen Filter
Dust and Pollen Filter, Cleaning the Seat Belts
494
LOOP
�����—�����—�
���y�
�������������y���
�(�/���������y���������y
2009 Pilot
Page 506 of 578
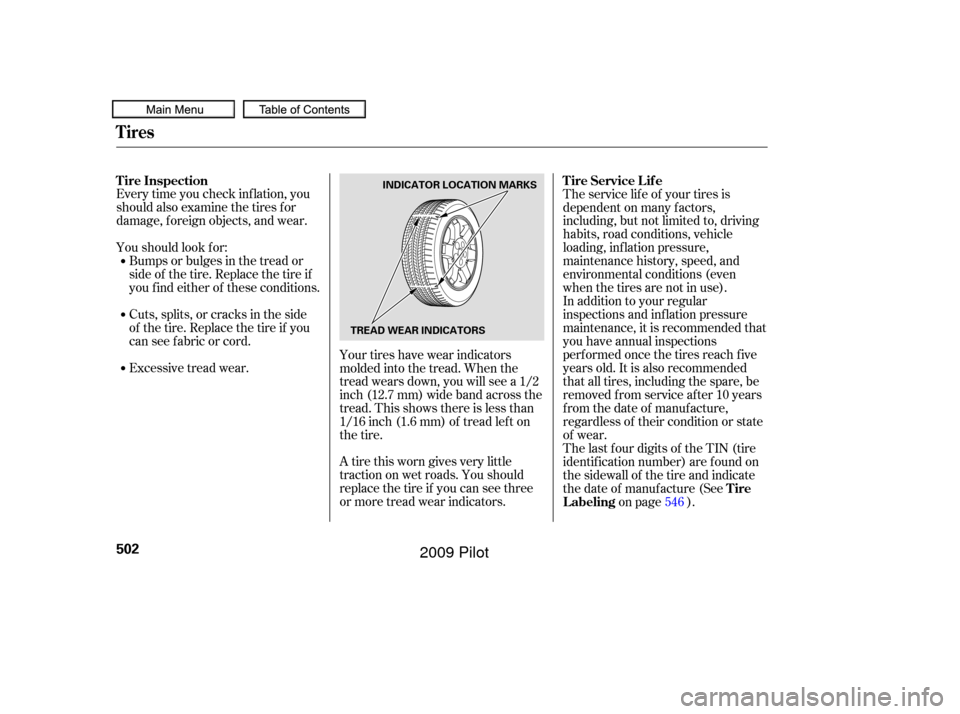
A tire this worn gives very little
traction on wet roads. You should
replace the tire if you can see three
or more tread wear indicators.
Every time you check inf lation, you
should also examine the tires f or
damage, f oreign objects, and wear.
Youshouldlookfor:
Bumps or bulges in the tread or
side of the tire. Replace the tire if
youfindeitherof theseconditions.
Cuts, splits, or cracks in the side
of the tire. Replace the tire if you
can see f abric or cord.
Excessive tread wear. The service lif e of your tires is
dependent on many f actors,
including, but not limited to, driving
habits, road conditions, vehicle
loading, inf lation pressure,
maintenance history, speed, and
environmental conditions (even
when the tires are not in use).
In addition to your regular
inspections and inf lation pressure
maintenance, it is recommended that
you have annual inspections
perf ormed once the tires reach f ive
years old. It is also recommended
that all tires, including the spare, be
removed from service after 10 years
from the date of manufacture,
regardless of their condition or state
of wear.
The last f our digits of the TIN (tire
identif ication number) are f ound on
the sidewall of the tire and indicate
the date of manufacture (See
on page ).
Your tires have wear indicators
molded into the tread. When the
tread wears down, you will see a 1/2
inch (12.7 mm) wide band across the
tread. This shows there is less than
1/16 inch (1.6 mm) of tread lef t on
the tire.
546
Tire Inspection
Tire Service Lif e
Tire
Labeling
Tires
502
TREAD WEAR INDICATORS INDICATOR LOCATION MARKS
�����—�����—�
���y�
�������������y���
�(�/���������y���������y
2009 Pilot