2009 HONDA PILOT change time
[x] Cancel search: change timePage 52 of 156

52Navigation System
Distance and Time to
Destination
When you select a destination, the
distance to the destination is the actual
road distance of the calculated route,
and not “as the crow flies.” When
viewing a list of destinations (points of
interest), such as restaurants, the
distance is “as the crow flies” (see Sort
by Distance to Travel on page32).
The displayed time to the destination
may differ from the actual travel time
because the time is calculated based on
the posted road speed data and your
current speed. If part of your route
includes unverified roads, the “distance”
and “time to go” fo r that portion is
estimated using 25 mph as an average
speed.
Map Menu
When the map screen is displayed,
pressing in on the Interface Dial
displays the Map menu. If the map is
scrolled, the Map menu will not
appear. Move the Interface Dial left or
press the CANCEL button to return to
the basic map screen.
Voice - Button shown if currently en
route. Select to hear the next guidance
maneuver (see page53).
Directions - Button shown if currently
en route. Select to see a list of directions
to your destination (see page53). North-up/Heading-up -
Select
Heading-up or North-up button to
change map orientation. See Map
Orientation on page57 for details. On
scales greater than 1 mile, this button is
grayed out (North-up only mode).
Show Icon on Map - Allows you to
select the icons displayed on the map
(for a thorough description of this
feature, see Showing Icons on the Map
on page60).
By voice control, you can select the icon
by saying the name of the icon (“gas
station,” “ATM,” etc.). Say the icon
name again to turn the icon off.
Driving to Your Destination
2009 Pilot
Page 53 of 156

Navigation System53
Driving to Your Destination
Voice Guidance Prompts
As you get near the maneuver, you will
hear a voice reminder and see a pop-up
window showing you the maneuver.
The number of reminders that you will
hear before a maneuver is determined
by Guidance Prompts in SETUP on
page77.
With the factory default (NORMAL),
typically you will hear two prompts:
The first is about 1/4 mile from the maneuver.
The final prompt is close to your actual turn.
If the distance between the next two
driving maneuvers is very small, both
maneuvers are displayed on the screen
in a single window, and the voice will
remind you of both of them at the same
time. NOTE:
You can say “Voice” at any time, or
select Voice after pushing on the
Interface Dial to be reminded of the
next maneuver. For information on
the available voice commands, see
Voice Command Index on page136.
Typically, a pop-up guidance window shows your next turn, and a voice
guidance prompt is heard. The timing
of these prompts varies, depending on
the type of road you are on, and the
distance to your next maneuver.
When given guidance in unverified
areas, the words “if possible” are
inserted before each guidance prompt.
See Unverified Area Routing on page86
for more details about unverified
routing.
Direction List
If you select Directions from the Map
menu , the display changes to:
NOTE:
The map and voice guidance in unverified areas differ from those in
verified areas. See Unverified Area
Routing on page86.
Only maneuvers that occur at freeway exits or contain freeway exit
information will show the exit info
icon (“i” icon) on the right end of the
items in the direction list. If no exit
info icon is shown on the list, the
EXIT INFO is not displayed.
2009 Pilot
Page 57 of 156

Navigation System57
Driving to Your Destination
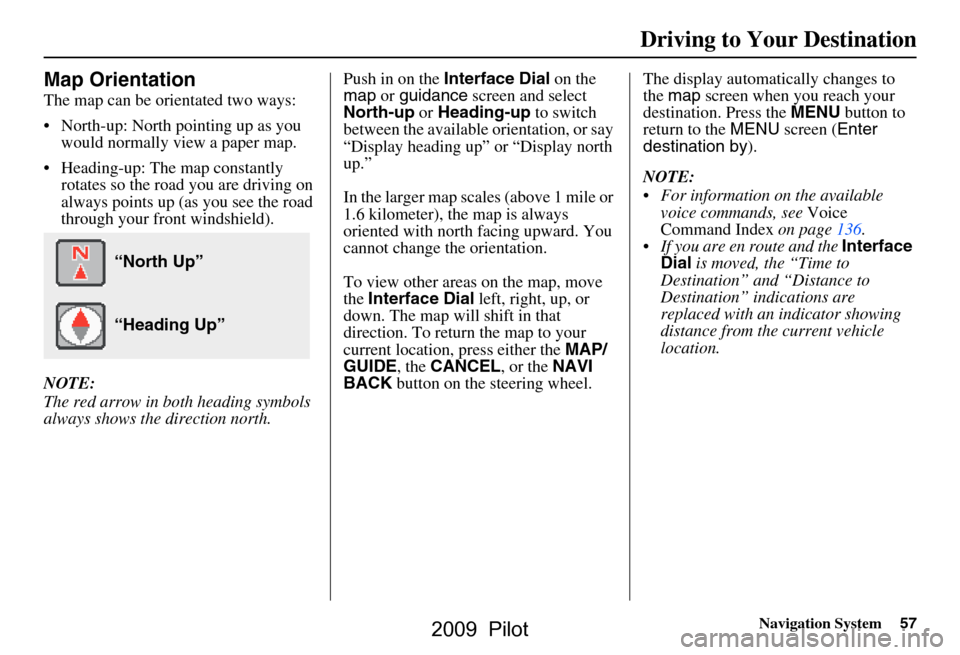
Map Orientation
The map can be orientated two ways:
North-up: North pointing up as you
would normally view a paper map.
Heading-up: The map constantly rotates so the road you are driving on
always points up (as you see the road
through your front windshield).
NOTE:
The red arrow in both heading symbols
always shows the direction north. Push in on the
Interface Dial on the
map or guidance screen and select
North-up or Heading-up to switch
between the available orientation, or say
“Display heading up” or “Display north
up.”
In the larger map scales (above 1 mile or
1.6 kilometer), the map is always
oriented with north facing upward. You
cannot change the orientation.
To view other areas on the map, move
the Interface Dial left, right, up, or
down. The map will shift in that
direction. To return the map to your
current location, press either the MAP/
GUIDE , the CANCEL , or the NAVI
BACK button on the steering wheel. The display automati
cally changes to
the map screen when you reach your
destination. Press the MENU button to
return to the MENU screen ( Enter
destination by ).
NOTE:
For information on the available voice commands, see Voice
Command Index on page136.
If you are en route and the Interface
Dial is moved, the “Time to
Destination” and “Distance to
Destination” indications are
replaced with an indicator showing
distance from the current vehicle
location.
“North Up”
“Heading Up”
2009 Pilot
Page 63 of 156

Navigation System63
Driving to Your Destination
Viewing/Saving the Current
Location
Whenever you are on a map screen, you
can always obtain your current location
either by pushing in on the Interface
Dial , selecting Show Icon on Map ,
and selecting Current Location , or by
using the voice control system and
saying “Display current location.” A
screen pops up which shows the address
of your current location, as well as the
latitude, longitude, and elevation. NOTE:
The elevation will not appear when the
system is temporarily lacking proper
GPS information. The system elevation
may not agree with elevations shown on
roadside elevation signs, and may
fluctuate plus or minus 100 feet or more.
You can store the current location for
later use. It does not change or cancel
your current route.
For example, you
are following the
system’s directions to get to a
destination. While sitting at a stoplight
you notice a store on the corner, but do
not have time to visit it right now. You
can save the location to select as a
destination at a later date. To save the location, say “Save current
location” or select
Save on the Current
location screen. The Edit address
book screen with the current location
data will appear. You can edit the name,
phone number, or category name to be
saved in your personal Address Book.
After the location is saved, select
Return to return to the map screen.
You can then use Address Book from
the MENU screen ( Enter destination
by ) to select the saved location and
return to the same spot.
2009 Pilot
Page 71 of 156

Navigation System71
Information Features
You can scroll through the calendar day
by day by rotating the Interface Dial
knob , or select the day by voice. When
you move the Interface Dial up or
down, you can also scroll through the
calendar week by week. To change the
month, say “Next month” or “Previous
month,” or move the Interface Dial
right or left.Entering Your Schedule
Set your schedule by selecting the day
on the calendar, and the display changes
to:
Reminder
The default for Reminder is ON. This
allows the system to remind you of the
calendar item the next time you start the
vehicle. See System Start-up on page17.
Edit Date
This allows you to move your calendar
entry to a different date. If you say or
select Edit Date , the Calendar screen
is displayed with existing entries grayed
out. Select a new day and the display
returns to the Edit schedule screen
with a new date.
Edit Title
Say or select Edit Title, then enter the
name of your title using the Interface
Dial . Once you have entered the title,
say or select DONE. The title will be
displayed on the spec ified date of the
Calendar screen.
Edit Message
Say or select Edit Message , and the
system will show the Edit Message
screen. You can enter a message on two
lines. Use to change the line.
Once you have entered the message, say
or select DONE. The message will be
displayed on the spec ified date of the
Calendar screen.
Message Icon
Say or select Message Icon , and the
system displays a list of icons you can
select to help identify the type of
message you entered. The message icon
you choose will be displayed alongside
the specified date on the Calendar
screen.
2009 Pilot
Page 76 of 156

76Navigation System
System Setup
SETUP Mode
The SETUP function consists of two
main screens that allow you to change
and update information in the system.
To display the SETUP screen ( Main
Setup ), use the voice control system
and say “Setup” or press the SETUP
button. To change it to the SETUP
screen ( Other), select the “Other” tab.
You can switch screens by selecting the
tab.
You can use the voice control system to
select any item on the SETUP screen.
NOTE:
If some items appear to be grayed out and cannot be selected, it is because
you did not select OK on the initial
Disclaimer screen. See System Start-
up on page
17.
For information on the available voice commands, see Voice
Command Index on page
146 .
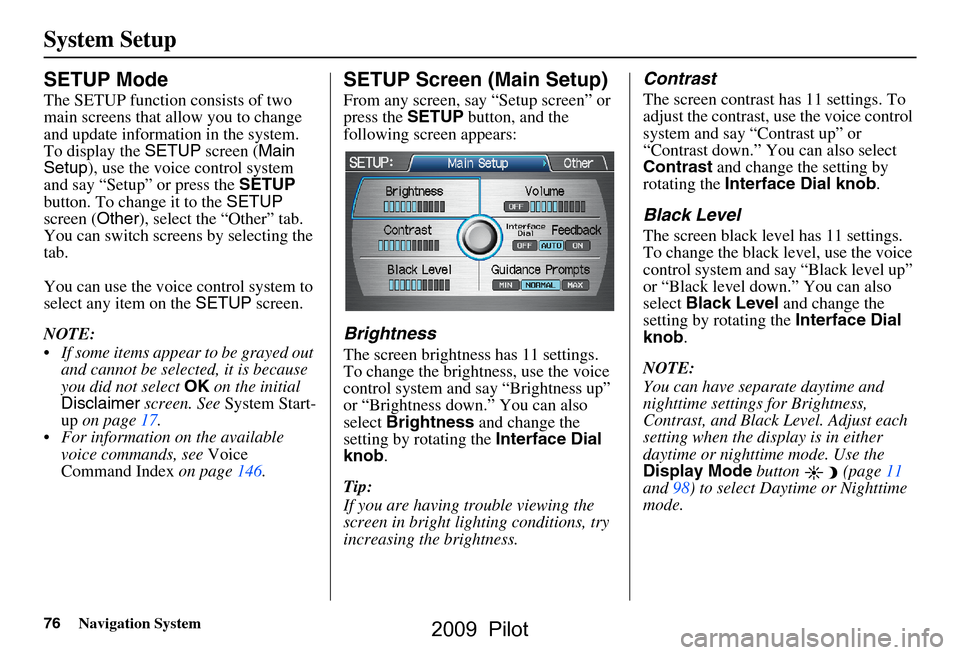
SETUP Screen (Main Setup)
From any screen, say “Setup screen” or
press the SETUP button, and the
following screen appears:
Brightness
The screen brightness has 11 settings.
To change the brightness, use the voice
control system and say “Brightness up”
or “Brightness down.” You can also
select Brightness and change the
setting by rotating the Interface Dial
knob .
Tip:
If you are having trouble viewing the
screen in bright li ghting conditions, try
increasing the brightness.
Contrast
The screen contrast has 11 settings. To
adjust the contrast, use the voice control
system and say “Contrast up” or
“Contrast down.” You can also select
Contrast and change the setting by
rotating the Interface Dial knob .
Black Level
The screen black level has 11 settings.
To change the black level, use the voice
control system and say “Black level up”
or “Black level down.” You can also
select Black Level and change the
setting by rotating the Interface Dial
knob .
NOTE:
You can have separate daytime and
nighttime settings for Brightness,
Contrast, and Black Level. Adjust each
setting when the display is in either
daytime or nighttime mode. Use the
Display Mode button (page
11
and 98) to select Daytime or Nighttime
mode.
2009 Pilot
Page 80 of 156

80Navigation System
System Setup
Edit Address
When you say or select Edit Address,
the display changes to:
Current Position - Allows you to use
your current position as the address.
Address - Requires you to enter the city
and address you wish to store. The
operation is the same as selecting
Address from the MENU screen
( Enter destination by ). See page22.Places -
Allows you to select one of the
Point of Interest (POI) locations already
stored in the system as one of your
personal addresses. This operation is the
same as selecting Places from the
MENU screen ( Enter destination by ).
See page28.
Previous Destinations - Allows you to
choose one of the locations in the
Previous Destination list for your
Address Book list. Th is operation is the
same as selecting Previous
Destinations from the MENU screen
( Enter destination by ). See page39.
After you have used one of these four
options to enter the address, the initial
screen for entering the personal address
is redisplayed, with the address shown
in the “Address” field. If you have
entered the address using Places, the
phone number corresponding to the
address also appears in the “Phone
Number” field. Edit Phone Number
You can enter the telephone number of
the address. If the
address was chosen
with Places , and it has a telephone
number, that number is entered
automatically.
Say or select Edit Phone Number to
display the Enter phone number
screen. Enter the telephone number,
including the area code, by using the
voice control system (say the entire
phone number one digit at a time) or by
using the Interface Dial . Say or select
DONE when finished.
2009 Pilot
Page 82 of 156

82Navigation System
System Setup
Home Address
This feature lets you return “Home”
from any location simply by saying “Go
home” at the map screen. Alternatively,
you can select Go Home on the MENU
screen ( Enter destination by ). See By
Go Home on page45.
Enter the name, address, and phone
number in the same way as entering a
personal address, then say or select
Done . To leave the screen, press the
CANCEL button.
NOTE:
If your Home address cannot be found
in the system, while lo cated on the street
close to your home, select “Current
Position” when entering the “Edit
Address” field.
PIN Number
You can set a four-digit PIN (Personal
Identification Number) for accessing
and changing personal addresses and
your home address if desired. Once you
set the PIN on this screen, the system
asks you to enter the PIN when you
access a personal address or your home
address.
NOTE:
PINs are optional. If you choose to use a
PIN, make sure you remember it. If you
forget your PIN, the dealer will have to
reset it for you.
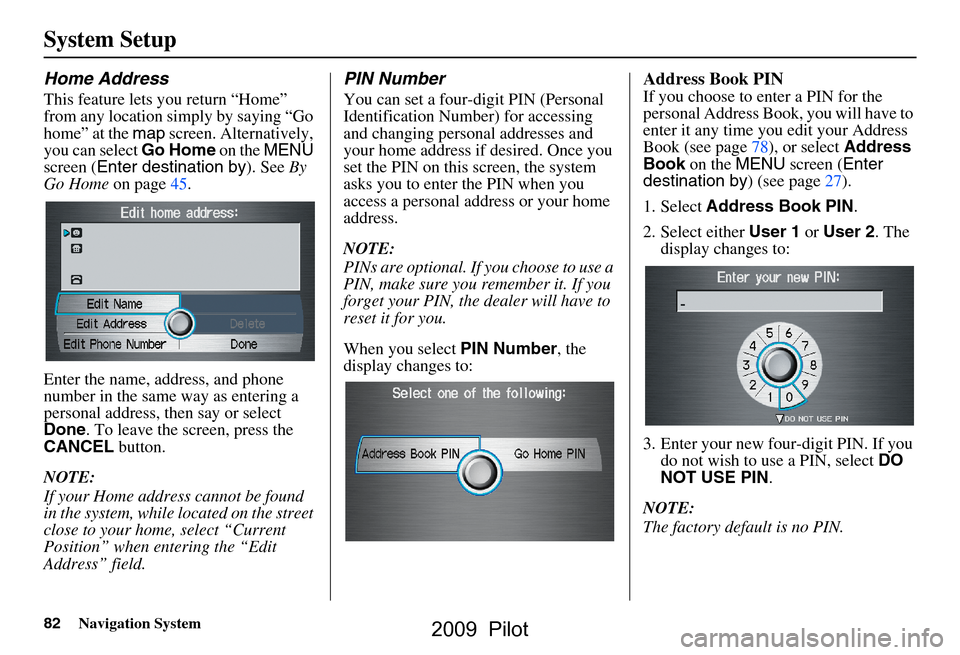
When you select PIN Number, the
display changes to:
Address Book PIN
If you choose to enter a PIN for the
personal Address Book, you will have to
enter it any time you edit your Address
Book (see page78), or select Address
Book on the MENU screen ( Enter
destination by ) (see page27).
1. Select Address Book PIN .
2. Select either User 1 or User 2 . The
display changes to:
3. Enter your new four-digit PIN. If you do not wish to use a PIN, select DO
NOT USE PIN .
NOTE:
The factory default is no PIN.
2009 Pilot