Page 66 of 532

This section gives inf ormation about
the controls and displays that
contribute to the daily operation of
your vehicle. All the essential
controls are within easy reach............................
Control Locations .64
............................
Instrument Panel .65
..........
Instrument Panel Indicators .67
.............................................
Gauges .77
.............
Multi-Inf ormation Display .81
Controls Near the Steering
.........................................
Wheel .133Windshield Wipers and
.................................
Washers .134
Rear Window Wiper and ...................................
Washer .135
.........
Turn Signal and Headlights .135
......
Instrument Panel Brightness .139
...............
Hazard Warning Button .140
...............
Rear Window Def ogger .140
........
Steering Wheel Adjustment .141
.............................
Keys and Locks .142
......................
Immobilizer System .143
..............................
Ignition Switch .144
.....................
Remote Transmitter .145
Opening or Closing the Power .........................
Sliding Doors .148
Opening or Closing the Power ..................................
Tailgate .148
....................................
Door Locks .151
....................
Power Door Locks .151
Auto Door Locking/
..............................
Unlocking .152
............
Childproof Door Locks .157
..........................................
Tailgate .157
..........................
Power Tailgate .158
.................................
Sliding Doors .161
...............................................
Seats .167..................................
Seat Heaters .183
Driving Position Memory ........................................
System .184
............................
Power Windows .186
.......................................
Moonroof .189
...........................................
Mirrors .190
...............................
Parking Brake .192
.
Adjustable Driver’s Foot Pedals .193
.........
Interior Convenience Items .194
..........
Retractable Center Tray .195
.....................
Beverage Holders .195
................
Integrated Sunshade .197
....................
Sunglasses Holder .197
................
Conversation Mirror .198
...................................
Sun Visor .198
............................
Vanity Mirror .199
...................
Rear Compartment .199
................
Second Row Console .199
...............
In-Floor Storage Area .200
..............................
Glove Boxes .201
...........................
Center Pocket .202
...............................
Coin Pocket .202
........
Accessory Power Sockets .203
.......................
AC Power Outlet .203
...............................
Interior Lights .205
Instruments and Controls
Inst rument s and Cont rols
63
�\f���—�\f���—���
�y�
�
�������\f���y���
�(���������\f�y�\f�\f�����y
2009 Odyssey
Page 105 of 532

�Î�Î�Î
�Î �Î
�Î �Î
�Î
�µ�™�¶ �™
�µ�™�¶ �™
�ΠMenu Item
LANGUAGE
SELECTION
ADJUST OUTSIDE
TEMP. DISPLAY
TRIP A RESET WITH
REFUEL
ELAPSED TIME
RESET
MEMORY POSIT ION
LINK
INTERIOR LIGHT
DIMMING T IME
HEADLIGHT AUT O
OFF TIMER Description
Changes the language used in the display.
Changes the outside temperature reading above or
below its current reading.
Causes trip meter A and the average fuel economy to
reset when you refuel.
Resets the elapsed time of your current trip.
Changes the driver’s seat to a stored setting.
Changes how long (in seconds) the interior lights stay
on after you close the doors.
Changes how long (in seconds) the exterior lights
stay on after you close the driver’s door. Setting Option
ENGLISH
FRENCH
SPANISH 5F° 0°F 5F° (U.S.)
3C° 0°C 3C°
(Canada)
ON
OFF
IGN RESET
TRIP A RESET
TRIP B RESET
ON
OFF
15 sec
30 sec
60 sec
0sec
15 sec
30 sec
60 sec Page
108
110
112
114
116
118
120
Group Setup
MET ER SET UP
(P.107)
POSITION SETUP
(P.116)
LIGHTING
SETUP
(P.118)
Default setting
:
Multi-Inf ormation Display
102
�����—�����—���
�y�
�
�����������y���
�(�����������y���
�����y
2009 Odyssey
Page 121 of 532

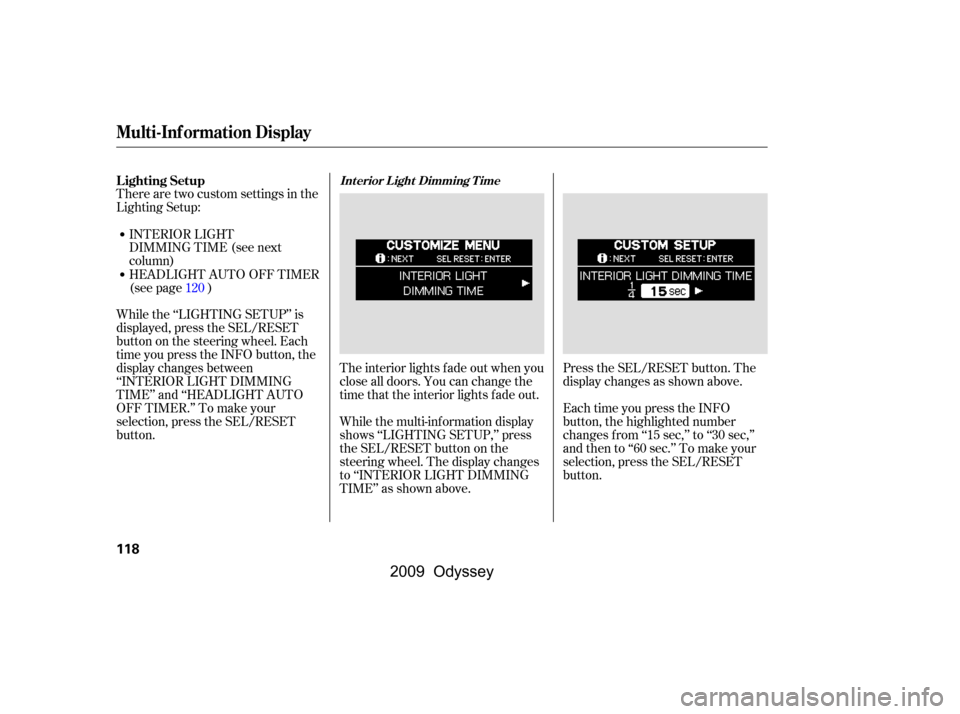
There are two custom settings in the
Lighting Setup:Press the SEL/RESET button. The
display changes as shown above.
Each time you press the INFO
button, the highlighted number
changes f rom ‘‘15 sec,’’ to ‘‘30 sec,’’
andthento‘‘60sec.’’Tomakeyour
selection, press the SEL/RESET
button.
The interior lights f ade out when you
close all doors. You can change the
time that the interior lights fade out.
While the multi-information display
shows ‘‘LIGHTING SETUP,’’ press
the SEL/RESET button on the
steering wheel. The display changes
to ‘‘INTERIOR LIGHT DIMMING
TIME’’ as shown above.
INTERIOR LIGHT
DIMMING TIME (see next
column)
While the ‘‘LIGHTING SETUP’’ is
displayed, press the SEL/RESET
button on the steering wheel. Each
time you press the INFO button, the
display changes between
‘‘INTERIOR LIGHT DIMMING
TIME’’ and ‘‘HEADLIGHT AUTO
OFF TIMER.’’ To make your
selection, press the SEL/RESET
button. HEADLIGHT AUTO OFF TIMER
(see page )120
Lighting Setup
Int erior L ight Dimming T ime
Multi-Inf ormation Display
118
�\f���—�\f���—���
�y�
�
�����������y���
�(���������\f�y�\f�
�����y
2009 Odyssey
Page 122 of 532
If you f ail to enter your selection,
you will see the above display f or
several seconds, and the display goes
back to ‘‘CUSTOMIZE MENU.’’
Repeat the setup.To exit ‘‘INTERIOR LIGHT
DIMMING TIME,’’ press the INFO
button until you see ‘‘EXIT,’’ then
press the SEL/RESET button.
When your selection is entered, you
will see the above display for several
seconds, and then the display goes
back to ‘‘CUSTOMIZE MENU.’’
Multi-Inf ormation Display
Inst rument s and Cont rols
119
�\f���—�\f���—���
�y�
�
����\f��\f���y���
�(���������\f�y�\f�
�����y
2009 Odyssey
Page 202 of 532
Pull up the vanity mirror cover to use
the mirror. The lights come on when
you open the cover. Make sure you
close the cover when you are not
using the vanity mirror.
The vanity mirror light will not come
on if the sun visor is slid outward.To open the compartment, pull the
lever and lif t the lid. To close, lower
the lid and push it down until it
latches.
You can store items under the seat
cushion of the plus-one seat.
Pull the strap to raise the seat
cushion, store items, then reinstall
the cushion or remove the cushion
and fold the seat-back down to use
the seat as a tray.Except U.S. LX and Canadian DX
models
Vanity Mirror Rear CompartmentSecond Row Console
Interior Convenience Items
Inst rument s and Cont rols
199
REAR COMPARTMENT LEVER STRAP
�\f���—�\f���—���
�y�
�
����\f������y���
�(���������\f�y�\f���\f���y
2009 Odyssey
Page 206 of 532
There is a 115 volt AC power outlet
in the rear compartment on the
driver’s side. To use the AC power
outlet, open the rear compartment
lid and open the outlet cover. Insert
the plug into the receptacle slightly,
turn it 90° clockwise, then push in
the plug all the way.
Always run the engine when you use
the AC power outlet.
There are two accessory power
sockets in your vehicle. One
accessory power socket is above the
center pocket and another is on the
cargo area sidewall on the driver’s
side.
Each socket is intended to supply
power f or 12 volt DC accessories
that are rated 120 watts or less (10
amps).
None of the sockets will power an
automotive type cigarette lighter
element.
If equipped
AC Power Outlet
A ccessory Power Sockets
Interior Convenience Items
Inst rument s and Cont rols
203
�\f���—�\f���—���
�y�
�
����
������y���
�(���������\f�y�\f���\f���y
2009 Odyssey
Page 208 of 532

The individual map lights in the
f ront can be turned on and of f by
pressing the lenses.
The individual map lights in the
second and third rows cannot be
turned on.
None of the lights come on when a
door is opened.The individual map lights in the
f ront come on when any door is
opened. When the doors are
closed, each light can be turned on
and of f by pressing the lenses.
The individual map lights in the
second and third rows come on
when any door is opened. When
the doors are closed, each light
canbeturnedonandoff by
pushingonthelens.
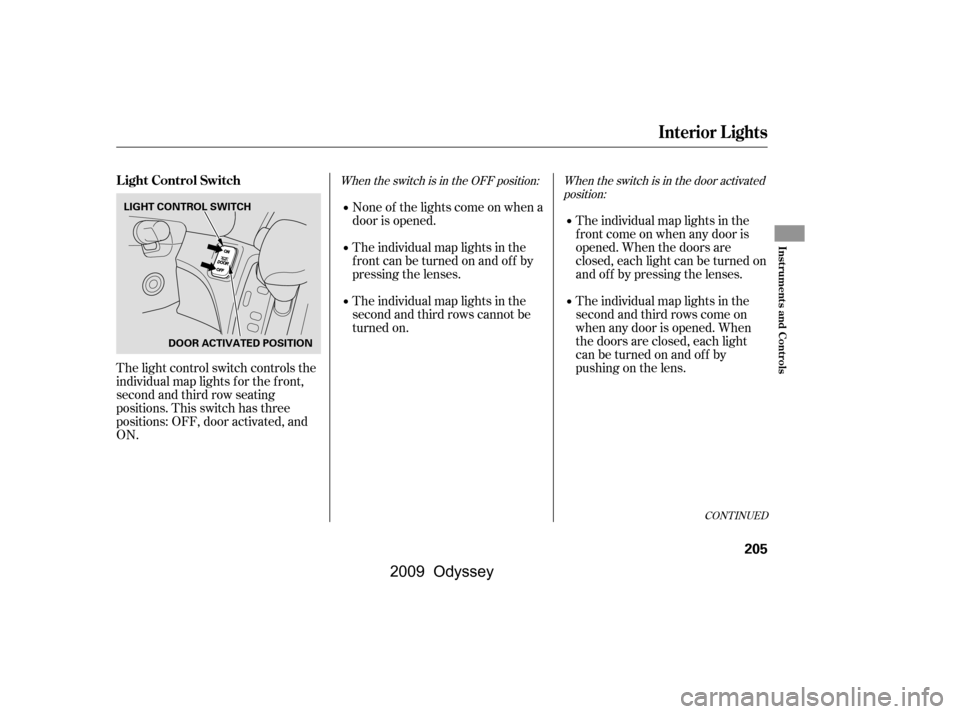
The light control switch controls the
individual map lights f or the f ront,
second and third row seating
positions. This switch has three
positions: OFF, door activated, and
ON.
When the switch is in the OFF position: When the switch is in the door activated
position:
CONT INUED
L ight Control Switch
Interior Lights
Inst rument s and Cont rols
205
LIGHT CONTROL SWITCH
DOOR ACTIVATED POSITION
�\f���—�\f���—���
�y�
�
����
������y���
�(���������\f�y�\f���
�\f�y
2009 Odyssey
Page 209 of 532
Turn on the f ront and rear individual
map lights by pushing the lens of
each light. Push the lens again to
turn it of f . You can also operate
these lights with the light control
switch (see page ).
After all doors are closed tightly, the
light(s) dims slightly, then f ades out
in about 30 seconds.
With the light control switch in the
door activated position, all the
individual map lights come on when
you unlock the door with the remote
transmitter (see page ).
With any door lef t open, the lights
stay on about 3 minutes, then go out.
All the individual map lights come
onandstayonaslongasthe
switch remains in the ON position.
You can change the ‘‘INTERIOR
LIGHT DIMMING TIME’’ setting on
the multi-information display (see
page ).147
205
118
When the switch is in the ON position:
On Touring modelsIndividual Map L ights
Interior Lights
206
Front
�\f���—�\f���—���
�y�
�
����
������y���
�(���������\f�y�\f���
�
�y
2009 Odyssey