Page 139 of 532

�µ�µ�µ
Push down on the
lever to signal a lef t turn and up to
signal a right turn. To signal a lane
change, push lightly on the lever,
and hold it. The lever will return to
center when you release it or
complete a turn. The rotating switch
on the lef t lever controls the lights.
Turning this switch to the ‘‘ ’’
position turns on the parking lights,
taillights, instrument panel lights,
side-marker lights, and rear license
plate lights.
Turning the switch to the ‘‘ ’’
position turns on the headlights. If you leave the lights on with the
key removed f rom the ignition
switch, you will hear a reminder
chime when you open the driver’s
door.
When the light switch is in the
‘‘ ’’ or ‘‘ ’’ position, the
lights on indicator comes on as a
reminder. This indicator stays on if
you leave the light switch on and
turn the ignition switch to the
ACCESSORY (I) or the LOCK (0)
position. To switch f rom low
beams to high beams, push the lef t
lever f orward until you hear a click.
The high beam indicator will come
on (see page ). Pull it back to
return to low beams. To flash the
high beams, pull the lever back
lightly, then release it. The high
beams will stay on as long as you
hold the lever back. 73
Turn Signal
Headlights
High Beams
Turn Signal, Headlights
136
�\f���—�\f���—���
�y�
�
�������
���y���
�(���������\f�y�\f�
���
�y
2009 Odyssey
Page 140 of 532

�µThe lights turn of f automatically
when you turn the ignition switch to
the LOCK (0) position. To turn them
on again, either turn the ignition
switch to the ON (II) position, or
turn the light switch to the
position.
Even with the automatic lighting
f eature turned on, we recommend
thatyouturnonthelightsmanually
when driving at night or in a dense
f og, or when you enter dark areas
such as long tunnels or parking
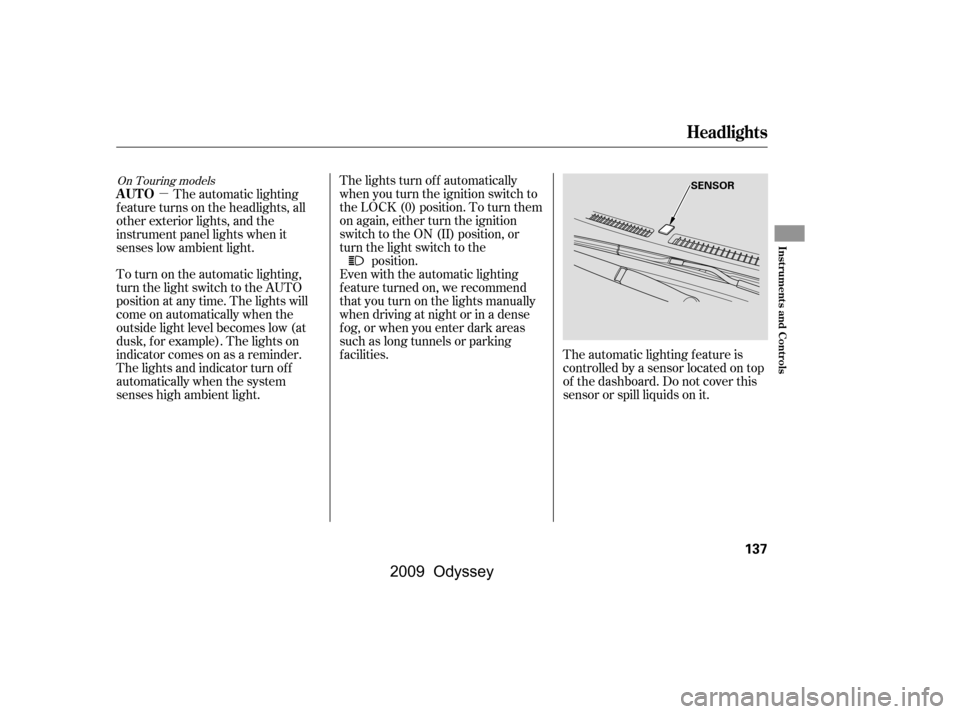
f acilities. The automatic lighting f eature is
controlledbyasensorlocatedontop
of the dashboard. Do not cover this
sensor or spill liquids on it.
The automatic lighting
f eature turns on the headlights, all
other exterior lights, and the
instrument panel lights when it
senses low ambient light.
To turn on the automatic lighting,
turn the light switch to the AUTO
position at any time. The lights will
come on automatically when the
outside light level becomes low (at
dusk, f or example). The lights on
indicator comes on as a reminder.
The lights and indicator turn of f
automatically when the system
senses high ambient light.
On Touring models
Headlights
AUTO
Inst rument s and Cont rols
137
SENSOR
�\f���—�\f���—���
�y�
�
�����������y���
�(���������\f�y�\f�
�����y
2009 Odyssey
Page 142 of 532

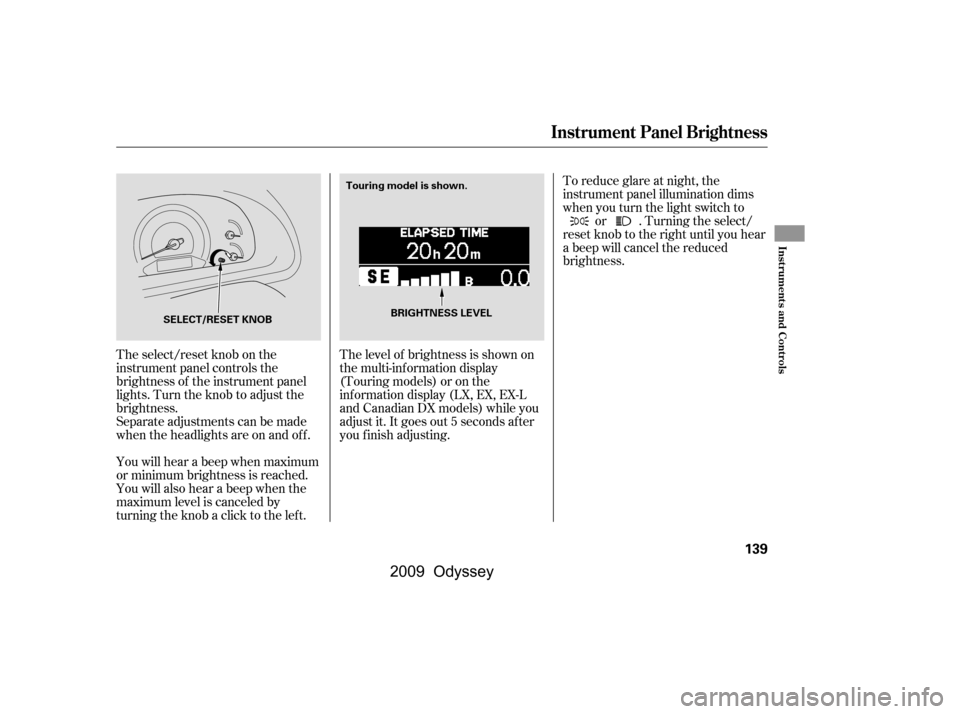
The select/reset knob on the
instrument panel controls the
brightness of the instrument panel
lights. Turn the knob to adjust the
brightness.
Separate adjustments can be made
when the headlights are on and of f .
You will hear a beep when maximum
or minimum brightness is reached.
You will also hear a beep when the
maximum level is canceled by
turning the knob a click to the lef t.To reduce glare at night, the
instrument panel illumination dims
when you turn the light switch to
or . Turning the select/
reset knob to the right until you hear
a beep will cancel the reduced
brightness.
The level of brightness is shown on
the multi-information display
(Touring models) or on the
inf ormation display (LX, EX, EX-L
and Canadian DX models) while you
adjust it. It goes out 5 seconds af ter
you f inish adjusting.
Instrument Panel Brightness
Inst rument s and Cont rols
139
BRIGHTNESS LEVEL
SELECT/RESET KNOB Touring model is shown.
�\f���—�\f���—���
�y�
�
�����������y���
�(���������\f�y�\f�
�����y
2009 Odyssey
Page 208 of 532

The individual map lights in the
f ront can be turned on and of f by
pressing the lenses.
The individual map lights in the
second and third rows cannot be
turned on.
None of the lights come on when a
door is opened.The individual map lights in the
f ront come on when any door is
opened. When the doors are
closed, each light can be turned on
and of f by pressing the lenses.
The individual map lights in the
second and third rows come on
when any door is opened. When
the doors are closed, each light
canbeturnedonandoff by
pushingonthelens.
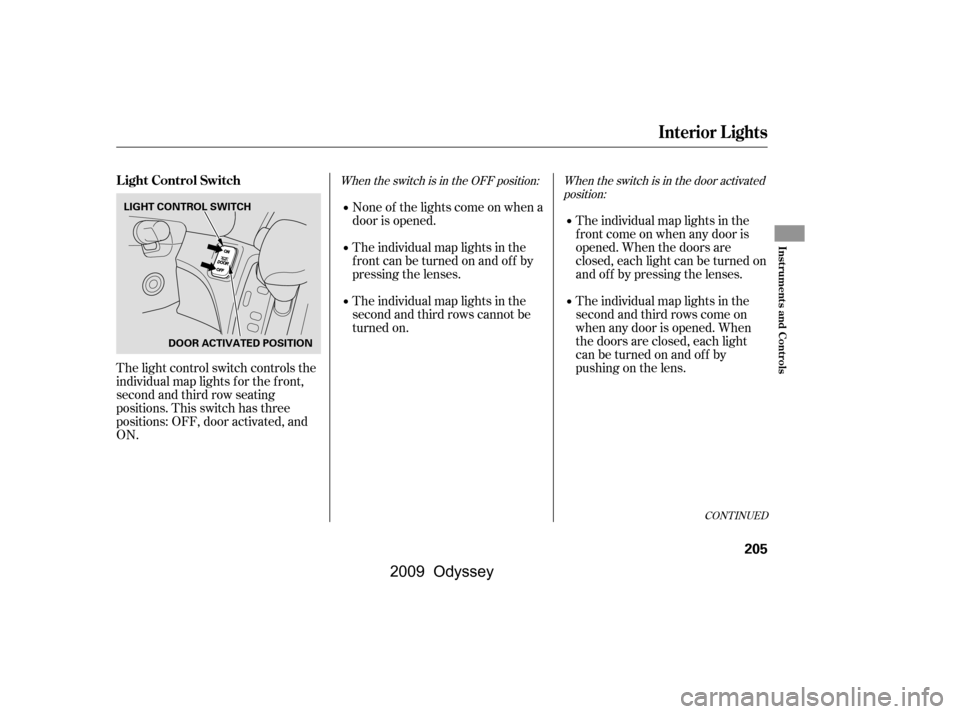
The light control switch controls the
individual map lights f or the f ront,
second and third row seating
positions. This switch has three
positions: OFF, door activated, and
ON.
When the switch is in the OFF position: When the switch is in the door activated
position:
CONT INUED
L ight Control Switch
Interior Lights
Inst rument s and Cont rols
205
LIGHT CONTROL SWITCH
DOOR ACTIVATED POSITION
�\f���—�\f���—���
�y�
�
����
������y���
�(���������\f�y�\f���
�\f�y
2009 Odyssey
Page 209 of 532
Turn on the f ront and rear individual
map lights by pushing the lens of
each light. Push the lens again to
turn it of f . You can also operate
these lights with the light control
switch (see page ).
After all doors are closed tightly, the
light(s) dims slightly, then f ades out
in about 30 seconds.
With the light control switch in the
door activated position, all the
individual map lights come on when
you unlock the door with the remote
transmitter (see page ).
With any door lef t open, the lights
stay on about 3 minutes, then go out.
All the individual map lights come
onandstayonaslongasthe
switch remains in the ON position.
You can change the ‘‘INTERIOR
LIGHT DIMMING TIME’’ setting on
the multi-information display (see
page ).147
205
118
When the switch is in the ON position:
On Touring modelsIndividual Map L ights
Interior Lights
206
Front
�\f���—�\f���—���
�y�
�
����
������y���
�(���������\f�y�\f���
�
�y
2009 Odyssey
Page 223 of 532
The direction and quantity of airf low
f rom each rear ceiling vent is
adjustable.
To adjust the direction of air coming
f rom a rear ceiling vent, move the
tab in the center of each vent back-
and-forth, and rotate the vent with
the tab. The lever next to each vent
can be opened and closed to regulate
the amount of airf low.Theclimatecontrolsystemhasthree
sensors. A sunlight sensor is in the
top of the dashboard, and a
temperature sensor is next to the
steering column. There is also a rear
sensor on the rear sidewall near the
exhaust vent. Do not cover the
sensors or spill any liquid on them.
On EX, EX-L and Touring models
Sunlight and T emperature
Sensors
Rear Ceiling Vents
Vents, Heating, and A/C, Climate Control Sensors
220
SUNLIGHT SENSOR TEMPERATURE SENSOR
TAB
LEVER
�\f���—�\f���—���
�y�
�
���������\f�y���
�(���������\f�y�\f�������y
2009 Odyssey
Page 228 of 532

�µ�µ
Press the SOUND (TUNE) knob
repeatedly to display the bass, treble,
balance, and f ader settings.
Eachmodeisshowninthedisplayas
it changes. Turn the SOUND
(TUNE) knob to adjust the setting to
your liking. When the level reaches
the center, you will see ‘‘C’’ in the
display. The system will
automatically return the display to
the selected audio mode about 5
seconds af ter you stop adjusting a
mode. Use the TRE/BAS
modes to adjust the tone to your
liking.
These two
modes adjust the strength of the
sound coming f rom each speaker.
BAL adjusts the side-to-side strength,
while FAD adjusts the f ront-to-back
strength. You can use the instrument panel
brightness control knob to adjust the
illumination of the audio system (see
page ). The audio system
illuminates when the parking lights
are on, even if the system is turned
of f .
139
Playing the AM/FM Radio (LX and Canadian DX models)
Adjusting the Sound
Treble/Bass
Balance/Fader A udio System L ighting
Features
225
�\f���—�\f���—���
�y�
�
�����������y���
�(���������\f�y�\f�����\f�y
2009 Odyssey
Page 240 of 532

�µ�µ
Press the SOUND (TUNE) knob
repeatedly to display the bass, treble,
balance, and f ader settings. Use the TRE/BAS
modes to adjust the tone to your
liking.
These two
modes adjust the strength of the
sound coming f rom each speaker.
BAL adjusts the side-to-side strength,
while FAD adjusts the f ront-to-back
strength. You can use the instrument panel
brightness control knob to adjust the
illumination of the audio system (see
page ). The audio system
illuminates when the parking lights
are on, even if the system is turned
of f .
Eachmodeisshowninthedisplayas
it changes. Turn the SOUND
(TUNE) knob to adjust the setting to
your liking. When the level reaches
the center, you will see ‘‘C’’ in the
display. The system will
automatically return the display to
the selected audio mode about 5
seconds af ter you stop adjusting a
mode. 139
Playing the AM/FM Radio (EX and EX-L models without navigation system)
Adjusting the Sound
Treble/Bass
Balance/Fader A udio System L ighting
Features
237
�\f���—�\f���—���
�y�
�
�������\f�
�y���
�(���������\f�y�\f�������y
2009 Odyssey