Page 121 of 352

Radio Data System (RDS)
On the FM band, you can select a
favorite station and display the
program service name according to
the information provided by the radio
data system (RDS).Program Service (PS) Name DisplayThe program service name display
function shows the name of the
station you are listening to. With the
audio system on and the FM band
selected, you can turn this function
on or off.
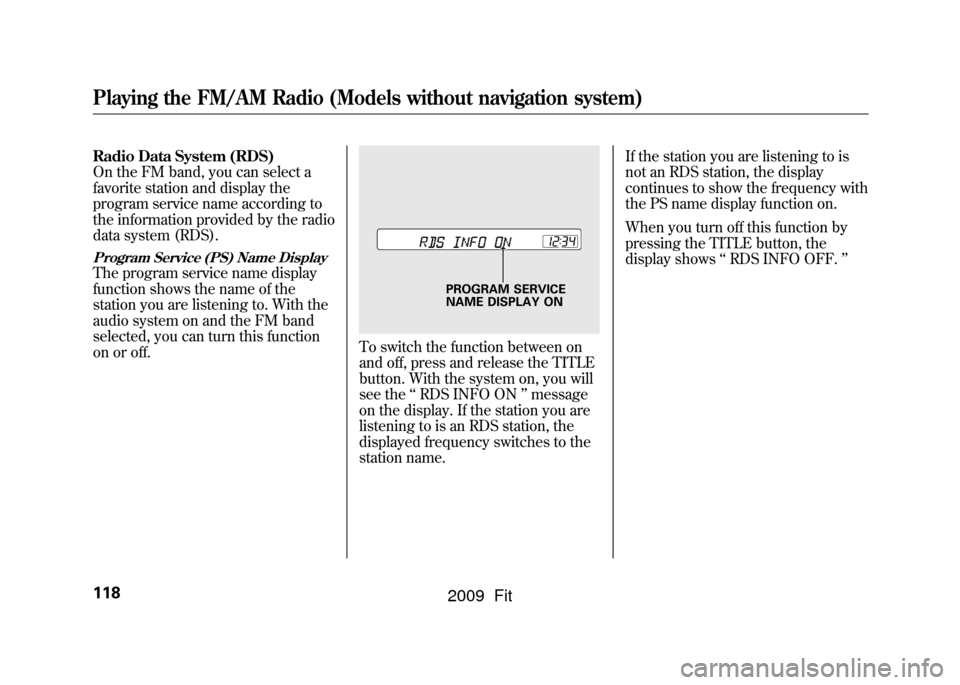
To switch the function between on
and off, press and release the TITLE
button. With the system on, you will
see the‘‘RDS INFO ON ’’message
on the display. If the station you are
listening to is an RDS station, the
displayed frequency switches to the
station name. If the station you are listening to is
not an RDS station, the display
continues to show the frequency with
the PS name display function on.
When you turn off this function by
pressing the TITLE button, the
display shows
‘‘RDS INFO OFF. ’’
PROGRAM SERVICE
NAME DISPLAY ON
Playing the FM/AM Radio (Models without navigation system)118
2009 Fit
Page 124 of 352

Adjusting the Sound
Press the SOUND (
) button to
select an appropriate setting: bass,
treble, fader, balance, and SVC
(speed-sensitive volume
compensation). Turn the VOL/
SELECT knob to adjust the setting.
BASS -Adjusts the bass.
TREBLE -Adjusts the treble.
FADER -Adjusts the front-to-back
strength of the sound.
BALANCE -Adjusts the side-to-
side strength of the sound.
Each mode is shown in the display as
it changes. Turn the VOL/SELECT
knob to adjust the setting to your
liking. When the level reaches the
center, you will see ‘‘C ’’in the
display. SVC
-Adjusts the volume level
based on the vehicle speed.
The system will return to the audio
display about 10 seconds after you
stop adjusting a mode.
Speed-sensitive Volume
Compensation (SVC)The SVC mode controls the volume
based on vehicle speed. The faster
you go, the louder the audio volume
becomes. As you slow down, the
audio volume decreases.
The SVC has four modes; SVC OFF,
SVC LOW, SVC MID, and SVC
HIGH. Turn the VOL/SELECT knob
to adjust the setting to your liking. If
you feel the sound is too loud,
choose low. If you feel the sound is
too quiet, choose high.
This function is set to MID as the
default setting when the vehicle
leaves the factory. Audio System Lighting
You can use the instrument panel
brightness control knob to adjust the
illumination of the audio system (see
page76).The audio system
illuminates when the parking lights
are on, even if the system is turned
off.
Playing the FM/AM Radio (Models without navigation system)
121
Features
2009 Fit
Page 126 of 352

To Play a Disc
To load or play discs, the ignition
switch must be in the ACCESSORY
(I) or ON (II) position.
You operate the in-dash disc player
with the same controls used for the
radio. To select the disc player, press
the CD button. You will see‘‘CD ’’in
the display. The folder or track
numbers are shown in the display.
You can also select the displayed
information with the TITLE button
(see page 123).The system will
continuously play a disc until you
change modes.Do not use discs with adhesive labels.
The label can curl up and cause the
disc to jam in the unit. The in-dash disc player can also play
CD-Rs and CD-RWs compressed in
CD-TEXT, MP3, and WMA formats.
When playing a disc in MP3 or
WMA, you will see
‘‘MP3 ’’or
‘‘ WMA ’’in the display. You can see
up to 99 folders, and select up to 999
tracks/files. NOTE: If a file on an MP3 or WMA
disc is protected by digital rights
management (DRM), the audio unit
displays UNSUPPORTED, and then
skips to the next file.
If you have a disc that is a
combination of CD-DA tracks and
MP3/WMA files, you can choose the
format to listen by pressing the CD
button.
Video CDs and DVDs will not work
in this unit.
A disc compressed in AAC format
cannot be played in this audio
system.
CONTINUED
Playing a Disc (Models without navigation system)
123
Features
2009 Fit
Page 128 of 352

If you press and hold the TITLE
button again, the display shows the
first 15 characters again.
If any letter is not available, it is
replaced with‘‘.’’ (dot) in the
display. When the disc has no text
data, you will see ‘‘NO INFO ’’on
the display.
You will also see some text data
under these conditions:●When a new folder, file, or track is
selected.●When you change the audio mode
to play a disc with text data or in
MP3 or WMA.●When you insert a disc, and the
system begins to play.
When playing a CD-DA with text
data, the album and track name are
shown in the display.With a disc in
MP3 or WMA, the display shows the
folder and file name. When you turn on the audio system
next time, the system keeps your
selection with the TITLE button.
To Change or Select Tracks/FilesYou can use the SEEK/SKIP button
while a disc is playing to select
passages and change tracks (files in
MP3/WMA mode).
In MP3/WMA mode, use theor
PLAY button to select folders in
the disc, and use the SEEK/SKIP
button to change files. SEEK/SKIP
-Each time you press
the
button, the player skips
forward to the beginning of the next
track (files in MP3/WMA mode).
Press the
button to skip
backward to the beginning of the
current track. Press it again to skip to
the beginning of the previous track.
To move rapidly within a track, press
and hold the
or
button.
You can also operate the track
selection by using the VOL/SELECT
knob. Press the VOL/SELECT knob
and you will see ‘‘SEL ’’in the
display. Turn the knob to switch the
track number. Press the VOL/
SELECT knob or
PLAY button to
set your selection. To turn it off,
press the
buttton.
CONTINUED
Playing a Disc (Models without navigation system)
125
Features
2009 Fit
Page 131 of 352

The chart on the right explains the
error messages you may see in the
display while playing a disc.
If you see an error message in the
display while playing a disc, press
the eject button. After ejecting the
disc, check it for damage or
deformation. If there is no damage,
insert the disc again. For the
additional information on damaged
discs, see page187.
The audio system will try to play the
disc. If there is still a problem, the
error message will reappear. Press
the eject button, and pull out the
disc.
Insert a different disc. If the new disc
plays, there is a problem with the
first disc. If the error message cycle
repeats and you cannot clear it, take
your vehicle to a dealer.Error
Message Cause
Solution
HEAT ERRORHigh Temperature Will disappear when the temperature returns to
normal.
UNSUPPORTED Track/File format not
supported Current track will be skipped. The next supported
track or file plays automatically.
BAD DISC
PLEASE CHECK
OWNERS
MANUAL PUSH EJECT Mechanical Error
Press the EJECT button and pull out the disc.
Check the disc for serious damage, signs of
deformation, excessive scratches, and/or dirt
(see page187).Insert the disc again. If the code
does not disappear, or the disc cannot be
removed, consult your dealer. Do not try to force
the disc out of the player.
BAD DISC
PLEASE CHECK OWNERSMANUAL Servo Error
BAD DISC
PLEASE CHECK OWNERSMANUAL DISC Error
Check the disc for serious damage, signs of
deformation, excessive scratches, and/or dirt
(see page187).
Disc Player Error Messages (Models without navigation system)128
2009 Fit
Page 133 of 352

To Play an iPod
ꭂ
This audio system can operate the
audio files on the iPod
ꭂwith the
same controls used for the in-dash
disc player. To play an iPod, connect
it to the USB adapter cable in the
upper glove box by using your dock
connector, then press the AUX
button. The ignition switch must be
in the ACCESSORY (I) or ON (II)
position. The iPod will also be
recharged with the ignition switch in
these positions.
The audio system reads and plays
sound files to be playable on the
iPod. The system cannot operate an
iPod as a mass storage device. The
system will only play songs stored on
the iPod with iTunes.
iPod and iTunes are registered
trademarks owned by Apple Inc.
iPods that are compatible with your
audio system are listed below.
Model Firmware
ꭧ
iPod 5G Ver. 1.2 or more
iPod classic Ver. 1.0 or more
iPod nano Ver. 1.2 or more
iPod nano 2nd
generation Ver. 1.1.2 or more
iPod nano 3rd
generation Ver. 1.0 or more
iPod touch Ver. 1.1.1 or more
iPhone Ver. 1.1.1 or moreꭧ: Use the latest firmware.
Use only compatible iPods with the
latest firmware. iPods that are not
compatible will not work in this audio
unit.
NOTE:●Do not connect your iPod using a
HUB.●Do not keep the iPod in the
vehicle. Direct sunlight and high
heat will damage it.
●Do not use an extension cable
between the USB adapter cable
equipped with your vehicle and
your dock connector.●We recommend backing up your
data before playing it.
In AAC format, DRM (digital rights
management) files cannot be played.
If the system finds a DRM file, the
audio unit displays UNPLAYABLE,
and then skips to the next file.
Playing an iPod
®
(Models without navigation system)
130
2009 Fit
Page 134 of 352
Connecting an iPod1. Open the upper glove box, and pullout the USB adapter cable.
2. Connect your dock connector tothe iPod correctly and securely.
3. Install the dock connector to the USB connector securely.
When the iPod is connected and the
iPod mode is selected on the audio
display, the USB and iPod indicators
are shown in the display. After
loading, you will see Honda mark
ꭧ
on the iPod. That means you can
only operate your iPod using the
vehicle ’s audio unit.
ꭧ : It may take a few minutes for the
Honda mark to display on the iPod. If
the display does not change, this
function is not supported on your
iPod model or firmware.
USB CONNECTOR
USB ADAPTER CABLE
DOCK CONNECTOR
USB CONNECTOR
Sample Display OK to disconnect.
CONTINUED
Playing an iPod
®
(Models without navigation system)
131
Features
2009 Fit
Page 135 of 352

If the audio system still does not
recognize the iPod, the iPod may
need to be reset. Follow the
instructions that came with your
iPod, or you can find reset
instructions online at
www.apple.com/
ipod
.
Text Data Display FunctionEach time you press the TITLE
button the display mode switches
between the album name, the song
name, the artist name, or name off
(which turns off the text display).
The display shows up to about 16
characters of the selected data. If the
text data has more than 16
characters, you will see the first 15
characters and the
indicator in the
display. Press and hold the TITLE
button until the next 16 characters
are shown.
To Change or Select FilesUse the SKIP button while an iPod is
playing to select passages and
change files.
SKIP -Each time you press the(SKIP +) button, the system skips
forward to the beginning of the next
file. Press the
(SKIP -) button,
to skip backward to the beginning of
the current file. Press it again to skip
to the beginning of the previous file.
To move rapidly within a file, press
and hold either side (
or
)of
the SKIP button.
Playing an iPod
®
(Models without navigation system)
132
2009 Fit