Page 90 of 150
90Navigation System
System Setup
Correct Vehicle Position
The system relies on satellites for
positioning information. Buildings,
tunnels, and other objects can block or
reflect these signals, requiring the
system to use “dead reckoning” to
determine your location and direction.
This can sometimes lead to small errors
in positioning, such as showing you on
an adjacent street.
NOTE:
Using this function to adjust vehicle
position is not recommended. When the
system acquires a GPS signal, it will
automatically place the vehicle in the
correct location.If you choose to do this, follow these
steps:
1. Stop the vehicle.
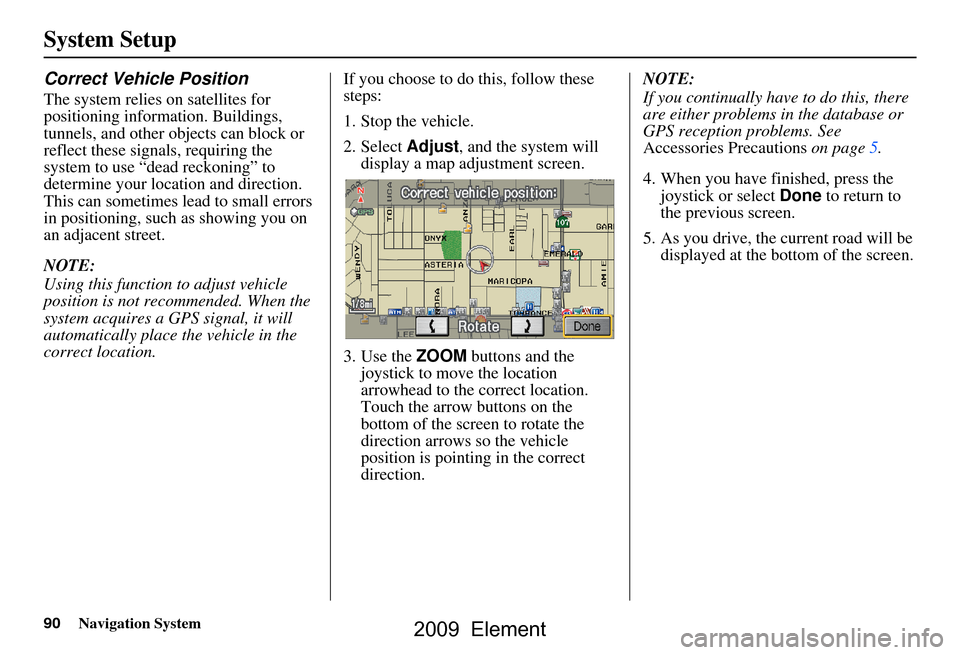
2. Select
Adjust, and the system will
display a map adjustment screen.
3. Use the ZOOM buttons and the
joystick to move the location
arrowhead to the correct location.
Touch the arrow buttons on the
bottom of the screen to rotate the
direction arrows so the vehicle
position is pointin g in the correct
direction. NOTE:
If you continually have to do this, there
are either problems in the database or
GPS reception problems. See
Accessories Precautions
on page5.
4. When you have finished, press the joystick or select Done to return to
the previous screen.
5. As you drive, the current road will be displayed at the bottom of the screen.
2009 Element
Page 95 of 150
Navigation System95
System Setup
Rearview Camera
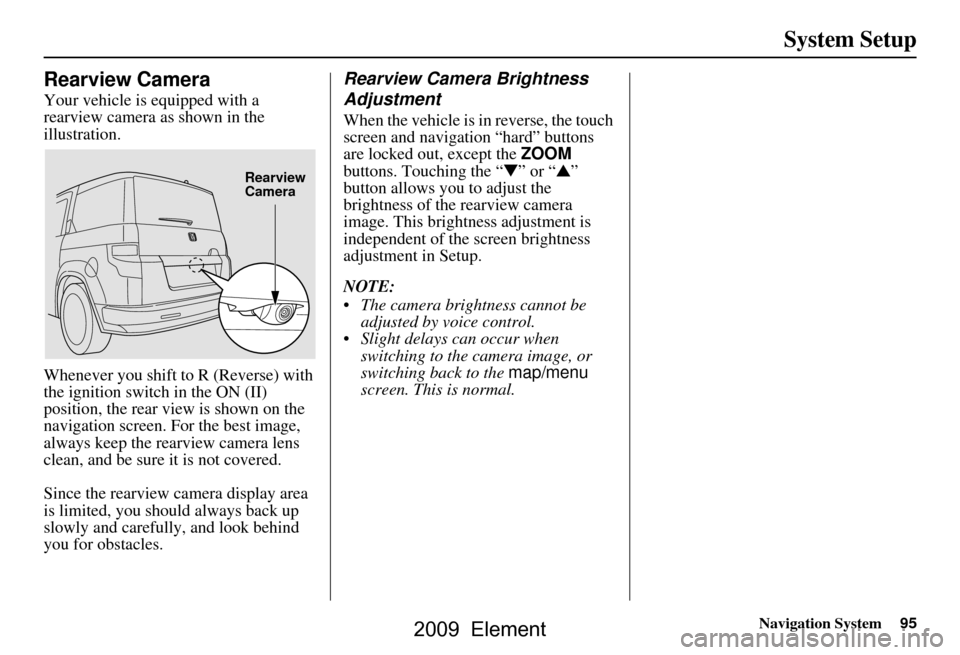
Your vehicle is equipped with a
rearview camera as shown in the
illustration.
Whenever you shift to R (Reverse) with
the ignition switch in the ON (II)
position, the rear view is shown on the
navigation screen. For the best image,
always keep the rearview camera lens
clean, and be sure it is not covered.
Since the rearview camera display area
is limited, you should always back up
slowly and carefully, and look behind
you for obstacles.
Rearview Camera Brightness
Adjustment
When the vehicle is in reverse, the touch
screen and navigation “hard” buttons
are locked out, except the ZOOM
buttons. Touching the “ ▼” or “ ▲”
button allows you to adjust the
brightness of the rearview camera
image. This brightness adjustment is
independent of the screen brightness
adjustment in Setup.
NOTE:
The camera brightness cannot be adjusted by voice control.
Slight delays can occur when switching to the ca mera image, or
switching back to the map/menu
screen. This is normal.
Rearview
Camera
2009 Element
Page 105 of 150
Navigation System105
Customer Assistance
PC Card Operation
A PC card with WMA or MP3 audio
files can be played through the audio
system and controlled using the
navigation voice control system. PC
card (PCMCIA) adaptors and various
media chips can be purchased at any
computer store. Tested media chips
include Compact Flash and SD media,
up to 2GB. Other media types and
storage capacities may work, but have
not been tested. Hard disc drive type
media are not recommended because
they can fail in a hot vehicle. See the
FAQs section for additional
information.
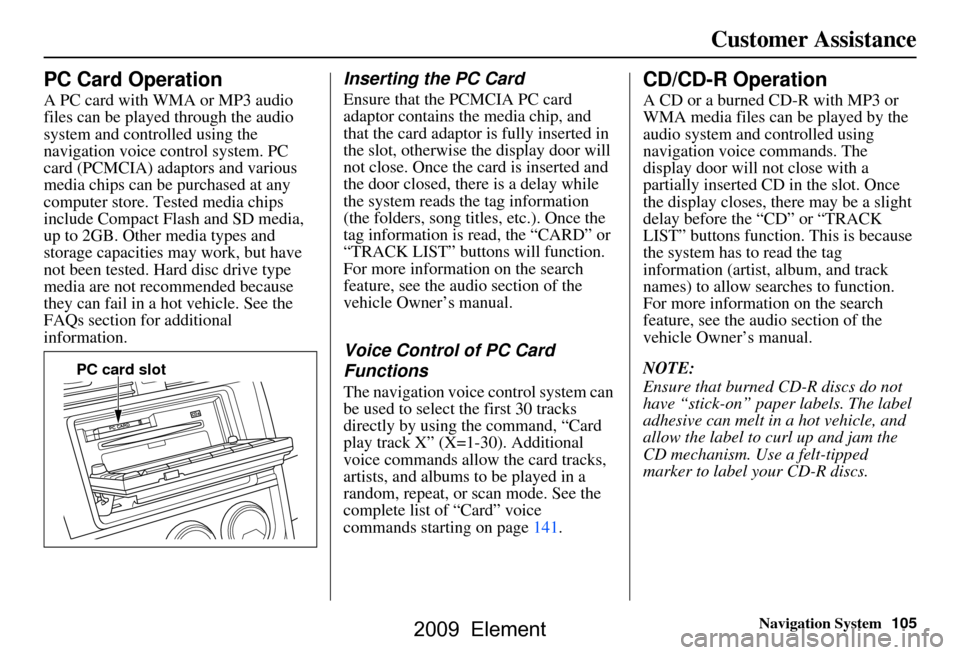
Inserting the PC Card
Ensure that the PCMCIA PC card
adaptor contains the media chip, and
that the card adaptor is fully inserted in
the slot, otherwise the display door will
not close. Once the card is inserted and
the door closed, ther e is a delay while
the system reads the tag information
(the folders, song titles, etc.). Once the
tag information is read, the “CARD” or
“TRACK LIST” buttons will function.
For more information on the search
feature, see the audio section of the
vehicle Owner’s manual.
Voice Control of PC Card
Functions
The navigation voice control system can
be used to select the first 30 tracks
directly by using the command, “Card
play track X” (X=1-30). Additional
voice commands allow the card tracks,
artists, and albums to be played in a
random, repeat, or scan mode. See the
complete list of “Card” voice
commands starting on page141.
CD/CD-R Operation
A CD or a burned CD-R with MP3 or
WMA media files can be played by the
audio system and controlled using
navigation voice commands. The
display door will not close with a
partially inserted CD in the slot. Once
the display closes, there may be a slight
delay before the “CD” or “TRACK
LIST” buttons function. This is because
the system has to read the tag
information (artist, album, and track
names) to allow searches to function.
For more information on the search
feature, see the audio section of the
vehicle Owner’s manual.
NOTE:
Ensure that burned CD-R discs do not
have “stick-on” paper labels. The label
adhesive can melt in a hot vehicle, and
allow the label to curl up and jam the
CD mechanism. Use a felt-tipped
marker to label your CD-R discs.
PC card slot
2009 Element
Page 136 of 150
136Navigation System
Glossary
Unverified Streets - These streets have
not been verified for turn restrictions,
one-way, etc. They are shown in light
brown on the map. Unverified streets
may be missing from the map, shown
in the wrong location, or have an
incorrect name or address range.
USB - Universal Serial Bus. A computer hardware interface used to store and
play audio files (MP3, WMA, AAC)
from USB devices, such as thumb
drives or iPods. See the Audio section
in your vehicle Owner’s Manual for
more information.
Vehicle Speed Sensor - Provides speed
signal to the navigation system for
moving the VP icon on the map.
Verified Streets - These streets consist
of the detailed metropolitan coverage
areas and all other inter-town
connection roads. These roads are
shown in black on the map.
Voice Control - See VR. VP -
Vehicle Position. When in map
mode, this circular icon shows the
vehicle position on the map. Touch
this icon to show the latitude,
longitude, and elevation of your
current position.
VR - Voice Recognition. This allows
voice control of many of the
navigation functions. The hardware
consists of the microphone, voice
control switch ( NAVI TALK/NAVI
BACK buttons), and the front
speakers.
Waypoint - A temporary destination
you may enter while en route (e.g., a
gas station, ATM, etc.). See page62.
WMA - A Windows media audio file that can be played from a CD-R, USB
thumb drive, or PC card.
Yaw Rate Sensor - Senses when the
vehicle makes a turn, which makes
the VP change direction on the map
as you turn.
2009 Element
Page 140 of 150
140Navigation System
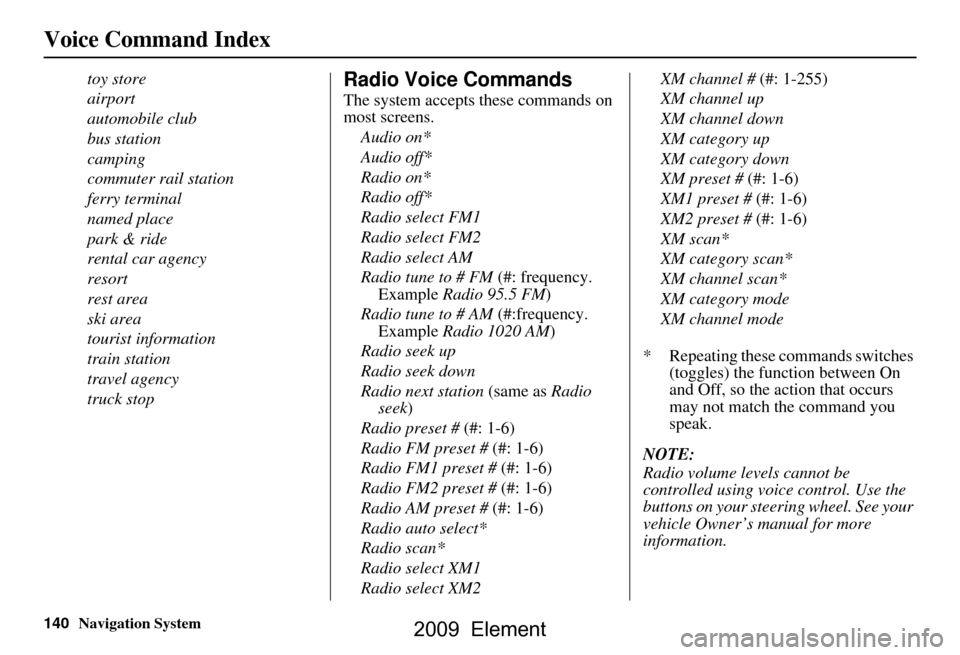
Voice Command Index
toy store
airport
automobile club
bus station
camping
commuter rail station
ferry terminal
named place
park & ride
rental car agency
resort
rest area
ski area
tourist information
train station
travel agency
truck stopRadio Voice Commands
The system accepts these commands on
most screens.Audio on*
Audio off*
Radio on*
Radio off*
Radio select FM1
Radio select FM2
Radio select AM
Radio tune to # FM (#: frequency.
Example Radio 95.5 FM )
Radio tune to # AM (#:frequency.
Example Radio 1020 AM )
Radio seek up
Radio seek down
Radio next station (same as Radio
seek)
Radio preset # (#: 1-6)
Radio FM preset # (#: 1-6)
Radio FM1 preset # (#: 1-6)
Radio FM2 preset # (#: 1-6)
Radio AM preset # (#: 1-6)
Radio auto select*
Radio scan*
Radio select XM1
Radio select XM2 XM channel #
(#: 1-255)
XM channel up
XM channel down
XM category up
XM category down
XM preset # (#: 1-6)
XM1 preset # (#: 1-6)
XM2 preset # (#: 1-6)
XM scan*
XM category scan*
XM channel scan*
XM category mode
XM channel mode
* Repeating these commands switches (toggles) the function between On
and Off, so the action that occurs
may not match the command you
speak.
NOTE:
Radio volume levels cannot be
controlled using voice control. Use the
buttons on your steering wheel. See your
vehicle Owner’s manual for more
information.
2009 Element
Page 148 of 150
148Navigation System
Index
Volume..........................................72
Z
ZOOM buttons
................................11
2009 Element
Page:
< prev 1-8 9-16 17-24