2009 GMC SIERRA turn signal
[x] Cancel search: turn signalPage 343 of 596

Some things to consider:
Is the path ahead clear?
Will the surface texture change abruptly up ahead?
Does the travel take you uphill or downhill?
Will you have to stop suddenly or change direction
quickly?
When driving over obstacles or rough terrain, keep a
�rm grip on the steering wheel. Ruts, troughs, or other
surface features can jerk the wheel out of your hands.
When driving over bumps, rocks, or other obstacles,
the wheels can leave the ground. If this happens,
even with one or two wheels, you cannot control
the vehicle as well or at all.
Because you will be on an unpaved surface, it is
especially important to avoid sudden acceleration,
sudden turns, or sudden braking.
Off-roading requires a different kind of alertness from
driving on paved roads and highways. There are no road
signs, posted speed limits, or signal lights. Use good
judgment about what is safe and what is not.
Driving on Hills
Off-road driving often takes you up, down, or across
a hill. Driving safely on hills requires good judgment and
an understanding of what the vehicle can and cannot
do. There are some hills that simply cannot be driven,
no matter how well built the vehicle.
{CAUTION:
Many hills are simply too steep for any vehicle.
If you drive up them, you will stall. If you drive down
them, you cannot control your speed. If you drive
across them, you will roll over. You could be
seriously injured or killed. If you have any doubt
about the steepness, do not drive the hill.
4-17
Page 404 of 596

Following Distance
Stay at least twice as far behind the vehicle ahead as
you would when driving the vehicle without a trailer. This
can help to avoid situations that require heavy braking
and sudden turns.
Passing
More passing distance is needed when towing a trailer.
Because the rig is longer, it is necessary to go much
farther beyond the passed vehicle before returning to
the lane.
Backing Up
Hold the bottom of the steering wheel with one hand.
Then, to move the trailer to the left, move that hand
to the left. To move the trailer to the right, move your
hand to the right. Always back up slowly and, if possible,
have someone guide you.
Making Turns
Notice:Making very sharp turns while trailering
could cause the trailer to come in contact with
the vehicle. The vehicle could be damaged. Avoid
making very sharp turns while trailering.
When turning with a trailer, make wider turns than
normal. Do this so the trailer will not strike soft
shoulders, curbs, road signs, trees or other objects.
Avoid jerky or sudden maneuvers. Signal well in
advance.
Turn Signals When Towing a Trailer
The arrows on the instrument panel �ash whenever
signaling a turn or lane change. Properly hooked up,
the trailer lamps also �ash, telling other drivers the
vehicle is turning, changing lanes or stopping.
When towing a trailer, the arrows on the instrument
panel �ash for turns even if the bulbs on the trailer
are burned out. For this reason you may think other
drivers are seeing the signal when they are not.
It is important to check occasionally to be sure
the trailer bulbs are still working.
4-78
Page 408 of 596

Heavy-Duty Trailer Wiring Harness
Package
For vehicles equipped with heavy duty trailering, the
harness is connected to a bracket on the hitch platform.
The seven-wire harness contains the following trailer
circuits:
Yellow: Left Stop/Turn Signal
Dark Green: Right Stop/Turn Signal
Brown: Taillamps
White: Ground
Light Green: Back-up Lamps
Red: Battery Feed*
Dark Blue: Trailer Brake**The fuses for these two circuits are installed in
the underhood electrical center, but the wires are
not connected. They should be connected by your
dealer/retailer or a quali�ed service center. The fuse
and wire for the ITBC is factory installed and connected
if the vehicle is equipped with an ITBC. The fuse for
the battery feed is not required if the vehicle has
an auxiliary battery. If the vehicle does not have an
auxiliary battery, have your dealer/retailer or authorized
service center install the required fuse.
If charging a remote (non-vehicle) battery, press the
tow/haul mode button located at the end of the shift lever.
This will boost the vehicle system voltage and properly
charge the battery. If the trailer is too light for tow/haul
mode, turn on the headlamps as a second way to boost
the vehicle system and charge the battery.
4-82
Page 409 of 596

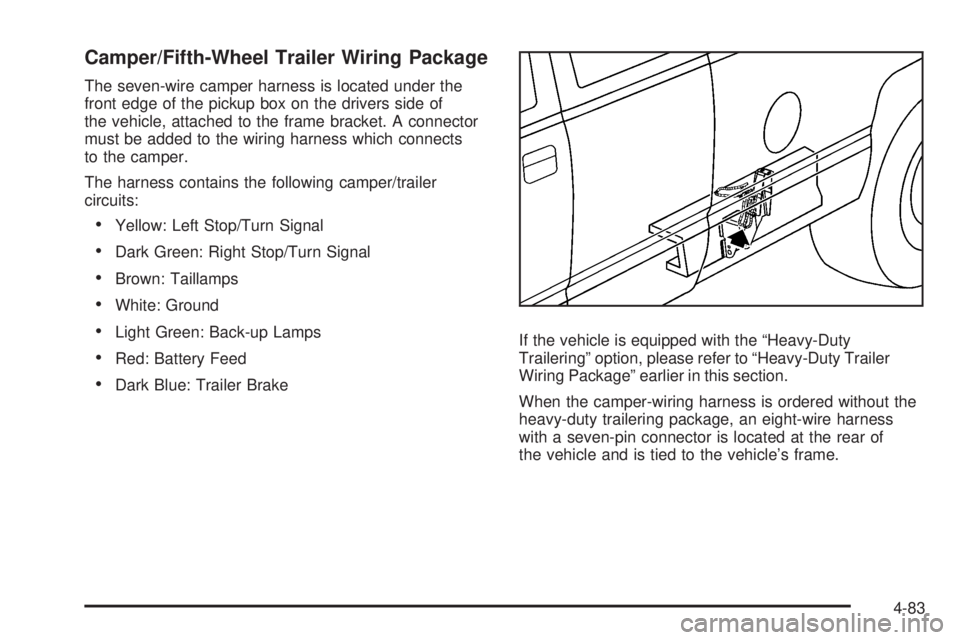
Camper/Fifth-Wheel Trailer Wiring Package
The seven-wire camper harness is located under the
front edge of the pickup box on the drivers side of
the vehicle, attached to the frame bracket. A connector
must be added to the wiring harness which connects
to the camper.
The harness contains the following camper/trailer
circuits:
Yellow: Left Stop/Turn Signal
Dark Green: Right Stop/Turn Signal
Brown: Taillamps
White: Ground
Light Green: Back-up Lamps
Red: Battery Feed
Dark Blue: Trailer BrakeIf the vehicle is equipped with the “Heavy-Duty
Trailering” option, please refer to “Heavy-Duty Trailer
Wiring Package” earlier in this section.
When the camper-wiring harness is ordered without the
heavy-duty trailering package, an eight-wire harness
with a seven-pin connector is located at the rear of
the vehicle and is tied to the vehicle’s frame.
4-83
Page 410 of 596

Electric Brake Control Wiring
Provisions
These wiring provisions are included with the vehicle as
part of the trailer wiring package. These provisions are
for an electric brake controller. The instrument panel
contains blunt cut wires behind the steering column for
the trailer brake controller. The harness contains the
following wires:
Dark Blue: Brake Signal to Trailer Connector
Red/Black: Battery
Light Blue/White: Brake Switch
White: Ground
It should be installed by your dealer/retailer or a
quali�ed service center.
If the vehicle is equipped with an ITBC, the blunt cuts
exist, but are not connected further in the harness.
If an aftermarket trailer brake controller is installed,
the ITBC must be disconnected. Do not power
both ITBC and aftermarket controllers to control
the trailer brakes at the same time.
Auxiliary Battery
The auxiliary battery provision can be used to supply
electrical power to additional equipment that may be
added, such as a slide-in camper. If the vehicle has this
provision, this relay will be located on the drivers side of
the vehicle, next to the underhood electrical center.Be sure to follow the proper installation instructions
that are included with any electrical equipment that
is installed.
Notice:Leaving electrical equipment on for
extended periods will drain the battery. Always turn
off electrical equipment when not in use and do
not use equipment that exceeds the maximum
amperage rating for the auxiliary battery provision.
Trailer Recommendations
Subtract the hitch loads from the Cargo Weight Rating
(CWR). CWR is the maximum weight of the load the
vehicle can carry. It does not include the weight of the
people inside, but you can �gure about 150 lbs. (68 kg)
for each passenger. The total cargo load must not be
more than the vehicles CWR.
Weigh the vehicle with the trailer attached, so
the GVWR or GAWR are not exceeded. If using a
weight-distributing hitch, weigh the vehicle without
the spring bars in place.
The best performance is obtained by correctly spreading
out the weight of the load and choosing the correct
hitch and trailer brakes.
For more information seeTowing a Trailer on page 4-51.
4-84
Page 412 of 596

Bulb Replacement..........................................5-58
Halogen Bulbs..............................................5-58
Headlamps..................................................5-58
Center High-Mounted Stoplamp (CHMSL)
and Cargo Lamp.......................................5-59
Pickup Box Identi�cation and Fender
Marker Lamps...........................................5-60
Taillamps, Turn Signal, Stoplamps and
Back-up Lamps.........................................5-61
License Plate Lamp......................................5-63
Replacement Bulbs.......................................5-63
Windshield Wiper Blade Replacement..............5-64
Tires..............................................................5-65
Tire Sidewall Labeling...................................5-66
Tire Terminology and De�nitions.....................5-70
In�ation - Tire Pressure.................................5-73
High-Speed Operation...................................5-74
Dual Tire Operation.......................................5-75
Tire Pressure Monitor System.........................5-76
Tire Pressure Monitor Operation.....................5-77
Tire Inspection and Rotation...........................5-81
When It Is Time for New Tires.......................5-83
Buying New Tires.........................................5-84
Different Size Tires and Wheels......................5-86Uniform Tire Quality Grading..........................5-86
Wheel Alignment and Tire Balance..................5-88
Wheel Replacement......................................5-89
Tire Chains..................................................5-90
If a Tire Goes Flat........................................5-91
Changing a Flat Tire.....................................5-92
Removing the Spare Tire and Tools................5-93
Removing the Flat Tire and Installing
the Spare Tire..........................................5-98
Secondary Latch System..............................5-106
Storing a Flat or Spare Tire and Tools...........5-109
Spare Tire.................................................5-113
Appearance Care
..........................................5-113
Interior Cleaning.........................................5-113
Fabric/Carpet..............................................5-115
Leather......................................................5-115
Instrument Panel, Vinyl, and Other
Plastic Surfaces.......................................5-116
Care of Safety Belts....................................5-116
Weatherstrips.............................................5-116
Washing Your Vehicle..................................5-117
Cleaning Exterior Lamps/Lenses....................5-117
Finish Care................................................5-118
Windshield and Wiper Blades.......................5-118
Section 5 Service and Appearance Care
5-2
Page 471 of 596

Taillamps, Turn Signal, Stoplamps
and Back-up Lamps
To replace one of these bulbs:
1. Open the tailgate.Tailgate on page 2-13for more
information.
2. Remove the two rear
lamp assembly screws
near the tailgate latch
strikerpost and pull out
the lamp assembly.
3. Determine which of the following taillamp
assemblies applies to your vehicle.A. Stoplamp/Taillamp/Turn Signal Lamp
B. Back-up Lamp
C. Stoplamp/Taillamp/Turn Signal Lamp
4. Press the tab, if the vehicle has one, and turn the
bulb socket counterclockwise to remove it from the
taillamp assembly.
Dually Models
5-61
Page 472 of 596

A. Stoplamp/Taillamp/
Turn Signal Lamp
B. Stoplamp/Taillamp/
Turn Signal LampC. Back-up Lamp
D. Sidemarker Lamp
5. Pull the old bulb straight out from the socket.
6. Press a new bulb into the socket and turn the socket
clockwise into the taillamp assembly.
7. Reinstall the taillamp assembly.
Taillamps (Chassis Cab Models)
A. Backup Lamp
B. Stoplamp/Taillamp/Turn Signal Lamp
To replace one of these bulbs:
1. Remove the four screws.
2. Lift the lens off the lamp assembly.
3. Turn the old bulb counterclockwise and pull the it
straight out from the socket.
4. Install a new bulb into the socket, turn it clockwise,
and press it in until it is tight.
5. Reinstall the lens and the four screws. All Other Models
5-62