2009 GMC SAVANA PASSENGER tires
[x] Cancel search: tiresPage 221 of 406
Tire and Loading Information Label
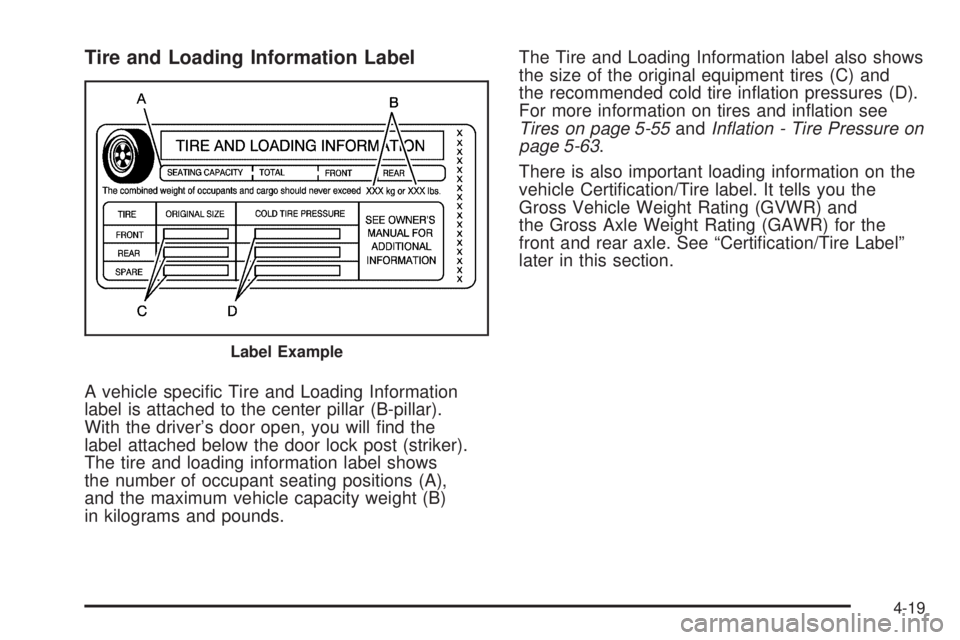
A vehicle specific Tire and Loading Information
label is attached to the center pillar (B-pillar).
With the driver’s door open, you will find the
label attached below the door lock post (striker).
The tire and loading information label shows
the number of occupant seating positions (A),
and the maximum vehicle capacity weight (B)
in kilograms and pounds.The Tire and Loading Information label also shows
the size of the original equipment tires (C) and
the recommended cold tire inflation pressures (D).
For more information on tires and inflation see
Tires on page 5-55andInflation - Tire Pressure on
page 5-63.
There is also important loading information on the
vehicle Certification/Tire label. It tells you the
Gross Vehicle Weight Rating (GVWR) and
the Gross Axle Weight Rating (GAWR) for the
front and rear axle. See “Certification/Tire Label”
later in this section.
Label Example
4-19
Page 224 of 406
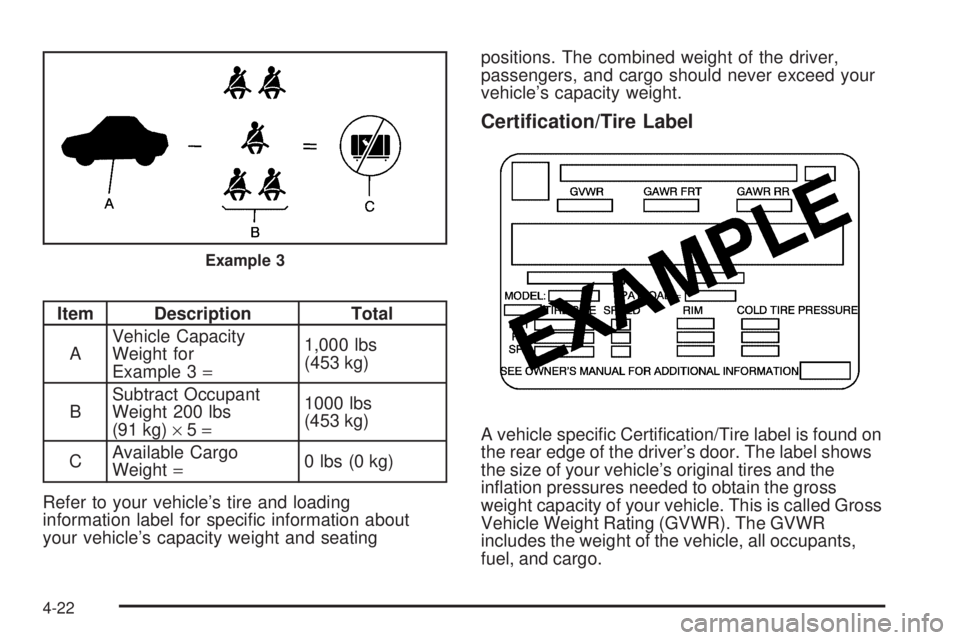
Item Description Total
AVehicle Capacity
Weight for
Example 3=1,000 lbs
(453 kg)
BSubtract Occupant
Weight 200 lbs
(91 kg)×5=1000 lbs
(453 kg)
CAvailable Cargo
Weight=0 lbs (0 kg)
Refer to your vehicle’s tire and loading
information label for specific information about
your vehicle’s capacity weight and seatingpositions. The combined weight of the driver,
passengers, and cargo should never exceed your
vehicle’s capacity weight.
Certication/Tire Label
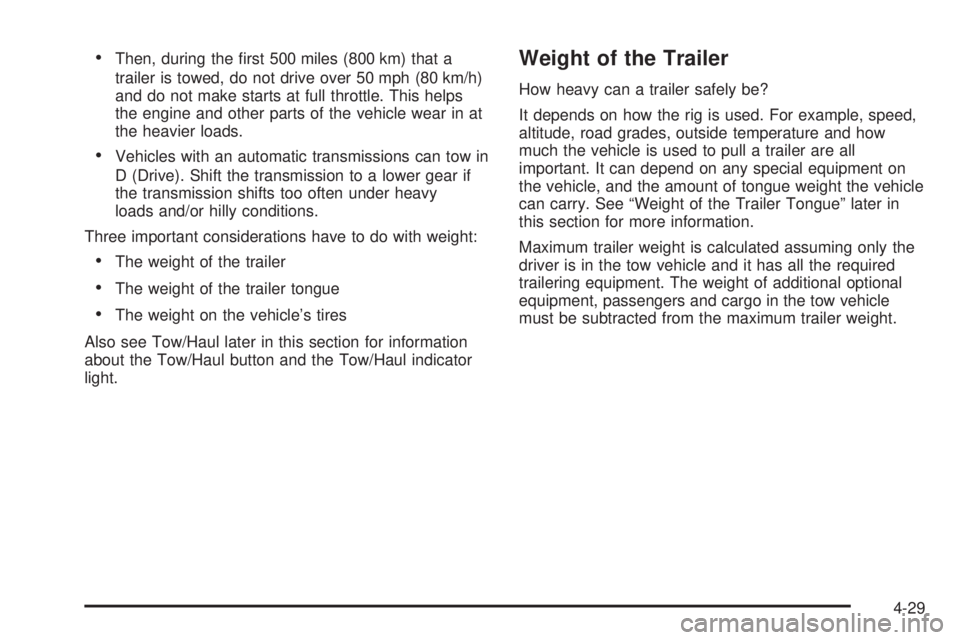
A vehicle specific Certification/Tire label is found on
the rear edge of the driver’s door. The label shows
the size of your vehicle’s original tires and the
inflation pressures needed to obtain the gross
weight capacity of your vehicle. This is called Gross
Vehicle Weight Rating (GVWR). The GVWR
includes the weight of the vehicle, all occupants,
fuel, and cargo.
Example 3
4-22
Page 231 of 406
•Then, during the first 500 miles (800 km) that a
trailer is towed, do not drive over 50 mph (80 km/h)
and do not make starts at full throttle. This helps
the engine and other parts of the vehicle wear in at
the heavier loads.
•Vehicles with an automatic transmissions can tow in
D (Drive). Shift the transmission to a lower gear if
the transmission shifts too often under heavy
loads and/or hilly conditions.
Three important considerations have to do with weight:
•The weight of the trailer
•The weight of the trailer tongue
•The weight on the vehicle’s tires
Also see Tow/Haul later in this section for information
about the Tow/Haul button and the Tow/Haul indicator
light.
Weight of the Trailer
How heavy can a trailer safely be?
It depends on how the rig is used. For example, speed,
altitude, road grades, outside temperature and how
much the vehicle is used to pull a trailer are all
important. It can depend on any special equipment on
the vehicle, and the amount of tongue weight the vehicle
can carry. See “Weight of the Trailer Tongue” later in
this section for more information.
Maximum trailer weight is calculated assuming only the
driver is in the tow vehicle and it has all the required
trailering equipment. The weight of additional optional
equipment, passengers and cargo in the tow vehicle
must be subtracted from the maximum trailer weight.
4-29
Page 236 of 406
It is important that the vehicle does not exceed any of
its ratings — GCWR, GVWR, RGAWR, Maximum Trailer
Rating or Tongue Weight. The only way to be sure it
is not exceeding any of these ratings is to weigh
the vehicle and trailer.
Total Weight on the Vehicle’s Tires
Be sure the vehicle’s tires are inflated to the upper limit
for cold tires. These numbers can be found on the
Certification label at the rear edge of the driver’s door or
seeLoading the Vehicle on page 4-18. Make sure not
to go over the GVW limit for the vehicle, or the GAWR,
including the weight of the trailer tongue. If using a
weight distributing hitch, make sure not to go over the
rear axle limit before applying the weight distribution
spring bars.
Hitches
It is important to have the correct hitch equipment.
Crosswinds, large trucks going by and rough roads are
a few reasons why the right hitch is needed.
Weight-Distributing Hitches and Weight
Carrying Hitches
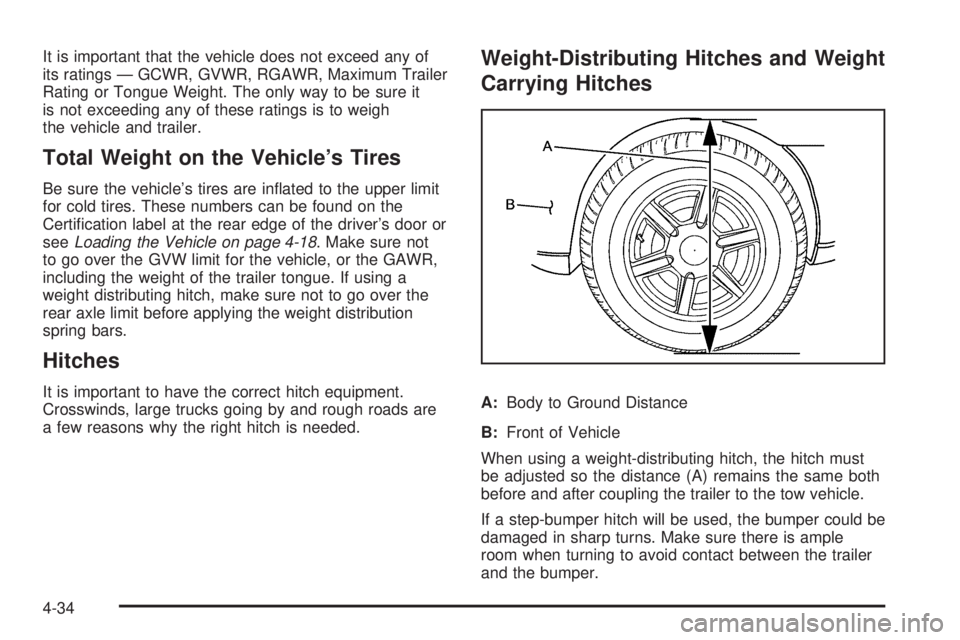
A:Body to Ground Distance
B:Front of Vehicle
When using a weight-distributing hitch, the hitch must
be adjusted so the distance (A) remains the same both
before and after coupling the trailer to the tow vehicle.
If a step-bumper hitch will be used, the bumper could be
damaged in sharp turns. Make sure there is ample
room when turning to avoid contact between the trailer
and the bumper.
4-34
Page 239 of 406
Towing a trailer requires a certain amount of experience.
Get to know the rig before setting out for the open
road. Get acquainted with the feel of handling and
braking with the added weight of the trailer. And always
keep in mind that the vehicle you are driving is now
longer and not as responsive as the vehicle is by itself.
Before starting, check all trailer hitch parts and
attachments, safety chains, electrical connectors, lamps,
tires and mirror adjustments. If the trailer has electric
brakes, start the vehicle and trailer moving and then
apply the trailer brake controller by hand to be sure the
brakes are working. This checks the electrical connection
at the same time.
During the trip, check occasionally to be sure that the
load is secure, and that the lamps and any trailer brakes
are still working.
Following Distance
Stay at least twice as far behind the vehicle ahead as
you would when driving the vehicle without a trailer. This
can help to avoid situations that require heavy braking
and sudden turns.
Passing
More passing distance is needed when towing a trailer.
Because the rig is longer, it is necessary to go much
farther beyond the passed vehicle before returning to
the lane.
Backing Up
Hold the bottom of the steering wheel with one hand.
Then, to move the trailer to the left, move that hand
to the left. To move the trailer to the right, move your
hand to the right. Always back up slowly and, if possible,
have someone guide you.
Making Turns
Notice:Making very sharp turns while trailering
could cause the trailer to come in contact with the
vehicle. The vehicle could be damaged. Avoid
making very sharp turns while trailering.
When turning with a trailer, make wider turns than
normal. Do this so the trailer will not strike soft
shoulders, curbs, road signs, trees or other objects.
Avoid jerky or sudden maneuvers. Signal well in
advance.
4-37
Page 244 of 406
Tires..............................................................5-55
Tire Sidewall Labeling...................................5-56
Tire Terminology and Definitions.....................5-60
Inflation - Tire Pressure.................................5-63
Dual Tire Operation.......................................5-64
Tire Pressure Monitor System.........................5-65
Tire Pressure Monitor Operation.....................5-66
Tire Inspection and Rotation...........................5-70
When It Is Time for New Tires.......................5-72
Buying New Tires.........................................5-73
Different Size Tires and Wheels......................5-75
Uniform Tire Quality Grading..........................5-75
Wheel Alignment and Tire Balance..................5-77
Wheel Replacement......................................5-77
Tire Chains..................................................5-78
If a Tire Goes Flat........................................5-79
Changing a Flat Tire.....................................5-80
Removing the Spare Tire and Tools................5-81
Removing the Flat Tire and Installing the
Spare Tire................................................5-84
Secondary Latch System...............................5-91
Storing a Flat or Spare Tire and Tools............5-94
Spare Tire...................................................5-95
Appearance Care............................................5-96
Interior Cleaning...........................................5-96
Fabric/Carpet...............................................5-97Instrument Panel, Vinyl, and Other Plastic
Surfaces..................................................5-98
Care of Safety Belts......................................5-98
Weatherstrips...............................................5-98
Washing Your Vehicle...................................5-99
Cleaning Exterior Lamps/Lenses.....................5-99
Finish Care................................................5-100
Windshield and Wiper Blades.......................5-100
Aluminum Wheels.......................................5-101
Tires.........................................................5-101
Sheet Metal Damage...................................5-101
Finish Damage...........................................5-102
Underbody Maintenance...............................5-102
Chemical Paint Spotting...............................5-102
Vehicle Identication.....................................5-103
Vehicle Identification Number (VIN)................5-103
Service Parts Identification Label...................5-103
Electrical System..........................................5-103
Add-On Electrical Equipment.........................5-103
Headlamp Wiring........................................5-104
Windshield Wiper Fuses...............................5-104
Fuses and Circuit Breakers..........................5-104
Floor Console Fuse Block............................5-104
Engine Compartment Fuse Block...................5-106
Capacities and Specications........................5-110
Section 5 Service and Appearance Care
5-2
Page 280 of 406
Brake Wear
This vehicle has disc brakes. Disc brake pads have
built-in wear indicators that make a high-pitched warning
sound when the brake pads are worn and new pads
are needed. The sound can come and go or be heard all
the time the vehicle is moving, except when applying
the brake pedal firmly.
{CAUTION:
The brake wear warning sound means that soon
the brakes will not work well. That could lead to an
accident. When the brake wear warning sound is
heard, have the vehicle serviced.
Notice:Continuing to drive with worn-out brake
pads could result in costly brake repair.Some driving conditions or climates can cause a brake
squeal when the brakes are first applied or lightly
applied. This does not mean something is wrong with
the brakes.
Properly torqued wheel nuts are necessary to help
prevent brake pulsation. When tires are rotated, inspect
brake pads for wear and evenly tighten wheel nuts in
the proper sequence to torque specifications in
Capacities and Specifications on page 5-110.
Brake linings should always be replaced as complete
axle sets.Brake Pedal Travel
See your dealer/retailer if the brake pedal does not
return to normal height, or if there is a rapid increase in
pedal travel. This could be a sign that brake service
might be required.
Brake Adjustment
Every brake stop, the brakes adjust for wear.
5-38
Page 297 of 406
Tires
Your new vehicle comes with high-quality tires
made by a leading tire manufacturer. If you ever
have questions about your tire warranty and where
to obtain service, see your vehicle Warranty booklet
for details. For additional information refer to the tire
manufacturer.
{CAUTION:
Poorly maintained and improperly used tires
are dangerous.
•Overloading your vehicle’s tires can
cause overheating as a result of too
much flexing. You could have an air-out
and a serious accident. SeeLoading the
Vehicle on page 4-18.
CAUTION: (Continued)
CAUTION: (Continued)
•
Underinflated tires pose the same danger
as overloaded tires. The resulting accident
could cause serious injury. Check all tires
frequently to maintain the recommended
pressure. Tire pressure should be
checked when your vehicle’s tires are
cold. SeeInflation - Tire Pressure on
page 5-63.
•Overinflated tires are more likely to be
cut, punctured, or broken by a sudden
impact — such as when you hit a pothole.
Keep tires at the recommended pressure.
•Worn, old tires can cause accidents.
If the tire’s tread is badly worn, or if your
vehicle’s tires have been damaged,
replace them.
5-55