Page 114 of 336

Usually, when something affects the compass readings, the compass will
correct itself after a few days of operating your vehicle in normal
conditions. If the compass still appears to be inaccurate, a manual
calibration may be necessary. Refer toCompass zone/calibration
adjustment.
Most geographic areas (zones) have a magnetic north compass point that
varies slightly from the northerly direction on maps. This variation is four
degrees between adjacent zones and will become noticeable as the
vehicle crosses multiple zones. A correct zone setting will eliminate this
error. Refer toCompass zone/calibration adjustment.
Compass zone adjustment
Perform the following steps on an open area free from steel structures
and high voltage lines. For optimum calibration, turn off all electrical
accessories (heater / air conditioning, wipers, etc.) and make sure all
vehicle doors are shut.
1. Turn ignition to the on position.
2. Start the engine.
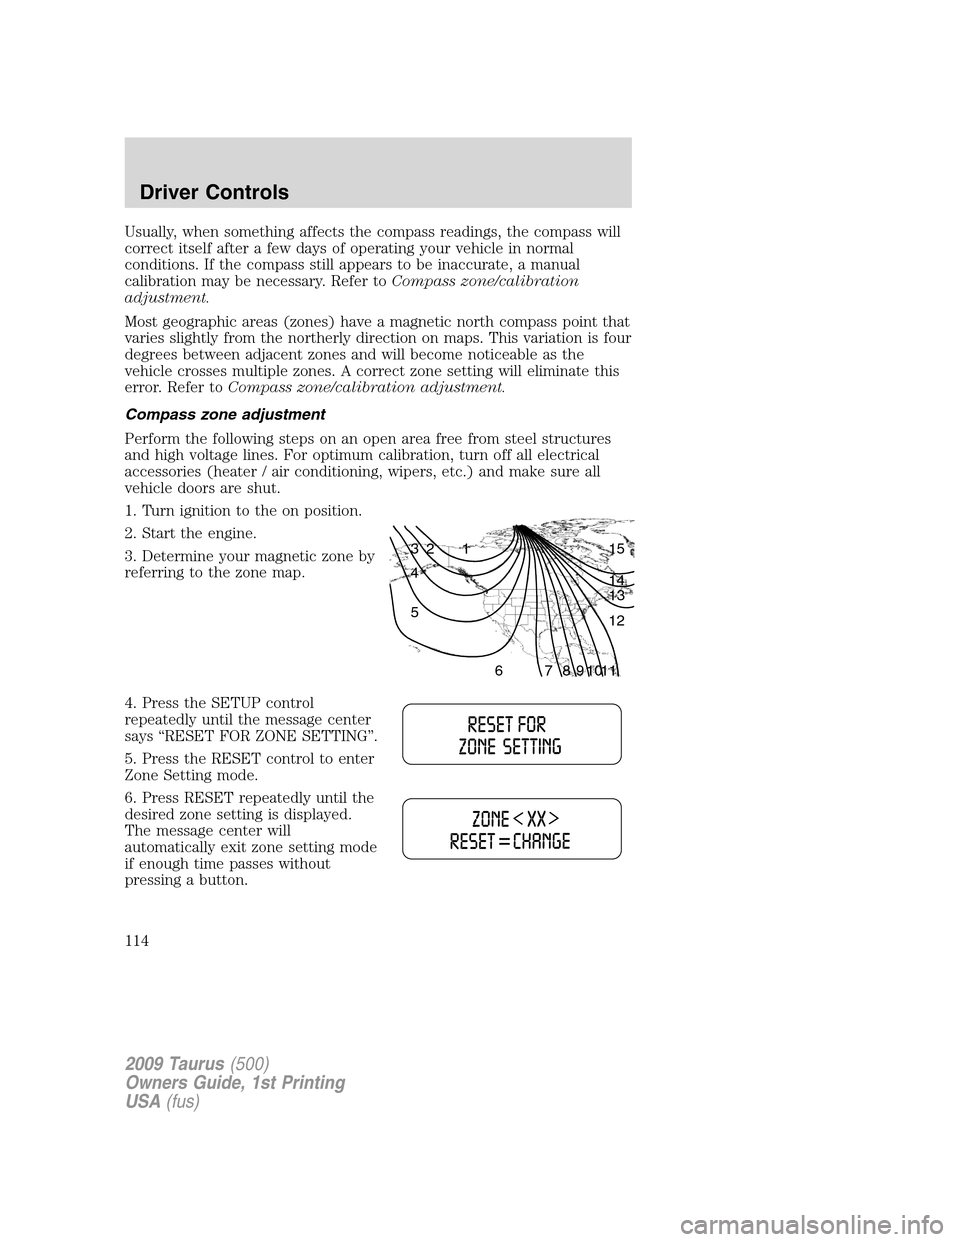
3. Determine your magnetic zone by
referring to the zone map.
4. Press the SETUP control
repeatedly until the message center
says “RESET FOR ZONE SETTING”.
5. Press the RESET control to enter
Zone Setting mode.
6. Press RESET repeatedly until the
desired zone setting is displayed.
The message center will
automatically exit zone setting mode
if enough time passes without
pressing a button.
1 2 3
4
5
6 7 8 9 101112 13 14 15
2009 Taurus(500)
Owners Guide, 1st Printing
USA(fus)
Driver Controls
114
Page 115 of 336

Compass calibration adjustment
Perform the following steps on an open area free from steel structures
and high voltage lines. For optimum calibration, turn off all electrical
accessories (heater / air conditioning, wipers, etc.) and make sure all
vehicle doors are shut.
1. Turn ignition to the on position.
2. Start the engine.
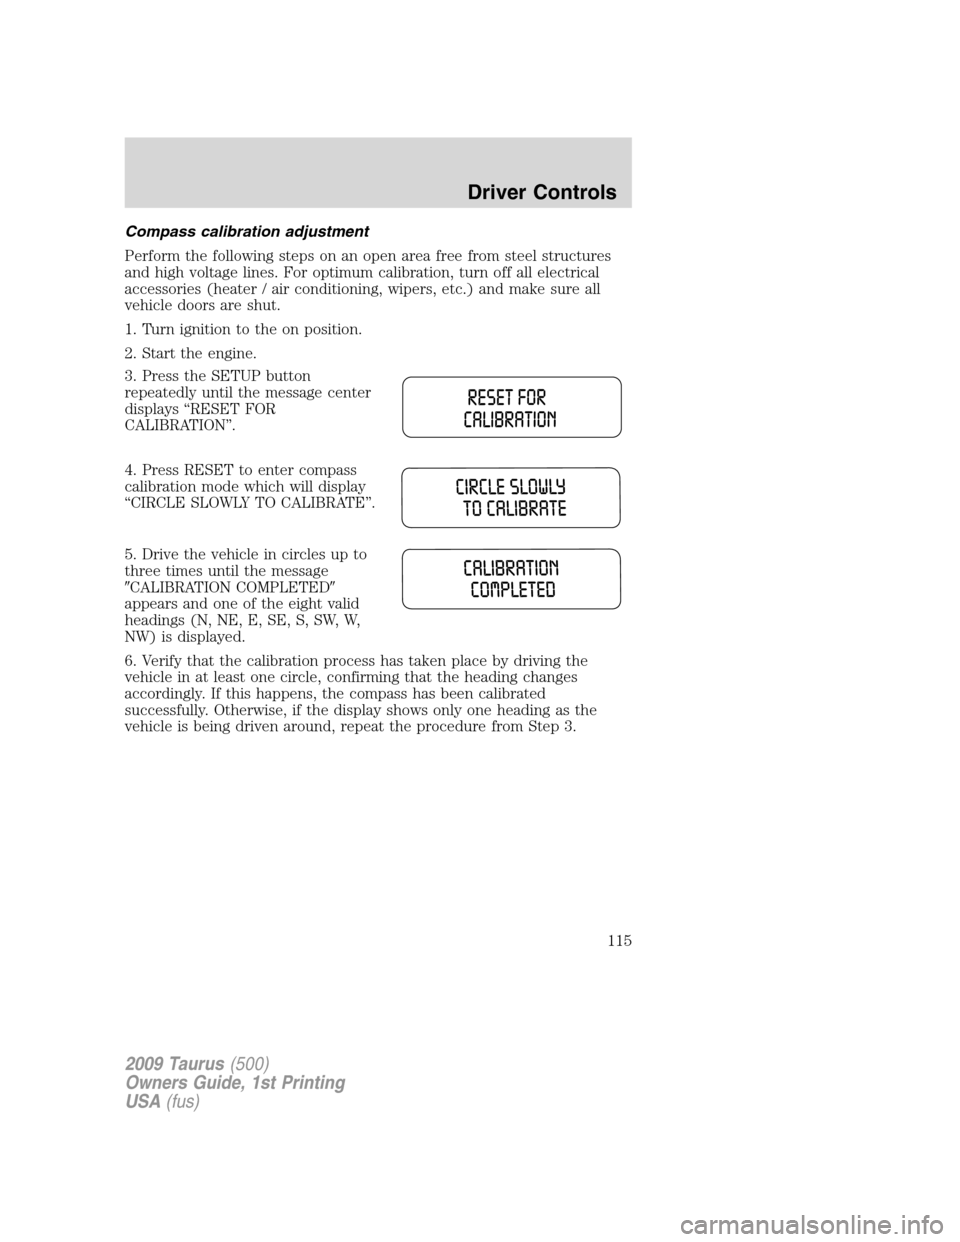
3. Press the SETUP button
repeatedly until the message center
displays “RESET FOR
CALIBRATION”.
4. Press RESET to enter compass
calibration mode which will display
“CIRCLE SLOWLY TO CALIBRATE”.
5. Drive the vehicle in circles up to
three times until the message
�CALIBRATION COMPLETED�
appears and one of the eight valid
headings (N, NE, E, SE, S, SW, W,
NW) is displayed.
6. Verify that the calibration process has taken place by driving the
vehicle in at least one circle, confirming that the heading changes
accordingly. If this happens, the compass has been calibrated
successfully. Otherwise, if the display shows only one heading as the
vehicle is being driven around, repeat the procedure from Step 3.
2009 Taurus(500)
Owners Guide, 1st Printing
USA(fus)
Driver Controls
115
Page 116 of 336

Setup menu
Press this control for the following
displays:
•System Check
•Oil Life
•Language
•Units (English/Metric)
•Autolamp Delay (if equipped)
•Autolock (if equipped)
•Autounlock (if equipped)
•Easy entry/exit seat (if equipped)
System check
Selecting this function from the
SETUP menu causes the message
center to cycle through each of the
systems being monitored. For each
of the monitored systems, the
message center will indicate either
an OK message or a warning message for two to four seconds.
Pressing the RESET control cycles the message center through each of
the systems being monitored.
The sequence of the system check report is as follows:
1. OIL LIFE
2. CHARGING SYSTEM
3. WASHER FLUID LEVEL
4. DOORS CLOSED
5. TRUNK CLOSED
6. BRAKE SYSTEM
7. TIRE PRESSURE MONITORING SYSTEM (if equipped and warning is
present)
8. DISTANCE TO EMPTY
Oil life
An oil change is required whenever indicated by the message center.
USE ONLY RECOMMENDED ENGINE OILS.
2009 Taurus(500)
Owners Guide, 1st Printing
USA(fus)
Driver Controls
116
Page 117 of 336
![FORD TAURUS 2009 5.G Owners Manual To reset the oil monitoring system to 100% after each oil change
(approximately 7,500 miles [12,000 km] or six months) perform the
following:
1. Press the SETUP control to enter
SYSTEM CHECK, then pre FORD TAURUS 2009 5.G Owners Manual To reset the oil monitoring system to 100% after each oil change
(approximately 7,500 miles [12,000 km] or six months) perform the
following:
1. Press the SETUP control to enter
SYSTEM CHECK, then pre](/manual-img/11/5355/w960_5355-116.png)
To reset the oil monitoring system to 100% after each oil change
(approximately 7,500 miles [12,000 km] or six months) perform the
following:
1. Press the SETUP control to enter
SYSTEM CHECK, then press SETUP
control again to display “OIL LIFE =
XXX% HOLD RESET = NEW”.
2. Press and hold the RESET
control for two seconds and release.
Oil life is set to 100% and “OIL LIFE
SET TO 100%” is displayed.
3. While “OIL LIFE SET TO 100%”
is displayed, if a lower oil life is
desired, press and release the RESET control to reduce the value. Each
press of the RESET control reduces the value by 10%.
Note:Oil life of 100% equals 7,500 miles (12,000 km) or six months. For
example, setting oil life to 60% sets the oil life value to 4,500 miles
(7,200 km) and 108 days.
Language
1. Select this function from the
SETUP menu for the current
language to be displayed.
2. Pressing the RESET control
cycles the message center through
each of the language choices.
3. Press and hold the RESET control to set the language choice.
Units (English/Metric)
1. Select this function from the
SETUP menu for the current units
to be displayed.
2. Press the RESET control to
change from English to Metric.
Autolamp delay (if equipped)
This feature keeps your headlights on for up to three minutes after the
ignition is switched off.
2009 Taurus(500)
Owners Guide, 1st Printing
USA(fus)
Driver Controls
117
Page 118 of 336

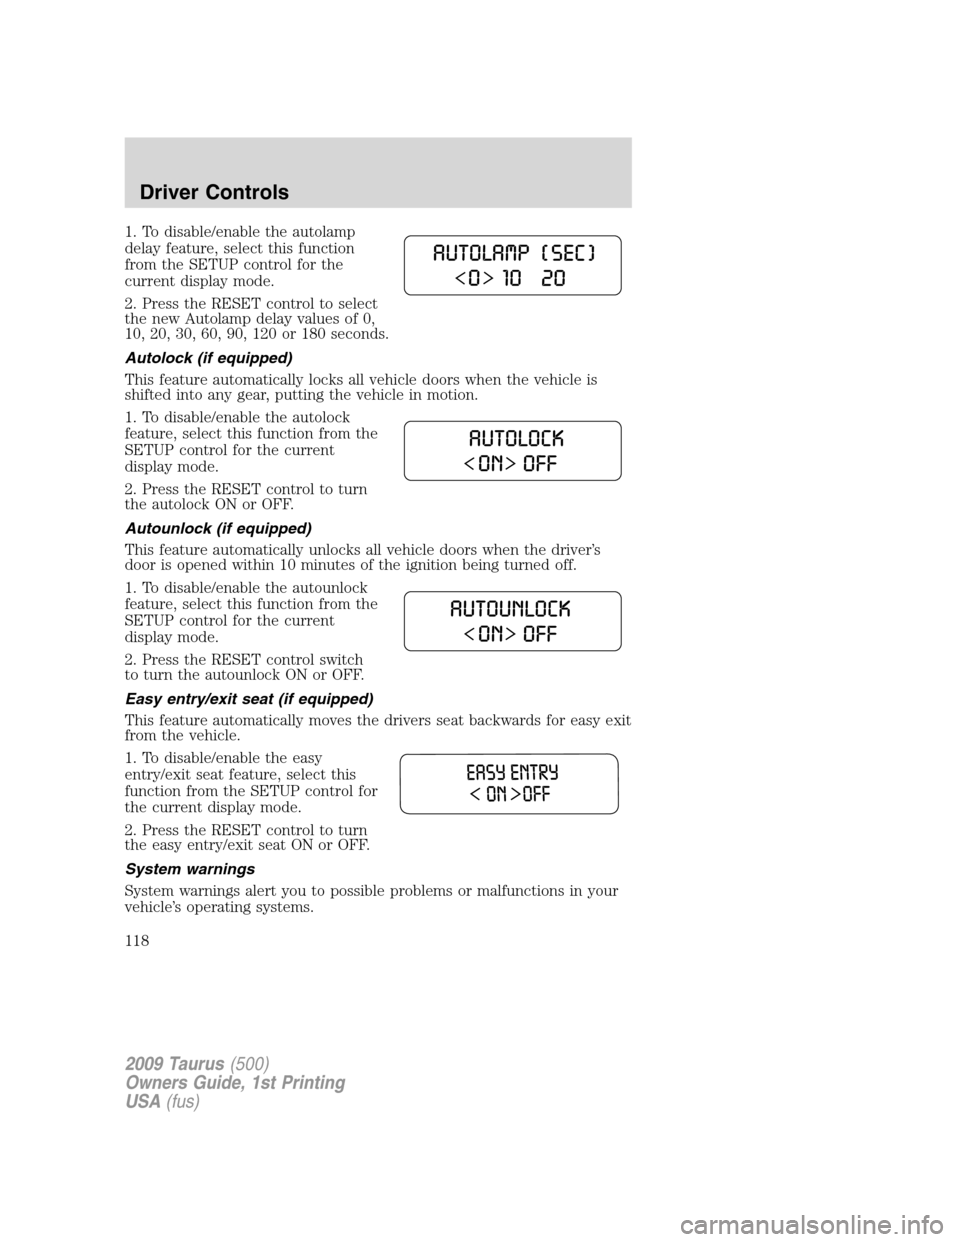
1. To disable/enable the autolamp
delay feature, select this function
from the SETUP control for the
current display mode.
2. Press the RESET control to select
the new Autolamp delay values of 0,
10, 20, 30, 60, 90, 120 or 180 seconds.
Autolock (if equipped)
This feature automatically locks all vehicle doors when the vehicle is
shifted into any gear, putting the vehicle in motion.
1. To disable/enable the autolock
feature, select this function from the
SETUP control for the current
display mode.
2. Press the RESET control to turn
the autolock ON or OFF.
Autounlock (if equipped)
This feature automatically unlocks all vehicle doors when the driver’s
door is opened within 10 minutes of the ignition being turned off.
1. To disable/enable the autounlock
feature, select this function from the
SETUP control for the current
display mode.
2. Press the RESET control switch
to turn the autounlock ON or OFF.
Easy entry/exit seat (if equipped)
This feature automatically moves the drivers seat backwards for easy exit
from the vehicle.
1. To disable/enable the easy
entry/exit seat feature, select this
function from the SETUP control for
the current display mode.
2. Press the RESET control to turn
the easy entry/exit seat ON or OFF.
System warnings
System warnings alert you to possible problems or malfunctions in your
vehicle’s operating systems.
2009 Taurus(500)
Owners Guide, 1st Printing
USA(fus)
Driver Controls
118
Page 119 of 336

In the event of a multiple warning situation, the message center will
cycle the display to show all warnings by displaying each one for several
seconds.
The message center will display the last selected feature if there are no
more warning messages. This allows you to use the full functionality of
the message center after you acknowledge the warning by pressing the
RESET control and clearing the warning message.
Warning messages that have been reset are divided into three categories:
•They will not disappear until a condition is changed.
•They will reappear on the display 10 minutes from the reset.
•They will not reappear until an ignition OFF-ON cycle has been
completed.
This acts as a reminder that these warning conditions still exist within
the vehicle.
Warnings Status
Driver door ajar Warning cannot be reset (CLOSE
DOOR TO RESET) will be displayed
Passenger door ajar
Rear left door ajar
Rear right door ajar
Fuel level low Warning returns after 10 minutes
Check charging system
Check brake system
Brake fluid level low Warning returns after the ignition key
is turned from OFF to RUN
Park brake engaged
Low tire pressure
Tire pressure monitor fault
Tire pressure sensor fault
Trunk ajar
Washer fluid level low
Oil life change soon
Oil change required
DRIVER DOOR AJAR— Displayed when the driver’s door is not
completely closed.
PASSENGER DOOR AJAR— Displayed when the passenger side door
is not completely closed.
2009 Taurus(500)
Owners Guide, 1st Printing
USA(fus)
Driver Controls
119
Page 255 of 336

FUEL PUMP SHUT-OFF SWITCH
This device stops the electric fuel pump from sending fuel to the engine
when your vehicle has had a substantial jolt.
After an accident, if the engine cranks but does not start, this switch
may have been activated.
The fuel pump shut-off switch is
located in the front passenger
footwell area in the right upper
corner.
To reset the switch:
1. Turn the ignition to the off
position.
2. Check the fuel system for leaks.
3. If no leaks are apparent, reset the
switch by pushing in on the reset
button.
4. Turn the ignition the on position.
5. Wait a few seconds and return
the key to the off position.
6. Make another check for leaks.
FUSES AND RELAYS
Fuses
If electrical components in the
vehicle are not working, a fuse may
have blown. Blown fuses are
identified by a broken wire within
the fuse. Check the appropriate
fuses before replacing any electrical
components.
Note:Always replace a fuse with one that has the specified amperage
rating. Using a fuse with a higher amperage rating can cause severe wire
damage and could start a fire.
15
2009 Taurus(500)
Owners Guide, 1st Printing
USA(fus)
Roadside Emergencies
255
Page 301 of 336

Because your vehicle’s engine is electronically controlled by a computer,
some control conditions are maintained by power from the battery. When
the battery is disconnected or a new battery is installed, the engine must
relearn its idle and fuel trim strategy for optimum driveability and
performance. To begin this process:
1. With the vehicle at a complete stop, set the parking brake.
2. Put the gearshift in P (Park), turn off all accessories and start the
engine.
3. Run the engine until it reaches normal operating temperature.
4. Allow the engine to idle for at least one minute.
5. Turn the A/C on and allow the engine to idle for at least one minute.
6. Release the parking brake. With your foot on the brake pedal and with
the A/C on, put the vehicle in D (Drive) and allow the engine to idle for
at least one minute.
7. Drive the vehicle to complete the relearning process.
•The vehicle may need to be driven 10 miles (16 km) or more to
relearn the idle and fuel trim strategy.
•If you do not allow the engine to relearn its idle trim, the idle
quality of your vehicle may be adversely affected until the idle
trim is eventually relearned.
If the battery has been disconnected or a new battery has been installed,
the clock and radio settings must be reset once the battery is
reconnected.
•Always dispose of automotive
batteries in a responsible manner.
Follow your local authorized
standards for disposal. Call your
local authorized recycling center
to find out more about recycling
automotive batteries.
L
E
A
D
RETURN
RECYCLE
2009 Taurus(500)
Owners Guide, 1st Printing
USA(fus)
Maintenance and Specifications
301