Page 223 of 312

FUEL PUMP SHUT-OFF SWITCH
This device stops the electric fuel pump from sending fuel to the engine
when your vehicle has had a substantial jolt.
After an accident, if the engine cranks but does not start, this switch
may have been activated.
The fuel pump shut-off switch is
located in the front passenger
footwell area in the right upper
corner.
To reset the switch:
1. Turn the ignition to the off
position.
2. Check the fuel system for leaks.
3. If no leaks are apparent, reset the
switch by pushing in on the reset
button.
4. Turn the ignition to the on
position.
5. Wait a few seconds and return
the key to off position.
6. Make another check for leaks.
FUSES AND RELAYS
Fuses
If electrical components in the
vehicle are not working, a fuse may
have blown. Blown fuses are
identified by a broken wire within
the fuse. Check the appropriate
fuses before replacing any electrical
components.
Note:Always replace a fuse with one that has the specified amperage
rating. Using a fuse with a higher amperage rating can cause severe wire
damage and could start a fire.
15
2009 Fusion(fsn)
Owners Guide
USA(fus)
Roadside Emergencies
223
Page 227 of 312

Power distribution box
The power distribution box is located in the engine compartment. The
power distribution box contains high-current fuses that protect your
vehicle’s main electrical systems from overloads.
WARNING:Always disconnect the battery before servicing high
current fuses.
WARNING:To reduce risk of electrical shock, always replace
the cover to the Power Distribution Box before reconnecting the
battery or refilling fluid reservoirs.
If the battery has been disconnected and reconnected, refer to the
Batterysection of theMaintenance and Specificationschapter.
The high-current fuses are coded as follows.
Fuse/Relay
LocationFuse Amp
RatingProtected Circuits
1 60A*** SJB power feed (fuses 12, 13, 14,
15, 16, 17, 18, C/B)
2 60A*** SJB power feed (fuses 1, 2, 4, 10,
11)
45 46 47
48 4950 51
52
53
55
5654
57
58
41 42 43 44
23 24 25 26 27
28
29 30 31 32 33 34 35
13 12
89
10 11 12
18 19 20 21 22345 6 7
1415
16
17
36
37
38
39
40
2009 Fusion(fsn)
Owners Guide
USA(fus)
Roadside Emergencies
227
Page 228 of 312
Fuse/Relay
LocationFuse Amp
RatingProtected Circuits
3 40A** Powertrain power, PCM relay coil
4 40A** Blower motor
5 — Not used
6 40A** Rear window defroster, Heated
mirrors
7 40A** PETA Pump (PZEV) power feed
8 40A** ABS pump
9 20A** Wipers
10 30A** ABS Valves
11 20A** Heated seats
12 — Not used
13 10A* SYNC
14 15A* Ignition switch
15 — Not used
16 15A* Transmission
17 10A* Alternator sense
18 — Not used
19 40A** Logic feed to SJB (solid state
devices)
20 — Not used
21 — Not used
22 20A** Console power point
23 10A* PCM KAM, FNR5 and canister
vent solenoid
24 15A* Fog lamps
25 10A* A/C Compressor clutch
26 — Not used
27 — Not used
28 60A*** Engine cooling fan
29 — Not used
30 30A** Fuel pump/injectors relay
2009 Fusion(fsn)
Owners Guide
USA(fus)
Roadside Emergencies
228
Page 232 of 312

•Wet weather driving capability
•All-Wheel driving capability (if applicable)
•Load leveling adjustment (if applicable)
When driving with the full-size dissimilar spare tire/wheel additional
caution should be given to:
•Towing a trailer
•Driving vehicles equipped with a camper body
•Driving vehicles with a load on the cargo rack
Drive cautiously when using a full-size dissimilar spare tire/wheel and
seek service as soon as possible.
Stopping and securing the vehicle
1. Park on a level surface, set the parking brake and activate the hazard
flashers.
2. Place the gearshift lever in P (Park) (automatic transmission) or R
(Reverse) (manual transmission) and turn the engine off.
Removing the spare tire and jack
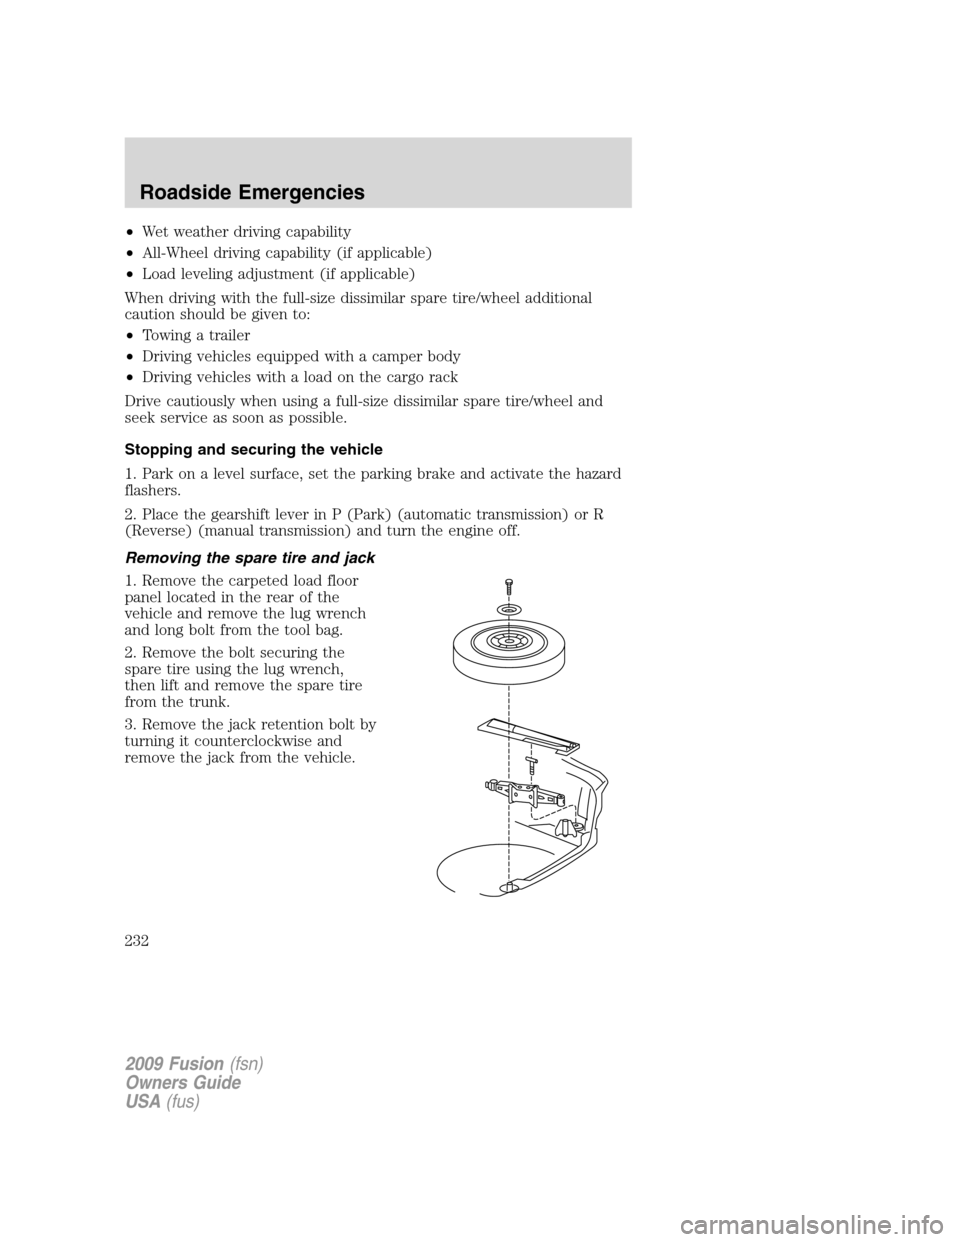
1. Remove the carpeted load floor
panel located in the rear of the
vehicle and remove the lug wrench
and long bolt from the tool bag.
2. Remove the bolt securing the
spare tire using the lug wrench,
then lift and remove the spare tire
from the trunk.
3. Remove the jack retention bolt by
turning it counterclockwise and
remove the jack from the vehicle.
2009 Fusion(fsn)
Owners Guide
USA(fus)
Roadside Emergencies
232
Page 234 of 312

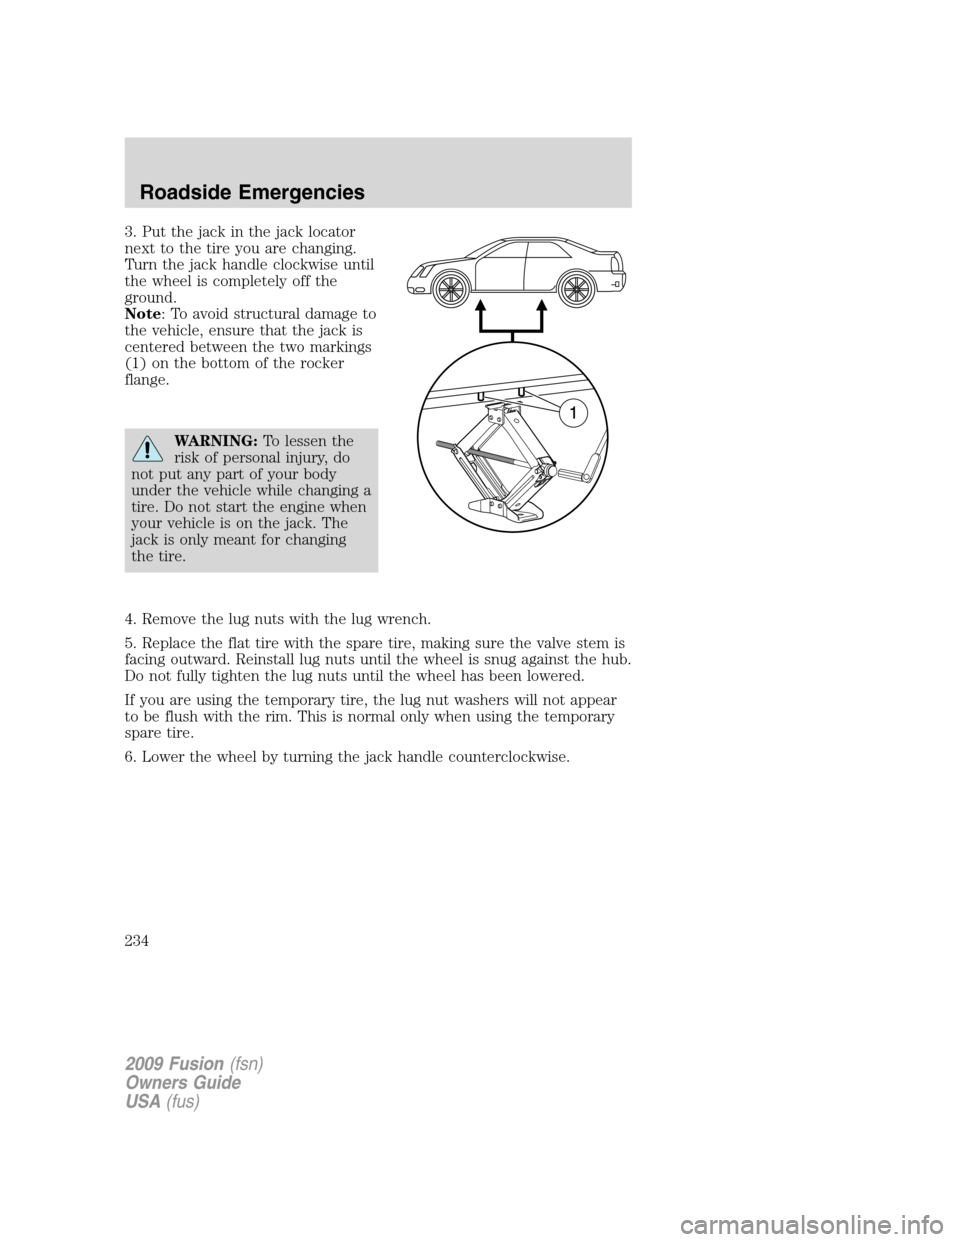
3. Put the jack in the jack locator
next to the tire you are changing.
Turn the jack handle clockwise until
the wheel is completely off the
ground.
Note: To avoid structural damage to
the vehicle, ensure that the jack is
centered between the two markings
(1) on the bottom of the rocker
flange.
WARNING:To lessen the
risk of personal injury, do
not put any part of your body
under the vehicle while changing a
tire. Do not start the engine when
your vehicle is on the jack. The
jack is only meant for changing
the tire.
4. Remove the lug nuts with the lug wrench.
5. Replace the flat tire with the spare tire, making sure the valve stem is
facing outward. Reinstall lug nuts until the wheel is snug against the hub.
Do not fully tighten the lug nuts until the wheel has been lowered.
If you are using the temporary tire, the lug nut washers will not appear
to be flush with the rim. This is normal only when using the temporary
spare tire.
6. Lower the wheel by turning the jack handle counterclockwise.
2009 Fusion(fsn)
Owners Guide
USA(fus)
Roadside Emergencies
234
Page 237 of 312

Preparing your vehicle
When the battery is disconnected or a new battery is installed, the
automatic transmission must relearn its shift strategy. As a result, the
transmission may have firm and/or soft shifts. This operation is
considered normal and will not affect function or durability of the
transmission. Over time, the adaptive learning process will fully update
transmission operation.
1.Use only a 12–volt supply to start your vehicle.
2. Do not disconnect the battery of the disabled vehicle as this could
damage the vehicle’s electrical system.
3. Park the booster vehicle close to the hood of the disabled vehicle
making sure the two vehiclesdo nottouch. Set the parking brake on
both vehicles and stay clear of the engine cooling fan and other moving
parts.
4. Check all battery terminals and remove any excessive corrosion before
you attach the battery cables. Ensure that vent caps are tight and level.
5. Turn the heater fan on in both vehicles to protect from any electrical
surges. Turn all other accessories off.
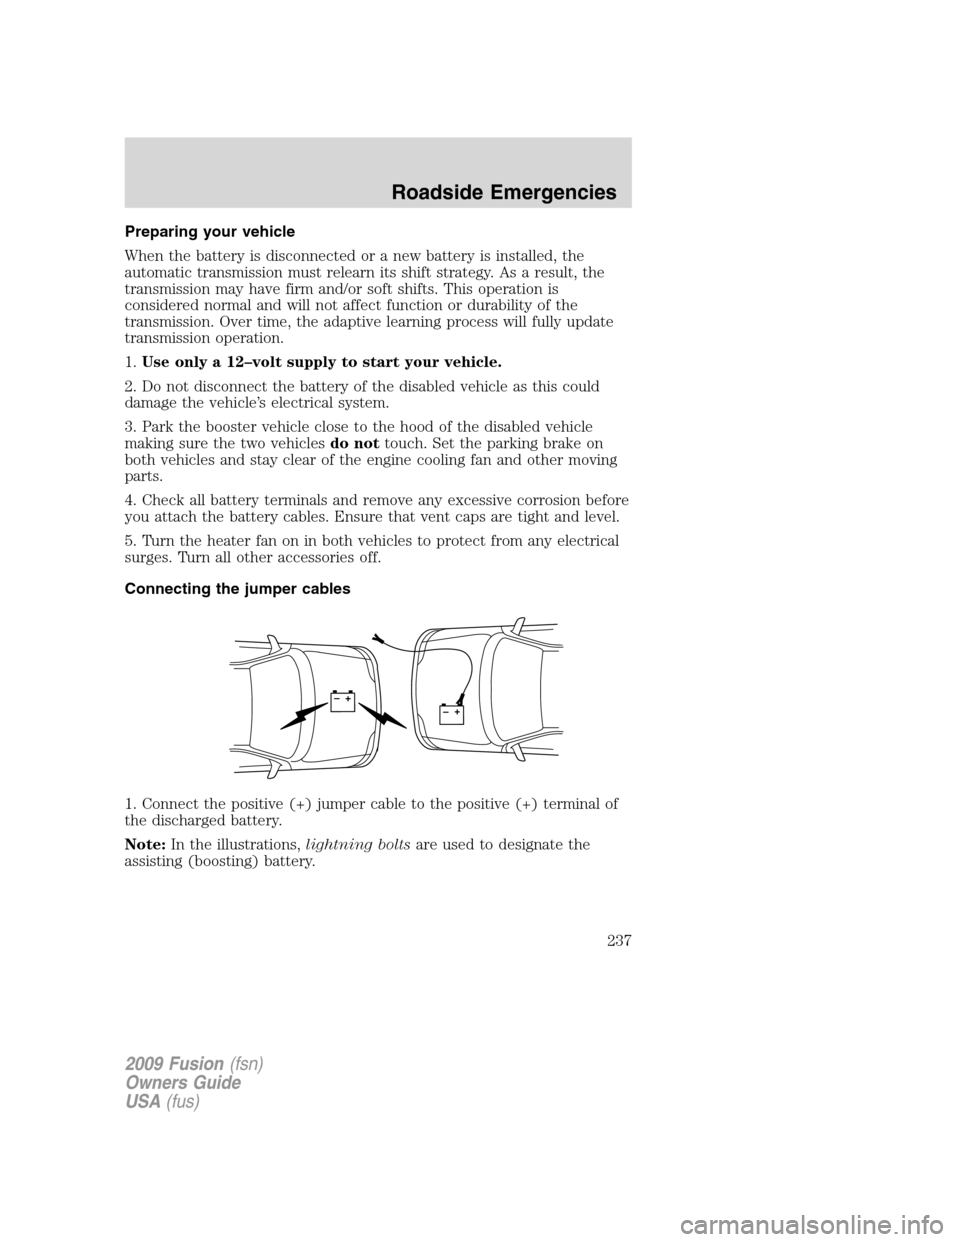
Connecting the jumper cables
1. Connect the positive (+) jumper cable to the positive (+) terminal of
the discharged battery.
Note:In the illustrations,lightning boltsare used to designate the
assisting (boosting) battery.
+–+–
2009 Fusion(fsn)
Owners Guide
USA(fus)
Roadside Emergencies
237
Page 239 of 312
4. Make the final connection of the negative (-) cable to an exposed
metal part of the stalled vehicle’s engine, away from the battery and the
carburetor/fuel injection system.Do notuse fuel lines, engine rocker
covers or the intake manifold asgroundingpoints.
WARNING:Do not connect the end of the second cable to the
negative (-) terminal of the battery to be jumped. A spark may
cause an explosion of the gases that surround the battery.
5. Ensure that the cables are clear of fan blades, belts, moving parts of
both engines, or any fuel delivery system parts.
Jump starting
1. Start the engine of the booster vehicle and run the engine at
moderately increased speed.
2. Start the engine of the disabled vehicle.
3. Once the disabled vehicle has been started, run both engines for an
additional three minutes before disconnecting the jumper cables.
+–+–
2009 Fusion(fsn)
Owners Guide
USA(fus)
Roadside Emergencies
239
Page 241 of 312
3. Remove the jumper cable from the positive (+) terminal of the booster
vehicle’s battery.
4. Remove the jumper cable from the positive (+) terminal of the
disabled vehicle’s battery.
After the disabled vehicle has been started and the jumper cables
removed, allow it to idle for several minutes so the engine computer can
relearnits idle conditions.
+–+–
+–+–
2009 Fusion(fsn)
Owners Guide
USA(fus)
Roadside Emergencies
241