Page 285 of 358

Fuse/Relay
LocationFuse Amp
RatingProtected Circuits
44 G8VA relay Rear wiper
45 10A** Speed control deactivate switch,
Mass air flow sensor, Inline
module VPWR2
46 10A** A/C clutch relay, VPWR3
47 15A** PCM VPWR1
48 15A** PCM VPWR4
49 15A** Heated mirrors
50 Full ISO relay PCM relay
51 — Not used
52 — Not used
53 Full ISO relay Rear defrost relay
54 Full ISO relay Blower motor relay
55 Full ISO relay Starter relay
56 — Not used
57 Full ISO relay Front wiper relay
58 — Not used
* Cartridge Fuses ** Mini Fuses
CHANGING THE TIRES
If you get a flat tire while driving:
•do not brake heavily.
•gradually decrease the vehicle’s speed.
•hold the steering wheel firmly.
•slowly move to a safe place on the side of the road.
Note:The tire pressure monitoring system (TPMS) indicator light will
illuminate when the spare is in use. To restore the full functionality of
the monitoring system, all road wheels equipped with tire pressure
monitoring sensors must be mounted on the vehicle.
Have a flat serviced by an authorized dealer in order to prevent damage
to the TPMS sensor, refer toChanging tires with TPMSin theTires,
Wheels and Loadingchapter. Replace the spare tire with a road tire as
soon as possible.
2009 Taurus X(219)
Owners Guide, 2nd Printing
USA(fus)
Roadside Emergencies
285
ProCarManuals.com
Page 288 of 358
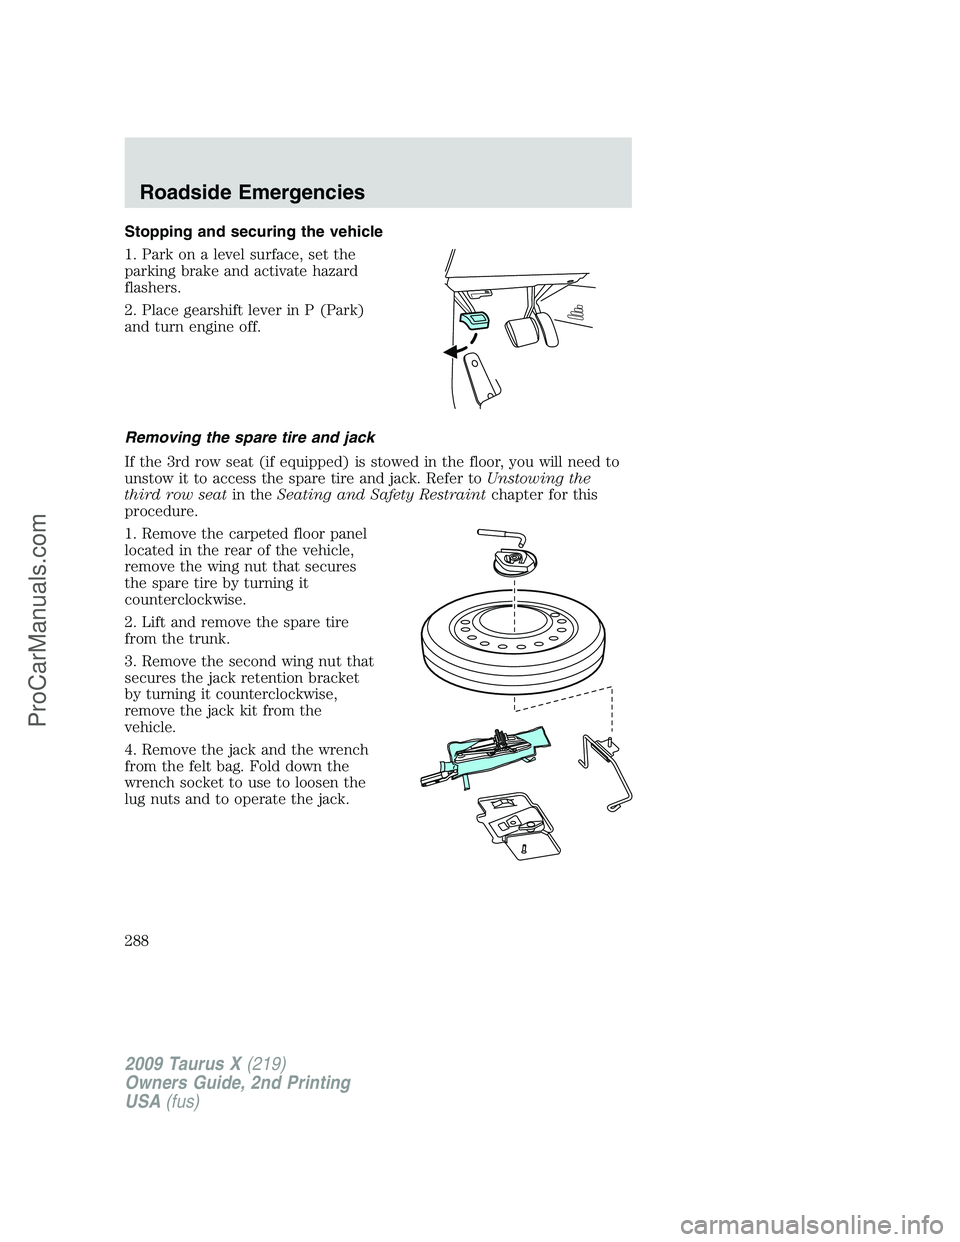
Stopping and securing the vehicle
1. Park on a level surface, set the
parking brake and activate hazard
flashers.
2. Place gearshift lever in P (Park)
and turn engine off.
Removing the spare tire and jack
If the 3rd row seat (if equipped) is stowed in the floor, you will need to
unstow it to access the spare tire and jack. Refer toUnstowing the
third row seatin theSeating and Safety Restraintchapter for this
procedure.
1. Remove the carpeted floor panel
located in the rear of the vehicle,
remove the wing nut that secures
the spare tire by turning it
counterclockwise.
2. Lift and remove the spare tire
from the trunk.
3. Remove the second wing nut that
secures the jack retention bracket
by turning it counterclockwise,
remove the jack kit from the
vehicle.
4. Remove the jack and the wrench
from the felt bag. Fold down the
wrench socket to use to loosen the
lug nuts and to operate the jack.
2009 Taurus X(219)
Owners Guide, 2nd Printing
USA(fus)
Roadside Emergencies
288
ProCarManuals.com
Page 289 of 358
Tire change procedure
WARNING:When one of the front wheels is off the ground, the
transmission alone will not prevent the vehicle from moving or
slipping off the jack, even if the vehicle is in P (Park).
WARNING:To help prevent the vehicle from moving when you
change a tire, be sure to place the transmission in P (Park), set
the parking brake and block (in both directions) the wheel that is
diagonally opposite (other side and end of the vehicle) to the tire
being changed.
WARNING:If the vehicle slips off the jack, you or someone else
could be seriously injured.
WARNING:Do not attempt to change a tire on the side of the
vehicle close to moving traffic. Pull far enough off the road to
avoid the danger of being hit when operating the jack or changing the
wheel.
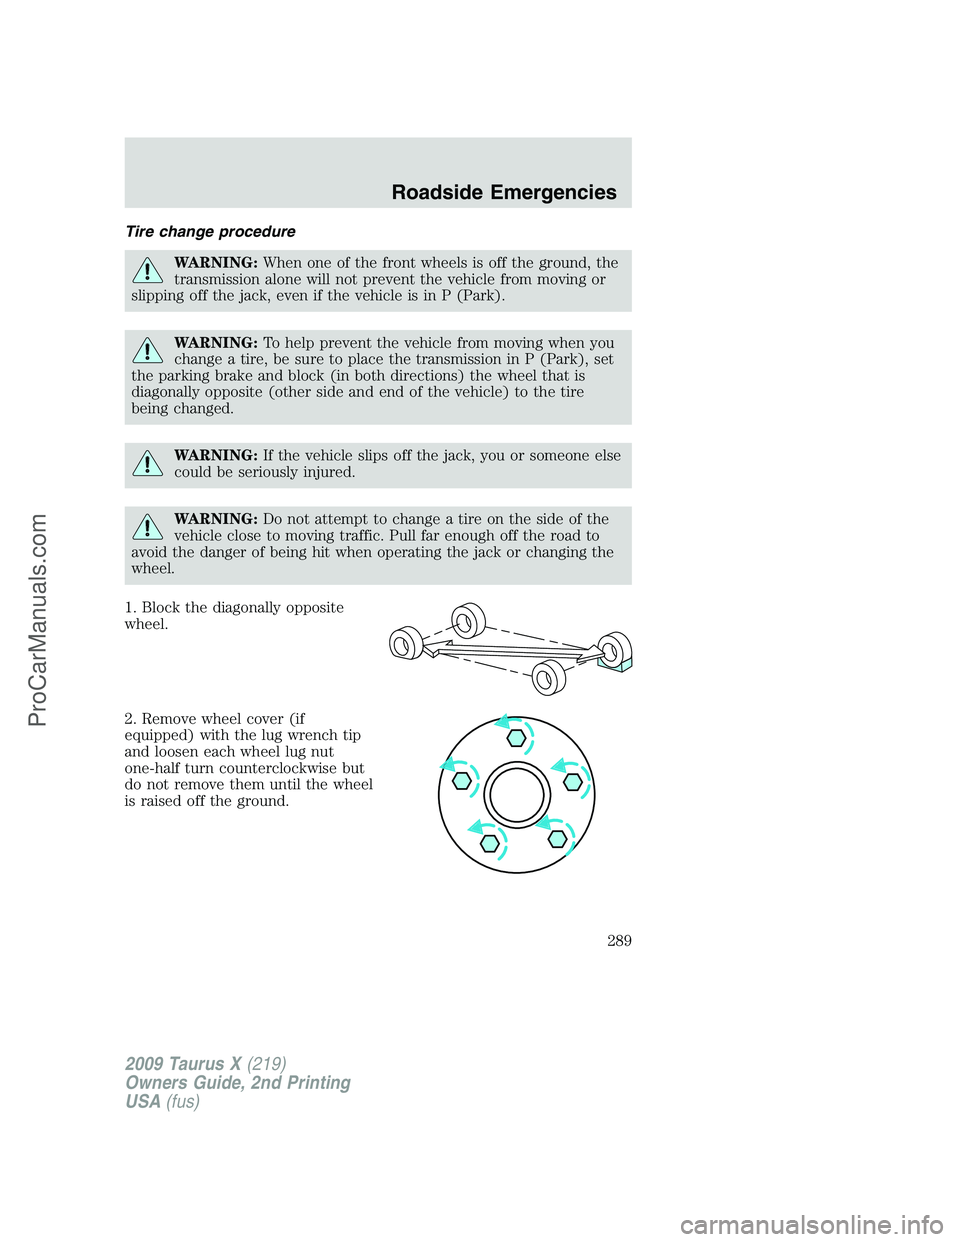
1. Block the diagonally opposite
wheel.
2. Remove wheel cover (if
equipped) with the lug wrench tip
and loosen each wheel lug nut
one-half turn counterclockwise but
do not remove them until the wheel
is raised off the ground.
2009 Taurus X(219)
Owners Guide, 2nd Printing
USA(fus)
Roadside Emergencies
289
ProCarManuals.com
Page 292 of 358
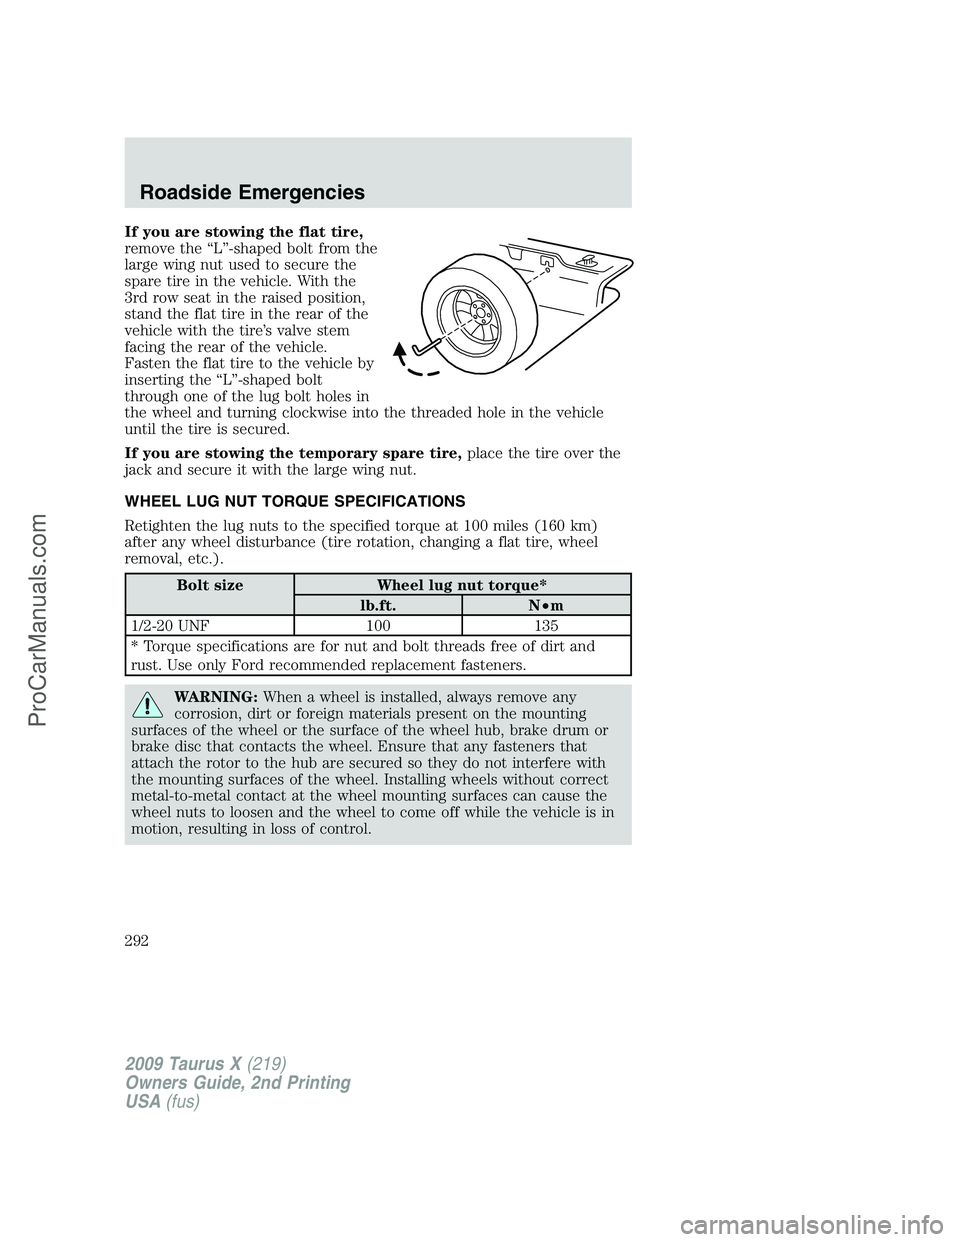
If you are stowing the flat tire,
remove the “L”-shaped bolt from the
large wing nut used to secure the
spare tire in the vehicle. With the
3rd row seat in the raised position,
stand the flat tire in the rear of the
vehicle with the tire’s valve stem
facing the rear of the vehicle.
Fasten the flat tire to the vehicle by
inserting the “L”-shaped bolt
through one of the lug bolt holes in
the wheel and turning clockwise into the threaded hole in the vehicle
until the tire is secured.
If you are stowing the temporary spare tire,place the tire over the
jack and secure it with the large wing nut.
WHEEL LUG NUT TORQUE SPECIFICATIONS
Retighten the lug nuts to the specified torque at 100 miles (160 km)
after any wheel disturbance (tire rotation, changing a flat tire, wheel
removal, etc.).
Bolt size Wheel lug nut torque*
lb.ft. N•m
1/2-20 UNF 100 135
* Torque specifications are for nut and bolt threads free of dirt and
rust. Use only Ford recommended replacement fasteners.
WARNING:When a wheel is installed, always remove any
corrosion, dirt or foreign materials present on the mounting
surfaces of the wheel or the surface of the wheel hub, brake drum or
brake disc that contacts the wheel. Ensure that any fasteners that
attach the rotor to the hub are secured so they do not interfere with
the mounting surfaces of the wheel. Installing wheels without correct
metal-to-metal contact at the wheel mounting surfaces can cause the
wheel nuts to loosen and the wheel to come off while the vehicle is in
motion, resulting in loss of control.
2009 Taurus X(219)
Owners Guide, 2nd Printing
USA(fus)
Roadside Emergencies
292
ProCarManuals.com
Page 293 of 358
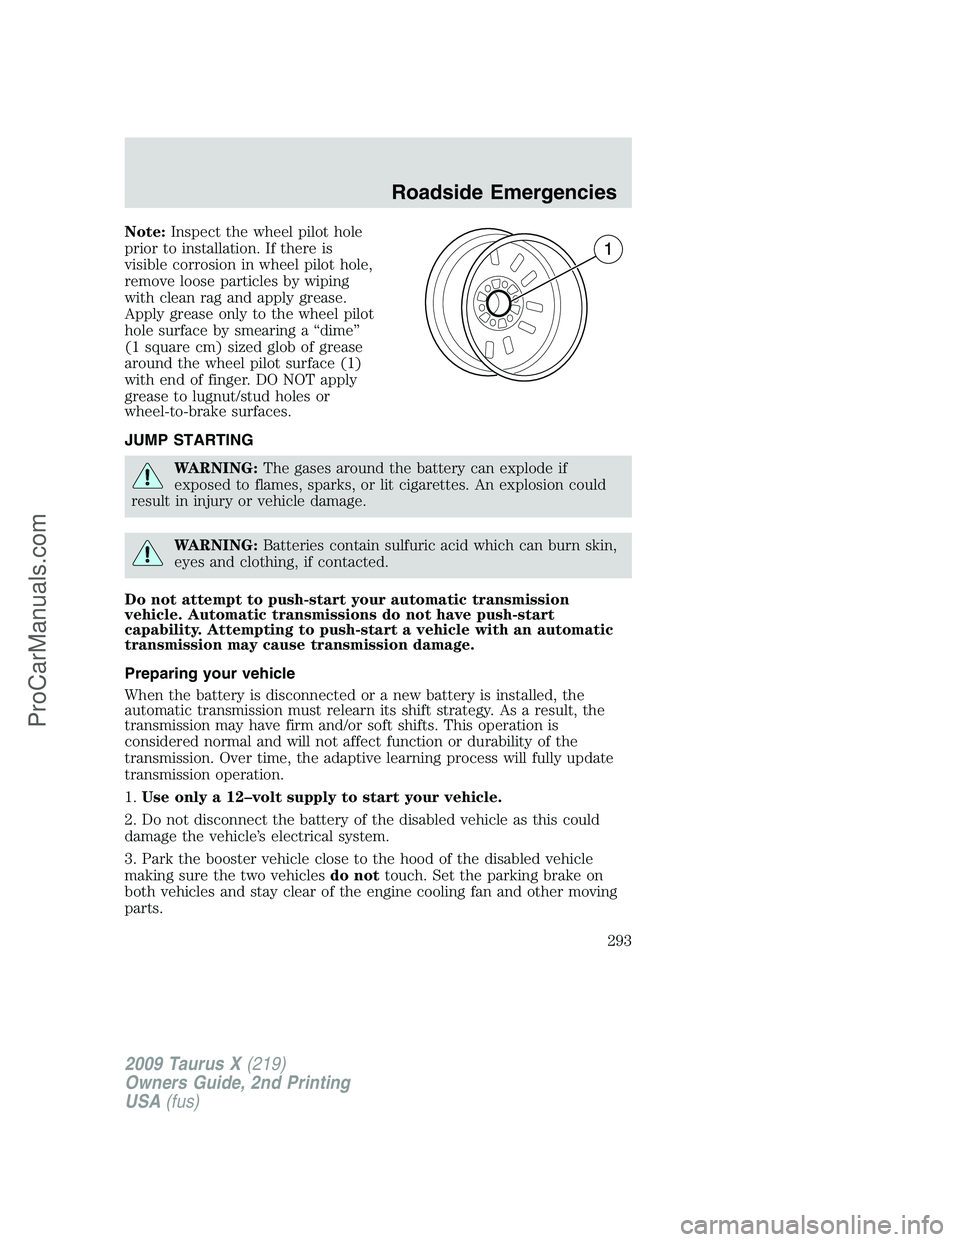
Note:Inspect the wheel pilot hole
prior to installation. If there is
visible corrosion in wheel pilot hole,
remove loose particles by wiping
with clean rag and apply grease.
Apply grease only to the wheel pilot
hole surface by smearing a “dime”
(1 square cm) sized glob of grease
around the wheel pilot surface (1)
with end of finger. DO NOT apply
grease to lugnut/stud holes or
wheel-to-brake surfaces.
JUMP STARTING
WARNING:The gases around the battery can explode if
exposed to flames, sparks, or lit cigarettes. An explosion could
result in injury or vehicle damage.
WARNING:Batteries contain sulfuric acid which can burn skin,
eyes and clothing, if contacted.
Do not attempt to push-start your automatic transmission
vehicle. Automatic transmissions do not have push-start
capability. Attempting to push-start a vehicle with an automatic
transmission may cause transmission damage.
Preparing your vehicle
When the battery is disconnected or a new battery is installed, the
automatic transmission must relearn its shift strategy. As a result, the
transmission may have firm and/or soft shifts. This operation is
considered normal and will not affect function or durability of the
transmission. Over time, the adaptive learning process will fully update
transmission operation.
1.Use only a 12–volt supply to start your vehicle.
2. Do not disconnect the battery of the disabled vehicle as this could
damage the vehicle’s electrical system.
3. Park the booster vehicle close to the hood of the disabled vehicle
making sure the two vehiclesdo nottouch. Set the parking brake on
both vehicles and stay clear of the engine cooling fan and other moving
parts.
2009 Taurus X(219)
Owners Guide, 2nd Printing
USA(fus)
Roadside Emergencies
293
ProCarManuals.com
Page 299 of 358
If the vehicle is towed by other means or incorrectly, vehicle
damage may occur.
Ford Motor Company produces a towing manual for all authorized tow
truck operators. Have your tow truck operator refer to this manual for
proper hook-up and towing procedures for your vehicle.
Emergency towing
In case of a roadside emergency with a disabled vehicle (without access
to wheel dollies, car hauling trailer, or flatbed transport vehicle) your
vehicle (regardless of transmission powertrain configuration) can be flat
towed (all wheels on the ground) under the following conditions:
•Vehicle is facing forward so that it is being towed in a forward
direction.
•Place the transmission in N (Neutral). Refer toBrake shift interlock
in theDrivingchapter for specific instructions if you cannot move the
gear shift lever into N (Neutral).
•Maximum speed is not to exceed 35 mph (56 km/h).
•Maximum distance is 50 miles (80 km).
2009 Taurus X(219)
Owners Guide, 2nd Printing
USA(fus)
Roadside Emergencies
299
ProCarManuals.com
Page 308 of 358
WAXING
•Wash the vehicle first.
•Do not use waxes that contain abrasives; use Motorcraft Premium
Liquid Wax (ZC-53-A), which is available from your authorized dealer,
or an equivalent quality product.
•Do not allow paint sealant to come in contact with any non-body
(low-gloss black) colored trim, such as grained door handles, roof
racks, bumpers, side moldings, mirror housings or the windshield cowl
area. The paint sealant will “gray” or stain the parts over time.
PAINT CHIPS
Your authorized dealer has touch-up paint to match your vehicle’s color.
Take your color code (printed on a sticker in the driver’s door jamb) to
your authorized dealer to ensure you get the correct color.
•Remove particles such as bird droppings, tree sap, insect deposits, tar
spots, road salt and industrial fallout before repairing paint chips.
•Always read the instructions before using the products.
ALUMINUM WHEELS AND WHEEL COVERS
Aluminum wheels and wheel covers are coated with a clearcoat paint
finish. In order to maintain their shine:
•Clean weekly with Motorcraft Wheel and Tire Cleaner (ZC-37-A),
which is available from your authorized dealer. Heavy dirt and brake
dust accumulation may require agitation with a sponge. Rinse
thoroughly with a strong stream of water.
•Never apply any cleaning chemical to hot or warm wheel rims or
covers.
•Some automatic car washes may cause damage to the finish on your
wheel rims or covers. Chemical-strength cleaners, or cleaning
chemicals, in combination with brush agitation to remove brake dust
and dirt, could wear away the clearcoat finish over time.
•Do not use hydrofluoric acid-based or high caustic-based wheel
cleaners, steel wool, fuels or strong household detergent.
•To remove tar and grease, use Motorcraft Bug and Tar Remover
(ZC-42), available from your authorized dealer.
2009 Taurus X(219)
Owners Guide, 2nd Printing
USA(fus)
Cleaning
308
ProCarManuals.com
Page 314 of 358
SERVICE RECOMMENDATIONS
To help you service your vehicle, we providescheduled maintenance
informationwhich makes tracking routine service easy.
If your vehicle requires professional service, your authorized dealer can
provide the necessary parts and service. Check yourWarranty
Guide/Customer Information Guideto find out which parts and
services are covered.
Use only recommended fuels, lubricants, fluids and service parts
conforming to specifications. Motorcraft parts are designed and built to
provide the best performance in your vehicle.
PRECAUTIONS WHEN SERVICING YOUR VEHICLE
•Do not work on a hot engine.
•Make sure that nothing gets caught in moving parts.
•Do not work on a vehicle with the engine running in an enclosed
space, unless you are sure you have enough ventilation.
•Keep all open flames and other burning (cigarettes) material away
from the battery and all fuel related parts.
Working with the engine off
1. Set the parking brake and shift to P (Park).
2. Turn off the engine and remove the key.
3. Block the wheels.
Working with the engine on
1. Set the parking brake and shift to P (Park).
2. Block the wheels.
WARNING:To reduce the risk of vehicle damage and/or
personal burn injuries, do not start your engine with the air
cleaner removed and do not remove it while the engine is running.
2009 Taurus X(219)
Owners Guide, 2nd Printing
USA(fus)
Maintenance and Specifications
314
ProCarManuals.com