2009 FORD F650 brake
[x] Cancel search: brakePage 179 of 276

Tightening steering column joint bolts
As a good maintenance practice, it is recommended that steering column
joint bolts be checked for tightness every 60,000 miles (96,000 km) or
annually, whichever occurs first. DO NOT OVERTIGHTEN.
Power steering
Whenever the power steering’s hydraulic system has been drained and
refilled for any reason, air must be bled from the system before returning
the vehicle to service. Failure to properly bleed the hydraulic system can
result in degradation of power system performance.
Consult your dealer who is aware of the proper procedures for filling and
bleeding the system.
OPENING THE HOOD
The hood and fenders are held in position by a latch located on each
fender.
WARNING:The parking brake must be fully set before opening
the hood or possible personal injury may occur.
WARNING:To reduce the risk of the possibility of personal
injury, never stand beneath the hood when it is being raised or
lowered.
WARNING:If you must leave the engine running while checking
under the hood, do not allow any loose clothing, jewelry, hair or
other items to get near moving engine components or possible personal
injury may occur.
To open the hood:
1. Set the parking brake, shift into N (Neutral) (automatic transmission)
or 1 (First) (manual transmission) and turn the engine off.
2009 F-650/750(f67)
Supplement
USA(fus)
Maintenance and Specifications
179
Page 190 of 276
•The engine may run rough and produce white smoke while air is in
the fuel system. This is normal and should stop after a short period of
time.
FUEL CONSUMPTION IMPROVEMENT MEASURES
There are two important factors you can control to improve fuel
economy: the mechanical condition of your vehicle and how you drive it.
A properly maintained vehicle will deliver better performance than a
neglected vehicle. Always follow your maintenance schedule to keep your
vehicle in top operating condition.
Also, your driving habits have a significant influence on use of fuel. By
following these suggestions, you can stretch your fuel use:
•Avoid changes in speed as much as possible.
•Anticipate changing traffic conditions. Sudden stops and fast
acceleration waste fuel.
•Avoid extensive idling.
•Do not drive with your foot resting on the brake pedal.
Essentials of good fuel economy
Measuring techniques
Your best source of information about actual fuel economy is you, the
driver. You must gather information as accurately and consistently as
possible. Fuel expense, frequency of fill-ups or fuel gauge readings are
NOT accurate as a measure of fuel economy. We do not recommend
taking fuel economy measurements during the first 1,000 miles
(1,600 km) of driving (engine break-in period). You will get a more
accurate measurement after 2,000–3,000 miles (3,000–5,000 km).
The advertised fuel capacity of the fuel tank(s) on your vehicle is equal
to the rated refill capacity of the fuel tank(s) as listed inFuel tanksin
this chapter. The advertised capacity is the amount of the Indicated
Capacity and the Empty Reserve combined. Indicated Capacity is the
difference in the amount of fuel in a full tank and a tank when the fuel
gauge indicates empty. Empty Reserve is the small amount of usable fuel
remaining in the fuel tank after the fuel gauge indicates empty.
The amount of Empty Reserve varies and should not be relied
upon to increase driving range. When refueling your vehicle after
the fuel gauge indicates empty, you might not be able to refuel
the full amount of the advertised capacity of the fuel tank due to
the empty reserve still present in the tank.
2009 F-650/750(f67)
Supplement
USA(fus)
Maintenance and Specifications
190
Page 192 of 276

Habits
•Smooth, moderate operation can yield up to 10% savings in fuel.
•Steady speeds without stopping will usually give the best fuel
economy.
•Anticipate stopping; slowing down may eliminate the need to stop.
•Sudden or hard accelerations may reduce fuel economy.
•Slow down gradually.
•Driving at reasonable speeds (traveling at 55 mph [88 km/h] uses 15%
less fuel than traveling at 65 mph [105 km/h]).
•Using the air conditioner or defroster may reduce fuel economy.
•Resting your foot on the brake pedal while driving may reduce fuel
economy.
Conditions
•Carrying unnecessary weight may reduce fuel economy.
•Fuel economy may decrease with lower temperatures during the first
8–10 miles (12–16 km) of driving.
•Flat terrain driving improves fuel economy over hilly roads.
•Transmissions give their best fuel economy when operated in the top
cruise gear and with steady pressure on the accelerator.
•Close windows for highway driving.
DIESEL PARTICULATE FILTER (DPF)
Your vehicle is equipped with a diesel particulate filter (DPF), as part of
the after-treatment exhaust system, to trap soot and other large particles
produced by the engine combustion process. The soot that accumulates
in the filter must be periodically reduced to ash to prevent excessive
exhaust restriction. The soot reduction process, also known as “filter
regeneration,” is generally performed automatically by your engine and
after-treatment system.
WARNING:The normal operating temperature of the exhaust
system is very high. Never work around, or attempt to repair,
any part of the exhaust system until it has cooled. Use special care
when working around the diesel particulate filter. The DPF heats up to
a high temperature after only a short period of engine operation, and
can remain hot even after the engine is turned off. Failure to follow
these instructions may result in serious personal injury.
2009 F-650/750(f67)
Supplement
USA(fus)
Maintenance and Specifications
192
Page 195 of 276
3. Remove feet from the accelerator pedal and clutch pedal (if
equipped).
4. Set the parking brake.
5.Within 5 seconds of setting the parking brake,remove foot from
the service brake pedal.
When these steps are performed successfully in the order outlined above,
the DPF lamp will begin flashing at a rate of once every 10 seconds. The
engine speed may also increase slightly. To allow parked regeneration to
continue uninterrupted:
1. The vehicle must remain parked
2. The transmission must remain in P (Park) or N (Neutral) (as
previously described in Step 2).
3. The accelerator pedal, service brake pedal, and clutch pedal (if
equipped) must not be depressed
4. The parking brake must remain set
On average (depending on filter level and other factors), the process will
take 20–30 minutes to complete. The DPF lamp will turn off when the
process is complete. Repeat Steps 1–5, if parked regeneration is
interrupted.
To discontinue parked regeneration (Cummins engine only)
Depress any of the floor pedals to discontinue parked regeneration.
Diesel particulate filter maintenance and service
The DPF is designed to retain a relatively large amount of residual ash
and provide many miles and hours of maintenance-free operation. At
some point, generally beyond 150,000 miles (240,000 km) or 5,000 hours
of operation (whichever comes first), the DPF will require professional
cleaning to remove the accumulated ash
The exact number of miles or hours of operation will vary greatly
depending upon vehicle/engine loading and operating conditions, ash
content of the engine oil, and quality of the diesel fuel used in your
truck. Adhering to your engine manufacturer’s recommended oil and fuel
specifications will maximize the miles and hours of operation before a
DPF professional cleaning is required. Refer to your engine
manufacturer’s owner’s manual for more details regarding recommended
maintenance and service of your DPF.
2009 F-650/750(f67)
Supplement
USA(fus)
Maintenance and Specifications
195
Page 197 of 276

•The fan ratio should not be changed and the fan spacer dimensions
and positions should not be altered.
•Inspect the fan clutch for proper operation, make sure that the fan is
disengaged when cooling of the engine is not required.
•Check for proper operation of radiator shutters, if equipped. The
shutters should be open during normal operating temperatures.
Engine and Driveline System
•Transmission Enclosure:inspect for cracks, holes, and tears. Clean
any deposits such as oil, dirt, and stones.
•Engine valve covers and block covers are made to damp out engine
mechanical noise and, if needed, should be replaced with
recommended parts. Check for mechanical isolations.
Exhaust System
•Inspect the exhaust system for leaks at various joint connections and
tighten the clamps.
•Do a visual inspection for cracks or holes in the muffler and tail pipe.
•Always use the recommended parts when items need to be replaced.
•The tail pipe elbow or offset tail pipe orientation must not be changed
from the standard position as originally received.
•To avoid abnormal changes in vehicle sound levels, it is necessary for
the owner to perform inspections and necessary maintenance at the
intervals shown in theScheduled Maintenance Guidechapter.
POWER STEERING FLUID
Check the power steering fluid level using the following procedure. If
adding fluid is necessary, refer toLubricant Specificationsin this
chapter for the proper fluid type. Refer to theScheduled Maintenance
Guidechapter for the recommended service intervals.
1. Set the parking brake, shift into N (Neutral) (automatic transmission)
or 1 (First) (manual transmission) and turn the engine off.
2. Open the hood.
3. Clean the top of the power steering fluid reservoir.
4. Remove the dipstick from the reservoir and wipe the dipstick clean.
5. Reinstall the dipstick. Remove it again and check the fluid level.
2009 F-650/750(f67)
Supplement
USA(fus)
Maintenance and Specifications
197
Page 198 of 276
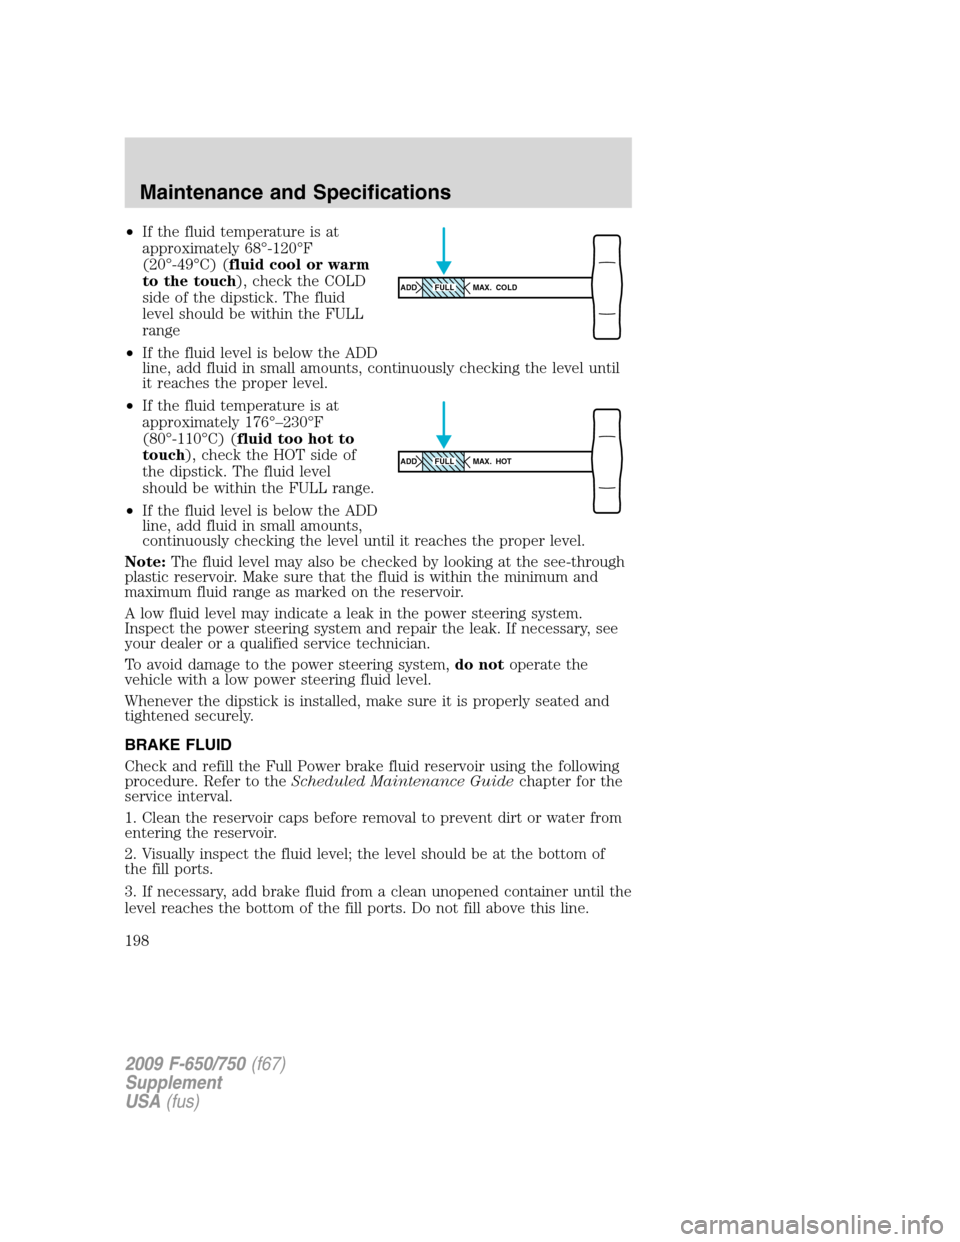
•If the fluid temperature is at
approximately 68°-120°F
(20°-49°C) (fluid cool or warm
to the touch), check the COLD
side of the dipstick. The fluid
level should be within the FULL
range
•If the fluid level is below the ADD
line, add fluid in small amounts, continuously checking the level until
it reaches the proper level.
•If the fluid temperature is at
approximately 176°–230°F
(80°-110°C) (fluid too hot to
touch), check the HOT side of
the dipstick. The fluid level
should be within the FULL range.
•If the fluid level is below the ADD
line, add fluid in small amounts,
continuously checking the level until it reaches the proper level.
Note:The fluid level may also be checked by looking at the see-through
plastic reservoir. Make sure that the fluid is within the minimum and
maximum fluid range as marked on the reservoir.
A low fluid level may indicate a leak in the power steering system.
Inspect the power steering system and repair the leak. If necessary, see
your dealer or a qualified service technician.
To avoid damage to the power steering system,do notoperate the
vehicle with a low power steering fluid level.
Whenever the dipstick is installed, make sure it is properly seated and
tightened securely.
BRAKE FLUID
Check and refill the Full Power brake fluid reservoir using the following
procedure. Refer to theScheduled Maintenance Guidechapter for the
service interval.
1. Clean the reservoir caps before removal to prevent dirt or water from
entering the reservoir.
2. Visually inspect the fluid level; the level should be at the bottom of
the fill ports.
3. If necessary, add brake fluid from a clean unopened container until the
level reaches the bottom of the fill ports. Do not fill above this line.
ADD MAX. COLDFULL
ADD MAX. HOTFULL
2009 F-650/750(f67)
Supplement
USA(fus)
Maintenance and Specifications
198
Page 199 of 276
4. Use only a DOT 3 brake fluid certified to meet manufacturer
specifications. Refer toLubricant specificationsin this chapter.
WARNING:Brake fluid is toxic. If brake fluid contacts the eyes,
flush eyes with running water for 15 minutes. Seek medical
attention if irritation persists. If taken internally, drink water and
induce vomiting. Seek medical attention immediately.
WARNING:If you use a brake fluid that is not DOT 3, you will
cause permanent damage to your brakes.
WARNING:Do not let the reservoir for the master cylinder run
dry. This may cause the brakes to fail.
CLUTCH FLUID/LINKAGE ADJUSTMENTS
Clutch fluid (if equipped)
Check the clutch fluid level. Refer to theScheduled Maintenance
Guidechapter for the service interval schedules.
During normal operation, the fluid level in the clutch reservoir should
remain constant. If the fluid level drops, maintain the fluid level at the
step in the reservoir.
Use only a DOT 3 brake fluid designed to meet manufacturer
specifications. Refer toLubricant specificationsin this chapter.
WARNING:Carefully read cautionary information on product
label. For MEDICAL EMERGENCY INFORMATION, contact a
physician or Poison Control Center immediately; on Ford-Motorcraft
products call: 1-800-959-3673 (FORD). Failure to follow these
instructions may result in personal injury.
2009 F-650/750(f67)
Supplement
USA(fus)
Maintenance and Specifications
199
Page 200 of 276
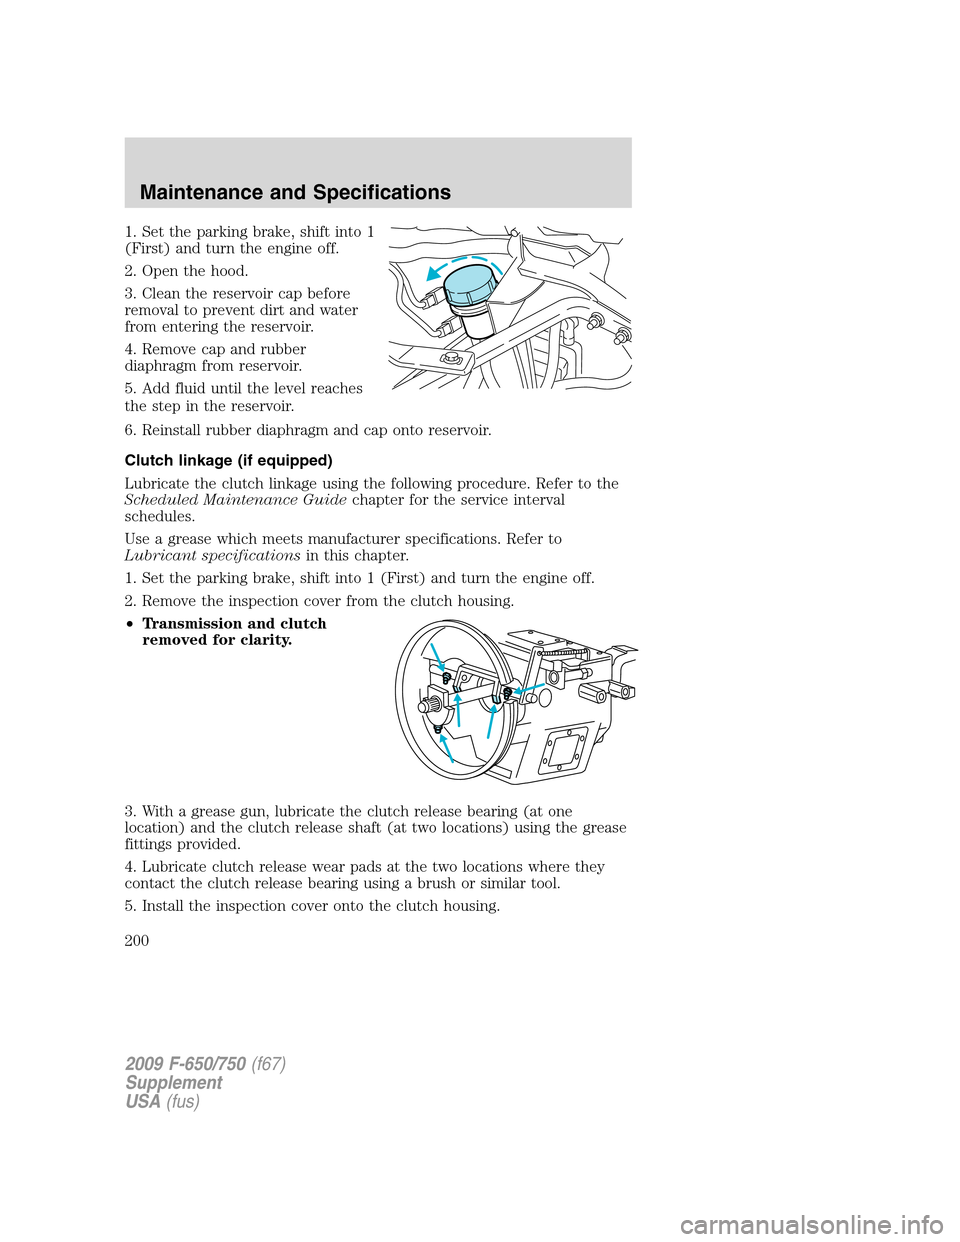
1. Set the parking brake, shift into 1
(First) and turn the engine off.
2. Open the hood.
3. Clean the reservoir cap before
removal to prevent dirt and water
from entering the reservoir.
4. Remove cap and rubber
diaphragm from reservoir.
5. Add fluid until the level reaches
the step in the reservoir.
6. Reinstall rubber diaphragm and cap onto reservoir.
Clutch linkage (if equipped)
Lubricate the clutch linkage using the following procedure. Refer to the
Scheduled Maintenance Guidechapter for the service interval
schedules.
Use a grease which meets manufacturer specifications. Refer to
Lubricant specificationsin this chapter.
1. Set the parking brake, shift into 1 (First) and turn the engine off.
2. Remove the inspection cover from the clutch housing.
•Transmission and clutch
removed for clarity.
3. With a grease gun, lubricate the clutch release bearing (at one
location) and the clutch release shaft (at two locations) using the grease
fittings provided.
4. Lubricate clutch release wear pads at the two locations where they
contact the clutch release bearing using a brush or similar tool.
5. Install the inspection cover onto the clutch housing.
2009 F-650/750(f67)
Supplement
USA(fus)
Maintenance and Specifications
200