2009 FORD F350 low beam
[x] Cancel search: low beamPage 19 of 419

Door ajar (RTT):Displays when
the ignition is in the on position and
any door is open.
Transmission Tow/Haul Feature
(automatic transmission) (if
equipped):The Tow Haul light
remains illuminated as long as the
Tow/Haul feature is activated. Refer to theDrivingchapter for
transmission function and operation. If the light remains illuminated and
will not cancel using the Tow/Haul switch located on the end of the gear
shift lever, have the system serviced immediately or damage to the
transmission could occur.
Four wheel drive low (if
equipped):Illuminates when
four-wheel drive low is engaged.
Four wheel drive high (if
equipped):Illuminates when
four-wheel drive high is engaged.
Anti-theft system:Flashes when
the SecuriLock™ Passive Anti-theft
System has been activated.
Speed control (if equipped):
Illuminates when the speed control
is activated. Turns off when the
speed control system is deactivated.
Turn signal:Illuminates when the
left or right turn signal or the
hazard lights are turned on. If the
indicators stay on or flash faster, check for a burned out bulb.
High beams:Illuminates when the
high beam headlamps are turned on.
4x4
LOW
4x4
HIGH
2009 F-250/350/450/550(f23)
Owners Guide, 3rd Printing
USA(fus)
Instrument Cluster
19
ProCarManuals.com
Page 91 of 419
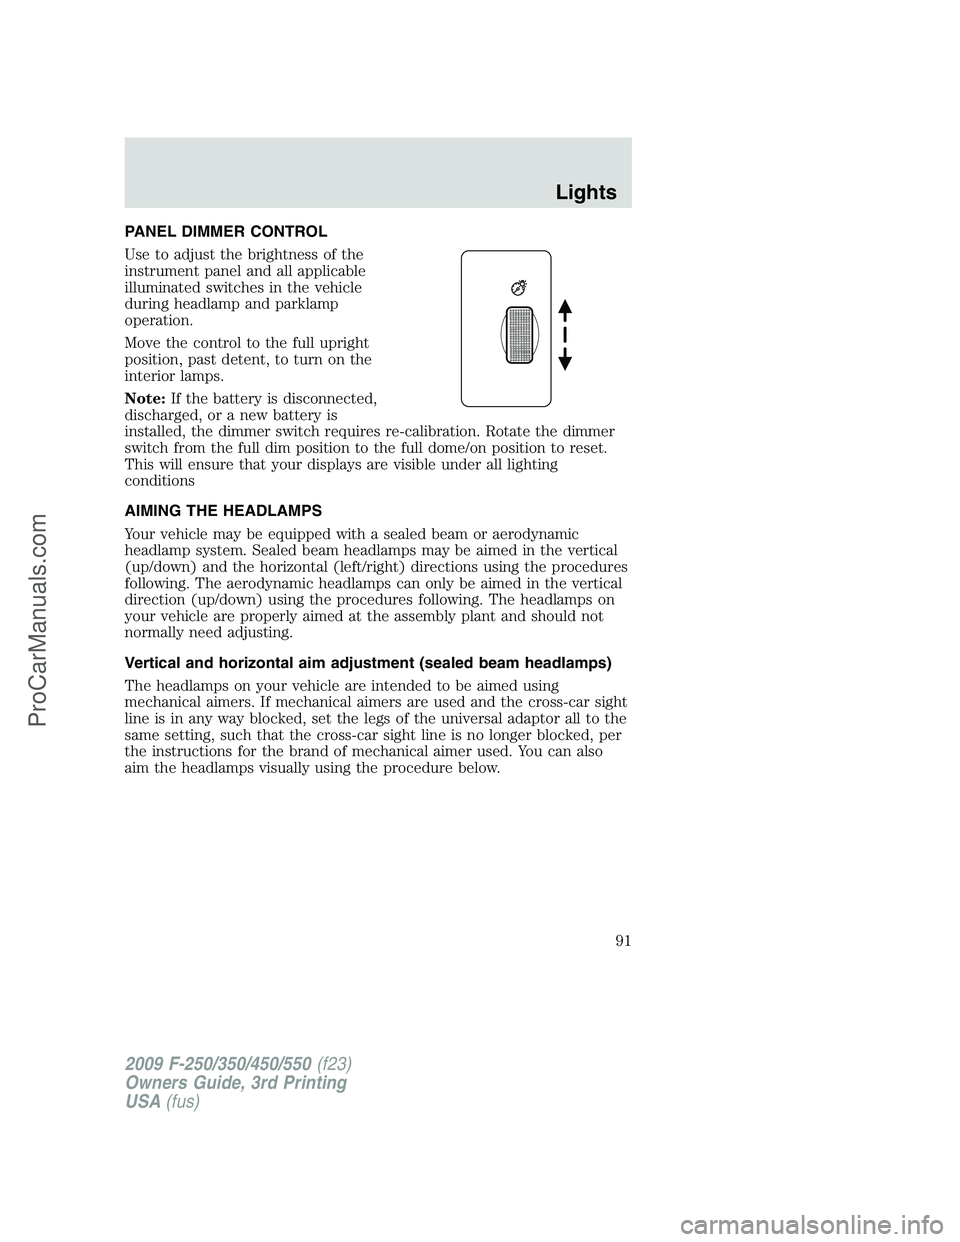
PANEL DIMMER CONTROL
Use to adjust the brightness of the
instrument panel and all applicable
illuminated switches in the vehicle
during headlamp and parklamp
operation.
Move the control to the full upright
position, past detent, to turn on the
interior lamps.
Note:If the battery is disconnected,
discharged, or a new battery is
installed, the dimmer switch requires re-calibration. Rotate the dimmer
switch from the full dim position to the full dome/on position to reset.
This will ensure that your displays are visible under all lighting
conditions
AIMING THE HEADLAMPS
Your vehicle may be equipped with a sealed beam or aerodynamic
headlamp system. Sealed beam headlamps may be aimed in the vertical
(up/down) and the horizontal (left/right) directions using the procedures
following. The aerodynamic headlamps can only be aimed in the vertical
direction (up/down) using the procedures following. The headlamps on
your vehicle are properly aimed at the assembly plant and should not
normally need adjusting.
Vertical and horizontal aim adjustment (sealed beam headlamps)
The headlamps on your vehicle are intended to be aimed using
mechanical aimers. If mechanical aimers are used and the cross-car sight
line is in any way blocked, set the legs of the universal adaptor all to the
same setting, such that the cross-car sight line is no longer blocked, per
the instructions for the brand of mechanical aimer used. You can also
aim the headlamps visually using the procedure below.
2009 F-250/350/450/550(f23)
Owners Guide, 3rd Printing
USA(fus)
Lights
91
ProCarManuals.com
Page 92 of 419
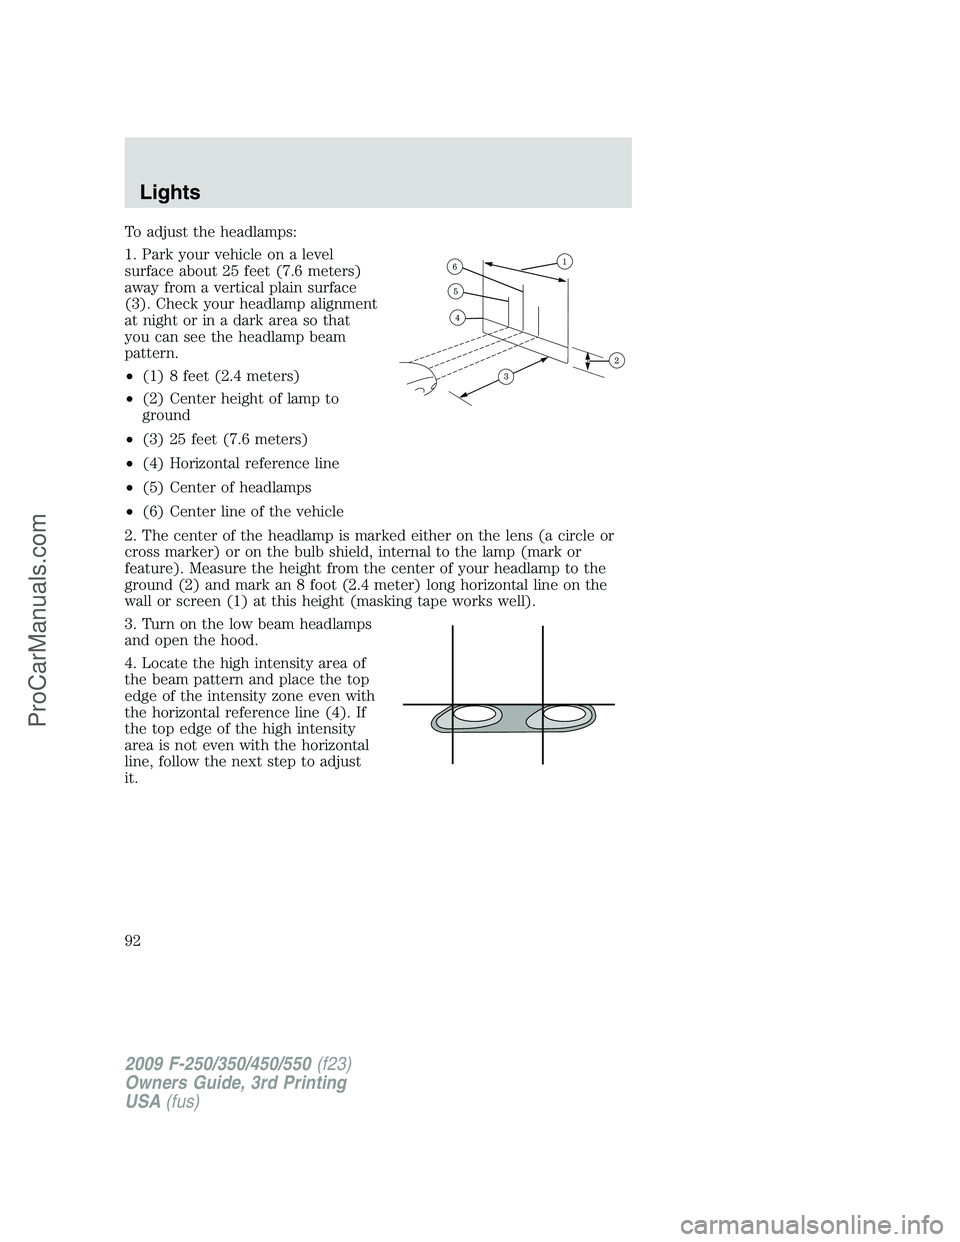
To adjust the headlamps:
1. Park your vehicle on a level
surface about 25 feet (7.6 meters)
away from a vertical plain surface
(3). Check your headlamp alignment
at night or in a dark area so that
you can see the headlamp beam
pattern.
•(1) 8 feet (2.4 meters)
•(2) Center height of lamp to
ground
•(3) 25 feet (7.6 meters)
•(4) Horizontal reference line
•(5) Center of headlamps
•(6) Center line of the vehicle
2. The center of the headlamp is marked either on the lens (a circle or
cross marker) or on the bulb shield, internal to the lamp (mark or
feature). Measure the height from the center of your headlamp to the
ground (2) and mark an 8 foot (2.4 meter) long horizontal line on the
wall or screen (1) at this height (masking tape works well).
3. Turn on the low beam headlamps
and open the hood.
4. Locate the high intensity area of
the beam pattern and place the top
edge of the intensity zone even with
the horizontal reference line (4). If
the top edge of the high intensity
area is not even with the horizontal
line, follow the next step to adjust
it.
2009 F-250/350/450/550(f23)
Owners Guide, 3rd Printing
USA(fus)
Lights
92
ProCarManuals.com
Page 93 of 419
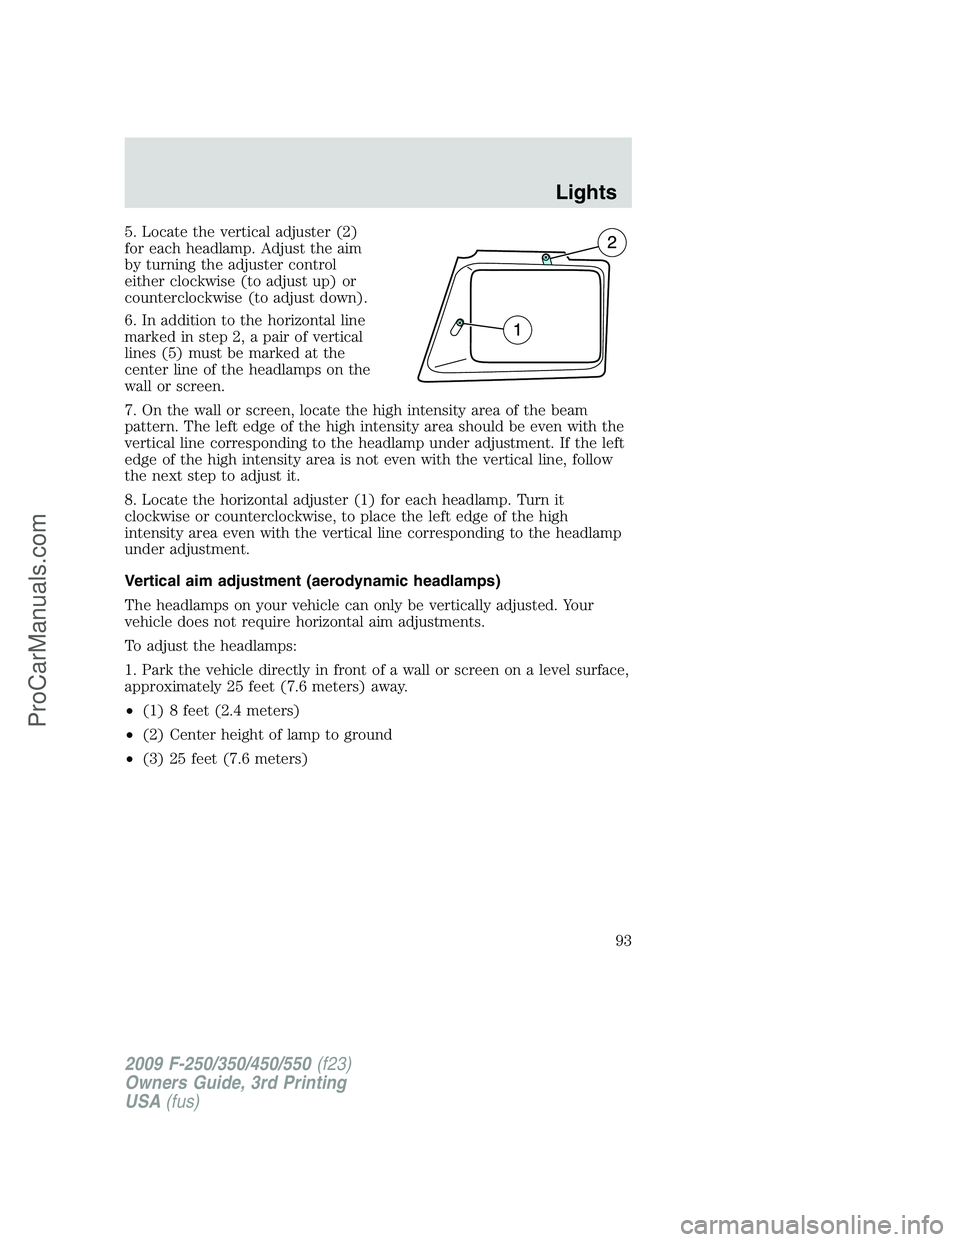
5. Locate the vertical adjuster (2)
for each headlamp. Adjust the aim
by turning the adjuster control
either clockwise (to adjust up) or
counterclockwise (to adjust down).
6. In addition to the horizontal line
marked in step 2, a pair of vertical
lines (5) must be marked at the
center line of the headlamps on the
wall or screen.
7. On the wall or screen, locate the high intensity area of the beam
pattern. The left edge of the high intensity area should be even with the
vertical line corresponding to the headlamp under adjustment. If the left
edge of the high intensity area is not even with the vertical line, follow
the next step to adjust it.
8. Locate the horizontal adjuster (1) for each headlamp. Turn it
clockwise or counterclockwise, to place the left edge of the high
intensity area even with the vertical line corresponding to the headlamp
under adjustment.
Vertical aim adjustment (aerodynamic headlamps)
The headlamps on your vehicle can only be vertically adjusted. Your
vehicle does not require horizontal aim adjustments.
To adjust the headlamps:
1. Park the vehicle directly in front of a wall or screen on a level surface,
approximately 25 feet (7.6 meters) away.
•(1) 8 feet (2.4 meters)
•(2) Center height of lamp to ground
•(3) 25 feet (7.6 meters)
2009 F-250/350/450/550(f23)
Owners Guide, 3rd Printing
USA(fus)
Lights
93
ProCarManuals.com
Page 94 of 419

•(4) Horizontal reference line
2. Measure the height from the
center of your headlamp (indicated
by a 3.0 mm circle on the lens) to
the ground and mark an 8 foot
(2.4 meter) horizontal reference line
on the vertical wall or screen at this
height (a piece of masking tape
works well).
3. Turn on the low beam headlamps
to illuminate the wall or screen and open the hood. Cover one of the
headlamps so no light from that lamp hits the wall.
4. On the wall or screen you will
observe a light pattern with a
distinct horizontal edge towards the
right. If this edge is not at the
horizontal reference line, the beam will need to be adjusted so the edge
is at the same height as the horizontal reference line.
5. Locate the vertical adjuster on
each headlamp, then use a E5 Torx
socket to turn the adjuster either
counterclockwise (to adjust down)
or clockwise (to adjust up) aligning
the upper edge of the light pattern
up to the horizontal line.
6. Repeat Steps 3–5 for the other
headlamp.
7. Close the hood and turn off the
lamps.
TURN SIGNAL CONTROL
•Push down to activate the left
turn signal.
•Push up to activate the right turn
signal.
2009 F-250/350/450/550(f23)
Owners Guide, 3rd Printing
USA(fus)
Lights
94
ProCarManuals.com
Page 194 of 419
WARNING:Never place your arm over the airbag module as a
deploying airbag can result in serious arm fractures or other
injuries.
To properly position yourself away from the airbag:
•Move your seat to the rear as far as you can while still reaching the
pedals comfortably.
•Recline the seat slightly one or two degrees from the upright position.
WARNING:Do not put anything on or over the airbag module.
Placing objects on or over the airbag inflation area may cause
those objects to be propelled by the airbag into your face and torso
causing serious injury.
WARNING:Do not attempt to service, repair, or modify the
airbag supplemental restraint systems or its fuses. Contact your
authorized dealer as soon as possible.
WARNING:The front passenger airbag is not designed to offer
protection to an occupant in the center front seating position.
WARNING:Modifying or adding equipment to the front end of
the vehicle (including frame, bumper, front end body structure
and tow hooks) may affect the performance of the airbag system,
increasing the risk of injury. Do not modify the front end of the
vehicle.
WARNING:Additional equipment such as snowplow equipment
may effect the performance of the airbag sensors increasing the
risk of injury. Please refer to theBody Builders Layout Bookfor
instructions about the appropriate installation of additional equipment.
WARNING:Removing the blocker beam without installing snow
plow attachment hardware may effect airbag deployment in a
crash. Do not operate the truck unless either the blocker beam or
snow plow attachment hardware is installed on the vehicle.
2009 F-250/350/450/550(f23)
Owners Guide, 3rd Printing
USA(fus)
Seating and Safety Restraints
194
ProCarManuals.com
Page 320 of 419

The fuses are coded as follows.
Fuse/Relay
LocationFuse Amp
RatingProtected Circuits
1 30A Not used (spare)
2 15A Not used (spare)
3 15A Family Entertainment System (FES)
4 30A Not used (spare)
5 10A Keypad illumination, Brake-Shift
Interlock (BSI), SPBJB
6 20A Turn signals
7 10A Left headlamp (Low beam)
8 10A Right headlamp (Low beam)
9 15A Interior lighting, Lighted running boards
10 15A Cargo lamp, Puddle lamp, Switch
backlight
2009 F-250/350/450/550(f23)
Owners Guide, 3rd Printing
USA(fus)
Roadside Emergencies
320
ProCarManuals.com
Page 336 of 419
10. Lower the wheel by turning the jack handle counterclockwise.
Go to step 19.
The following steps apply to F–350 Dual Rear Wheel (DRW) and
F–450/F–550 vehicles only:
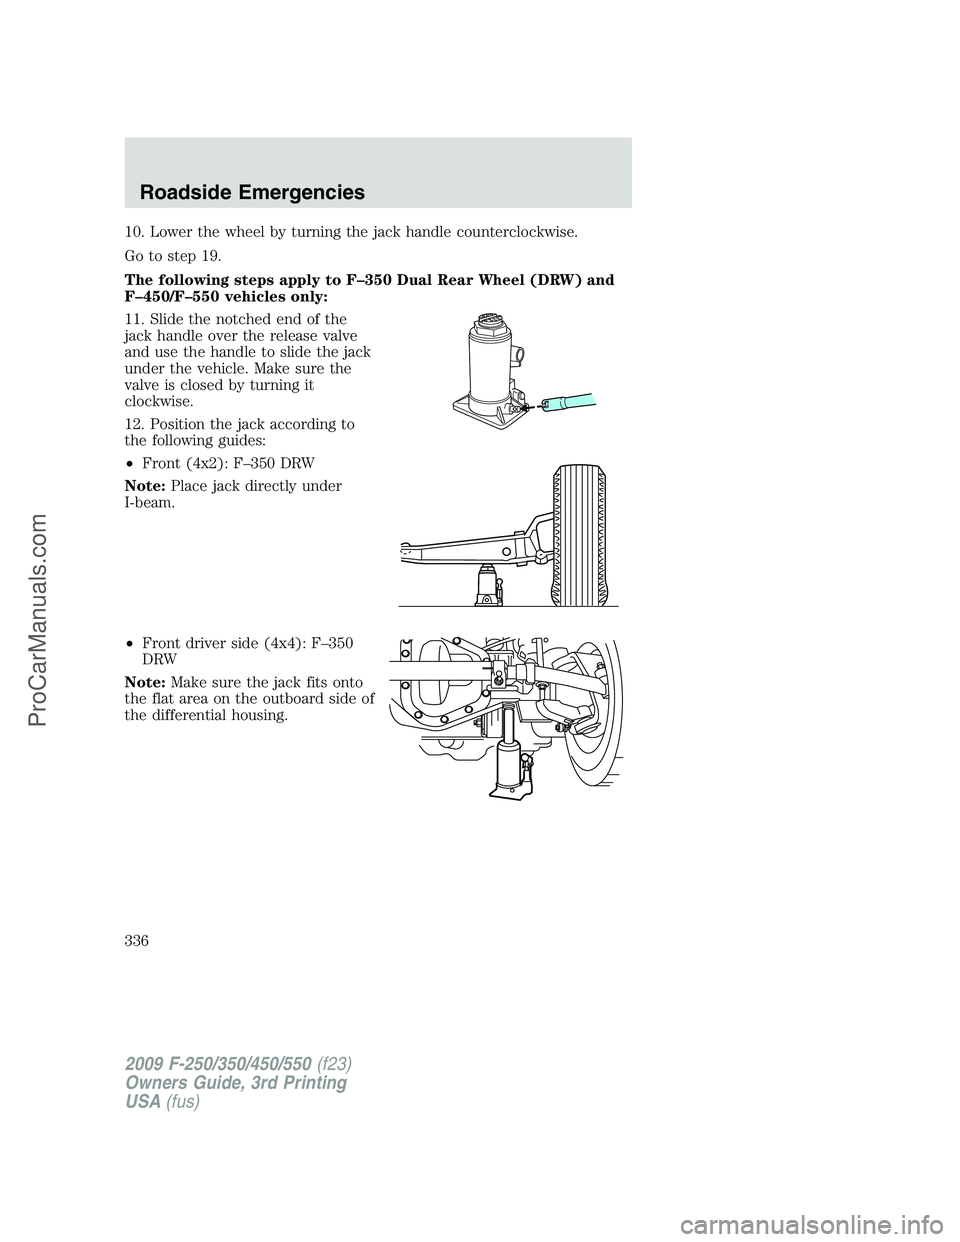
11. Slide the notched end of the
jack handle over the release valve
and use the handle to slide the jack
under the vehicle. Make sure the
valve is closed by turning it
clockwise.
12. Position the jack according to
the following guides:
•Front (4x2): F–350 DRW
Note:Place jack directly under
I-beam.
•Front driver side (4x4): F–350
DRW
Note:Make sure the jack fits onto
the flat area on the outboard side of
the differential housing.
2009 F-250/350/450/550(f23)
Owners Guide, 3rd Printing
USA(fus)
Roadside Emergencies
336
ProCarManuals.com