Page 243 of 419
Additional information contained on the tire sidewall for “LT” type
tires
“LT” type tires have some additional
information beyond those of “P”
type tires; these differences are
described below.
Note:Tire Quality Grades do not
apply to this type of tire.
1.LT:Indicates a tire, designated by
the Tire and Rim Association
(T&RA), that is intended for service
on light trucks.
2.Load Range/Load Inflation
Limits:Indicates the tire’s
load-carrying capabilities and its
inflation limits.
3.Maximum Load Dual lb. (kg) at psi (kPa) cold:Indicates the
maximum load and tire pressure when the tire is used as a dual; defined
as four tires on the rear axle (a total of six or more tires on the vehicle).
4.Maximum Load Single lb. (kg) at psi (kPa) cold:Indicates the
maximum load and tire pressure when the tire is used as a single;
defined as two tires (total) on the rear axle.
2009 F-250/350/450/550(f23)
Owners Guide, 3rd Printing
USA(fus)
Tires, Wheels and Loading
243
ProCarManuals.com
Page 244 of 419

Information on “T” type tires
“T” type tires have some additional
information beyond those of “P”
type tires; these differences are
described below:
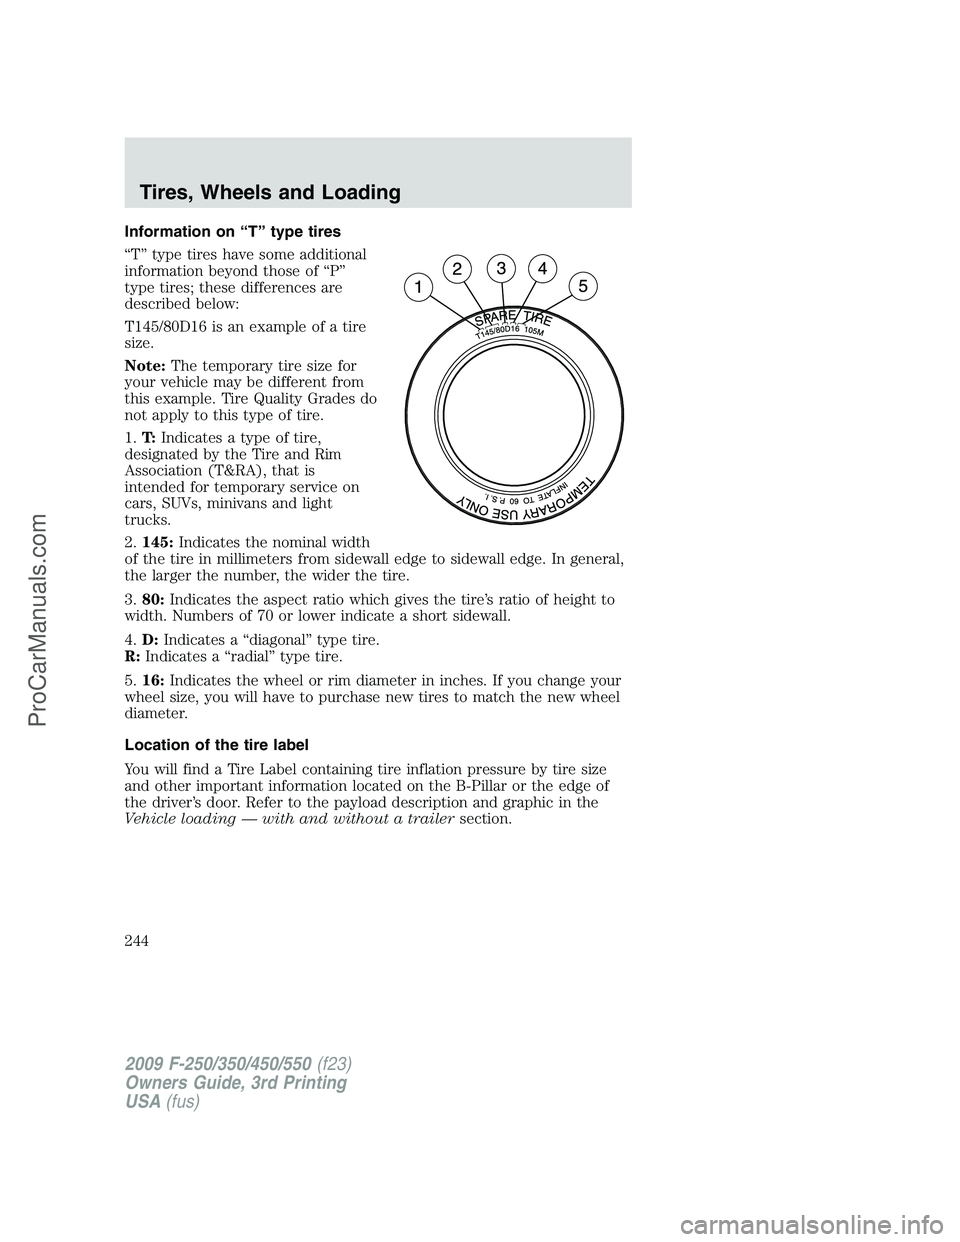
T145/80D16 is an example of a tire
size.
Note:The temporary tire size for
your vehicle may be different from
this example. Tire Quality Grades do
not apply to this type of tire.
1.T:Indicates a type of tire,
designated by the Tire and Rim
Association (T&RA), that is
intended for temporary service on
cars, SUVs, minivans and light
trucks.
2.145:Indicates the nominal width
of the tire in millimeters from sidewall edge to sidewall edge. In general,
the larger the number, the wider the tire.
3.80:Indicates the aspect ratio which gives the tire’s ratio of height to
width. Numbers of 70 or lower indicate a short sidewall.
4.D:Indicates a “diagonal” type tire.
R:Indicates a “radial” type tire.
5.16:Indicates the wheel or rim diameter in inches. If you change your
wheel size, you will have to purchase new tires to match the new wheel
diameter.
Location of the tire label
You will find a Tire Label containing tire inflation pressure by tire size
and other important information located on the B-Pillar or the edge of
the driver’s door. Refer to the payload description and graphic in the
Vehicle loading — with and without a trailersection.
2009 F-250/350/450/550(f23)
Owners Guide, 3rd Printing
USA(fus)
Tires, Wheels and Loading
244
ProCarManuals.com
Page 246 of 419

The Tire Pressure Monitoring System complies with part 15 of the FCC
rules and with RSS-210 of Industry Canada. Operation is subject to the
following two conditions: (1) This device may not cause harmful
interference, and (2) This device must accept any interference received,
including interference that may cause undesired operation.
WARNING:The Tire Pressure Monitoring System is NOT a
substitute for manually checking tire pressure. The tire pressure
should be checked periodically (at least monthly) using a tire gauge,
seeInflating your tiresin this chapter. Failure to properly maintain
your tire pressure could increase the risk of tire failure, loss of control,
vehicle rollover and personal injury.
Changing tires with TPMS
Each road tire is equipped with
a tire pressure sensor fastened
to the inside rim of the wheel.
The pressure sensor is covered
by the tire and is not visible
unless the tire is removed. The
pressure sensor is located
opposite (180 degrees) from the
valve stem. Care must be taken
when changing the tire to avoid
damaging the sensor.It is
recommended that you always have
your tires serviced by an authorized
dealer.
The tire pressure should be checked
periodically (at least monthly) using
an accurate tire gauge, refer to
Inflating your tiresin this chapter.
2009 F-250/350/450/550(f23)
Owners Guide, 3rd Printing
USA(fus)
Tires, Wheels and Loading
246
ProCarManuals.com
Page 253 of 419
4. Press and hold the brake pedal
for two (2) seconds, then release.
5. Turn the ignition to off—DO
NOTremove the key.
6. Cycle the ignition from off to on three (3) times ending in on.DO
NOTstart the engine.
If the reset mode has been entered successfully, the horn will sound
once, the TPMS indicator
will flash and the message center will
displayTRAIN LEFT FRONT TIRE.
If after repeated attempts to enter the reset mode, the horn does not
sound, the TPMS indicator
does not flash and the message center
does not displayTRAIN LEFT FRONT TIRE, seek service from your
authorized dealer.
2009 F-250/350/450/550(f23)
Owners Guide, 3rd Printing
USA(fus)
Tires, Wheels and Loading
253
ProCarManuals.com
Page 254 of 419

7. Train the TPMS sensors in the tires using the following TPMS reset
sequence starting with theleft front tirein the following clockwise
order:
1. Left front tire (Front driver’s side)
2. Right front tire (Front passenger’s side)
3. Right rear tire (Rear passenger’s side)
4. Left rear tire (Rear driver’s side)
8.Left front tire:Place the TPMS reset tool against the left front tire
where the tire meets the rim, opposite from the valve stem (1) as shown.
This is where the sensor is located inside the rim.
The tool needs to be held against the tire sidewall opposite the
valve stem as illustrated with the arrow on the tool pointing
towards the rim; do not use the tool with the arrow pointing away
from the rim as it may not activate the sensor.
9. Press and release the green button and hold the tool to the tire
sidewall until the horn sounds. The red light on the TPMS reset tool will
illuminate while the tool is active. The horn will sound once within
10 seconds to indicate the process was successful.
Note:
•If a double horn chirp is heard, repeat the procedure. If a single horn
chirp is not heard, move the vehicle to rotate the wheels at least a
1�4-turn and repeat the procedure starting with Step 1.
•If a double horn chirp is heard even after the wheels were
repositioned, seek service from your authorized dealer.
2009 F-250/350/450/550(f23)
Owners Guide, 3rd Printing
USA(fus)
Tires, Wheels and Loading
254
ProCarManuals.com
Page 272 of 419

type (All-Season or All-Terrain) or is from a different manufacturer
other than the road tires on your vehicle, your spare tire is considered
“temporary”. Consult information on the spare Tire Label or Safety
Compliance Certification Label for limitations when using.
Servicing after towing
If you tow a trailer for long distances, your vehicle will require more
frequent service intervals. Refer to yourscheduled maintenance
informationfor more information.
Trailer towing safety tips
General
•Ensure that the trailer, safety chains and 7–pin electrical connectors
are securely fastened.
•Make sure the truck receiver, draw bar, and coupler are properly
connected and adjusted.
•Check rear view and side mirrors for proper visibility especially when
towing trailer wider than the truck.
•When towing, operate the vehicle at lower speeds than you would
when not towing a trailer. The likelihood of trailer sway is greater at
higher speeds.
•If you will be towing a trailer frequently in hot weather, hilly
conditions, at GCWR, or any combination of these factors, consider
refilling your rear axle with synthetic gear lubricant if not already so
equipped. Refer toMaintenance Product Specifications and
Capacitiesin theMaintenance and Specificationschapter for the
proper axle lubricant. Remember that regardless of the rear axle
lubricant used, do not tow a trailer for the first 500 miles (800 km) of
a new vehicle, and that the first 500 miles of towing be done at no
faster than 70 mph (113 km/h) with no full-throttle starts.
•When turning make wide turns to allow trailer tires to properly clear
any obstacles.
•Be prepared for trailer sway due to buffeting when larger vehicles
pass in either direction.
Loading
•Keep the center-of-gravity low for best handling.
•Trailer loads should be evenly distributed front to back and left to
right.
2009 F-250/350/450/550(f23)
Owners Guide, 3rd Printing
USA(fus)
Tires, Wheels and Loading
272
ProCarManuals.com
Page 273 of 419

•The load distribution within the trailer should be such that 10%–15%
of the trailer weight is on the hitch. (15%–25% for fifth-wheel or
gooseneck towing.)
•Never exceed truck, trailer, receiver, ball, tongue, tire or coupler
loading recommendations.
Braking
•The trailer brakes must be inspected and serviced at intervals
specified by the manufacturer. This includes the shoes, drum and
trailer brake magnets.
•Electric brakes also require periodic adjustment to keep the shoes
properly spaced. If the brakes get hot when driving or if they will not
hold, chances are that they need adjustment.
•Anticipate the need to stop; allow much more distance and time to
stop than normal.
•Do not apply the trailer brakes for extended periods of time as they
can overheat and lose effectiveness.
Backing up
•Practice backing up, particularly if you are a novice. Turn the steering
wheel to the right to move the trailer’s rear end to the right.
•Sharp steering movements may cause the trailer to jackknife or go out
of control.
Tires
•All trailer tires should be of the same size, and construction.
•Select tires that meet the trailer loading requirements.
•Always check tow vehicle and trailer tire pressure before towing.
Launching or retrieving a boat
Disconnect the wiring to the trailer before backing the trailer
into the water. Reconnect the wiring to the trailer after the
trailer is removed from the water.
When backing down a ramp during boat launching or retrieval:
•do not allow the static water level to rise above the bottom edge of
the rear bumper.
•do not allow waves to break higher than 6 inches (15 cm) above the
bottom edge of the rear bumper.
2009 F-250/350/450/550(f23)
Owners Guide, 3rd Printing
USA(fus)
Tires, Wheels and Loading
273
ProCarManuals.com
Page 281 of 419

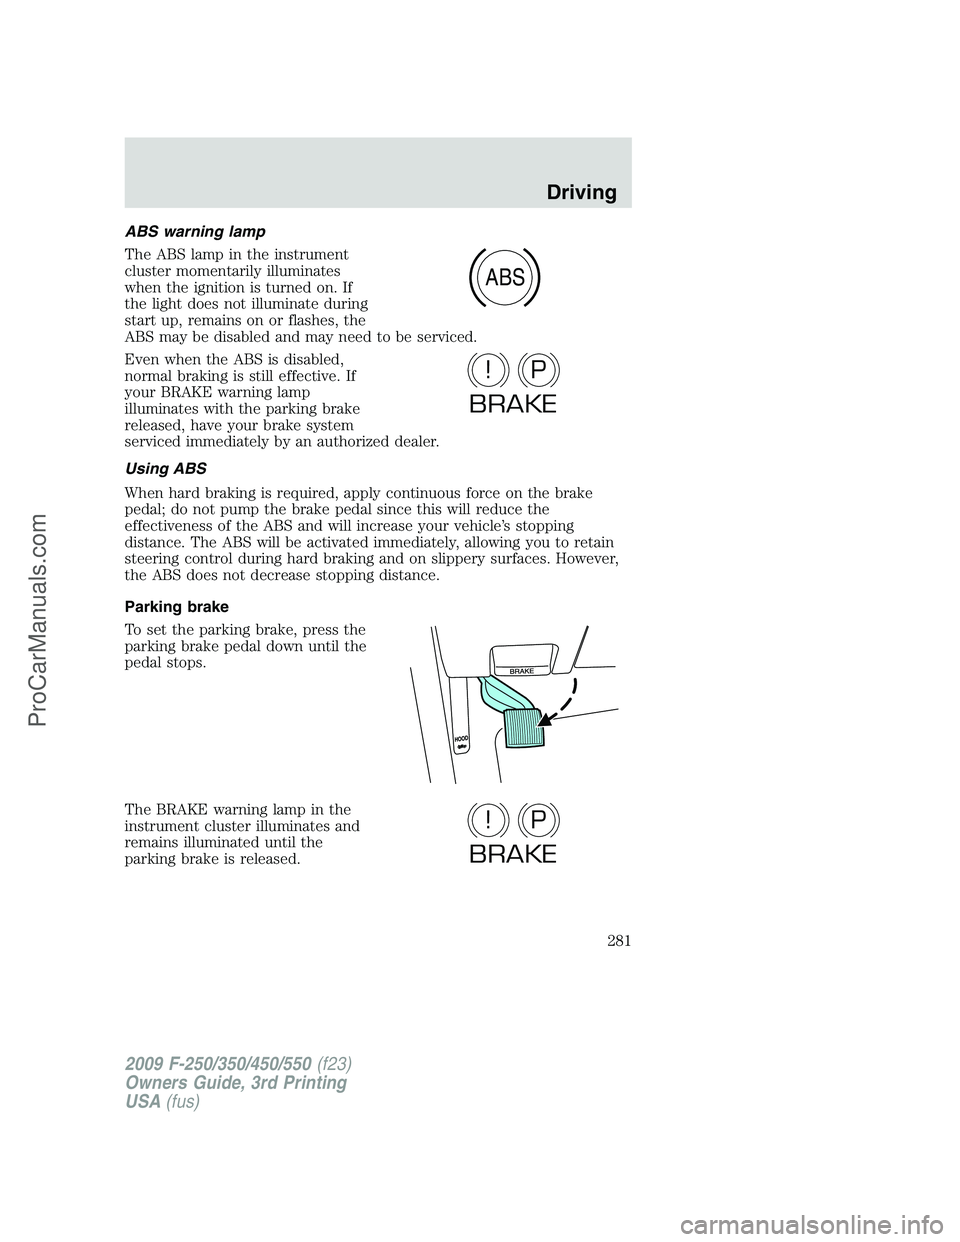
ABS warning lamp
The ABS lamp in the instrument
cluster momentarily illuminates
when the ignition is turned on. If
the light does not illuminate during
start up, remains on or flashes, the
ABS may be disabled and may need to be serviced.
Even when the ABS is disabled,
normal braking is still effective. If
your BRAKE warning lamp
illuminates with the parking brake
released, have your brake system
serviced immediately by an authorized dealer.
Using ABS
When hard braking is required, apply continuous force on the brake
pedal; do not pump the brake pedal since this will reduce the
effectiveness of the ABS and will increase your vehicle’s stopping
distance. The ABS will be activated immediately, allowing you to retain
steering control during hard braking and on slippery surfaces. However,
the ABS does not decrease stopping distance.
Parking brake
To set the parking brake, press the
parking brake pedal down until the
pedal stops.
The BRAKE warning lamp in the
instrument cluster illuminates and
remains illuminated until the
parking brake is released.
ABS
P!
BRAKE
P!
BRAKE
2009 F-250/350/450/550(f23)
Owners Guide, 3rd Printing
USA(fus)
Driving
281
ProCarManuals.com