2009 FORD F350 remote control
[x] Cancel search: remote controlPage 159 of 419

4. Press and hold the 3•4. While holding the 3•4, press and release
the 7•8. While still holding the 3•4, press and release the 7•8a
second time.
5. Release the 3•4.
The user should receive ahorn chirpto indicate the system has been
disabled or a chirp followed by a honk to indicate the system has been
enabled.
CHILDPROOF DOOR LOCKS (IF EQUIPPED)
•When these locks are set, the
rear doors cannot be opened from
the inside.
•The rear doors can be opened
from the outside when the doors
are unlocked.
The childproof locks are located on
rear edge of each rear door and
must be set separately for each
door. Setting the lock for one door
will not automatically set the lock
for both doors.
•Move lock control up to engage
the childproof lock.
•Move lock control down to
disengage the childproof lock.
REMOTE ENTRY SYSTEM (IF EQUIPPED)
This device complies with part 15 of the FCC rules and with RS-210 of
Industry Canada. Operation is subject to the following two conditions:
(1) This device may not cause harmful interference, and (2) This device
must accept any interference received, including interference that may
cause undesired operation.
Changes or modifications not expressly approved by the party
responsible for compliance could void the user’s authority to
operate the equipment.
2009 F-250/350/450/550(f23)
Owners Guide, 3rd Printing
USA(fus)
Locks and Security
159
ProCarManuals.com
Page 160 of 419
The typical operating range for your remote entry transmitter is
approximately 33 feet (10 meters). A decrease in operating range could
be caused by:
•weather conditions,
•nearby radio towers,
•structures around the vehicle, or
•other vehicles parked next to your vehicle.
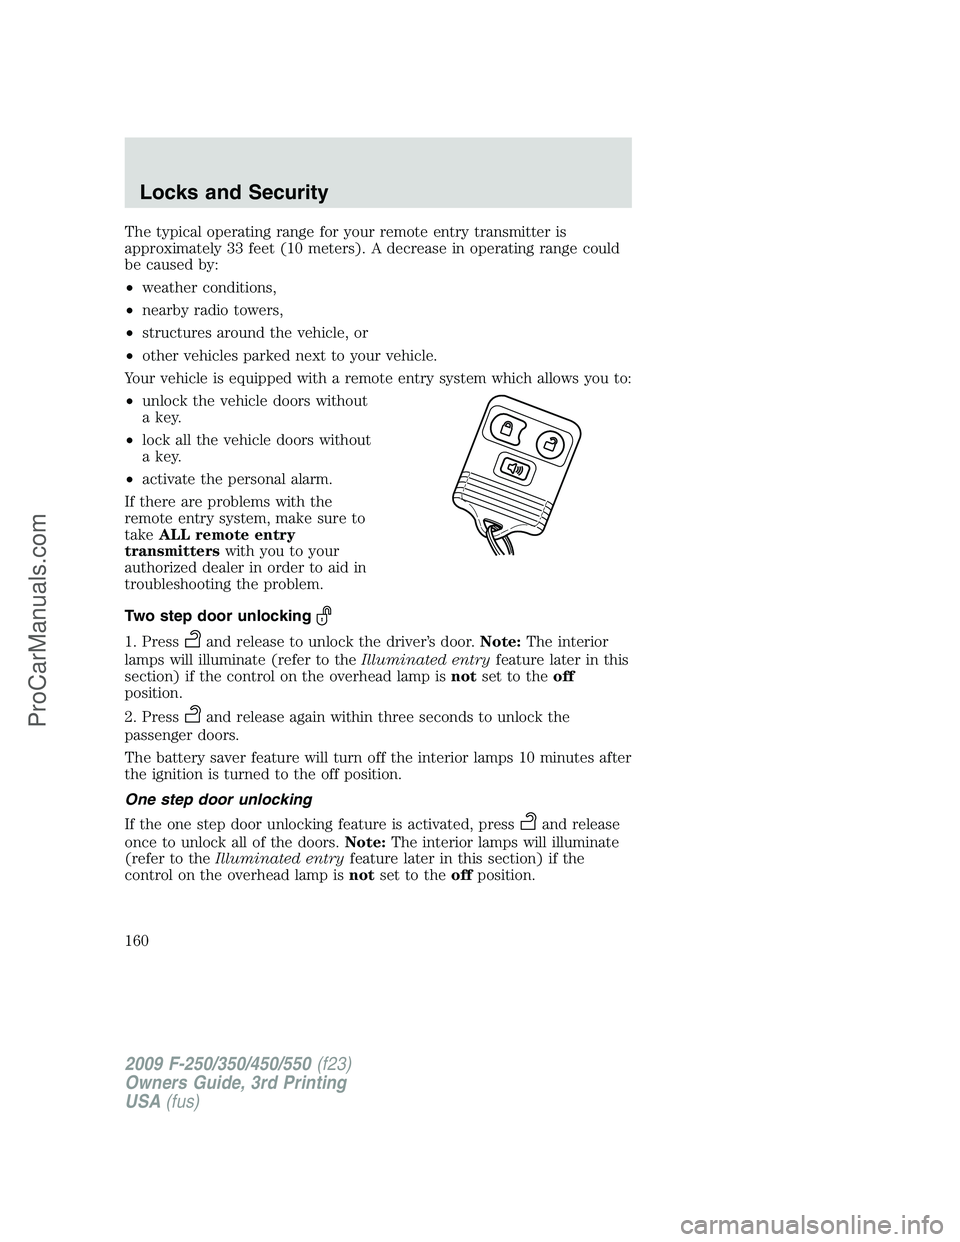
Your vehicle is equipped with a remote entry system which allows you to:
•unlock the vehicle doors without
a key.
•lock all the vehicle doors without
a key.
•activate the personal alarm.
If there are problems with the
remote entry system, make sure to
takeALL remote entry
transmitterswith you to your
authorized dealer in order to aid in
troubleshooting the problem.
Two step door unlocking
1. Pressand release to unlock the driver’s door.Note:The interior
lamps will illuminate (refer to theIlluminated entryfeature later in this
section) if the control on the overhead lamp isnotset to theoff
position.
2. Press
and release again within three seconds to unlock the
passenger doors.
The battery saver feature will turn off the interior lamps 10 minutes after
the ignition is turned to the off position.
One step door unlocking
If the one step door unlocking feature is activated, press
and release
once to unlock all of the doors.Note:The interior lamps will illuminate
(refer to theIlluminated entryfeature later in this section) if the
control on the overhead lamp isnotset to theoffposition.
2009 F-250/350/450/550(f23)
Owners Guide, 3rd Printing
USA(fus)
Locks and Security
160
ProCarManuals.com
Page 161 of 419

Switching from two step to one step door unlocking
Your vehicle comes with two step unlocking enabled. Unlocking can be
switched between two step and one step door unlocking by pressing and
holding both the
andbuttons simultaneously on the remote entry
transmitter for approximately four seconds. The hazard lamps will flash
twice to indicate that the vehicle has switched to one step unlocking.
Repeat the procedure to switch back to two-step unlocking.
Locking the doors
1. Press
and release to lock all the doors. The parking lamps will
flash if all the doors are closed and locked.
2. Press
and release again within three seconds to confirm that all
the doors are closed and locked.Note:The doors will lock again, the
horn will chirp once, and the parking lamps will flash once more.
If any of the doors are not properly closed the horn will make two quick
chirps and the parklamps will not flash.
Car finder
Press
twice within three seconds. The horn will chirp and the turn
lamps will flash. It is recommended that this method be used to locate
your vehicle, rather than using the panic alarm.
Sounding a panic alarm
Press
to activate the alarm. Press again or turn the ignition to on to
deactivate.
Note:The panic alarm will only operate when the ignition is in the off
position.
Memory seats/adjustable pedals/mirrors (if equipped)
The remote entry system can also control the memory seat/adjustable
pedals/mirrors.
Press
to automatically move the seat, adjustable pedals and mirrors to
the desired memory position (the seat position corresponds to the
transmitter being used).
2009 F-250/350/450/550(f23)
Owners Guide, 3rd Printing
USA(fus)
Locks and Security
161
ProCarManuals.com
Page 164 of 419
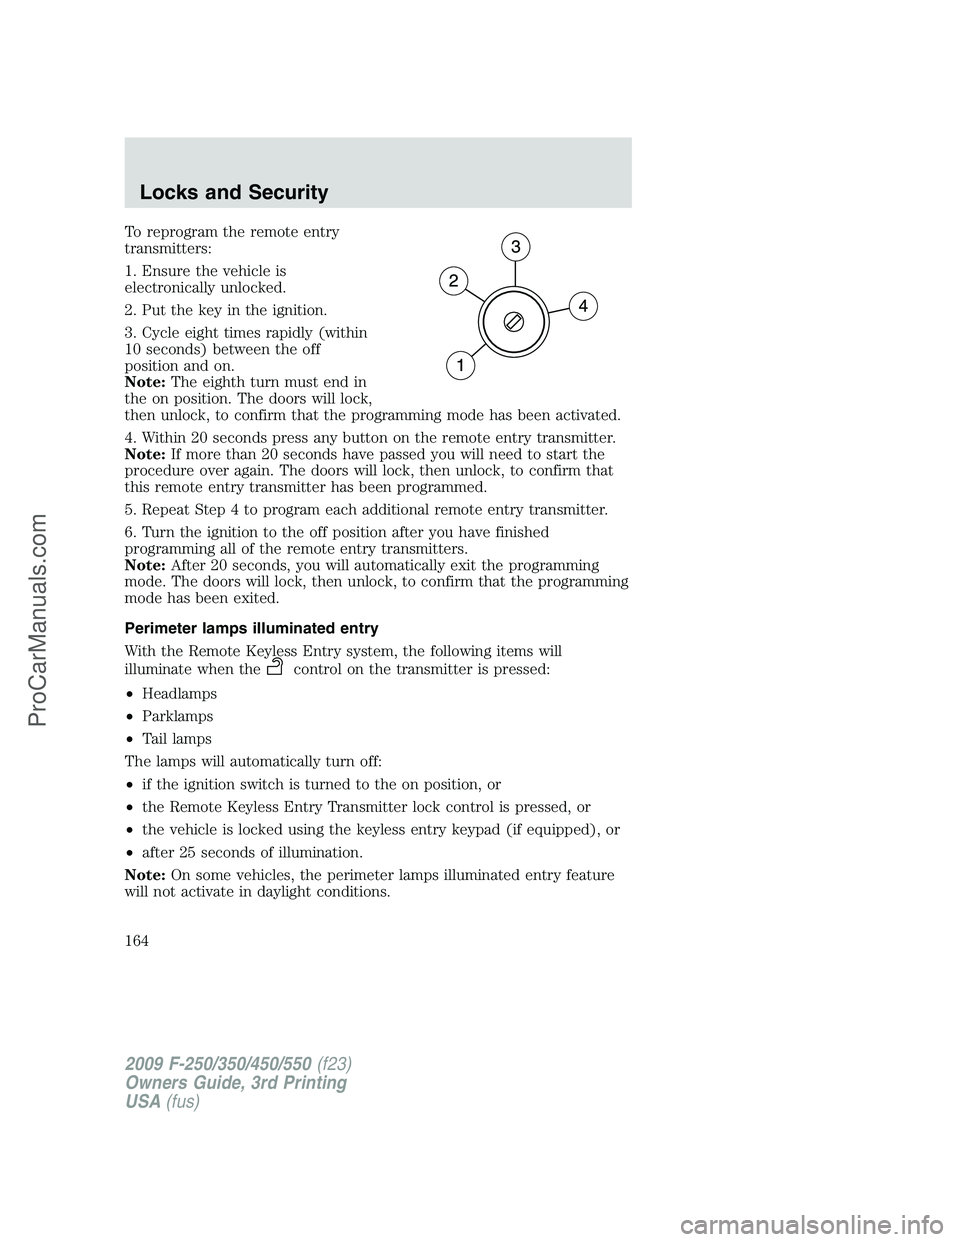
To reprogram the remote entry
transmitters:
1. Ensure the vehicle is
electronically unlocked.
2. Put the key in the ignition.
3. Cycle eight times rapidly (within
10 seconds) between the off
position and on.
Note:The eighth turn must end in
the on position. The doors will lock,
then unlock, to confirm that the programming mode has been activated.
4. Within 20 seconds press any button on the remote entry transmitter.
Note:If more than 20 seconds have passed you will need to start the
procedure over again. The doors will lock, then unlock, to confirm that
this remote entry transmitter has been programmed.
5. Repeat Step 4 to program each additional remote entry transmitter.
6. Turn the ignition to the off position after you have finished
programming all of the remote entry transmitters.
Note:After 20 seconds, you will automatically exit the programming
mode. The doors will lock, then unlock, to confirm that the programming
mode has been exited.
Perimeter lamps illuminated entry
With the Remote Keyless Entry system, the following items will
illuminate when the
control on the transmitter is pressed:
•Headlamps
•Parklamps
•Tail lamps
The lamps will automatically turn off:
•if the ignition switch is turned to the on position, or
•the Remote Keyless Entry Transmitter lock control is pressed, or
•the vehicle is locked using the keyless entry keypad (if equipped), or
•after 25 seconds of illumination.
Note:On some vehicles, the perimeter lamps illuminated entry feature
will not activate in daylight conditions.
2009 F-250/350/450/550(f23)
Owners Guide, 3rd Printing
USA(fus)
Locks and Security
164
ProCarManuals.com
Page 165 of 419
Deactivating/activating perimeter lamps illuminated entry
You may enable/disable this feature by having your vehicle serviced by
your authorized dealer.
You may also perform the following power door lock sequence to
enable/disable the perimeter lamps feature.
Note:Before starting, ensure the ignition is in the off position and all
vehicle doors are closed.
You must complete Steps 1–5 within 30 seconds or the procedure will
have to be repeated. If the procedure needs to be repeated, wait a
minimum of 30 seconds before beginning again.
1. Place the key in the ignition and turn the ignition to the on position.
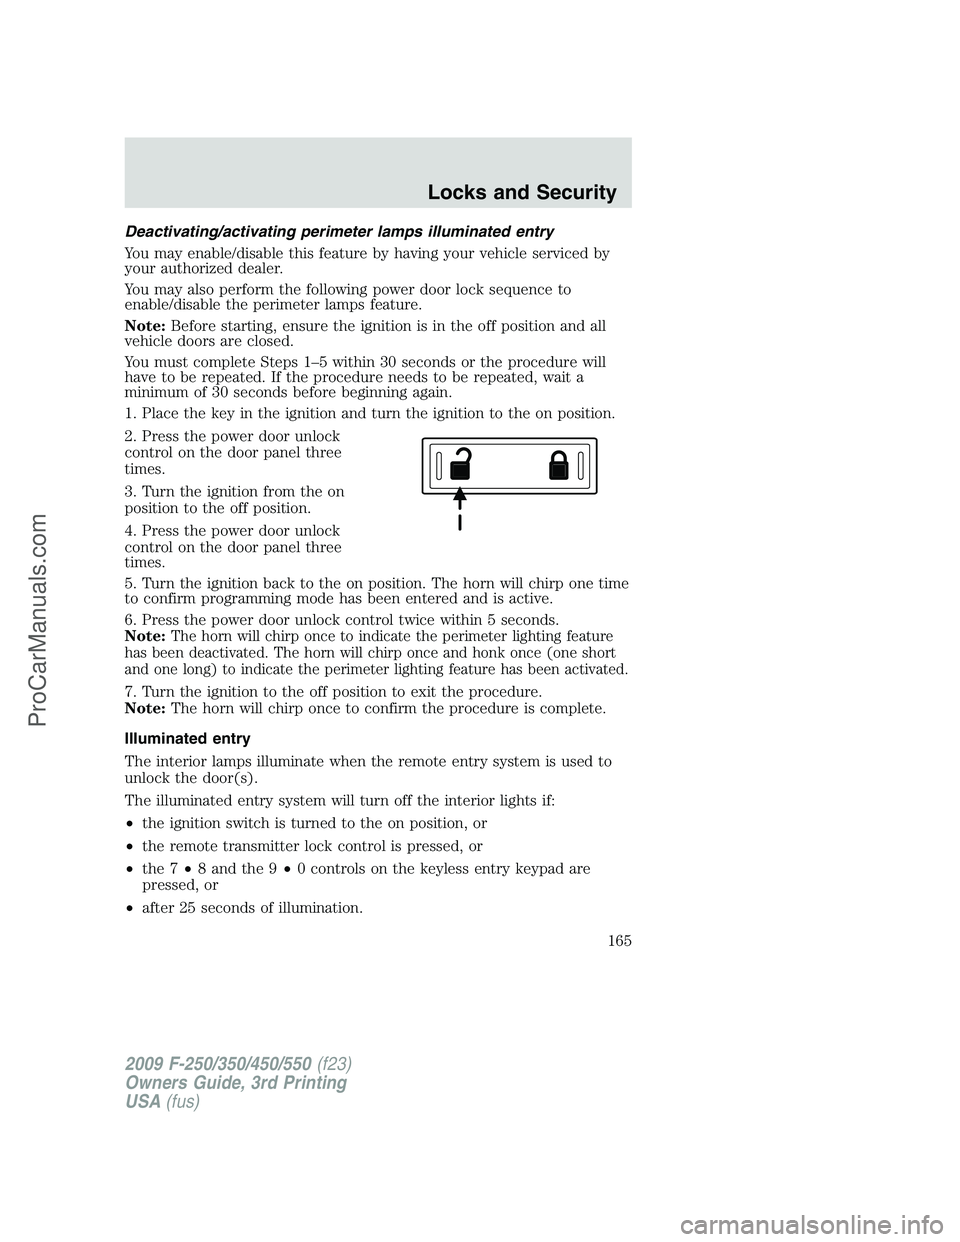
2. Press the power door unlock
control on the door panel three
times.
3. Turn the ignition from the on
position to the off position.
4. Press the power door unlock
control on the door panel three
times.
5. Turn the ignition back to the on position. The horn will chirp one time
to confirm programming mode has been entered and is active.
6. Press the power door unlock control twice within 5 seconds.
Note:
The horn will chirp once to indicate the perimeter lighting feature
has been deactivated. The horn will chirp once and honk once (one short
and one long) to indicate the perimeter lighting feature has been activated.
7. Turn the ignition to the off position to exit the procedure.
Note:The horn will chirp once to confirm the procedure is complete.
Illuminated entry
The interior lamps illuminate when the remote entry system is used to
unlock the door(s).
The illuminated entry system will turn off the interior lights if:
•the ignition switch is turned to the on position, or
•the remote transmitter lock control is pressed, or
•the 7•8 and the 9•0 controls on the keyless entry keypad are
pressed, or
•after 25 seconds of illumination.
2009 F-250/350/450/550(f23)
Owners Guide, 3rd Printing
USA(fus)
Locks and Security
165
ProCarManuals.com
Page 167 of 419
5. The doors will again lock then unlock to confirm that your personal
keycode has been programmed to the module.
Tips:
•Do not set a code that uses five of the same number.
•Do not use five numbers in sequential order.
•The factory set code will work even if you have set your own personal
code.
Erasing personal code
1. Enter the factory set 5–digit code.
2. Within five seconds, press the 1•2 on the keypad and release.
3. Press and hold the 1•2 for two seconds. This must be done within
five seconds of completing Step 2.
Your personal code is now erased and only the factory set 5–digit code
will work.
Anti-scan feature
If an incorrect code has been entered seven times (35 consecutive
button presses), the keypad will go into an anti-scan mode. This mode
disables the keypad for one minute and the keypad lamp will flash during
this time.
The anti-scan feature will turn off after:
•one minute of keypad inactivity.
•pressing the
control on the remote entry transmitter.
•the ignition is turned to the on position.
Unlocking and locking the doors using keyless entry
To unlock the driver’s door,enter the factory set 5-digit code or your
personal code. Each number must be pressed within five seconds of each
other. The interior lamps will illuminate after entering a valid keypad
entry code.
To unlock all doors,press the 3•4 control within five seconds.
To lock all doors,press the 7•8 and the 9•0 at the same time. You
do notneed to enter the keypad code first.Note:The interior lamps
will turn off.
2009 F-250/350/450/550(f23)
Owners Guide, 3rd Printing
USA(fus)
Locks and Security
167
ProCarManuals.com
Page 171 of 419

PERIMETER ALARM SYSTEM (IF EQUIPPED)
The perimeter anti-theft system will warn you in the event of an
unauthorized entry to your vehicle.
If there is any potential perimeter anti-theft problem with your vehicle,
ensureALL remote entry transmittersare taken to the authorized
dealer to aid in troubleshooting.
Arming the system
When armed, this system will respond if unauthorized entry is
attempted. When unauthorized entry occurs, the system will flash the
park/turn lamps and will sound the horn.
The system is ready to arm whenever the key is removed from the
ignition. Either of the following actions will prearm the alarm system:
•Press the
control on the remote entry transmitter.
•Open a door and press the power door lock control to lock all the
doors, and then close the door.
Disarming the system
You can disarm the system by any of the following actions:
•Unlock the doors by pressing the
control on your remote entry
transmitter.
•Unlock the doors with a key. Turn the key full travel (toward the front
of the vehicle) to ensure the alarm disarms.
•Turn the ignition to the on position with a programmed coded ignition
key.
Triggering the anti-theft system
The armed system will be triggered if any door or hood is opened
without using the key or the remote entry transmitter.
2009 F-250/350/450/550(f23)
Owners Guide, 3rd Printing
USA(fus)
Locks and Security
171
ProCarManuals.com
Page 178 of 419
To recall a memory position:
•Press and release either memory 1 button or memory 2 button.
A position can be recalled:
•in any gearshift position if the ignition isnotin the on position.
•only in P (Park) or N (Neutral) if the ignition is in the on position.
A memory seat position may be programmed at any time.
The memory positions are also recalled when you press your remote
entry transmitter
(unlock) control (if the transmitter is programmed
to a memory position) or, when you enter a valid personal entry code
that is programmed to a memory position.
To program the memory feature to a remote entry transmitter and for
more information on how to use the keypad, refer toRemote entry
systemin theLocks and Securitychapter.
REAR SEATS
Adjustable head restraints (if equipped)
The purpose of these head restraints is to help limit head motion in the
event of a rear collision. To properly adjust your head restraints, lift the
head restraint so that it is located directly behind your head or as close
to that position as possible.
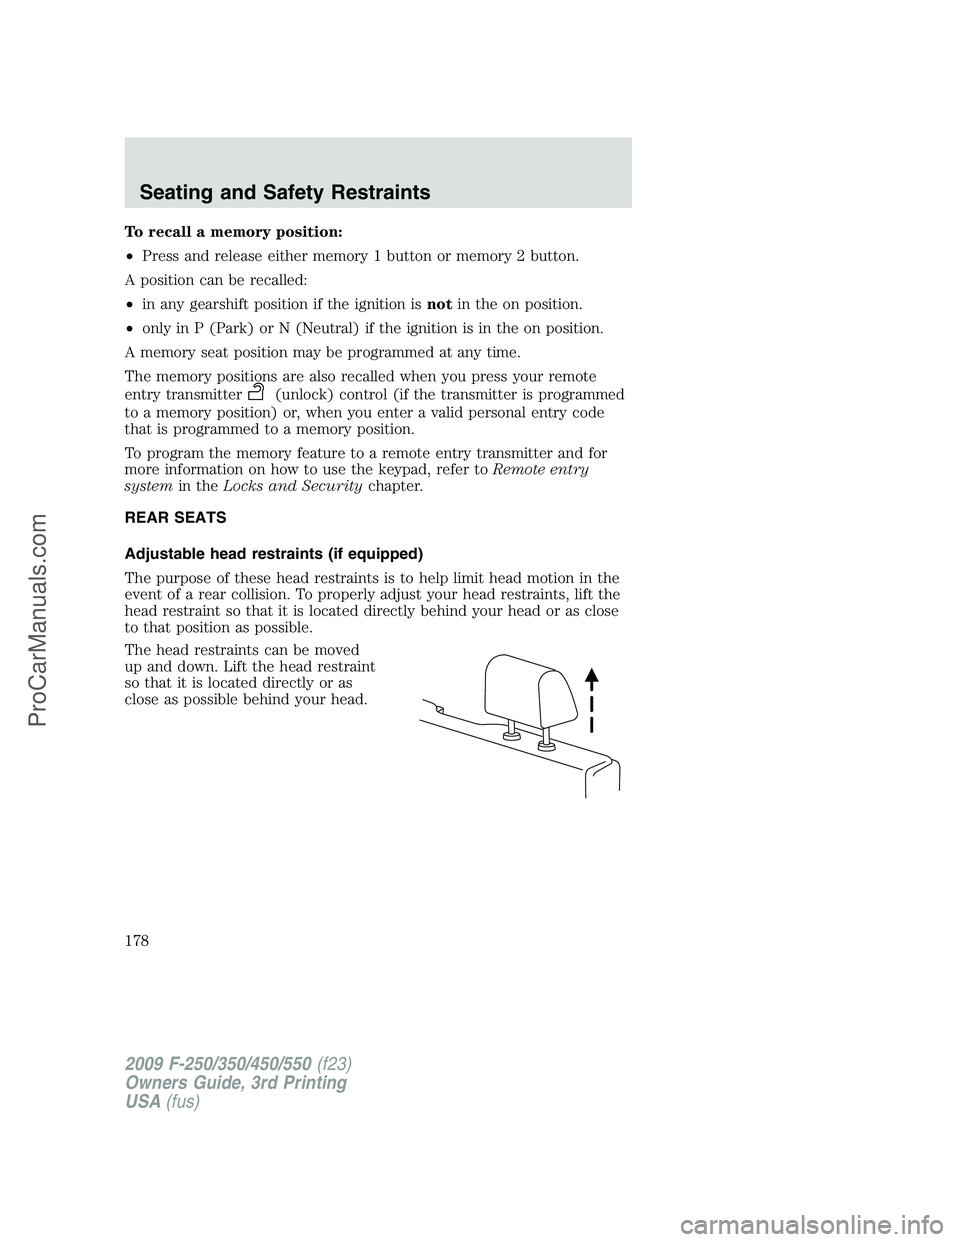
The head restraints can be moved
up and down. Lift the head restraint
so that it is located directly or as
close as possible behind your head.
2009 F-250/350/450/550(f23)
Owners Guide, 3rd Printing
USA(fus)
Seating and Safety Restraints
178
ProCarManuals.com