2009 FORD F250 reset
[x] Cancel search: resetPage 253 of 419
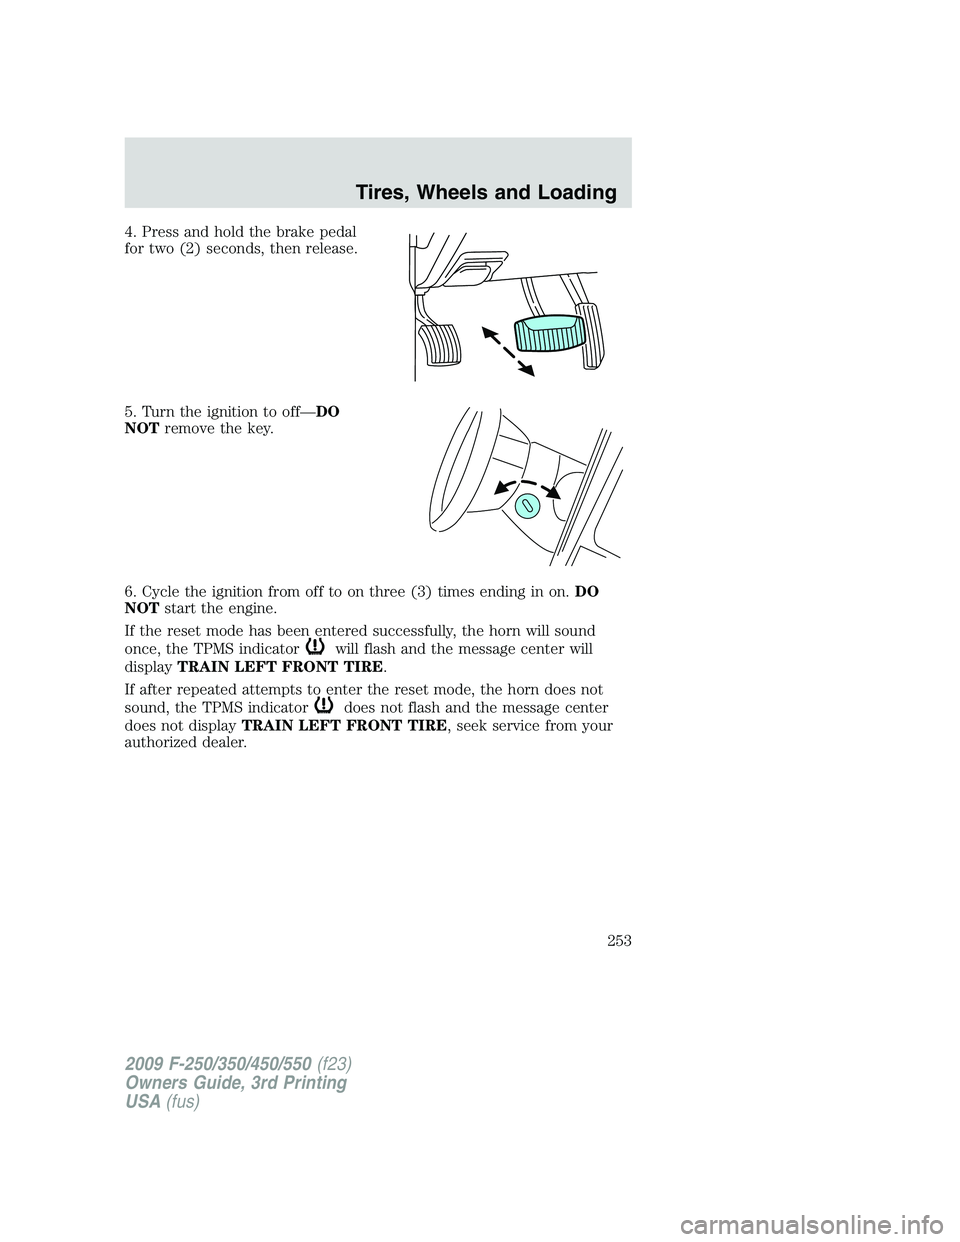
4. Press and hold the brake pedal
for two (2) seconds, then release.
5. Turn the ignition to off—DO
NOTremove the key.
6. Cycle the ignition from off to on three (3) times ending in on.DO
NOTstart the engine.
If the reset mode has been entered successfully, the horn will sound
once, the TPMS indicator
will flash and the message center will
displayTRAIN LEFT FRONT TIRE.
If after repeated attempts to enter the reset mode, the horn does not
sound, the TPMS indicator
does not flash and the message center
does not displayTRAIN LEFT FRONT TIRE, seek service from your
authorized dealer.
2009 F-250/350/450/550(f23)
Owners Guide, 3rd Printing
USA(fus)
Tires, Wheels and Loading
253
Page 254 of 419
7. Train the TPMS sensors in the tires using the following TPMS reset
sequence starting with theleft front tirein the following clockwise
order:
1. Left front tire (Front driver’s side)
2. Right front tire (Front passenger’s side)
3. Right rear tire (Rear passenger’s side)
4. Left rear tire (Rear driver’s side)
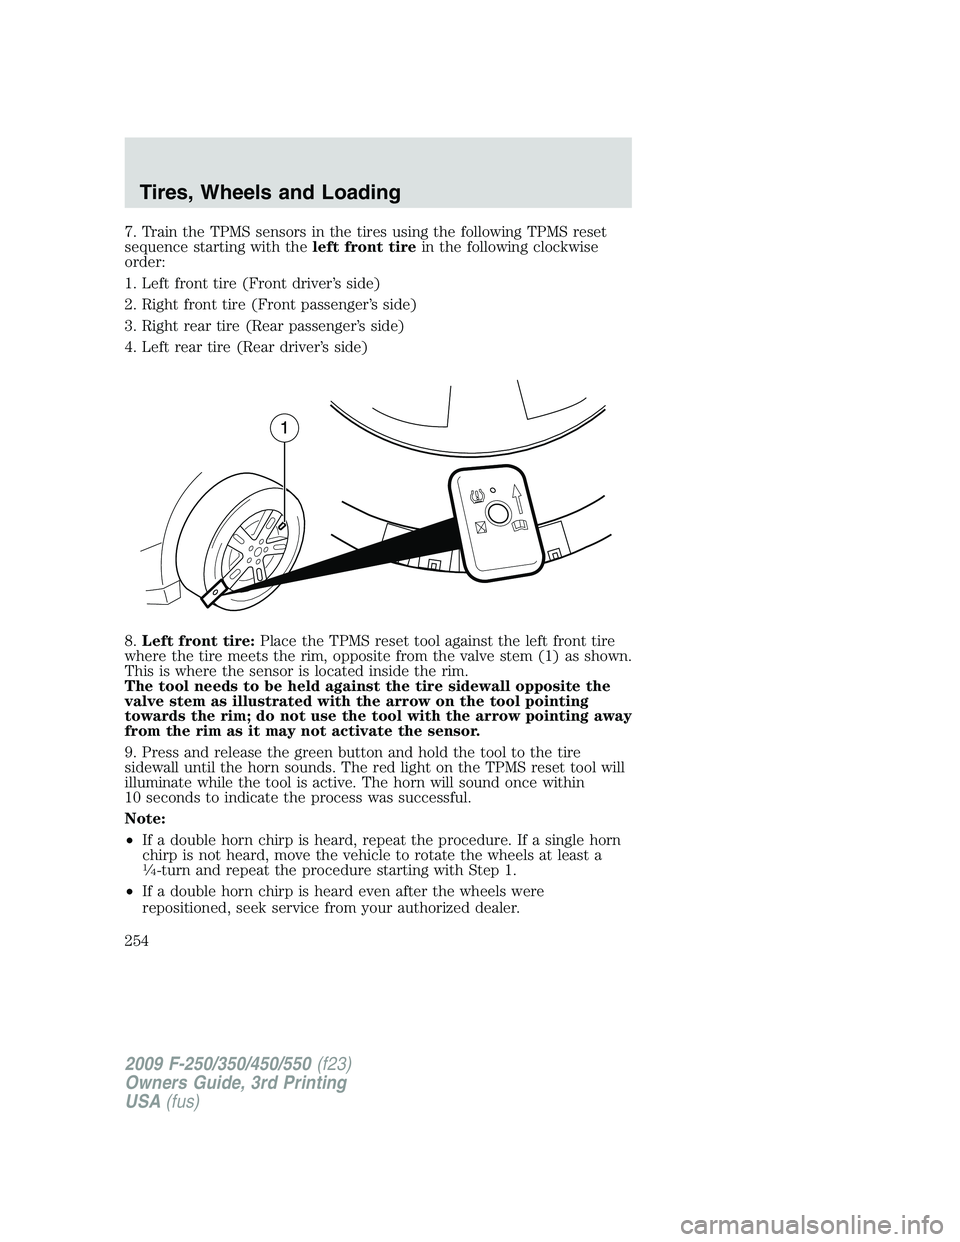
8.Left front tire:Place the TPMS reset tool against the left front tire
where the tire meets the rim, opposite from the valve stem (1) as shown.
This is where the sensor is located inside the rim.
The tool needs to be held against the tire sidewall opposite the
valve stem as illustrated with the arrow on the tool pointing
towards the rim; do not use the tool with the arrow pointing away
from the rim as it may not activate the sensor.
9. Press and release the green button and hold the tool to the tire
sidewall until the horn sounds. The red light on the TPMS reset tool will
illuminate while the tool is active. The horn will sound once within
10 seconds to indicate the process was successful.
Note:
•If a double horn chirp is heard, repeat the procedure. If a single horn
chirp is not heard, move the vehicle to rotate the wheels at least a
1�4-turn and repeat the procedure starting with Step 1.
•If a double horn chirp is heard even after the wheels were
repositioned, seek service from your authorized dealer.
2009 F-250/350/450/550(f23)
Owners Guide, 3rd Printing
USA(fus)
Tires, Wheels and Loading
254
Page 255 of 419
10. Perform Steps 8 and 9 on the right front tire, right rear tire and
finally the left rear tire. Training is complete after the horn sounds for
the last tire trained (left rear tire) and the message center displays:
TRAINING COMPLETE.
Turn the ignition to off. If two short horn beeps are heard, the reset
procedure was unsuccessful and must be repeated.
If after repeating the procedure and two short beeps are heard when the
ignition is turned to off, seek assistance from your authorized dealer.
SNOW TIRES AND CHAINS
WARNING:Snow tires must be the same size, load index, speed
rating as those originally provided by Ford. Use of any tire or
wheel not recommended by Ford can affect the safety and
performance of your vehicle, which could result in an increased risk of
loss of vehicle control, vehicle rollover, personal injury and death.
Additionally, the use of non-recommended tires and wheels could
cause steering, suspension, axle or transfer case/power transfer unit
failure.
Note:Do not use snow chains on vehicles with 20 inch wheels and tires.
The tires on your vehicle have all weather treads to provide traction in
rain and snow. However, in some climates, you may need to use snow
tires and chains. If you need to use chains, it is recommended that steel
wheels (of the same size and specifications) be used, as chains may chip
aluminum wheels.
Follow these guidelines when using snow tires and chains:
•Use only SAE Class S chains.
•Install chains securely, verifying that the chains do not touch any
wiring, brake lines or fuel lines.
•Drive cautiously. If you hear the chains rub or bang against your
vehicle, stop and re-tighten the chains. If this does not work, remove
the chains to prevent damage to your vehicle.
•If possible, avoid fully loading your vehicle.
•Remove the tire chains when they are no longer needed. Do not use
tire chains on dry roads.
•The suspension insulation and bumpers will help prevent vehicle
damage. Do not remove these components from your vehicle when
using snow tires and chains.
2009 F-250/350/450/550(f23)
Owners Guide, 3rd Printing
USA(fus)
Tires, Wheels and Loading
255
Page 287 of 419
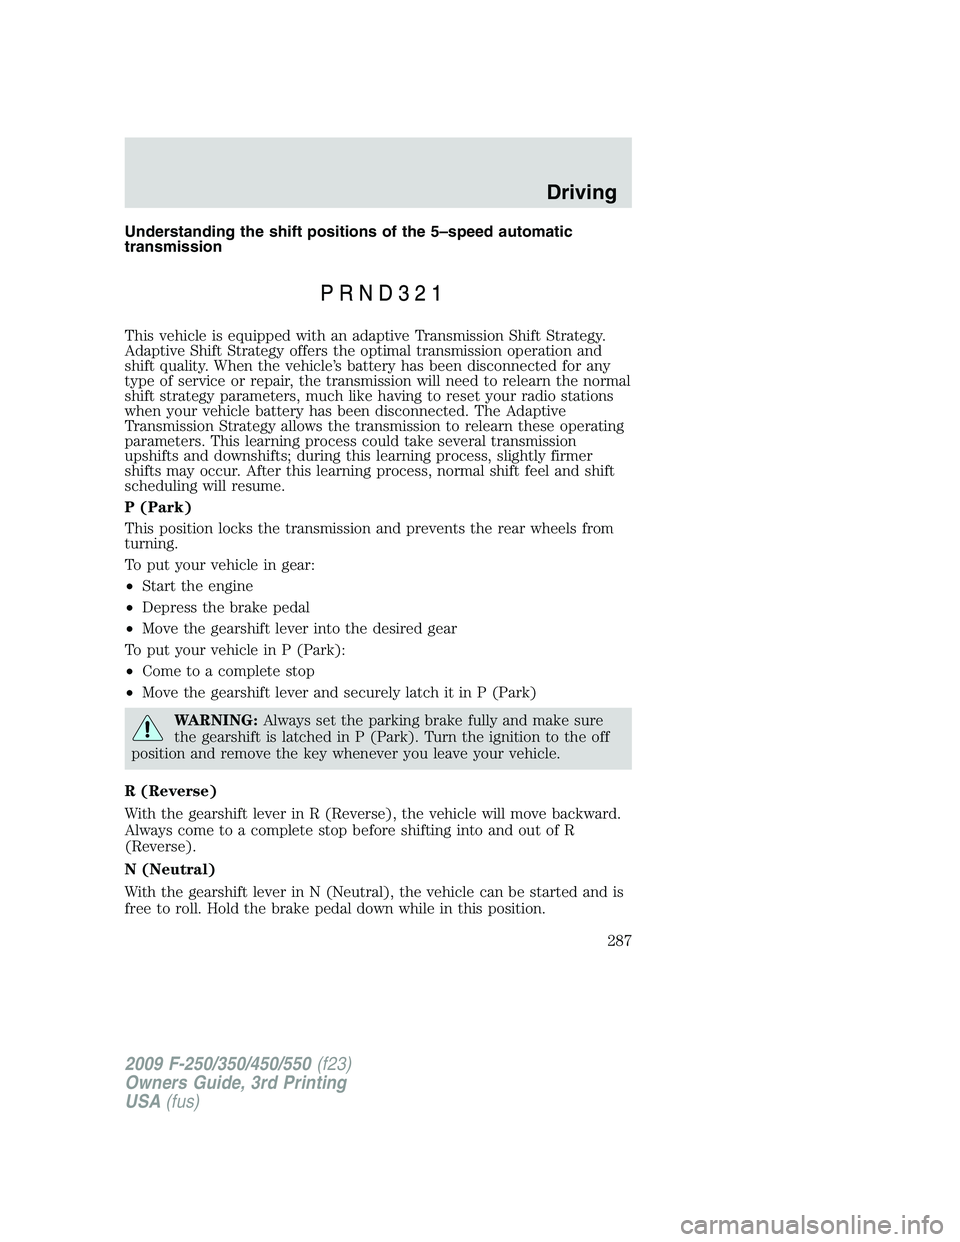
Understanding the shift positions of the 5–speed automatic
transmission
This vehicle is equipped with an adaptive Transmission Shift Strategy.
Adaptive Shift Strategy offers the optimal transmission operation and
shift quality. When the vehicle’s battery has been disconnected for any
type of service or repair, the transmission will need to relearn the normal
shift strategy parameters, much like having to reset your radio stations
when your vehicle battery has been disconnected. The Adaptive
Transmission Strategy allows the transmission to relearn these operating
parameters. This learning process could take several transmission
upshifts and downshifts; during this learning process, slightly firmer
shifts may occur. After this learning process, normal shift feel and shift
scheduling will resume.
P (Park)
This position locks the transmission and prevents the rear wheels from
turning.
To put your vehicle in gear:
•Start the engine
•Depress the brake pedal
•Move the gearshift lever into the desired gear
To put your vehicle in P (Park):
•Come to a complete stop
•Move the gearshift lever and securely latch it in P (Park)
WARNING:Always set the parking brake fully and make sure
the gearshift is latched in P (Park). Turn the ignition to the off
position and remove the key whenever you leave your vehicle.
R (Reverse)
With the gearshift lever in R (Reverse), the vehicle will move backward.
Always come to a complete stop before shifting into and out of R
(Reverse).
N (Neutral)
With the gearshift lever in N (Neutral), the vehicle can be started and is
free to roll. Hold the brake pedal down while in this position.
2009 F-250/350/450/550(f23)
Owners Guide, 3rd Printing
USA(fus)
Driving
287
Page 317 of 419

FUEL PUMP SHUT-OFF SWITCH
This device stops the electric fuel pump from sending fuel to the engine
when your vehicle has had a substantial jolt.
After an accident, if the engine cranks but does not start, this switch
may have been activated.
This switch is located on the
passenger’s side of the instrument
panel. Open the front passenger
door and remove the small access
panel
The switch has a red button on top
of it.
To reset the switch:
1. Turn the ignition off.
2. Check the fuel system for leaks.
3. If no leaks are apparent, reset the switch by pushing in on the reset
button.
4. Turn the ignition on.
5. Wait a few seconds and return the key to off.
6. Make another check for leaks.
2009 F-250/350/450/550(f23)
Owners Guide, 3rd Printing
USA(fus)
Roadside Emergencies
317
Page 376 of 419

WARNING:When lifting a plastic-cased battery, excessive
pressure on the end walls could cause acid to flow through the
vent caps, resulting in personal injury and/or damage to the vehicle or
battery. Lift the battery with a battery carrier or with your hands on
opposite corners.
WARNING:Keep batteries out of reach of children. Batteries
contain sulfuric acid. Avoid contact with skin, eyes or clothing.
Shield your eyes when working near the battery to protect against
possible splashing of acid solution. In case of acid contact with skin or
eyes, flush immediately with water for a minimum of 15 minutes and
get prompt medical attention. If acid is swallowed, call a physician
immediately.
WARNING:Battery posts, terminals and related accessories
contain lead and lead compounds.Wash hands after handling.
Because your vehicle’s engine is also electronically controlled by a
computer, some control conditions are maintained by power from the
battery. When the battery is disconnected or a new battery is installed,
the engine must relearn its idle and fuel trim strategy for optimum
driveability and performance. To begin this process:
1. With the vehicle at a complete stop, set the parking brake.
2. Put the gearshift in P (Park) (automatic transmission) or the neutral
position (manual transmission), turn off all accessories and start the
engine.
3. Run the engine until it reaches normal operating temperature.
4. Allow the engine to idle for at least one minute.
5. Turn the A/C on and allow the engine to idle for at least one minute.
6. Drive the vehicle to complete the relearning process.
•The vehicle may need to be driven 10 miles (16 km) or more to
relearn the idle and fuel trim strategy.
•If you do not allow the engine to relearn its idle trim, the idle
quality of your vehicle may be adversely affected until the idle
trim is eventually relearned.
If the battery has been disconnected or a new battery has been installed,
the clock and the preset radio stations must be reset once the battery is
reconnected.
2009 F-250/350/450/550(f23)
Owners Guide, 3rd Printing
USA(fus)
Maintenance and Specifications
376
Page 382 of 419
•Refer to the chart on the coolant container to ensure the
coolant concentration in your vehicle will provide adequate
protection at the temperatures in which you drive.
Vehicles driven year-round in non-extreme climates should use a 50/50
mixture of engine coolant and distilled water for optimum cooling system
and engine protection.
What you should know about fail-safe cooling (if equipped)
If the engine coolant supply is depleted, this feature allows the vehicle to
be driven temporarily before incremental component damage is incurred.
The “fail-safe” distance depends on ambient temperatures, vehicle load
and terrain.
How fail-safe cooling works
If the engine begins to overheat:
•The engine coolant temperature gauge will move to the red (hot)
area.
•The message center will indicate the engine is overheating.
•The
indicator will illuminate.
If the engine reaches a preset over-temperature condition, the engine
will automatically switch to alternating cylinder operation. Each disabled
cylinder acts as an air pump and cools the engine.
When this occurs the vehicle will still operate. However:
•The engine power will be limited.
•The air conditioning system will be disabled.
Continued operation will increase the engine temperature and the engine
will completely shut down, causing steering and braking effort to
increase.
Once the engine temperature cools, the engine can be re-started. Take
your vehicle to a service facility as soon as possible to minimize engine
damage.
2009 F-250/350/450/550(f23)
Owners Guide, 3rd Printing
USA(fus)
Maintenance and Specifications
382