2009 FORD F250 light
[x] Cancel search: lightPage 71 of 419
•Bit rate — The player supports bit rates from 32–320 kbps, as well as
variable bit rate MP3 files, but lower bit rates will have a noticeable
effect on sound quality and are recommended only for speech or low
fidelity music material. We recommend that you encode MP3 files
using a high quality encoder.
•PC configuration — Encoding MP3 files requires intensive use of your
computer’s resources. Follow the PC configuration recommendations
of the encoder software vendor. We recommend that you avoid
running other software applications on your PC during MP3 encoding
to avoid undesirable noise and distortion.
CD, MP3 and CD player care
•Handle discs by their edges only. Never touch the playing surface.
•Do not expose discs to direct sunlight or heat sources for extended
periods of time.
•Do not insert more than one disc into the slot of the CD player (if
equipped).
•Always store discs out of direct sunlight. Excessive heat may damage
or warp discs.
•Use care when handling and playing CD-R and CD-RW discs, which
are more susceptible to damage from heat, light and stress than are
regular CDs.
•Always insert and remove a disc by holding the disc flat, with the
playing surface facing down, in order to prevent damage to the disc or
the player.
•Never insert any object other than a compact disc (CD) or digital
versatile disc (DVD) into the player, as doing so may damage the
player and may cause injury to you.
•Do not disassemble the player. The laser used in disc playback is
extremely harmful to the eyes.
2009 F-250/350/450/550(f23)
Owners Guide, 3rd Printing
USA(fus)
Entertainment Systems
71
Page 73 of 419
Slow play
1. With a DVD playing, press pause.
2. Press and hold the reverse or
advance button to enter into slow
play mode. Once in slow play mode,
press and release the reverse or advance button repeatedly to cycle
through 1/4 and 1/2. These will display on the status bar on top of the
screen as the screens cycle through at this rate.
Frame by frame
1. With a DVD playing, press pause.
2. Press the right cursor button. The
DVD will advance one frame. Each
press of the right cursor button will
advance the DVD video by one
frame.
Headphone/auxiliary jacks
There are wired headphones (not included) and auxiliary jacks on the
left and right side of your DVD system. They can be used to plug in
wired headphones or to connect and play auxiliary electronic devices
such as game systems, personal camcorders, video cassette recorders,
etc.
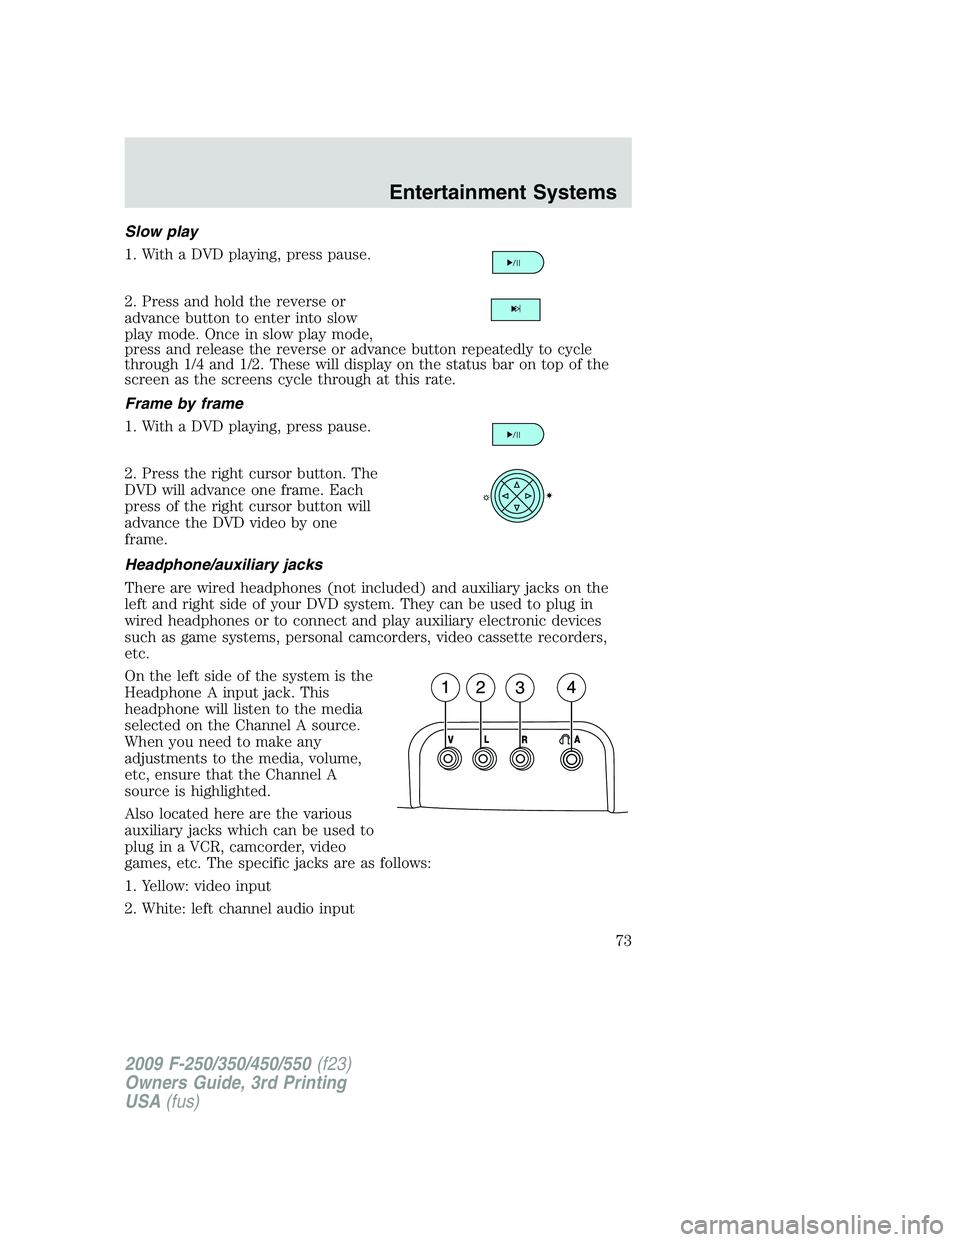
On the left side of the system is the
Headphone A input jack. This
headphone will listen to the media
selected on the Channel A source.
When you need to make any
adjustments to the media, volume,
etc, ensure that the Channel A
source is highlighted.
Also located here are the various
auxiliary jacks which can be used to
plug in a VCR, camcorder, video
games, etc. The specific jacks are as follows:
1. Yellow: video input
2. White: left channel audio input
2009 F-250/350/450/550(f23)
Owners Guide, 3rd Printing
USA(fus)
Entertainment Systems
73
Page 77 of 419

Do not expose the liquid crystal display (LCD) flip-down screen
to direct sunlight or intensive ultraviolet rays for extensive
periods of time. Ultraviolet rays deteriorate the liquid crystal.
Be sure to review User Manuals for video games and video game
equipment when used as auxiliary inputs for your Family Entertainment
System (FES).
Do not operate video games or video equipment if the power cords
and/or cables are broken, split or damaged. Carefully place cords and/or
cables where they will not be stepped on or interfere with the operation
of seats and/or compartments.
Disconnect video games and video equipment power cords and/or cables
when not in use.
Avoid touching auxiliary input jacks with your fingers. Do not blow on
them or allow them to get wet or dirty.
Do not clean any part of the DVD player with benzene, paint thinner, or
any other solvent.
Federal Communication Commission (FCC) Compliance
Changes or modifications not approved by Ford Lincoln-Mercury could
void user’s authority to operate the equipment. This equipment has been
tested and found to comply with the limits for a Class B digital device,
pursuant to Part 15 of the FCC Rules. These limits are designed to
provide reasonable protection against harmful interference in a
residential installation. This equipment generates, uses and can radiate
radio frequency energy and, if not installed and used in accordance with
the instructions, may cause harmful interference and radio
communications.
However, there is no guarantee that interference will not occur in a
particular installation. If this equipment does cause harmful interference
to radio or television reception, which can be determined by turning the
equipment off and on, the user is encouraged to consult the dealer or an
experienced radio/TV technician for help.
2009 F-250/350/450/550(f23)
Owners Guide, 3rd Printing
USA(fus)
Entertainment Systems
77
Page 78 of 419
Care and service of the DVD player
Environmental extremes
DVD players which are subjected to harsh environmental conditions may
be damaged or perform at less than maximum capability. To avoid these
outcomes, whenever possible avoid exposing your DVD player to:
•extremely hot or cold temperatures.
•direct sunlight.
•high humidity.
•a dusty environment.
•locations where strong magnetic fields are generated.
Temperature extremes
When the vehicle is parked under direct sunlight or in an extremely cold
place for a long period of time, wait until the cabin temperature of the
vehicle is at normal temperature before operating the system.
Humidity and moisture condensation
Moisture in the air will condense in the DVD player under extremely
humid conditions or when moving from a cold place to a warm one.
Moisture condensation may cause damage to the DVD and/or player. If
moisture condensation occurs, do not insert a CD or DVD into the
player. If one is already in the player, remove it. Turn the DVD player ON
to dry the moisture before inserting a DVD. This could take an hour or
more.
Foreign substances
Exercise care to prevent dirt and foreign objects from entering the DVD
player compartment. Be especially careful not to spill liquids of any kind
onto the media controls or into the system. If liquid is accidentally
spilled onto the system, immediately turn the system OFF and consult a
qualified service technician.
Cleaning the liquid crystal display (LCD) flip-down screen
Clean the display screen by applying a small amount of water or any
ammonia-based household glass cleaner directly to a soft cloth. Rub the
screen gently until the dust, dirt or fingerprints are removed. Do not
spray the screen directly with water or glass cleaning solvents. Overspray
from these fluids could drip down into the internal electronics of the
screen and cause damage. Do not apply excessive pressure while
cleaning the screen.
2009 F-250/350/450/550(f23)
Owners Guide, 3rd Printing
USA(fus)
Entertainment Systems
78
Page 83 of 419

Operating tips
•To reduce fog build up on the windshield during humid weather, place
the air flow selector in the
position.
•To reduce humidity build up inside the vehicle, do not drive with the
air flow selector in the O (OFF) position.
•Do not put objects under the front seats that will interfere with the
airflow to the rear seats.
•Remove any snow, ice or leaves from the air intake area at the base of
the windshield.
•To improve the A/C cool down, drive with the windows slightly open
for 2–3 minutes after start up or until the vehicle has been “aired out.”
During extreme high ambient temperatures when idling stationary for
extended periods of time in gear, it is recommended to run the A/C in
the MAX A/C position, reduce blower fan speed from the highest setting
and put the vehicle’s transmission into the PARK gear position
(automatic transmission only) to continue to receive cool air from your
A/C system.
For maximum cooling performance in MAX A/C mode:
1. Move the temperature control to the coolest setting.
2. Set the fan to the highest speed initially, then adjust in order to
maintain comfort.
To aid in side window defogging and demisting in cold weather:
1. Select
.
2. Select A/C.
3. Set the temperature control to maintain comfort.
4. Set the fan speed to highest setting.
5. Direct the outer instrument panel vents towards the side windows.
2009 F-250/350/450/550(f23)
Owners Guide, 3rd Printing
USA(fus)
Climate Controls
83
Page 87 of 419

Operating tips
•To reduce fog build up on the windshield during humid weather, place
the air flow selector in the
position.
•To reduce humidity build up inside the vehicle, do not drive with the
system OFF, or with recirculated air
engaged and A/C off.
•Do not put objects under the front seats that will interfere with the
airflow to the back seats.
•Remove any snow, ice or leaves from the air intake area at the base of
the windshield.
•To improve the A/C cool down, drive with the windows slightly open
for 2-3 minutes after start up or until the vehicle has been “aired out”.
During extreme high ambient temperatures when idling stationary for
extended periods of time in gear, it is recommended to run the A/C in
the MAX A/C position, reduce blower fan speed from the highest setting
and put the vehicle’s transmission into the PARK gear position
(automatic transmission only) to continue to receive cool air from your
A/C system.
For maximum cooling performance (MAX A/C):
Automatic operation:
1. Press AUTO for full automatic operation.
2. Do not override A/C or
(recirculated air).
3. Set the temperature to 60°F (16°C).
Override operation:
1. Select air distribution.
2. Select A/C and
(recirculated air). Use(recirculated air) with
A/C to provide colder airflow.
3. Set the temperature to 60°F (16°C).
4. Set highest fan speed initially, then adjust to maintain comfort.
2009 F-250/350/450/550(f23)
Owners Guide, 3rd Printing
USA(fus)
Climate Controls
87
Page 89 of 419
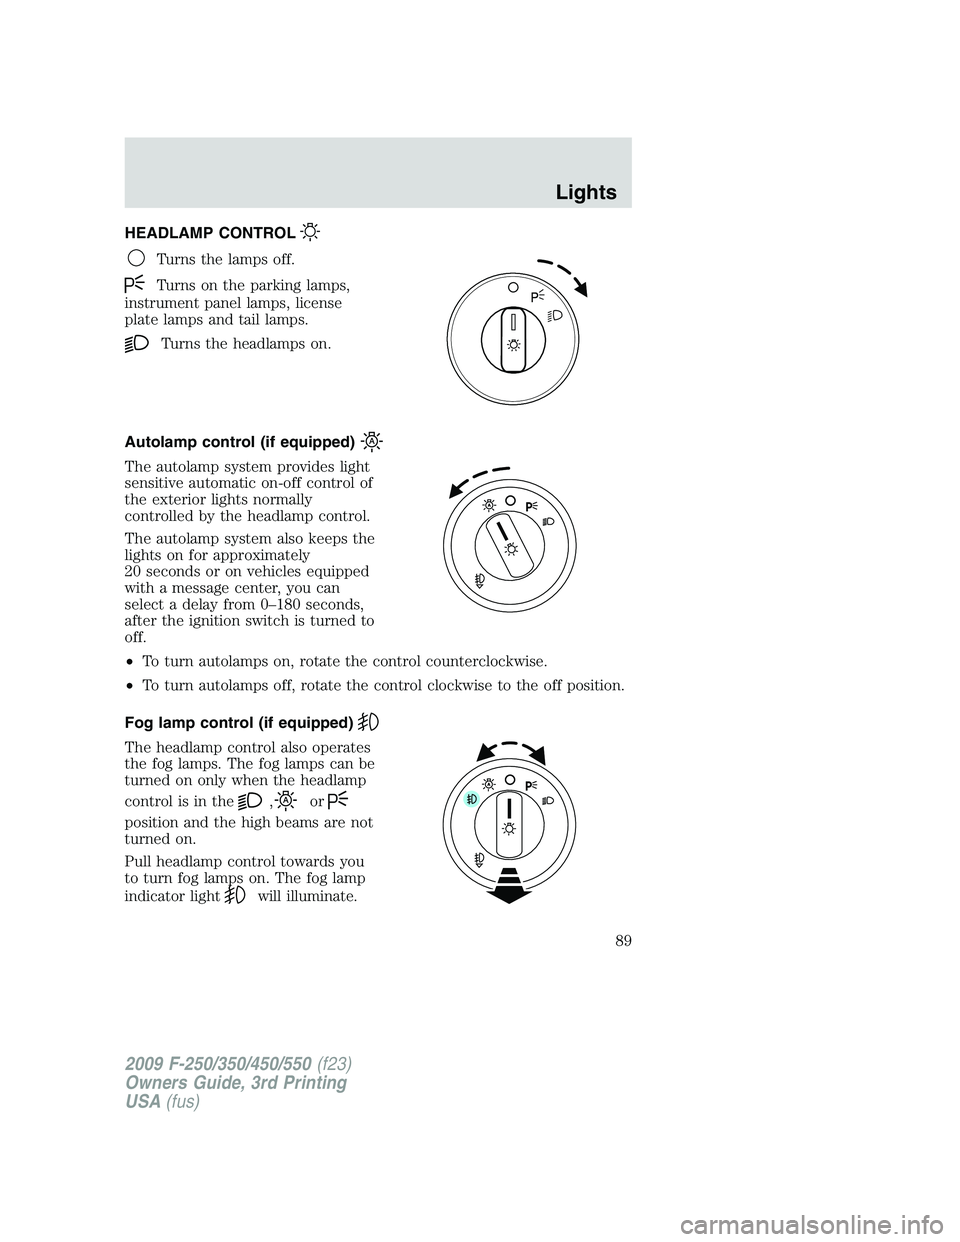
HEADLAMP CONTROL
Turns the lamps off.
Turns on the parking lamps,
instrument panel lamps, license
plate lamps and tail lamps.
Turns the headlamps on.
Autolamp control (if equipped)
The autolamp system provides light
sensitive automatic on-off control of
the exterior lights normally
controlled by the headlamp control.
The autolamp system also keeps the
lights on for approximately
20 seconds or on vehicles equipped
with a message center, you can
select a delay from 0–180 seconds,
after the ignition switch is turned to
off.
•To turn autolamps on, rotate the control counterclockwise.
•To turn autolamps off, rotate the control clockwise to the off position.
Fog lamp control (if equipped)
The headlamp control also operates
the fog lamps. The fog lamps can be
turned on only when the headlamp
control is in the
,or
position and the high beams are not
turned on.
Pull headlamp control towards you
to turn fog lamps on. The fog lamp
indicator light
will illuminate.
2009 F-250/350/450/550(f23)
Owners Guide, 3rd Printing
USA(fus)
Lights
89
Page 90 of 419
Daytime running lamps (DRL) (if equipped)
Turns the headlamps on with a reduced output.
To activate:
•the ignition must be in the on position,
•the headlamp control is in the off or parking lamp position and
•the parking brake must be disengaged.
WARNING:Always remember to turn on your headlamps at
dusk or during inclement weather. The Daytime Running Lamp
(DRL) system does not activate the tail lamps and generally may not
provide adequate lighting during these conditions. Failure to activate
your headlamps under these conditions may result in a collision.
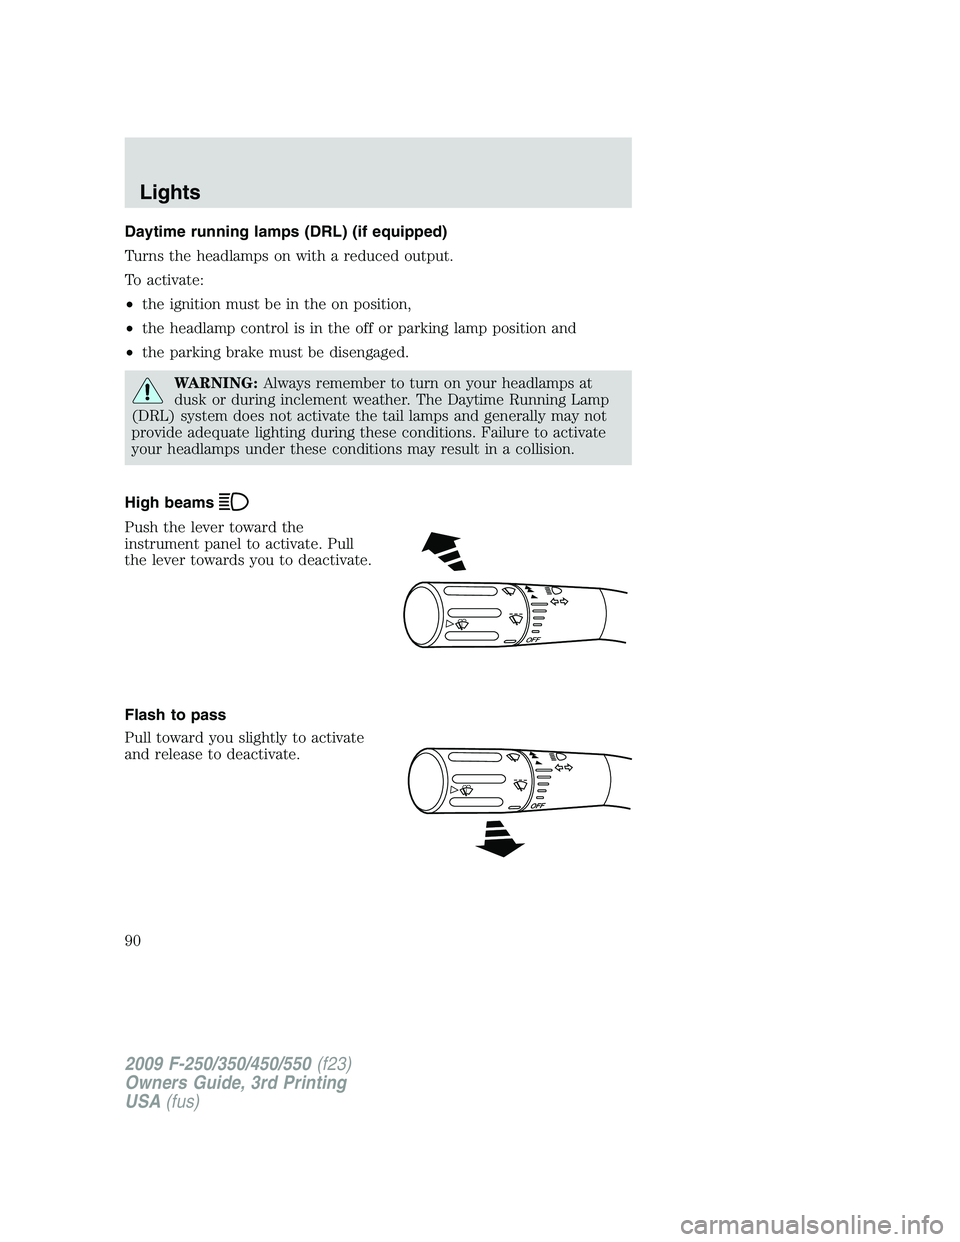
High beams
Push the lever toward the
instrument panel to activate. Pull
the lever towards you to deactivate.
Flash to pass
Pull toward you slightly to activate
and release to deactivate.
O
F
F
2009 F-250/350/450/550(f23)
Owners Guide, 3rd Printing
USA(fus)
Lights
90