Page 1 of 351
Introduction 4
Instrument Cluster 12
Warning lights and chimes 12
Gauges 18
Entertainment Systems 21
How to get going 21
AM/FM stereo with CD 25
AM/FM stereo with in-dash six CD 33
Auxiliary input jack (Line in) 41
USB port 43
Satellite radio information 46
Navigation system 49
SYNC�49
Climate Controls 50
Manual heating and air conditioning 50
Automatic temperature control 52
Lights 56
Headlamps 56
Turn signal control 60
Bulb replacement 60
Driver Controls 66
Windshield wiper/washer control 66
Steering wheel adjustment 67
Power windows 71
Mirrors 75
Speed control 78
Message center 84
Table of Contents
1
2009 07+ Explorer Sport Trac(esp)
Owners Guide, 2nd Printing
USA(fus)
Page 12 of 351
WARNING LIGHTS AND CHIMES
Standard instrument cluster
Optional instrument cluster
Warning lights and gauges can alert you to a vehicle condition that may
become serious enough to cause expensive repairs. A warning light may
illuminate when a problem exists with one of your vehicle’s functions.
Many lights will illuminate when you start your vehicle to make sure the
bulb works. If any light remains on after starting the vehicle, refer to the
respective system warning light for additional information.
Note:Some warning lights will display in the message center as words
and function the same as the warning light.
Note:Depending on which options your vehicle has, some indicators
may not be present in your vehicle.
2009 07+ Explorer Sport Trac(esp)
Owners Guide, 2nd Printing
USA(fus)
Instrument Cluster
12
Page 50 of 351
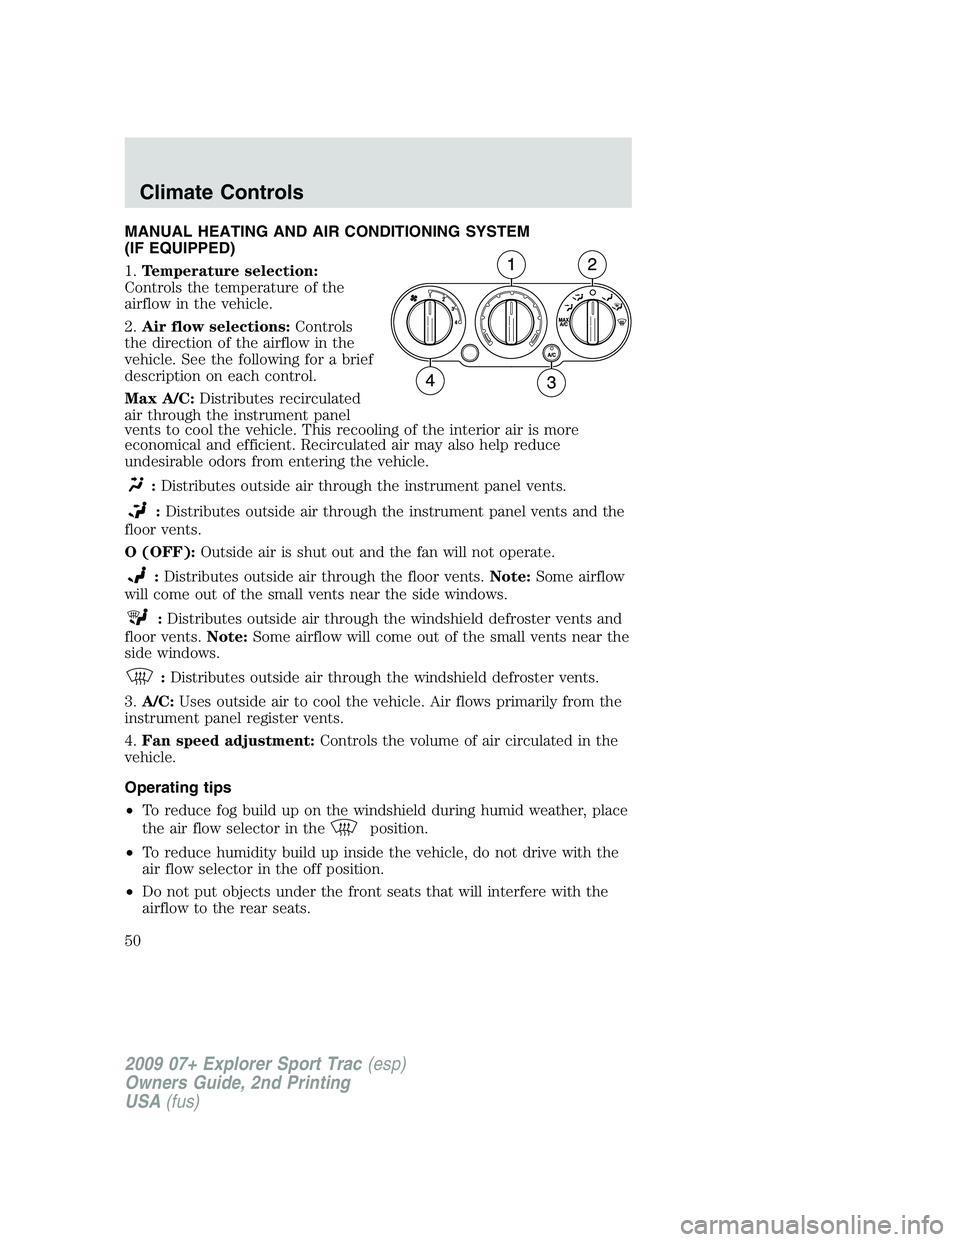
MANUAL HEATING AND AIR CONDITIONING SYSTEM
(IF EQUIPPED)
1.Temperature selection:
Controls the temperature of the
airflow in the vehicle.
2.Air flow selections:Controls
the direction of the airflow in the
vehicle. See the following for a brief
description on each control.
Max A/C:Distributes recirculated
air through the instrument panel
vents to cool the vehicle. This recooling of the interior air is more
economical and efficient. Recirculated air may also help reduce
undesirable odors from entering the vehicle.
:Distributes outside air through the instrument panel vents.
:Distributes outside air through the instrument panel vents and the
floor vents.
O (OFF):Outside air is shut out and the fan will not operate.
:Distributes outside air through the floor vents.Note:Some airflow
will come out of the small vents near the side windows.
:Distributes outside air through the windshield defroster vents and
floor vents.Note:Some airflow will come out of the small vents near the
side windows.
:Distributes outside air through the windshield defroster vents.
3.A/C:Uses outside air to cool the vehicle. Air flows primarily from the
instrument panel register vents.
4.Fan speed adjustment:Controls the volume of air circulated in the
vehicle.
Operating tips
•To reduce fog build up on the windshield during humid weather, place
the air flow selector in the
position.
•To reduce humidity build up inside the vehicle, do not drive with the
air flow selector in the off position.
•Do not put objects under the front seats that will interfere with the
airflow to the rear seats.
2009 07+ Explorer Sport Trac(esp)
Owners Guide, 2nd Printing
USA(fus)
Climate Controls
50
Page 52 of 351
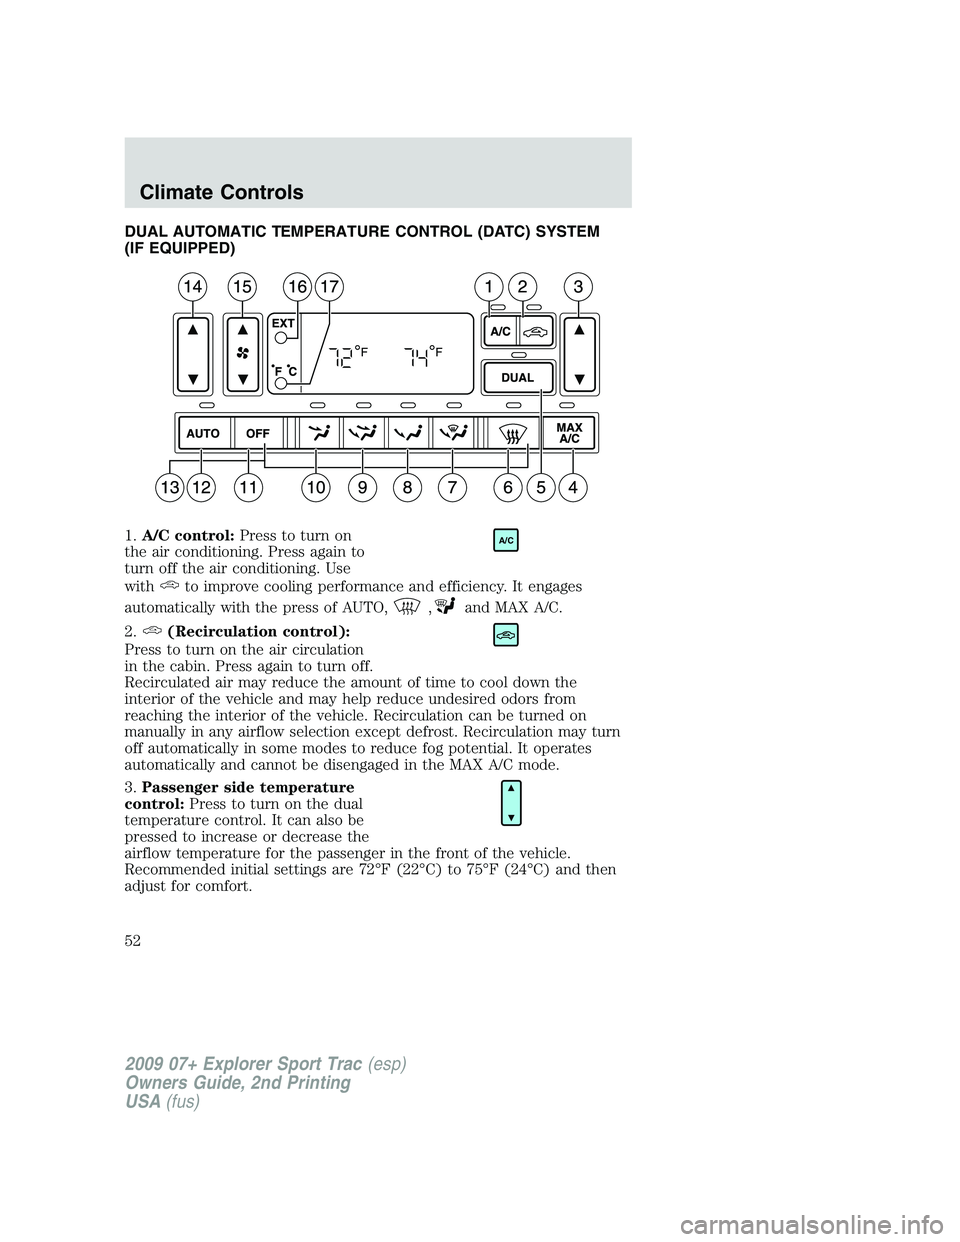
DUAL AUTOMATIC TEMPERATURE CONTROL (DATC) SYSTEM
(IF EQUIPPED)
1.A/C control:Press to turn on
the air conditioning. Press again to
turn off the air conditioning. Use
with
to improve cooling performance and efficiency. It engages
automatically with the press of AUTO,
,and MAX A/C.
2.
(Recirculation control):
Press to turn on the air circulation
in the cabin. Press again to turn off.
Recirculated air may reduce the amount of time to cool down the
interior of the vehicle and may help reduce undesired odors from
reaching the interior of the vehicle. Recirculation can be turned on
manually in any airflow selection except defrost. Recirculation may turn
off automatically in some modes to reduce fog potential. It operates
automatically and cannot be disengaged in the MAX A/C mode.
3.Passenger side temperature
control:Press to turn on the dual
temperature control. It can also be
pressed to increase or decrease the
airflow temperature for the passenger in the front of the vehicle.
Recommended initial settings are 72°F (22°C) to 75°F (24°C) and then
adjust for comfort.
A/C
2009 07+ Explorer Sport Trac(esp)
Owners Guide, 2nd Printing
USA(fus)
Climate Controls
52
Page 60 of 351
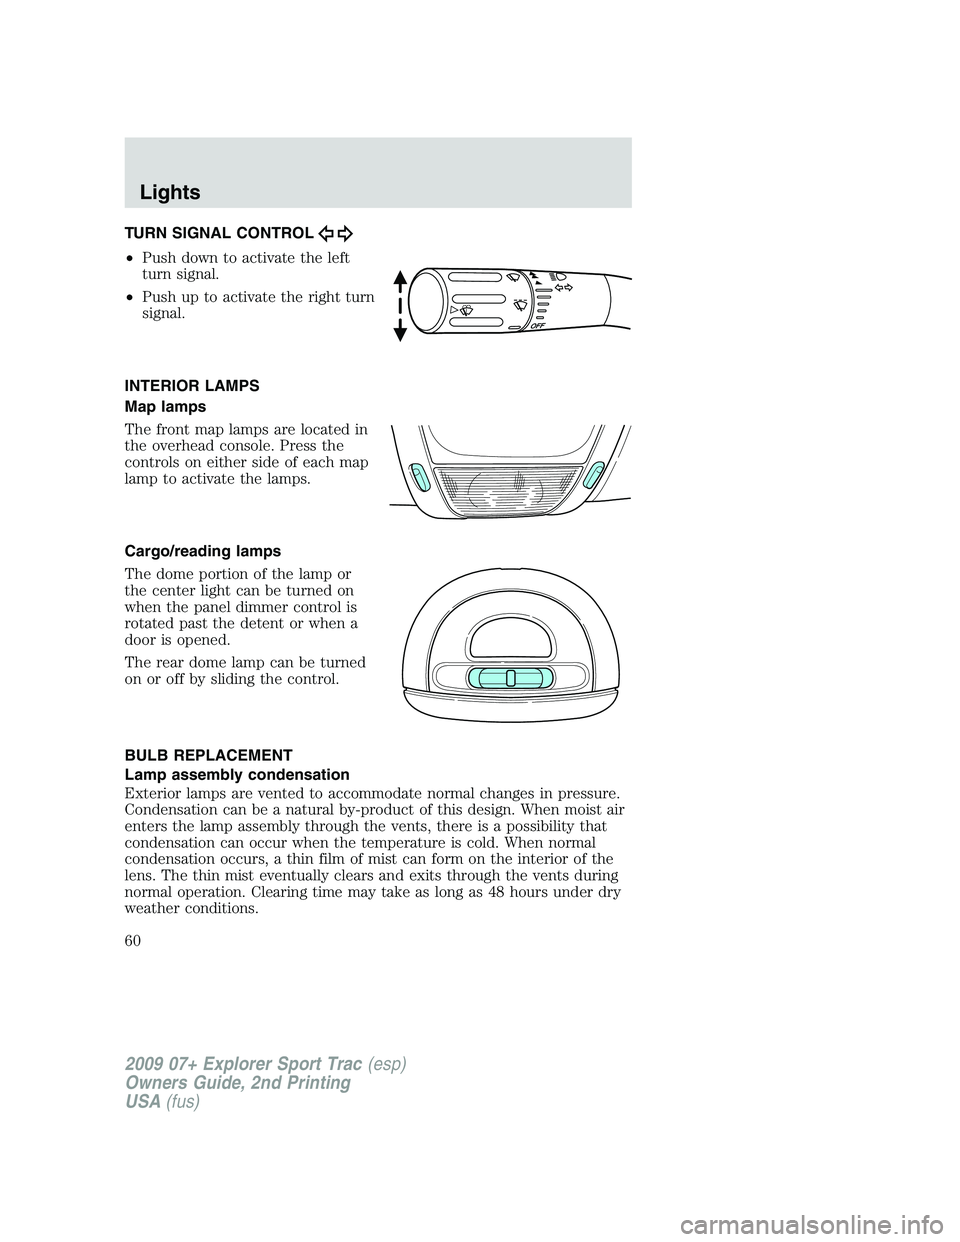
TURN SIGNAL CONTROL
•Push down to activate the left
turn signal.
•Push up to activate the right turn
signal.
INTERIOR LAMPS
Map lamps
The front map lamps are located in
the overhead console. Press the
controls on either side of each map
lamp to activate the lamps.
Cargo/reading lamps
The dome portion of the lamp or
the center light can be turned on
when the panel dimmer control is
rotated past the detent or when a
door is opened.
The rear dome lamp can be turned
on or off by sliding the control.
BULB REPLACEMENT
Lamp assembly condensation
Exterior lamps are vented to accommodate normal changes in pressure.
Condensation can be a natural by-product of this design. When moist air
enters the lamp assembly through the vents, there is a possibility that
condensation can occur when the temperature is cold. When normal
condensation occurs, a thin film of mist can form on the interior of the
lens. The thin mist eventually clears and exits through the vents during
normal operation. Clearing time may take as long as 48 hours under dry
weather conditions.
2009 07+ Explorer Sport Trac(esp)
Owners Guide, 2nd Printing
USA(fus)
Lights
60
Page 92 of 351
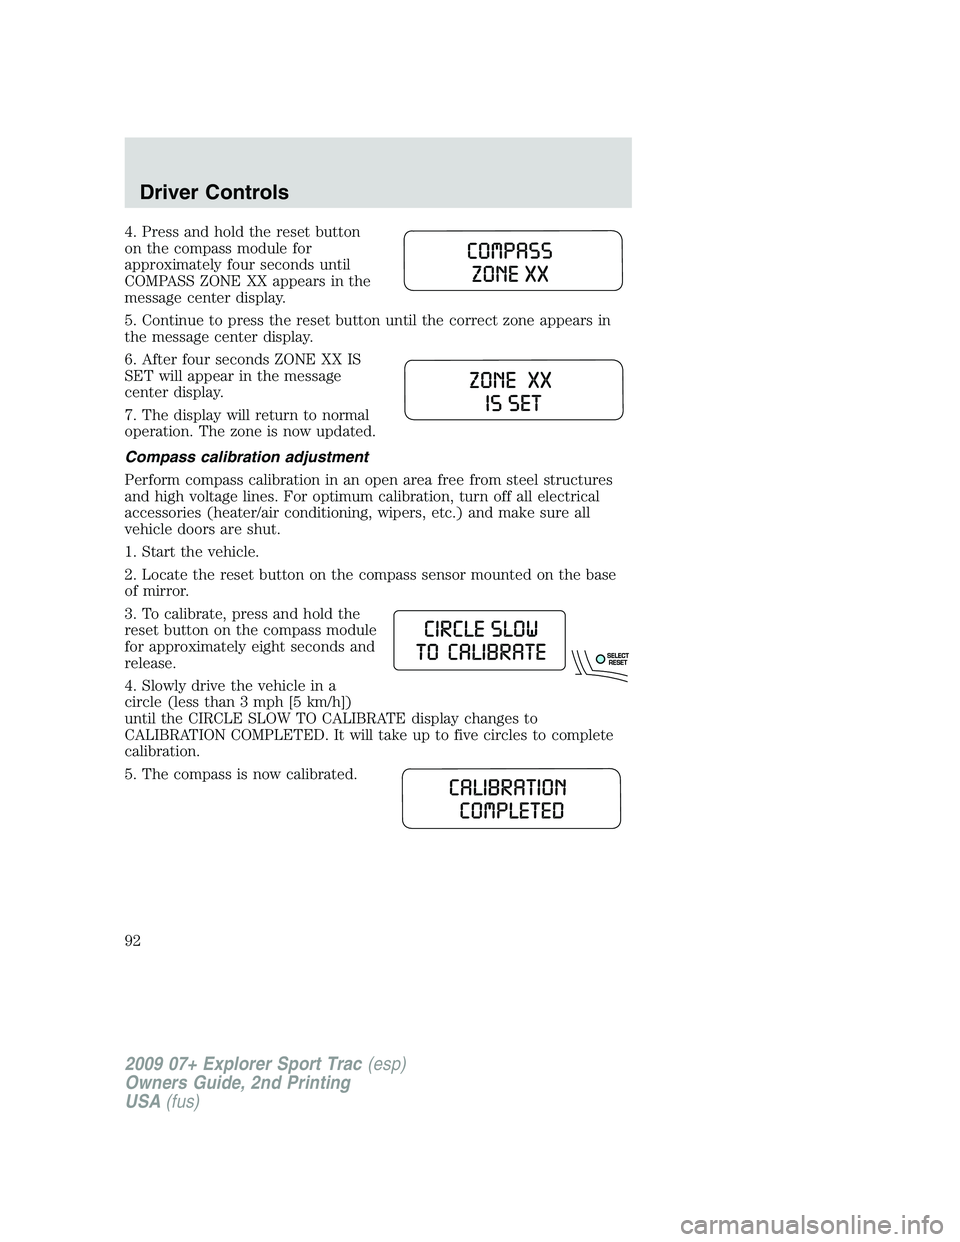
4. Press and hold the reset button
on the compass module for
approximately four seconds until
COMPASS ZONE XX appears in the
message center display.
5. Continue to press the reset button until the correct zone appears in
the message center display.
6. After four seconds ZONE XX IS
SET will appear in the message
center display.
7. The display will return to normal
operation. The zone is now updated.
Compass calibration adjustment
Perform compass calibration in an open area free from steel structures
and high voltage lines. For optimum calibration, turn off all electrical
accessories (heater/air conditioning, wipers, etc.) and make sure all
vehicle doors are shut.
1. Start the vehicle.
2. Locate the reset button on the compass sensor mounted on the base
of mirror.
3. To calibrate, press and hold the
reset button on the compass module
for approximately eight seconds and
release.
4. Slowly drive the vehicle in a
circle (less than 3 mph [5 km/h])
until the CIRCLE SLOW TO CALIBRATE display changes to
CALIBRATION COMPLETED. It will take up to five circles to complete
calibration.
5. The compass is now calibrated.
2009 07+ Explorer Sport Trac(esp)
Owners Guide, 2nd Printing
USA(fus)
Driver Controls
92
Page 105 of 351
Compass calibration adjustment (if equipped)
Perform compass calibration in an open area free from steel structures
and high voltage lines. For optimum calibration, turn off all electrical
accessories (heater/air conditioning, wipers, etc.) and make sure all
vehicle doors are shut.
1. From the SETUP menu, press the
SETUP control to select the
compass calibration function.
2. Press RESET for calibration.
3. Slowly drive the vehicle in a
circle (less than 3 mph [5 km/h])
until the CIRCLE SLOWLY TO
CALIBRATE display changes to
CALIBRATION COMPLETE. It will
take up to five circles to complete
calibration.
4. The compass is now calibrated.
Oil life Setup and Start Value
To reset the oil monitoring system to 100% after each oil change
(approximately 7,500 miles [12,000 km] or six months) perform the
following:
1. Press RESET control to display
“HOLD RESET IF NEW OIL”.
2009 07+ Explorer Sport Trac(esp)
Owners Guide, 2nd Printing
USA(fus)
Driver Controls
105
Page 143 of 351
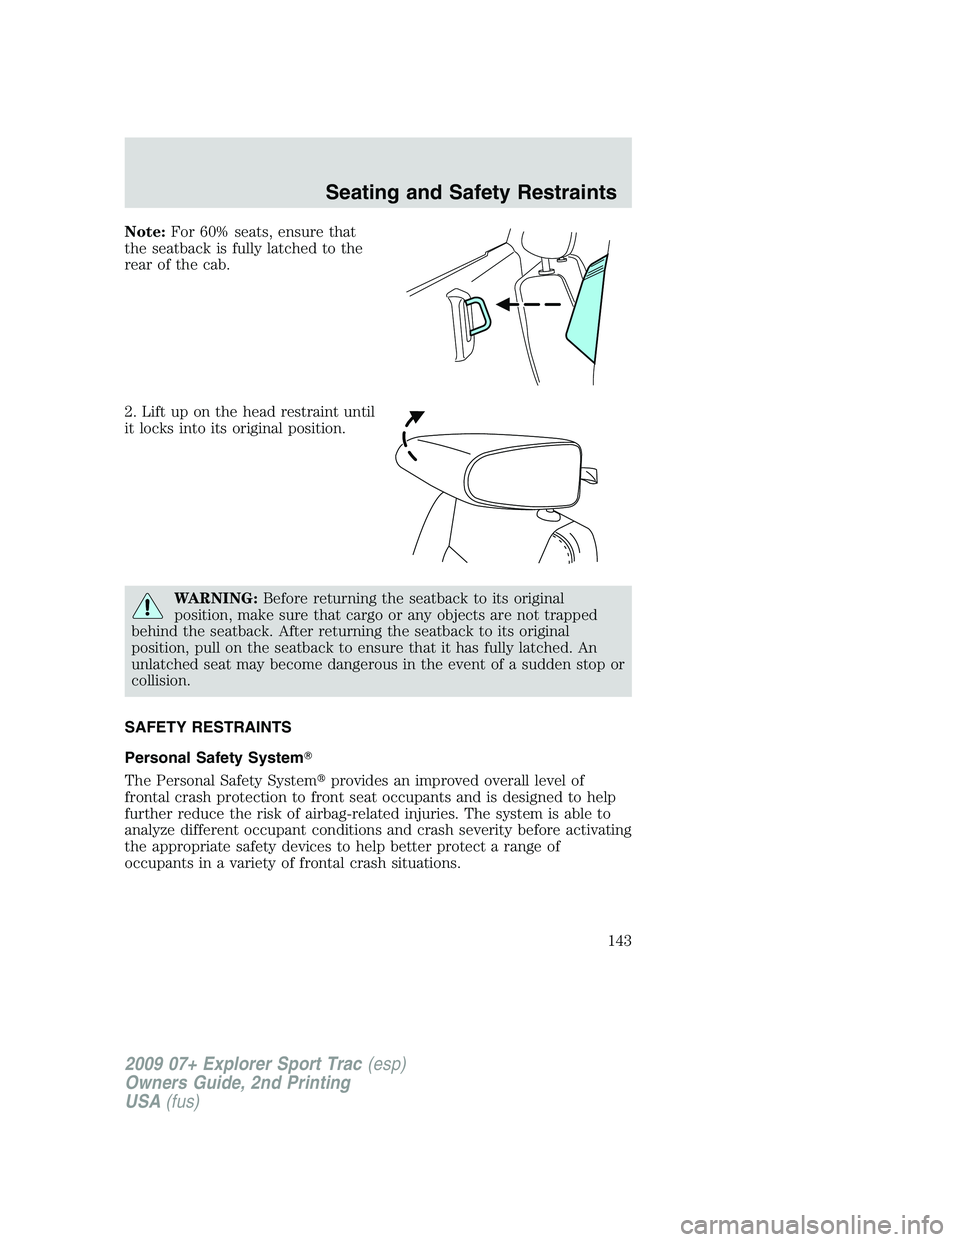
Note:For 60% seats, ensure that
the seatback is fully latched to the
rear of the cab.
2. Lift up on the head restraint until
it locks into its original position.
WARNING:Before returning the seatback to its original
position, make sure that cargo or any objects are not trapped
behind the seatback. After returning the seatback to its original
position, pull on the seatback to ensure that it has fully latched. An
unlatched seat may become dangerous in the event of a sudden stop or
collision.
SAFETY RESTRAINTS
Personal Safety System�
The Personal Safety System�provides an improved overall level of
frontal crash protection to front seat occupants and is designed to help
further reduce the risk of airbag-related injuries. The system is able to
analyze different occupant conditions and crash severity before activating
the appropriate safety devices to help better protect a range of
occupants in a variety of frontal crash situations.
2009 07+ Explorer Sport Trac(esp)
Owners Guide, 2nd Printing
USA(fus)
Seating and Safety Restraints
143