2009 FORD EXPLORER fuel cap
[x] Cancel search: fuel capPage 3 of 407

Customer Assistance 339
Reporting safety defects (U.S. only) 346
Reporting safety defects (Canada only) 346
Cleaning 347
Maintenance and Specifications 355
Engine compartment 357
Engine oil 361
Battery 366
Engine coolant 368
Fuel information 375
Air filter(s) 389
Part numbers 391
Maintenance product specifications and capacities 392
Engine data 396
Accessories 399
Index 401
All rights reserved. Reproduction by any means, electronic or mechanical
including photocopying, recording or by any information storage and retrieval
system or translation in whole or part is not permitted without written
authorization from Ford Motor Company. Ford may change the contents without
notice and without incurring obligation.
Copyright © 2008 Ford Motor Company
Table of Contents
3
2009 Explorer(exp)
Owners Guide, 1st Printing
USA(fus)
Page 11 of 407

Vehicle Symbol Glossary
Power Windows
Front/Rear
Power Window Lockout
Child Safety Door
Lock/UnlockInterior Luggage
Compartment Release
Panic AlarmEngine Oil
Engine CoolantEngine Coolant
Temperature
Do Not Open When HotBattery
Avoid Smoking, Flames,
or SparksBattery Acid
Explosive GasFan Warning
Power Steering FluidMaintain Correct Fluid
LevelMAX
MIN
Service Engine SoonEngine Air Filter
Passenger Compartment
Air FilterJack
Check Fuel CapLow Tire Pressure
Warning
2009 Explorer(exp)
Owners Guide, 1st Printing
USA(fus)
Introduction
11
Page 16 of 407

Low tire pressure warning:
Illuminates when your tire pressure
is low. If the light remains on at
start up or while driving, the tire
pressure should be checked. Refer
toInflating your tiresin theTires, Wheels and Loadingchapter. When
the ignition is first turned to on, the light will illuminate for three
seconds to ensure the bulb is working. If the light does not turn on,
contact your authorized dealer as soon as possible. For more information
on this system, refer toTire pressure monitoring system (TPMS)in
theTires, Wheels and Loadingchapter.
Check fuel cap fill inlet (if equipped):Illuminates when the fuel fill
inlet may not be properly closed. Continued driving with this light on
may cause the service engine soon warning light to come on, refer to
Easy Fuel “no cap” fuel systemin theMaintenance and Specification
chapter.
•Standard instrument cluster
•Optional instrument cluster
Speed control (if equipped):
Illuminates when the speed control
is activated. Turns off when the
speed control system is deactivated.
O/D off:Illuminates when the
overdrive function of the
transmission has been turned off;
refer to theDrivingchapter.
O/D
OFF
2009 Explorer(exp)
Owners Guide, 1st Printing
USA(fus)
Instrument Cluster
16
Page 133 of 407

CHECK FUEL FILL INLET (if equipped)— Displayed when the fuel
fill inlet may not be properly closed. Refer toEasy Fuel™ “no cap” fuel
systemin theMaintenance and Specificationschapter.
CHECK CHARGING SYSTEM— Displayed when the electrical system
is not maintaining proper voltage when the engine is running. If you are
operating electrical accessories when the engine is idling at a low speed,
turn off as many of the electrical loads as soon as possible. If the
warning stays on or comes on when the engine is operating at normal
speeds, contact your authorized dealer as soon as possible.
FUEL LEVEL LOW— Displayed as an early reminder of a low fuel
condition.
PARK BRAKE ENGAGED— Displayed when the manual park brake is
set, the engine is running and the vehicle is driven more than 3 mph
(5 km/h). If the warning stays on after the park brake is released,
contact your authorized dealer as soon as possible.
CHECK BRAKE SYSTEM— Displayed when the braking system is not
operating properly. If the warning stays on or continues to come on,
contact your authorized dealer as soon as possible.
CHECK PARK AID (if equipped)— Displayed when the transmission
is in R (Reverse) and the Reverse Sensing System (Park Aid) is disabled.
Refer toReverse Sensing System (Park Aid)in this section to enable.
LOW TIRE PRESSURE— Displayed when one or more tires on your
vehicle have low tire pressure. Refer toInflating your tiresin theTires,
Wheels and Loadingchapter.
TIRE PRESSURE MONITOR FAULT— Displayed when the Tire
Pressure Monitoring System is malfunctioning. If the warning stays on or
continues to come on, contact your authorized dealer as soon as
possible.
TIRE PRESSURE SENSOR FAULT— Displayed when a tire pressure
sensor is malfunctioning, or your spare tire is in use. For more
information on how the system operates under these conditions, refer to
Understanding your Tire Pressure Monitoring System (TPMS)in the
Tires, Wheels and Loadingchapter. If the warning stays on or
continues to come on, contact your authorized dealer as soon as
possible.
2009 Explorer(exp)
Owners Guide, 1st Printing
USA(fus)
Driver Controls
133
Page 147 of 407

Warning display Status
Door ajar Warning cannot be reset
Fuel level low Warning returns after 10 minutes
Park brake engaged
Service RSC now
Check brake system
Check park aid (if equipped) Warning returns only after the ignition
key is turned from off to on.
Brake fluid level low
Washer fluid level low
Oil change required
Oil life change soon
Liftgate/glass ajar Warning returns after the condition
has cleared then reoccurs within the
same ignition on-off cycle. Remove objects near pass seat
Check fuel fill inlet (if
equipped)
Check charging system
Low tire pressure
Tire pressure monitor fault
Tire pressure sensor fault
Trailer sway, reduce speed Temporary alert
For 4x4 low stop vehicle (if
equipped)
For 4x4 low shift to N (if
equipped)
To exit 4x4 low stop vehicle (if
equipped)
To exit 4x4 low shift to N (if
equipped)
DOOR AJAR— Displayed when a door is not completely closed.
REMOVE OBJECTS NEAR PASS SEAT— Displayed when objects
are by the passenger seat. After the objects are moved away from the
seat, if the warning stays on or continues to come on, contact your
authorized dealer as soon as possible.
CHECK FUEL FILL INLET (if equipped)— Displayed when the fuel
fill inlet may not be properly closed. Refer toEasy Fuel™ “no cap” fuel
systemin theMaintenance and Specificationschapter.
2009 Explorer(exp)
Owners Guide, 1st Printing
USA(fus)
Driver Controls
147
Page 260 of 407

SNOW TIRES AND CHAINS
WARNING:Snow tires must be the same size, load index, speed
rating as those originally provided by Ford. The use of
non-recommended tires and wheels could cause steering, suspension,
axle or transfer case/power transfer unit failure. Using any tire or
wheel not recommended by Ford may increase the risk of loss of
vehicle control or vehicle rollover, which could result in personal injury
or death.
The tires on your vehicle have all-weather treads to provide traction in
rain and snow. However, in some climates, using snow tires or traction
devices may be necessary. Ford offers tire cables as a Ford approved
accessory and recommends use of these or SAE class “S” tire cables. See
your authorized dealer for more information on tire cables for your
vehicle.
Follow these guidelines when using snow tires and traction devices:
•Use only SAE Class S chains.
•Cables should only be used on the rear wheels.
•Do not use tire chains, cables or optional traction devices on 17, 18 or
20 inch wheels and tires.
•Install cables securely, verifying that the cables do not touch any
wiring, brake lines or fuel lines.
•Drive cautiously. If you hear the cables rub or bang against the
vehicle, stop and retighten them. If this does not work, remove the
cables to prevent vehicle damage.
•Avoid overloading your vehicle.
•Remove the cables when they are no longer needed.
•Do not use cables on dry roads.
•Do not exceed 30 mph (48 km/h) with tire cables on your vehicle.
Consult your authorized dealer for information on other Ford Motor
Company approved methods of traction control.
VEHICLE LOADING – WITH AND WITHOUT A TRAILER
This section will guide you in the proper loading of your vehicle and/or
trailer, to keep your loaded vehicle weight within its design rating
capability, with or without a trailer. Properly loading your vehicle will
provide maximum return of vehicle design performance. Before loading
2009 Explorer(exp)
Owners Guide, 1st Printing
USA(fus)
Tires, Wheels and Loading
260
Page 261 of 407

your vehicle, familiarize yourself with the following terms for determining
your vehicle’s weight ratings, with or without a trailer, from the vehicle’s
Tire Label or Safety Compliance Certification Label:
Base Curb Weight– is the weight of the vehicle including a full tank of
fuel and all standard equipment. It does not include passengers, cargo, or
optional equipment.
Vehicle Curb Weight– is the weight of your new vehicle when you
picked it up from your authorized dealer plus any aftermarket
equipment.
Payload– is the combined weight of cargo and passengers that the
vehicle is carrying. The maximum payload for your vehicle can be found
on the Tire Label on the B-Pillar or the edge of the driver’s door
(vehicles exported outside the US and Canada may not have a Tire
Label). Look for“THE COMBINED WEIGHT OF OCCUPANTS AND
CARGO SHOULD NEVER EXCEED XXX kg OR XXX lb.”for
maximum payload. The payload listed on the Tire Label is the maximum
payload for the vehicle as built by the assembly plant. If any aftermarket
or authorized-dealer installed equipment has been installed on the
vehicle, the weight of the equipment must be subtracted from the
payload listed on the Tire Label in order to determine the new payload.
WARNING:The appropriate loading capacity of your vehicle can
be limited either by volume capacity (how much space is
available) or by payload capacity (how much weight the vehicle should
carry). Once you have reached the maximum payload of your vehicle,
do not add more cargo, even if there is space available. Overloading or
improperly loading your vehicle can contribute to loss of vehicle
control and vehicle rollover.
2009 Explorer(exp)
Owners Guide, 1st Printing
USA(fus)
Tires, Wheels and Loading
261
Page 331 of 407

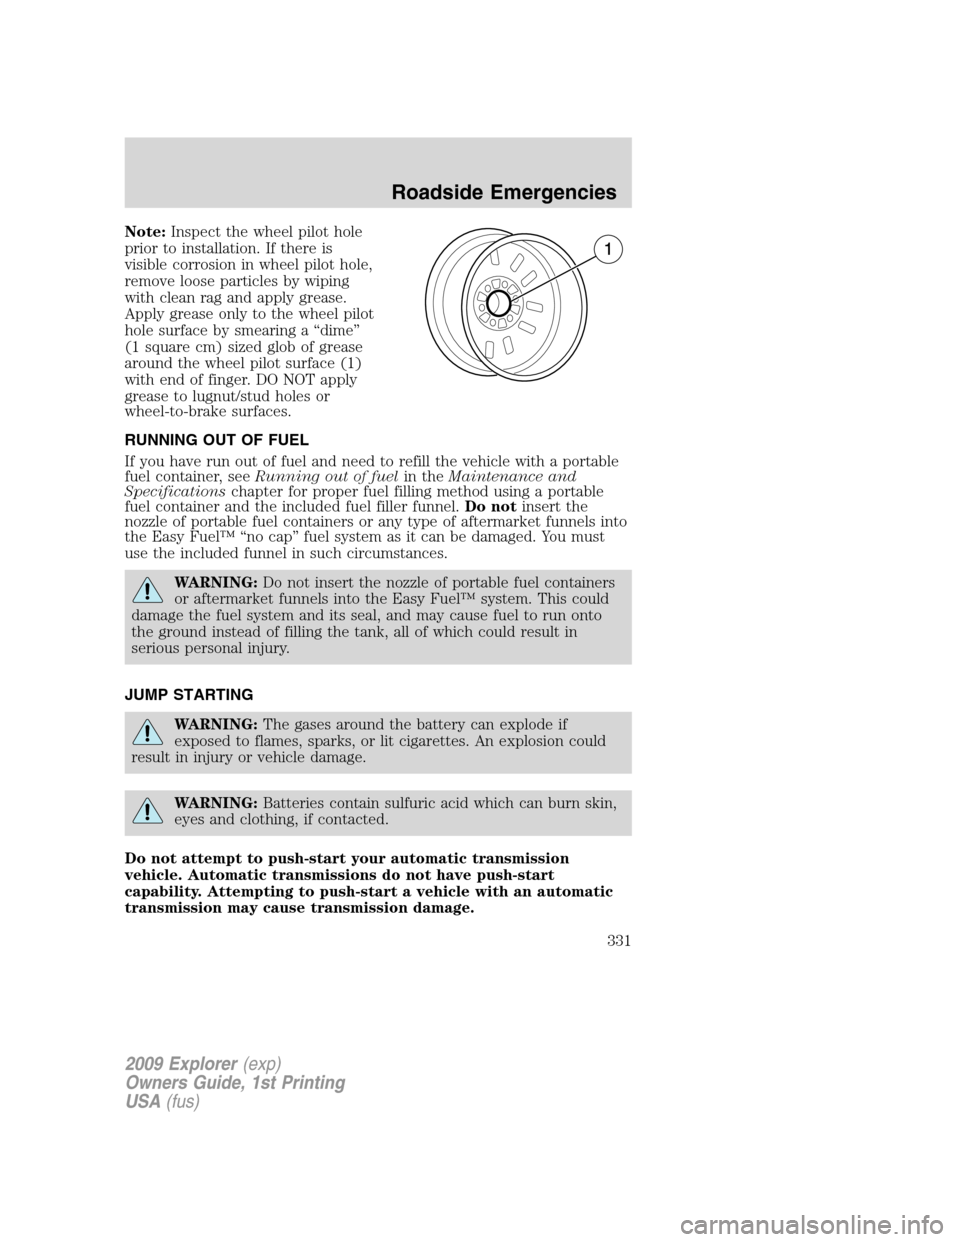
Note:Inspect the wheel pilot hole
prior to installation. If there is
visible corrosion in wheel pilot hole,
remove loose particles by wiping
with clean rag and apply grease.
Apply grease only to the wheel pilot
hole surface by smearing a “dime”
(1 square cm) sized glob of grease
around the wheel pilot surface (1)
with end of finger. DO NOT apply
grease to lugnut/stud holes or
wheel-to-brake surfaces.
RUNNING OUT OF FUEL
If you have run out of fuel and need to refill the vehicle with a portable
fuel container, seeRunning out of fuelin theMaintenance and
Specificationschapter for proper fuel filling method using a portable
fuel container and the included fuel filler funnel.Do notinsert the
nozzle of portable fuel containers or any type of aftermarket funnels into
the Easy Fuel™ “no cap” fuel system as it can be damaged. You must
use the included funnel in such circumstances.
WARNING:Do not insert the nozzle of portable fuel containers
or aftermarket funnels into the Easy Fuel™ system. This could
damage the fuel system and its seal, and may cause fuel to run onto
the ground instead of filling the tank, all of which could result in
serious personal injury.
JUMP STARTING
WARNING:The gases around the battery can explode if
exposed to flames, sparks, or lit cigarettes. An explosion could
result in injury or vehicle damage.
WARNING:Batteries contain sulfuric acid which can burn skin,
eyes and clothing, if contacted.
Do not attempt to push-start your automatic transmission
vehicle. Automatic transmissions do not have push-start
capability. Attempting to push-start a vehicle with an automatic
transmission may cause transmission damage.
2009 Explorer(exp)
Owners Guide, 1st Printing
USA(fus)
Roadside Emergencies
331