Page 56 of 320
3. Rotate the bulb socket counterclockwise and remove.
4. Carefully pull the bulb straight out of the socket.
To complete installation, follow the removal procedures in reverse order.
Replacing side marker bulbs
1. Make sure the headlamp control is in the off position.
2. Remove the headlamp assembly. Refer toReplacing headlamp bulbs
in this section.
Aerodynamic
Sealed beam
3. Rotate the bulb socket counterclockwise and remove.
4. Carefully pull the bulb straight out of the socket.
To complete installation, follow the removal procedures in reverse order.
2009 Econoline(eco)
Owners Guide, 2nd Printing
USA(fus)
Lights
56
ProCarManuals.com
Page 57 of 320

Replacing high-mount brakelamp bulbs
On vehicles without a rear headliner, the interior cargo lamp (if
equipped) will have to be removed from under the high-mount
brakelamp assembly located inside the vehicle. Then, do the following:
1. Remove the two screws from the
high-mount brakelamp assembly and
lift the lamp from the vehicle.
2. Remove the bulb socket from the
lamp assembly by turning
counterclockwise.
3. Carefully pull the bulb straight
out of the socket.
To install the new bulb, follow the removal procedure in reverse order.
Replacing license plate lamp bulbs
1. Turn the headlamp switch to the
off position.
2. Remove the two screws and the
license plate lamp assembly from
the rear door.
3. Remove bulb socket from lamp
assembly by turning
counterclockwise.
4. Pull the bulb out from socket and
push in the new bulb.
To install the new bulb, follow the removal procedures in reverse order.
2009 Econoline(eco)
Owners Guide, 2nd Printing
USA(fus)
Lights
57
ProCarManuals.com
Page 58 of 320
Replacing stop/turn/tail/side marker/backup lamp bulbs
The stop/turn/tail/side marker/backup lamp bulbs are located in the tail
lamp assembly. Follow the same steps to replace any of the bulbs:
1. Turn the headlamp switch to the
off position and then remove the
four screws and the lamp assembly
from vehicle.
2. Rotate bulb socket
counterclockwise and remove from
lamp assembly.
3. Carefully pull the bulb straight
out of the socket and push in the
new bulb.
To install the lamp, follow the removal procedures in reverse order.
2009 Econoline(eco)
Owners Guide, 2nd Printing
USA(fus)
Lights
58
ProCarManuals.com
Page 63 of 320

3. Press and hold the SELECT
control until VAR appears in the
display, then release. The display
should show the current zone
number.
4. Press the SELECT control until
the desired zone number appears.
The display will flash and then
return to normal operation. The zone is now updated.
Compass calibration adjustment
Perform this adjustment in an open
area free from steel structures and
high voltage lines:
•Press and hold the SELECT
control until CAL appears in the
display (approximately eight
seconds) and release.
•Drive the vehicle slowly (less
than 3 mph [5 km/h]) in circles until CAL indicator turns off in about
2–3 complete circles.
•The compass is now calibrated.
AUXILIARY POWER POINT (12VDC)
Power outlets are designed for accessory plugs only. Do not insert
any other object in the power outlet as this will damage the
outlet and blow the fuse. Do not hang any type of accessory or
accessory bracket from the plug. Improper use of the power
outlet can cause damage not covered by your warranty.
The auxiliary power point (equipped
with a cover or a cap plug) is
located on the instrument panel.
A second power point (if equipped)
is located behind the driver’s seat on
the upper trim panel.
A third power point (if equipped) is
located in the glove box.
Do not use the power point for operating the cigarette lighter element (if
equipped).
9 VAR
CAL
2009 Econoline(eco)
Owners Guide, 2nd Printing
USA(fus)
Driver Controls
63
ProCarManuals.com
Page 64 of 320

To prevent the fuse from being blown, do not use the power point(s)
over the vehicle capacity of 12 VDC/180W. If the power point or cigar
lighter socket is not working, a fuse may have blown. Refer toFuses and
relaysin theRoadside Emergencieschapter for information on
checking and replacing fuses.
To have full capacity usage of your power point, the engine is required to
be running to avoid unintentional discharge of the battery. To prevent
the battery from being discharged:
•do not use the power point longer than necessary when the engine is
not running,
•do not leave battery chargers, video game adapters, computers and
other devices plugged in overnight or when the vehicle is parked for
extended periods.
Always keep the power point caps closed when not being used.
Cigar/Cigarette lighter (if equipped)
Do not plug optional electrical accessories into the cigarette lighter
socket.
Do not hold the lighter in with your hand while it is heating, this will
damage the lighter element and socket. The lighter will be released from
its heating position when it is ready to be used.
Note:Improper use of the lighter can cause damage not covered by your
warranty, and can result in fire or serious injury.
POWER WINDOWS
WARNING:Do not leave children unattended in the vehicle and
do not let children play with the power windows. They may
seriously injure themselves.
WARNING:When closing the power windows, you should verify
they are free of obstructions and ensure that children and/or
pets are not in the proximity of the window openings.
2009 Econoline(eco)
Owners Guide, 2nd Printing
USA(fus)
Driver Controls
64
ProCarManuals.com
Page 65 of 320

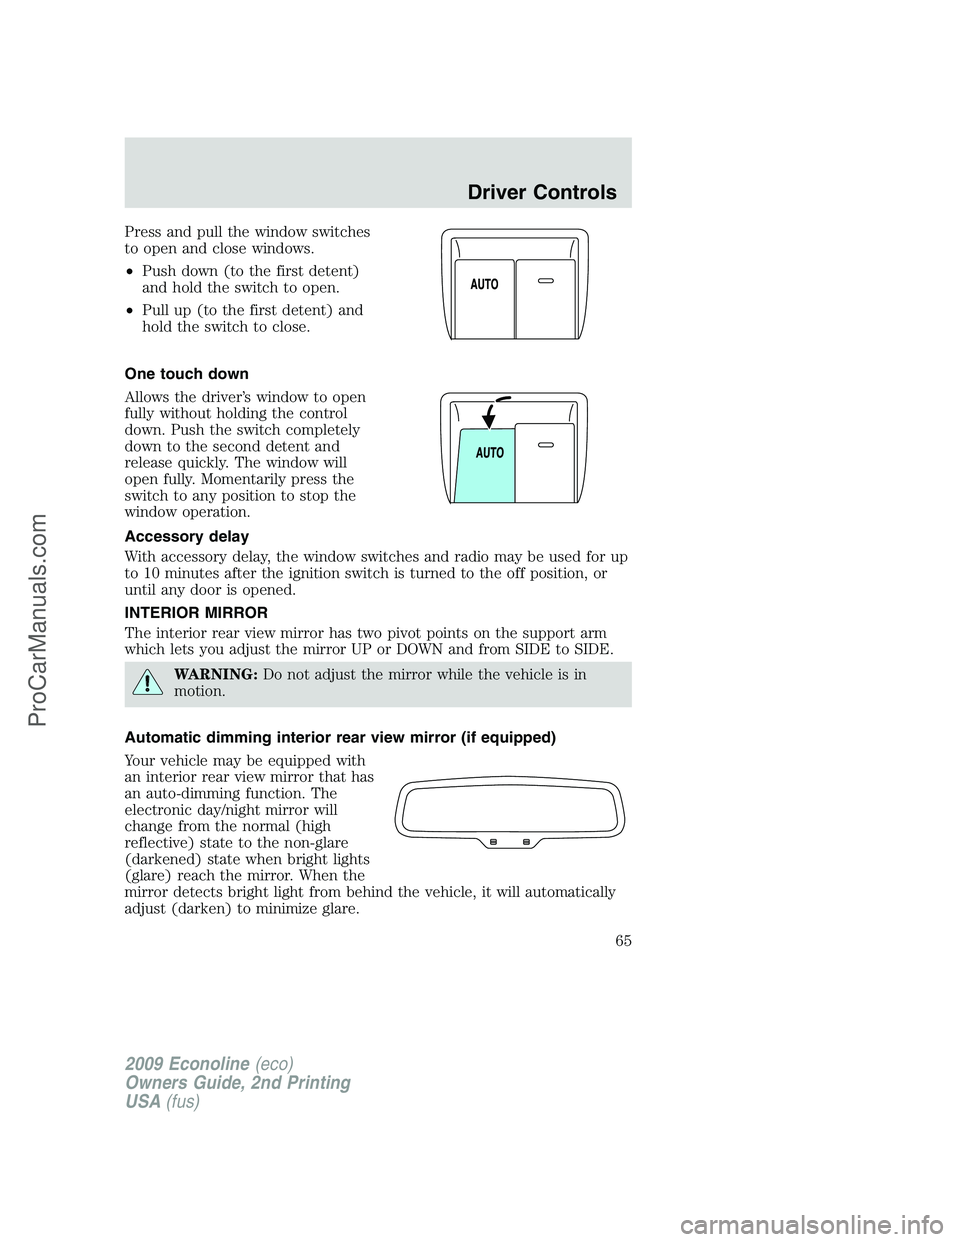
Press and pull the window switches
to open and close windows.
•Push down (to the first detent)
and hold the switch to open.
•Pull up (to the first detent) and
hold the switch to close.
One touch down
Allows the driver’s window to open
fully without holding the control
down. Push the switch completely
down to the second detent and
release quickly. The window will
open fully. Momentarily press the
switch to any position to stop the
window operation.
Accessory delay
With accessory delay, the window switches and radio may be used for up
to 10 minutes after the ignition switch is turned to the off position, or
until any door is opened.
INTERIOR MIRROR
The interior rear view mirror has two pivot points on the support arm
which lets you adjust the mirror UP or DOWN and from SIDE to SIDE.
WARNING:Do not adjust the mirror while the vehicle is in
motion.
Automatic dimming interior rear view mirror (if equipped)
Your vehicle may be equipped with
an interior rear view mirror that has
an auto-dimming function. The
electronic day/night mirror will
change from the normal (high
reflective) state to the non-glare
(darkened) state when bright lights
(glare) reach the mirror. When the
mirror detects bright light from behind the vehicle, it will automatically
adjust (darken) to minimize glare.
2009 Econoline(eco)
Owners Guide, 2nd Printing
USA(fus)
Driver Controls
65
ProCarManuals.com
Page 88 of 320

3. Cycle eight times rapidly (within 10 seconds) between the 3 (off)
position and 4 (on).Note:The eighth turn must end in the 4 (on)
position.
4. The doors will lock, then unlock, to confirm that the programming
mode has been activated.
5. Within 20 seconds press any button on the remote entry transmitter.
Note:If more than 20 seconds have passed you will need to start the
procedure over again.
6. The doors will lock, then unlock, to confirm that this remote entry
transmitter has been programmed.
7. Repeat Steps 4 and 5 to program each additional remote entry
transmitter (up to four transmitters).
8. Turn the ignition to the 3 (off) position after you have finished
programming all of the remote entry transmitters.
9. The doors will lock, then unlock, to confirm that the programming
mode has been exited.
Illuminated entry
The interior lamps illuminate when the remote entry system is used to
unlock the door(s) or sound the personal alarm.
The illuminated entry system will turn off the interior lights if:
•the ignition switch is turned to the on or accessory position, or
•the remote transmitter lock control is pressed, or
•after 25 seconds of illumination.
The dome lamp control (if equipped) mustnotbe set to the off position
for the illuminated entry system to operate.
The inside lights will not turn off if:
•they have been turned on with the dimmer control, or
•any door is open.
SECURILOCK™ PASSIVE ANTI-THEFT SYSTEM (IF EQUIPPED)
SecuriLock™ passive anti-theft system is an engine immobilization
system. This system is designed to help prevent the engine from being
started unless acoded key programmed to your vehicleis used. The
use of the wrong type of coded key may lead to a “no-start” condition.
Your vehicle comes with two coded keys; additional coded keys may be
purchased from your authorized dealer. The authorized dealer can
2009 Econoline(eco)
Owners Guide, 2nd Printing
USA(fus)
Locks and Security
88
ProCarManuals.com
Page 105 of 320

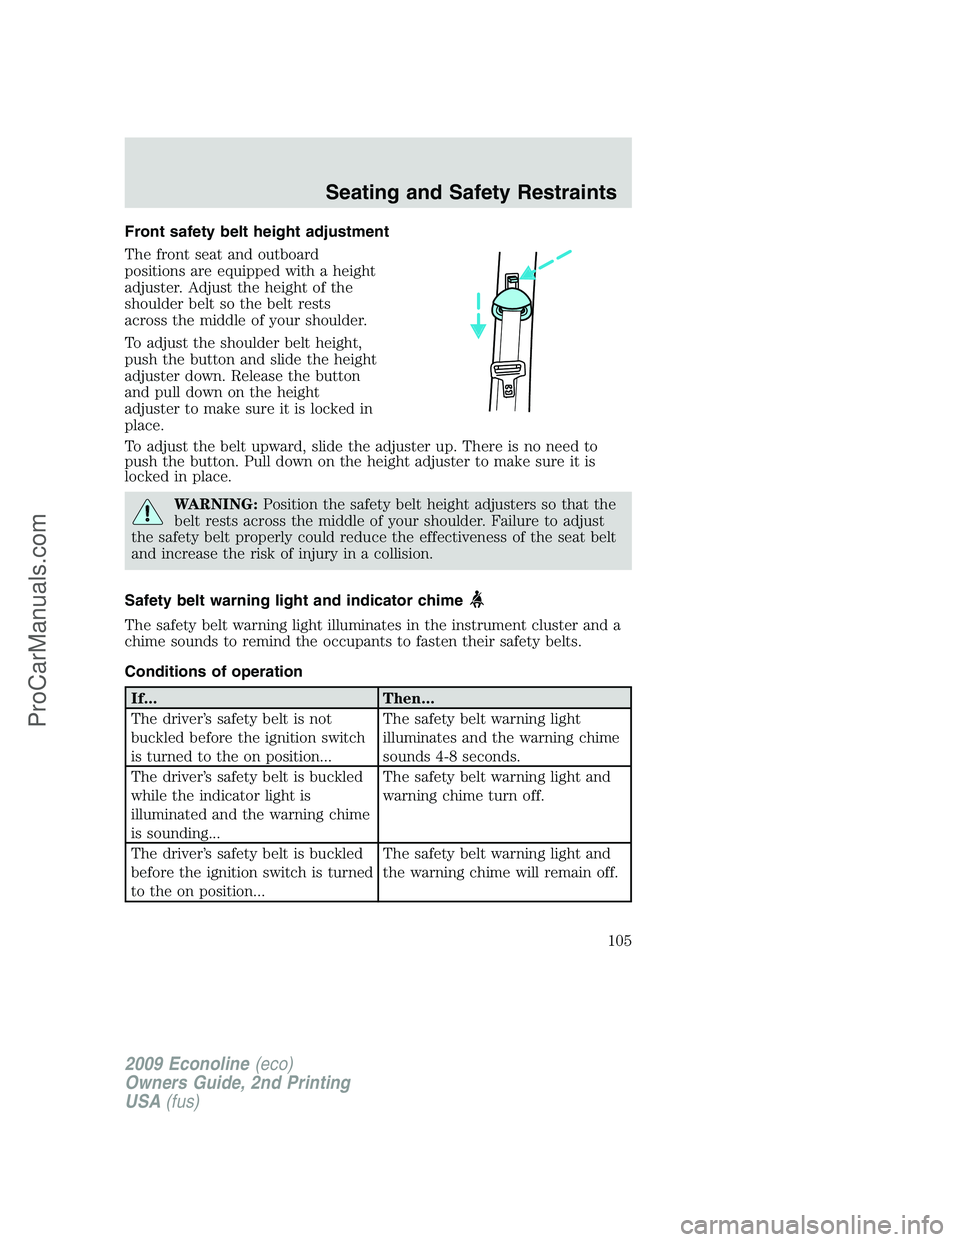
Front safety belt height adjustment
The front seat and outboard
positions are equipped with a height
adjuster. Adjust the height of the
shoulder belt so the belt rests
across the middle of your shoulder.
To adjust the shoulder belt height,
push the button and slide the height
adjuster down. Release the button
and pull down on the height
adjuster to make sure it is locked in
place.
To adjust the belt upward, slide the adjuster up. There is no need to
push the button. Pull down on the height adjuster to make sure it is
locked in place.
WARNING:Position the safety belt height adjusters so that the
belt rests across the middle of your shoulder. Failure to adjust
the safety belt properly could reduce the effectiveness of the seat belt
and increase the risk of injury in a collision.
Safety belt warning light and indicator chime
The safety belt warning light illuminates in the instrument cluster and a
chime sounds to remind the occupants to fasten their safety belts.
Conditions of operation
If... Then...
The driver’s safety belt is not
buckled before the ignition switch
is turned to the on position...The safety belt warning light
illuminates and the warning chime
sounds 4-8 seconds.
The driver’s safety belt is buckled
while the indicator light is
illuminated and the warning chime
is sounding...The safety belt warning light and
warning chime turn off.
The driver’s safety belt is buckled
before the ignition switch is turned
to the on position...The safety belt warning light and
the warning chime will remain off.
2009 Econoline(eco)
Owners Guide, 2nd Printing
USA(fus)
Seating and Safety Restraints
105
ProCarManuals.com