2009 FORD E450 warning
[x] Cancel search: warningPage 217 of 320

Used for improved traction on slippery roads. Selecting 3 (Third)
provides additional engine braking.
2 (Second)
Use 2 (Second) to start-up on slippery roads or to provide additional
engine braking on downgrades.
1 (First)
•Provides maximum engine braking.
•Allows upshifts by moving gearshift lever.
•The transmission will not downshift into 1 (First) at high speeds; it
will downshift to a lower gear and then shift into 1 (First) when the
vehicle reaches slower speeds.
Forced downshifts
•Allowed in D (Drive) with Overdrive or D (Drive) without Overdrive.
•Depress the accelerator to the floor.
•Allows transmission to select an appropriate gear.
If your vehicle goes off the edge of the pavement
•If your vehicle goes off the edge of the pavement, slow down, but
avoid severe brake application, ease the vehicle back onto the
pavement only after reducing your speed. Do not turn the steering
wheel too sharply while returning to the road surface.
•It may be safer to stay on the apron or shoulder of the road and slow
down gradually before returning to the pavement. You may lose
control if you do not slow down or if you turn the steering wheel too
sharply or abruptly.
•It often may be less risky to strike small objects, such as highway
reflectors, with minor damage to your vehicle rather than attempt a
sudden return to the pavement which could cause the vehicle to slide
sideways out of control or roll over. Remember, your safety and the
safety of others should be your primary concern.
WARNING:Vehicles with a higher center of gravity such as
utility and four-wheel drive vehicles handle differently than
vehicles with a lower center of gravity. Utility and four-wheel drive
vehicles arenotdesigned for cornering at speeds as high as passenger
cars any more than low-slung sports cars are designed to perform
satisfactorily under off-road conditions. Avoid sharp turns, excessive
speed and abrupt maneuvers in these vehicles. Failure to drive
cautiously could result in an increased risk of loss of vehicle control,
vehicle rollover, personal injury and death.
2009 Econoline(eco)
Owners Guide, 2nd Printing
USA(fus)
Driving
217
Page 218 of 320

REVERSE SENSING SYSTEM (IF EQUIPPED)
The Reverse Sensing System (RSS) sounds a tone to warn the driver of
obstacles near the rear bumper when the R (Reverse) is selected and the
vehicle is moving at speeds less than 3 mph (5 km/h). The system is not
effective at speeds above 3 mph (5 km/h) and may not detect certain
angular or moving objects.
WARNING:To help avoid personal injury, please read and
understand the limitations of the reverse sensing system as
contained in this section. Reverse sensing is only an aid for some
(generally large and fixed) objects when moving in reverse on a flat
surface at “parking speeds”. Inclement weather may also affect the
function of the RSS; this may include reduced performance or a false
activation.
WARNING:To help avoid personal injury, always use caution
when in reverse and when using the RSS.
WARNING:This system is not designed to prevent contact with
small or moving objects. The system is designed to provide a
warning to assist the driver in detecting large stationary objects to
avoid damaging the vehicle. The system may not detect smaller
objects, particularly those close to the ground.
WARNING:Certain add-on devices such as large trailer hitches,
bike or surfboard racks and any device that may block the
normal detection zone of the RSS system may create false beeps.
2009 Econoline(eco)
Owners Guide, 2nd Printing
USA(fus)
Driving
218
Page 219 of 320

The RSS detects obstacles up to
6 feet (2 meters) from the rear
bumper with a decreased coverage
area at the outer corners of the
bumper, (refer to the figures for
approximate zone coverage areas).
As you move closer to the obstacle,
the rate of the tone increases. When
the obstacle is less than 10 inches
(25.0 cm) away, the tone will sound
continuously. If the RSS detects a
stationary or receding object further
than 10 inches (25.0 cm) from the
side of the vehicle, the tone will
sound for only three seconds. Once
the system detects an object
approaching, the tone will sound
again.
While receiving a warning, on some radios, the volume will be reduced to
a predetermined level. After the warning goes away, the radio will return
to the previous value.
The RSS automatically turns on when the gear selector is placed in R
(Reverse) and the ignition is on. A control in the message center allows
the driver to disable the system only when the ignition is on and the
gear selector is in R (Reverse). Refer toMessage centerin theDriver
Controlschapter for more information.
Keep the RSS sensors (located on the rear bumper/fascia) free
from snow, ice and large accumulations of dirt (do not clean the
sensors with sharp objects). If the sensors are covered, it will
affect the accuracy of the RSS.
If your vehicle sustains damage to the rear bumper/fascia, leaving
it misaligned or bent, the sensing zone may be altered causing
inaccurate measurement of obstacles or false alarms.
2009 Econoline(eco)
Owners Guide, 2nd Printing
USA(fus)
Driving
219
Page 221 of 320

Note:The default setting for the rear camera delay is off. Push the
“Settings” button found on the navigation screen (if equipped) to set the
rear camera delay feature to on or off.
When towing, the camera system will only see what is being towed
behind the vehicle; this might not provide adequate coverage as it
usually provides in normal operation and some objects might not be
seen.
The camera lens for the camera system is located on the backdoor, above
the license plate. Keep the lens clean so the video image remains clear
and undistorted. Clean the lens with a soft, lint-free cloth and
non-abrasive cleaner.
Note:If the camera system image is not clear or seems distorted, it may
be covered with water droplets, snow, mud or any other substance. If
this occurs, clean the camera lens before using the camera system.
WARNING:The camera system is a reverse aid supplement
device that still requires the driver to use it in conjunction with
the rear view mirror and the side mirrors for maximum coverage.
WARNING:Objects that are close to either corner of the
bumper or under the bumper, might not be seen on the screen
due to the limited coverage of the camera system.
WARNING:Backup as slow as possible since higher speeds
might limit your reaction time to stop the vehicle.
WARNING:Do not use the camera system with the backdoor
open.
If the back end of the vehicle is hit or damaged, then check with your
authorized dealer to have your rear video system checked for proper
coverage and operation.
Night time and dark area use
At night time or in dark areas, the camera system relies on the reverse
lamp lighting to produce an image. Therefore it is necessary that both
reverse lamps are operating in order to get a clear image in the dark. If
either of the lamps are not operating, stop using the camera system, at
least in the dark, until the lamp(s) are replaced and functioning.
2009 Econoline(eco)
Owners Guide, 2nd Printing
USA(fus)
Driving
221
Page 227 of 320

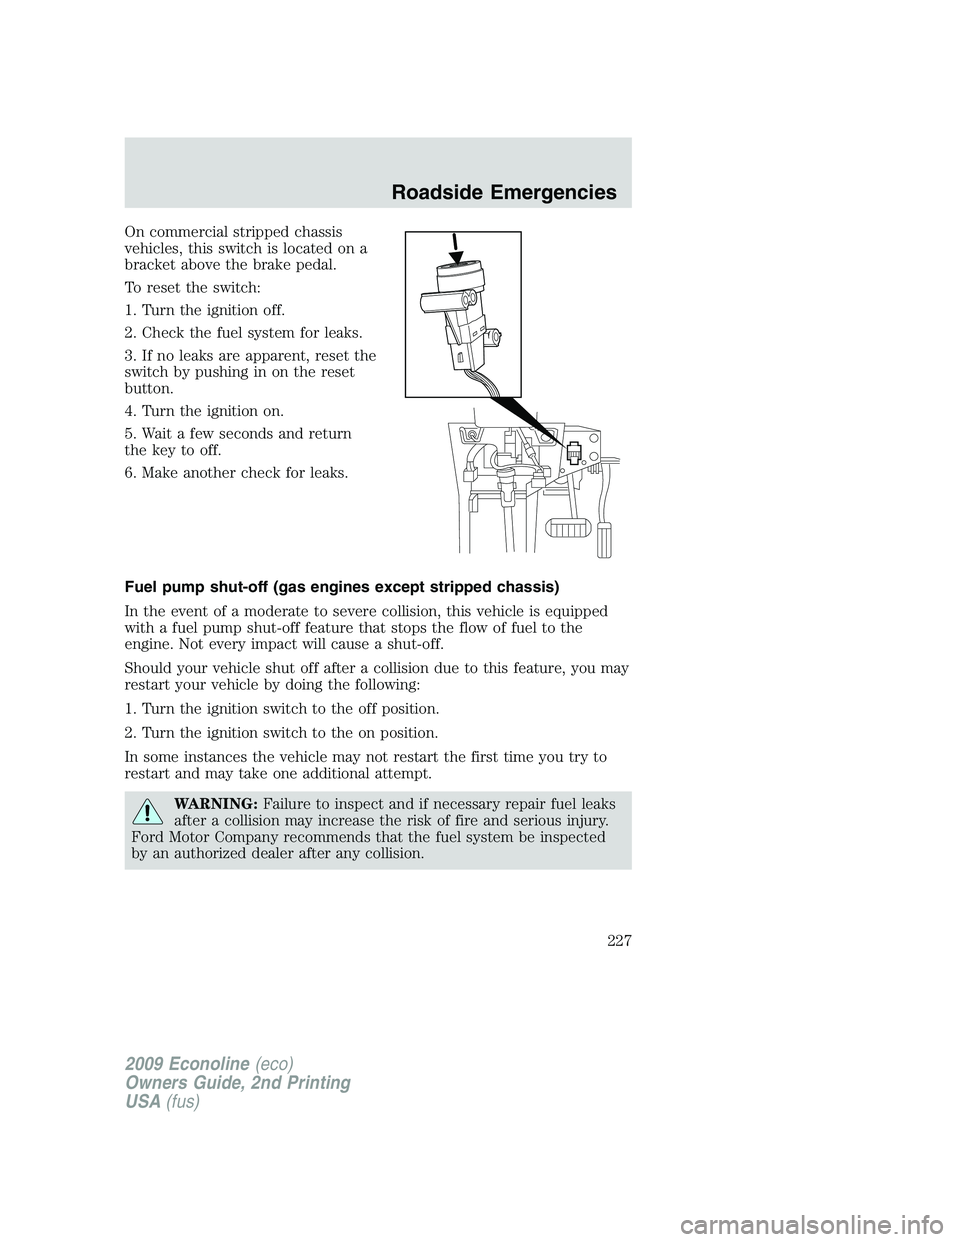
On commercial stripped chassis
vehicles, this switch is located on a
bracket above the brake pedal.
To reset the switch:
1. Turn the ignition off.
2. Check the fuel system for leaks.
3. If no leaks are apparent, reset the
switch by pushing in on the reset
button.
4. Turn the ignition on.
5. Wait a few seconds and return
the key to off.
6. Make another check for leaks.
Fuel pump shut-off (gas engines except stripped chassis)
In the event of a moderate to severe collision, this vehicle is equipped
with a fuel pump shut-off feature that stops the flow of fuel to the
engine. Not every impact will cause a shut-off.
Should your vehicle shut off after a collision due to this feature, you may
restart your vehicle by doing the following:
1. Turn the ignition switch to the off position.
2. Turn the ignition switch to the on position.
In some instances the vehicle may not restart the first time you try to
restart and may take one additional attempt.
WARNING:Failure to inspect and if necessary repair fuel leaks
after a collision may increase the risk of fire and serious injury.
Ford Motor Company recommends that the fuel system be inspected
by an authorized dealer after any collision.
2009 Econoline(eco)
Owners Guide, 2nd Printing
USA(fus)
Roadside Emergencies
227
Page 229 of 320

WARNING:Always disconnect the battery before servicing high
current fuses.
If your vehicle is equipped with an auxiliary battery,
disconnecting the primary under-hood battery DOES NOT remove
power from all circuits.
To remove a fuse use the fuse puller tool provided on the inside of the
fuse panel cover.
The fuses are coded as follows.
Fuse/Relay
LocationFuse Amp
RatingProtected Circuits
1 30A Not used (spare)
2 15A Not used (spare)
3 15A Not used (spare)
4 30A Not used (spare)
5 10A SPDJB/Brake shift interlock
2009 Econoline(eco)
Owners Guide, 2nd Printing
USA(fus)
Roadside Emergencies
229
Page 231 of 320

Fuse/Relay
LocationFuse Amp
RatingProtected Circuits
35 10A Reverse park aid, Rear video
camera, Cutaway run/start
36 5A PATS RF module
37 10A Climate control, Stripped chassis
IP #1 run/start
38 20A Not used (spare)
39 20A Radio, Navigation
40 20A Amplifier
41 15A Radio, Switch illumination,
Reverse camera mirror
42 10A Upfitter switch
43 10A Overhead console, Stripped
chassis IP1
44 10A Auxiliary battery relay/Trailer tow
battery charger relay
45 5A Wipers, Stripped chassis Engine
connector 3
46 7.5A PADI
47 30A circuit
breakerWindows accessory delay
48 Relay Delayed accessory
Power distribution box
The power distribution box is located in the engine compartment. The
power distribution box contains high-current fuses that protect your
vehicle’s main electrical systems from overloads.
WARNING:Always disconnect the battery before servicing high
current fuses.
WARNING:To reduce risk of electrical shock, always replace
the cover to the Power Distribution Box before reconnecting the
battery or refilling fluid reservoirs.
2009 Econoline(eco)
Owners Guide, 2nd Printing
USA(fus)
Roadside Emergencies
231
Page 236 of 320

Have a flat serviced by an authorized dealer in order to prevent damage
to the TPMS sensors, refer toTire pressure monitoring system
(TPMS)in theTires, Wheels and Loadingchapter. Replace the spare
tire with a road tire as soon as possible. During repairing or replacing of
the flat tire, have the authorized dealer inspect the TPMS sensor for
damage.
WARNING:The use of tire sealants may damage your Tire
Pressure Monitoring System and should not be used.
WARNING:Refer toTire pressure monitoring system (TPMS)
in theTires, Wheels and Loadingchapter for important
information. If the tire pressure monitor sensor becomes damaged, it
will no longer function.
Dissimilar spare tire/wheel information
WARNING:Failure to follow these guidelines could result in an
increased risk of loss of vehicle control, injury or death.
If you have a dissimilar spare tire/wheel, then it is intended for
temporary use only. This means that if you need to use it, you should
replace it as soon as possible with a road tire/wheel that is the same size
and type as the road tires and wheels that were originally provided by
Ford. If the dissimilar spare tire or wheel is damaged, it should be
replaced rather than repaired.
A dissimilar spare tire/wheel is defined as a spare tire and/or wheel that
is different in brand, size or appearance from the road tires and wheels
and can be one of three types:
1.T-type mini-spare:This spare tire begins with the letter “T” for tire
size and may have “Temporary Use Only” molded in the sidewall
2.Full-size dissimilar spare with label on wheel:This spare tire has
a label on the wheel that states: “THIS TIRE AND WHEEL FOR
TEMPORARY USE ONLY”
When driving with one of the dissimilar spare tires listed above,do not:
•Exceed 50 mph (80 km/h)
•Load the vehicle beyond maximum vehicle load rating listed on the
Safety Compliance Label
•Tow a trailer
2009 Econoline(eco)
Owners Guide, 2nd Printing
USA(fus)
Roadside Emergencies
236