Page 63 of 320

3. Press and hold the SELECT
control until VAR appears in the
display, then release. The display
should show the current zone
number.
4. Press the SELECT control until
the desired zone number appears.
The display will flash and then
return to normal operation. The zone is now updated.
Compass calibration adjustment
Perform this adjustment in an open
area free from steel structures and
high voltage lines:
•Press and hold the SELECT
control until CAL appears in the
display (approximately eight
seconds) and release.
•Drive the vehicle slowly (less
than 3 mph [5 km/h]) in circles until CAL indicator turns off in about
2–3 complete circles.
•The compass is now calibrated.
AUXILIARY POWER POINT (12VDC)
Power outlets are designed for accessory plugs only. Do not insert
any other object in the power outlet as this will damage the
outlet and blow the fuse. Do not hang any type of accessory or
accessory bracket from the plug. Improper use of the power
outlet can cause damage not covered by your warranty.
The auxiliary power point (equipped
with a cover or a cap plug) is
located on the instrument panel.
A second power point (if equipped)
is located behind the driver’s seat on
the upper trim panel.
A third power point (if equipped) is
located in the glove box.
Do not use the power point for operating the cigarette lighter element (if
equipped).
9 VAR
CAL
2009 Econoline(eco)
Owners Guide, 2nd Printing
USA(fus)
Driver Controls
63
Page 102 of 320
•Front and rear seats
2. To unfasten, push the release button and remove the tongue from the
buckle.
•Front and rear seats
All safety restraints in the vehicle are combination lap and shoulder
belts. All of the passenger combination lap and shoulder belts have three
types of locking modes described below:
Vehicle sensitive mode
This is the normal retractor mode, which allows free shoulder belt length
adjustment to your movements and locking in response to vehicle
movement. For example, if the driver brakes suddenly or turns a corner
sharply, or the vehicle receives an impact of approximately 5 mph
(8 km/h) or more, the combination safety belts will lock to help reduce
forward movement of the driver and passengers.
2009 Econoline(eco)
Owners Guide, 2nd Printing
USA(fus)
Seating and Safety Restraints
102
Page 105 of 320

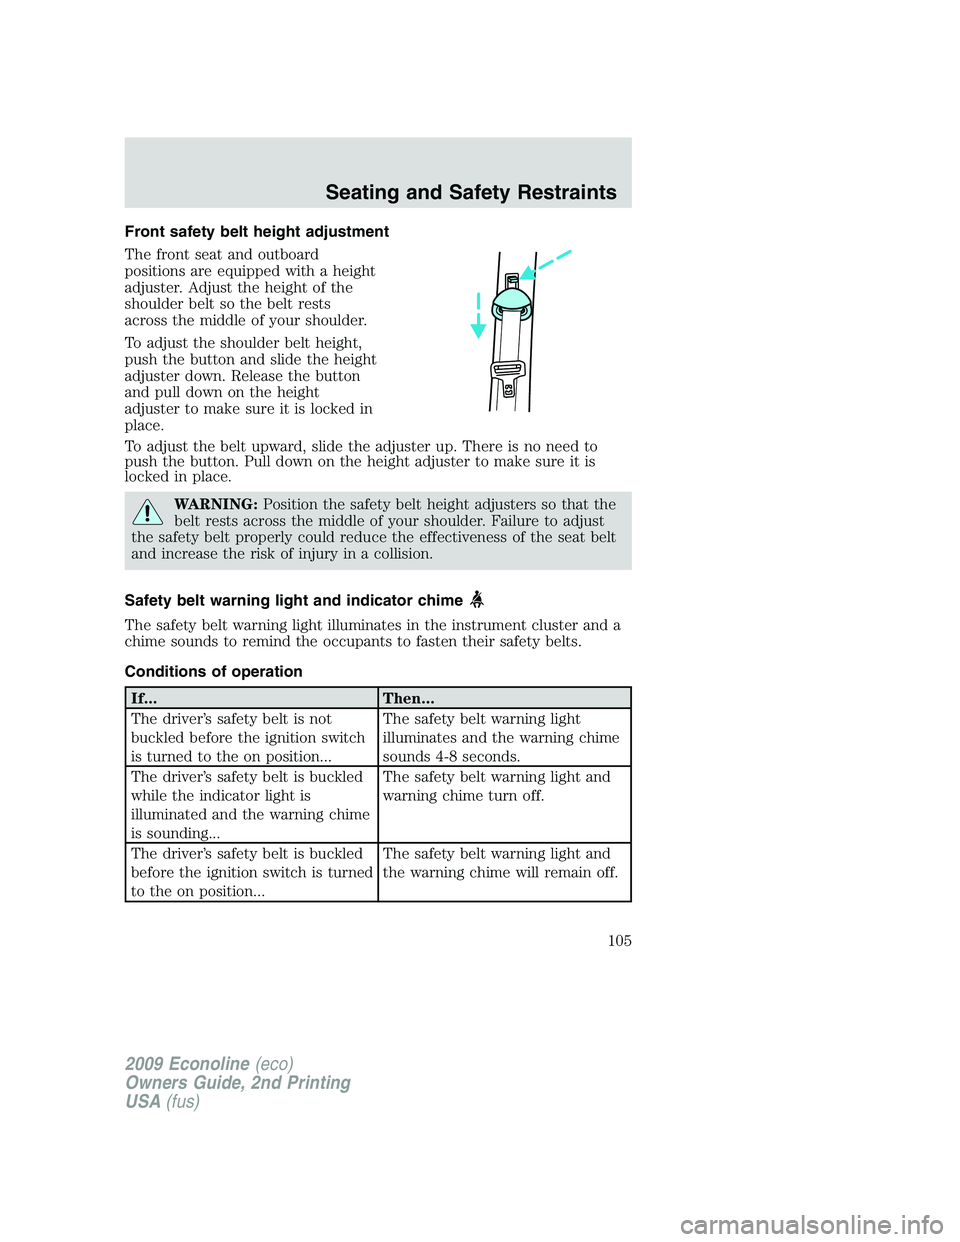
Front safety belt height adjustment
The front seat and outboard
positions are equipped with a height
adjuster. Adjust the height of the
shoulder belt so the belt rests
across the middle of your shoulder.
To adjust the shoulder belt height,
push the button and slide the height
adjuster down. Release the button
and pull down on the height
adjuster to make sure it is locked in
place.
To adjust the belt upward, slide the adjuster up. There is no need to
push the button. Pull down on the height adjuster to make sure it is
locked in place.
WARNING:Position the safety belt height adjusters so that the
belt rests across the middle of your shoulder. Failure to adjust
the safety belt properly could reduce the effectiveness of the seat belt
and increase the risk of injury in a collision.
Safety belt warning light and indicator chime
The safety belt warning light illuminates in the instrument cluster and a
chime sounds to remind the occupants to fasten their safety belts.
Conditions of operation
If... Then...
The driver’s safety belt is not
buckled before the ignition switch
is turned to the on position...The safety belt warning light
illuminates and the warning chime
sounds 4-8 seconds.
The driver’s safety belt is buckled
while the indicator light is
illuminated and the warning chime
is sounding...The safety belt warning light and
warning chime turn off.
The driver’s safety belt is buckled
before the ignition switch is turned
to the on position...The safety belt warning light and
the warning chime will remain off.
2009 Econoline(eco)
Owners Guide, 2nd Printing
USA(fus)
Seating and Safety Restraints
105