2009 FIAT PANDA ECU
[x] Cancel search: ECUPage 67 of 226

Never exceed the maximum allowed load
in the boot (see “Technical Specifica-
tions”). Make sure that the objects are well
arranged in the boot so that they will not be pro-
jected forwards following sudden braking.
WARNING
Never travel with the tailgate open: ex-
haust gases may get into the passenger’s
compartment.
WARNING
If you travel in areas with few filling sta-
tions and you want to transport fuel in
a spare tank, comply with the regulations in force
and use only an approved, suitably secured tank.
Even in this way the risk of fire increases in case
of accident.
WARNING
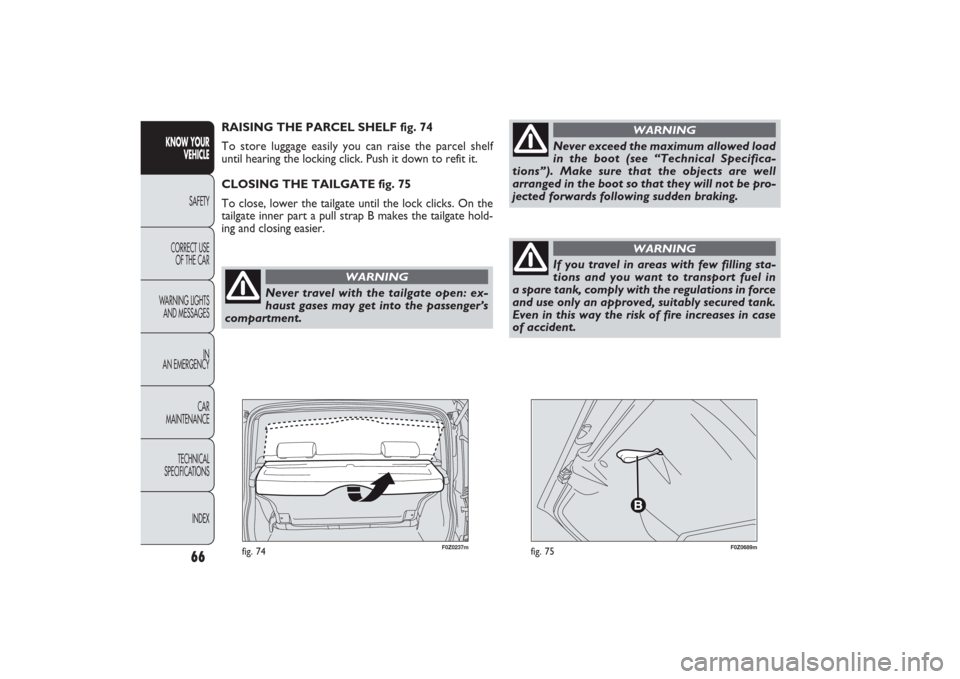
RAISING THE PARCEL SHELF fig. 74
To store luggage easily you can raise the parcel shelf
until hearing the locking click. Push it down to refit it.
CLOSING THE TAILGATE fig. 75
To close, lower the tailgate until the lock clicks. On the
tailgate inner part a pull strap B makes the tailgate hold-
ing and closing easier.
fig. 75
F0Z0689m
fig. 74
F0Z0237m
66
KNOW YOUR
VEHICLE
SAFETY
CORRECT USE
OF THE CAR
WARNING LIGHTS
AND MESSAGES
IN
AN EMERGENCY
CAR
MAINTENANCE
TECHNICAL
SPECIFICATIONS
INDEX
065-090 PANDA EN 7-10-2009 13:45 Pagina 66
Page 68 of 226

Open the tailgate with care when carrying
objects on the roof rack to prevent injuries.
WARNING
A heavy load that has not been secured
may cause serious injuries in case of
accident.
WARNING
EXTENDING THE BOOT
(versions with fixed rear seat) fig. 76
To extend the boot, proceed as follows:
1) The parcel shelf removed can be placed transversally
behind the backrests. To remove, release the two catch-
es A (one each side) from their locations and pull the par-
cel shelf outwards.
2) Operate the levers on the backrests outer side and tilt
the backrest forwards shifting aside the seat belt.
For three-point central seat belts see paragraph “Use of
the central seat belt” in chapter “Safety devices”.
To bring back the seat in its standard position: lift the back-
rest and push it backwards until you hear the locking click
and make sure the seat belts are at the front of the back-
rest.
Upon demand the car can be fitted with split rear seat.The boot extension possibilities offered by the split seat
are many and can be chosen according to the number of
passengers and the amount of luggage to be carried:
❒
total extension with right and left side of the seat tilt-
ed as described above;
❒
partial extension with left or right side of the seat tilt-
ed and place only for one person on the rear seat.
IMPORTANT If in a rather heavy load is being carried in
the boot and you are travelling at night, check and adjust
the main beam headlights aiming (see “Headlights” in this
section).fig. 76
F0Z0131m
67KNOW YOUR
VEHICLESAFETY
CORRECT USE
OF THE CAR
WARNING LIGHTS
AND MESSAGES
IN
AN EMERGENCY
CAR
MAINTENANCE
TECHNICAL
SPECIFICATIONS
INDEX
065-090 PANDA EN 7-10-2009 13:45 Pagina 67
Page 70 of 226

The bonnet may drop suddenly if the sup-
porting rod is not positioned properly. This
should only be done when the car is stationary.
WARNING
Before opening the bonnet, check that
windscreen wiper arm is not lifted from
the windscreen.
WARNING
With hot engine, proceed with the utmost
care inside the engine compartment to
avoid burns. Do not place your hands close to the
fan: it might start working also with the ignition
key removed. Wait for engine cooling.
WARNING
BONNETTo open - fig. 79-80-81
Pull the red lever (under the dashboard) in the arrow
direction as shown in the figure.
Lift the lever A.
Lift the bonnet and at the same time release the rod B from
its catch C.
Insert the end of the rod in recess D on the bonnet
and secure it.
fig. 80
F0Z0690m
fig. 79
F0Z0202m
69KNOW YOUR
VEHICLESAFETY
CORRECT USE
OF THE CAR
WARNING LIGHTS
AND MESSAGES
IN
AN EMERGENCY
CAR
MAINTENANCE
TECHNICAL
SPECIFICATIONS
INDEX
065-090 PANDA EN 7-10-2009 13:45 Pagina 69
Page 71 of 226

70
F0Z0075m
fig. 81
To close - fig. 81
Hold the bonnet up with one hand and with the other
remove rod B from its recess D; then, fit it back into its
catch C.
Lower the bonnet to approximately 20 centimetres above
the engine compartment and let it come down. Make sure
the bonnet is properly locked and not just secured in safe-
ty position. In this case, do not press the bonnet down, rather
lift it again and repeat the procedure.
For safety reasons, the bonnet must al-
ways be properly closed while the car is
travelling. Make sure that the bonnet is properly
closed and that the lock is engaged. Should you
notice that the bonnet is not properly secured
while travelling, stop the car immediately and lose
the bonnet safely.
WARNING
Pay attention to scarves, ties and other
loose fitting garments. If they accidental-
ly touch moving parts, they may easily get caught
up with serious risks for those who wear them.
WARNING
KNOW YOUR
VEHICLE
SAFETY
CORRECT USE
OF THE CAR
WARNING LIGHTS
AND MESSAGES
IN
AN EMERGENCY
CAR
MAINTENANCE
TECHNICAL
SPECIFICATIONS
INDEX
065-090 PANDA EN 7-10-2009 13:45 Pagina 70
Page 72 of 226

71
F0Z00203m
fig. 82
ROOF RACK/SKI RACKSETTING THE FASTENERS fig. 82
The roof rack fasteners A are shown in the figure.
To secure the roof rack, remove the plugs B (two each
side).
An especially designed roof rack/ski rack is available from
Lineaccessori Fiat.
On some versions, roof rack bars can be provided as
an optional.
KNOW YOUR
VEHICLESAFETY
CORRECT USE
OF THE CAR
WARNING LIGHTS
AND MESSAGES
IN
AN EMERGENCY
CAR
MAINTENANCE
TECHNICAL
SPECIFICATIONS
INDEX
After travelling a few kilometres, check that
the attachment fastening screws are tight.
WARNING
Never exceed the max. allowed load ca-
pacity (see chapter “Technical specifica-
tions”).
065-090 PANDA EN 7-10-2009 13:45 Pagina 71
Page 94 of 226

93KNOW YOUR
VEHICLESAFETYCORRECT USE
OF THE CAR
WARNING LIGHTS
AND MESSAGES
IN AN EMERGENCY
CAR
MAINTENANCE
TECHNICAL
SPECIFICATIONS
INDEX
F0Z0224m
fig. 101
F0Z0241m
fig. 102
Seat lap reel belt with three anchor points fig. 102
(for versions/markets where provided)
The seat belt is provided with a double buckle and fastening
tab.
To use the seat belts, take the tongues out of the reel com-
partment and pull the belt, guide the belt to prevent it from
twisting then secure tongue G into buckle L with the black
button M.
To use the belt, make the webbing run further and insert
the fastening tab I in the seat of the buckle N. USING THE CENTRAL SEAT BELT
Static lap belt with two anchor points fig. 101
(for versions/markets where provided)
To fasten the seat belt, fit the tongue A into the buckle
B, until hearing the locking click.
To unfasten the seat belt: press the button C.
To adjust the belt: run the tape in the buckle D, pulling the
end E to tighten and section F to loosen.
091-110 PANDA EN 7-10-2009 13:46 Pagina 93
Page 104 of 226

103KNOW YOUR
VEHICLESAFETYCORRECT USE
OF THE CAR
WARNING LIGHTS
AND MESSAGES
IN AN EMERGENCY
CAR
MAINTENANCE
TECHNICAL
SPECIFICATIONS
INDEX
F0Z0055m
fig. 110
PRESETTING FOR MOUNTING
THE “ISOFIX” TYPE CHILD
RESTRAINT SYSTEM (for versions/markets where provided)
The car is preset for mounting the Universal Isofix child
restraint system, a new European standardised system for
carrying children safely. Isofix type is an additional option
that does not prevent from using traditional child restraint
systems.
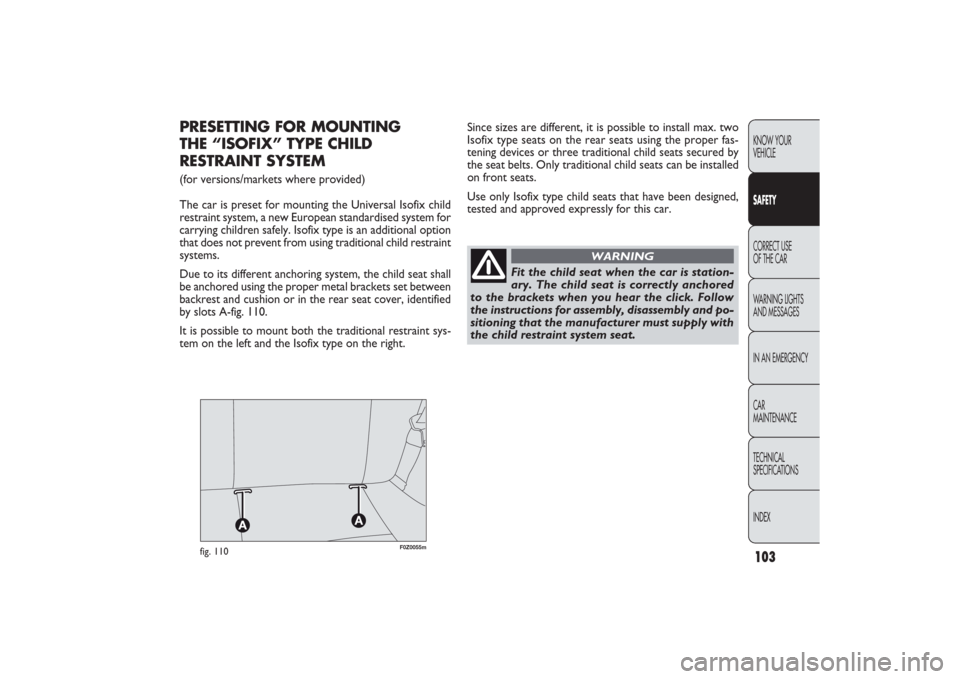
Due to its different anchoring system, the child seat shall
be anchored using the proper metal brackets set between
backrest and cushion or in the rear seat cover, identified
by slots A-fig. 110.
It is possible to mount both the traditional restraint sys-
tem on the left and the Isofix type on the right.Since sizes are different, it is possible to install max. two
Isofix type seats on the rear seats using the proper fas-
tening devices or three traditional child seats secured by
the seat belts. Only traditional child seats can be installed
on front seats.
Use only Isofix type child seats that have been designed,
tested and approved expressly for this car.
Fit the child seat when the car is station-
ary. The child seat is correctly anchored
to the brackets when you hear the click. Follow
the instructions for assembly, disassembly and po-
sitioning that the manufacturer must supply with
the child restraint system seat.
WARNING
091-110 PANDA EN 7-10-2009 13:46 Pagina 103
Page 119 of 226

118
KNOW YOUR
VEHICLE
SAFETYCORRECT USE
OF THE CARWARNING LIGHTS
AND MESSAGESI
IN
AN EMERGENCY
CAR
MAINTENANCE
TECHNICAL
SPECIFICATIONS
INDEX
INSTALLING THE TOW HOOK
The towing device should be fastened to the body by spe-
cialised personnel according to any additional and/or in-
tegrative information supplied by the Manufacturer of the
device.
The towing device must meet current regulations with
reference to 94/20/EEC Directive and subsequent amend-
ments.
For any version the towing device used must match the
towable weight of the car on which it is to be installed.
For the electric connection a standard connector should
be used which is generally placed on a special bracket nor-
mally fastened to the towing device, and a special ECU for
external trailer light control must be installed on the car.
For the electric connection, a 7 pin 12V DC connection
is to be used (CUNA/UNI and ISO/DIN Standards). Fol-
low the instructions provided by the car manufacturer
and/or the tow hook manufacturer.
An electric brake (or electric winch) should be supplied
directly by the battery through a cable with a cross sec-
tion of no less than 2.5 mm
2.
IMPORTANT Electric brake or other devices shall be used
with running engine.
In addition to the electrical branches, the car electric sys-
tem can only be connected to the supply cable for an elec-
tric brake and to the cable for an internal light for the trail-
er, not exceeding 15 W.
For connections use the preset control unit with battery
cable not less than 2.5 mm2.
The ABS system with which the vehicle
may be equipped does not control the
braking system of the trailer. Take specific care
when travelling on slippery roads.
WARNING
Under no circumstances should the car
braking system be modified to control the
trailer brake. The trailer braking system must be
fully independent of the car’s hydraulic system.
WARNING
111-122 PANDA EN 7-10-2009 15:01 Pagina 118