2009 DODGE RAM 5500 CHASSIS CAB oil
[x] Cancel search: oilPage 27 of 429
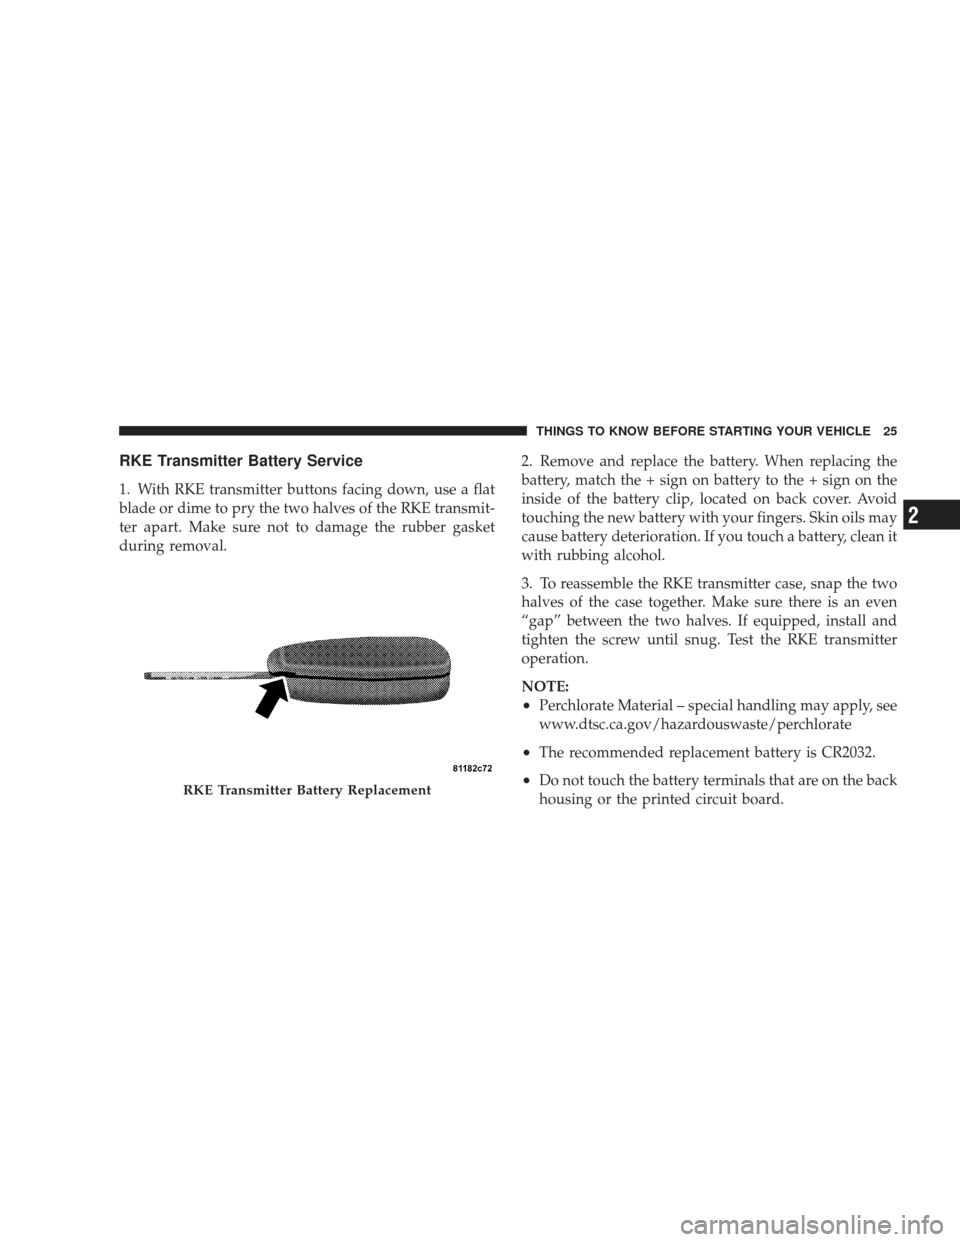
RKE Transmitter Battery Service
1. With RKE transmitter buttons facing down, use a flat
blade or dime to pry the two halves of the RKE transmit-
ter apart. Make sure not to damage the rubber gasket
during removal.2. Remove and replace the battery. When replacing the
battery, match the + sign on battery to the + sign on the
inside of the battery clip, located on back cover. Avoid
touching the new battery with your fingers. Skin oils may
cause battery deterioration. If you touch a battery, clean it
with rubbing alcohol.
3. To reassemble the RKE transmitter case, snap the two
halves of the case together. Make sure there is an even
“gap” between the two halves. If equipped, install and
tighten the screw until snug. Test the RKE transmitter
operation.
NOTE:
•Perchlorate Material – special handling may apply, see
www.dtsc.ca.gov/hazardouswaste/perchlorate
•The recommended replacement battery is CR2032.
•Do not touch the battery terminals that are on the back
housing or the printed circuit board.RKE Transmitter Battery Replacement
THINGS TO KNOW BEFORE STARTING YOUR VEHICLE 25
2
Page 74 of 429
Children Too Large for Booster Seats
Children who are large enough to wear the shoulder belt
comfortably, and whose legs are long enough to bend
over the front of the seat when their back is against the
seat back should use the lap/shoulder belt in a rear seat.
•Make sure that the child is upright in the seat.
•The lap portion should be low on the hips and as snug
as possible.
•Check belt fit periodically. A child’s squirming or
slouching can move the belt out of position.
If the shoulder belt contacts the face or neck, move the
child closer to the center of the vehicle. Never allow a
child to put the shoulder belt under an arm or behind
their back.
Transporting Pets
Airbags deploying in the front seat could harm your pet.
An unrestrained pet will be thrown about and possibly injured, or injure a passenger during panic braking or in
a collision. Pets should be restrained in the rear seat in
pet harnesses or pet carriers that are secured by seat belts.
NEW ENGINE BREAK-IN
5.7L Gas Engine – 3500 Models Only
A long break-in period is not required for the engine in
your new vehicle. Drive moderately during the first 300
mi (500 km). After the initial 60 mi (100 km), speeds up to
50 or 55 mph (80 or 90 km/h) are desirable. While
cruising, brief full-throttle acceleration within the limits
of local traffic laws contributes to a good break-in.
Avoid wide open throttle acceleration in low gear.
The engine oil installed in the engine at the factory is a
high quality, energy conserving type lubricant. Oil
changes should be consistent with the anticipated cli-
matic conditions under which vehicle operation will
72 THINGS TO KNOW BEFORE STARTING YOUR VEHICLE
Page 75 of 429
occur. For recommended viscosity and quality grades,
refer to “Engine Oil” under “Maintenance Procedures” in
Section 7.
NON-DETERGENT OR STRAIGHT MINERAL OILS
MUST NEVER BE USED.
A new engine may consume some oil during its first few
thousand miles (kilometers) of operation. This is a nor-
mal part of the break-in and is not an indication of
difficulty.
CAUTION!
•During the first 500 mi (805 km) your new vehicle
is driven, do not tow a trailer. Doing so may
damage your axles, driveline and vehicle.
•Limit your speed to 50 or 55 mph (80 or 90 km/h)
during the first 500 mi (805 km) of towing.
SAFETY TIPS
Exhaust System
WARNING!
Exhaust gases contain carbon monoxide, an ex-
tremely toxic gas that by itself is colorless and
odorless. To avoid inhaling these gases, the following
precautions should be observed:
•Do not run the engine in a closed garage or in confined
areas any longer than needed to move your vehicle in
or out of the area.
•It may be necessary to sit in a parked vehicle with the
engine running for more than a short period. If so,
adjust your climate control system to force outside air
into the vehicle. Set the blower at high speed and the
controls in any position except Off or Recirculation.
THINGS TO KNOW BEFORE STARTING YOUR VEHICLE 73
2
Page 76 of 429
•The best protection against carbon monoxide entry
into the vehicle body is a properly maintained engine
exhaust system.
Be aware of changes in the sound of the exhaust system,
exhaust fumes detected inside the vehicle, or damage to
the underside or rear of the vehicle. Have a competent
mechanic inspect the complete exhaust system and adja-
cent body areas for broken, damaged, deteriorated or
mispositioned parts. Open seams or loose connections
could permit exhaust fumes to seep into the passenger
compartment. In addition, inspect the exhaust system
each time the vehicle is raised for lubrication or oil
change. Replace or adjust as required.Safety Checks You Should Make Inside The
Vehicle
Heater Defroster Ducts
Inspect the heater defroster ducts for proper operation.
Check for proper airflow through all defroster ducts. If
there is any question regarding the operation of your
heater defroster ducts, have the system checked by an
authorized dealer
Seat Belts
Inspect the seat belt system periodically, checking for
cuts, frays and loose parts. Damaged parts must be
replaced immediately. Do not disassemble or modify the
system.
Seat belt assemblies must be replaced after an accident if
they have been damaged (bent retractor, torn webbing,
etc.) or if the front airbags have deployed. If there is any
question regarding seat belt or retractor condition, re-
place the seat belt.
74 THINGS TO KNOW BEFORE STARTING YOUR VEHICLE
Page 77 of 429
Airbag Warning Light
The airbag warning light should come on, and remain on,
for six to eight seconds as a bulb check when the ignition
switch is first turned ON. If the light is not lit during
starting, see your authorized dealer. If the light stays on,
flickers or comes on while driving, have the system
checked by an authorized dealer. If there is a problem
with the airbag warning light, the seat belt light will
flash.
Safety Checks You Should Make Outside The
Vehicle
Tires
Examine tires for tread wear or uneven wear patterns.
Check for stones, nails, glass or other objects lodged in
the tread.
Inspect for tread cuts or sidewall cracks. Check wheel
nuts for tightness and tires for proper pressure.
Lights
Check the operation of all exterior lights. Check turn
signal and high beam indicator lights on the instrument
panel.
Door Latches
Check for positive closing, latching and locking.
Fluid Leaks
Check area under vehicle after overnight parking for fuel,
water, oil, or other fluid leaks. Also, if fuel fumes are
detected the cause should be located and corrected.
THINGS TO KNOW BEFORE STARTING YOUR VEHICLE 75
2
Page 164 of 429

INSTRUMENT CLUSTER DESCRIPTION
1. Check GaugesThis light illuminates when the Voltmeter, Engine
Oil Pressure or Engine Coolant Temperature
gauges indicate a reading either too high or too low.
Examine the gauges carefully, and follow the instructions
contained below for each indicated problem.
NOTE: When the ignition switch is turned to OFF, the
Fuel Gauge, Voltmeter, Oil Pressure and Engine Coolant
Temperature gauges may not show accurate readings.
When the engine is not running, turn the ignition switch
to ON to obtain accurate readings.
2. Voltmeter When the engine is running, the gauge indicates
the electrical system voltage. The pointer should
stay within the normal range if the battery is charged. If the pointer moves to either extreme left or right and
remains there during normal driving, the electrical sys-
tem should be serviced.
NOTE:
•If the gauge pointer moves to either extreme of the
gauge, the “Check Gauges” indicator will illuminate
and a single chime will sound.
•The voltmeter may show a gauge fluctuation at vari-
ous engine temperatures. This cycling operation is
caused by the post-heat cycle of the intake manifold
heater system. The number of cycles and the length of
the cycling operation is controlled by the engine
control module. Post-heat operation can run for sev-
eral minutes, and then the electrical system and volt-
meter needle will stabilize.
3. Turn Signal Indicators Lights in instrument cluster flash when outside turn
signals are operating.
162 UNDERSTANDING YOUR INSTRUMENT PANEL
Page 166 of 429

9. Oil Pressure GaugeThe pointer should always indicate some oil pres-
sure when the engine is running. A continuous
high or low reading, under normal driving conditions,
may indicate a lubrication system malfunction. Immedi-
ate service should be obtained.
NOTE: If the gauge pointer moves to either extreme of
the gauge, the “Check Gauges” indicator will illuminate
and a single chime will sound.
10. Transfer Case Position
This display indicator shows the transfer case position
selection.
For additional information refer to “Four-Wheel Drive
Operation” in Section 5 of this manual. 11 .
TOW HAUL
The TOW HAUL button is located at the end of
the shift lever. This light will illuminate when
the TOW HAUL OD/OFF button is pushed
once.
12. OD/OFF
the OD/OFF button is located at the end of the shift lever.
This light will illuminate when the TOW HAUL OD/OFF
button is pushed twice.
13. Temperature Gauge The temperature gauge shows engine coolant tem-
perature. Any reading within the normal range
indicates that the engine cooling system is operat-
ing satisfactorily.
164 UNDERSTANDING YOUR INSTRUMENT PANEL
Page 167 of 429
The gauge pointer will likely indicate a higher tempera-
ture when driving in hot weather, up mountain grades,
or when towing a trailer. It should not be allowed to
exceed the upper limits of the normal operating range.
CAUTION!
Driving with a hot engine cooling system could
damage your vehicle. If temperature gauge reads “H”
pull over and stop the vehicle. Idle the vehicle with
the air conditioner turned off until the pointer drops
back into the normal range. If the pointer remains on
the “H” and you hear continuous chimes, turn the
engine off immediately, and call an authorized deal-
ership for service.
WARNING!
A hot engine cooling system is dangerous. You or
others could be badly burned by steam or boiling
coolant. You may want to call an authorized dealer-
ship for service if your vehicle overheats. If you
decide to look under the hood yourself, see Section 7
of this manual. Follow the warnings under the Cool-
ing System Pressure Cap paragraph.
14. Vehicle Security Light — If Equipped This light will flash at a fast rate for approxi-
mately 15 seconds, when the vehicle security
alarm is arming, and then will flash slowly
until the vehicle is disarmed.
UNDERSTANDING YOUR INSTRUMENT PANEL 165
4