Page 16 of 532

Locking Doors With A KeyYou can insert the key with either side up. To lock the
door, turn the key rearward. To unlock the door, turn the
key forward. For door lock lubrication, see “Body Lubri-
cation” in Section 7 of this manual.STEERING WHEEL LOCK — IF EQUIPPEDYour vehicle may be equipped with a passive steering
wheel lock. This lock prevents steering the vehicle with-
out the ignition key. If the steering wheel is moved
approximately a half turn in either direction and the key
is not in the ignition switch, the steering wheel will lock.To Manually Lock the Steering WheelWith the engine running, turn the steering wheel upside
down, turn off the engine and remove the key. Turn the
steering wheel slightly in either direction until the lock
engages.
To Release the Steering Wheel LockInsert the key in the ignition switch and start the engine.
If the key is difficult to turn, move the wheel slightly to
the right or left to disengage the lock.
NOTE:If you turned the wheel to the right to engage
the lock, you must turn the wheel slightly to the right to
disengage it. If you turned the wheel to the left to engage
the lock, turn the wheel slightly to the left to disengage it.Automatic Transmission Ignition Interlock SystemThis system prevents the key from being removed unless
the shift lever is in PARK. It also prevents shifting out of
PARK unless the key is in the ON positions, and the
brake pedal is depressed.
14 THINGS TO KNOW BEFORE STARTING YOUR VEHICLE
Page 27 of 532

REMOTE STARTING SYSTEM — IF EQUIPPED
This system uses the Remote Keyless Entry
(RKE) transmitter to start the engine conve-
niently from outside the vehicle while still
maintaining security. The system has a targeted
range of 328 ft (100 m).
NOTE: The vehicle must be equipped with an auto-
matic transmission to be equipped with Remote Start.
How to Use Remote StartAll of the following conditions must be met before the
engine will remote start:•
Shift lever in PARK
•
Doors closed
•
Hood closed
•
Hazard switch off
•
Brake switch inactive (brake pedal not pressed)
•
Ignition key removed from ignition switch
•
Battery at an acceptable charge level
•
RKE PANIC button not pressed
To Enter Remote Start
Press and release the REMOTE START button
on the RKE transmitter twice, within five sec-
onds. The parking lights will flash and the horn
will chirp twice (if programmed). Then, the
engine will start and the vehicle will remain in the
Remote Start mode for a 15-minute cycle.
NOTE:
•
The park lamps will turn on and remain on during
Remote Start mode.
•
For security, power window and power sunroof op-
eration (if equipped) are disabled when the vehicle is
in the Remote Start mode.THINGS TO KNOW BEFORE STARTING YOUR VEHICLE 25
2
Page 62 of 532

2. Used in defense of litigation involving a Chrysler LLC
product.
3. Requested by police under a legal warrant.
4. Otherwise required by law.
Data parameters that may be recorded:•
Diagnostic trouble code(s) and warning light status for
electronically-controlled safety systems, including the
airbag system
•
Airbag disable light status (if equipped)
•
�Time�of airbag deployment (in terms of ignition
cycles and vehicle mileage)
•
Airbag deployment level (if applicable)
•
Impact acceleration and angle
•
Seat belt status
•
Brake status (service and parking brakes)
•
Accelerator status (including vehicle speed)
•
Engine control status (including engine speed)
•
Transmission gear selection
•
Cruise control status
•
Traction/stability control status
•
Tire Pressure Monitoring System status
Child RestraintsEveryone in your vehicle needs to be buckled up at all
times, including babies and children. Every state in the
United States and all Canadian provinces require that
small children ride in proper restraint systems. This is the
law, and you can be prosecuted for ignoring it.
60 THINGS TO KNOW BEFORE STARTING YOUR VEHICLE
Page 78 of 532

DefrosterCheck operation by selecting the defrost mode and place
the blower control on high speed. You should be able to
feel the air directed against the windshield. See your
authorized dealer for service if your defroster is
inoperable.Periodic Safety Checks You Should Make Outside
the Vehicle
TiresExamine tires for excessive tread wear and uneven wear
patterns. Check for stones, nails, glass, or other objects
lodged in the tread. Inspect the tread and sidewall for
cuts and cracks. Check the wheel nuts for tightness.
Check the tires (including spare) for proper pressure.
LightsHave someone observe the operation of exterior lights
while you work the controls. Check turn signal and high
beam indicator lights on the instrument panel.Door LatchesCheck for positive closing, latching, and locking.Fluid LeaksCheck area under vehicle after overnight parking for fuel,
engine coolant, oil, or other fluid leaks. Also, if gasoline
fumes are detected or if fuel, power steering fluid, or
brake fluid leaks are suspected, the cause should be
located and corrected immediately.
76 THINGS TO KNOW BEFORE STARTING YOUR VEHICLE
Page 136 of 532

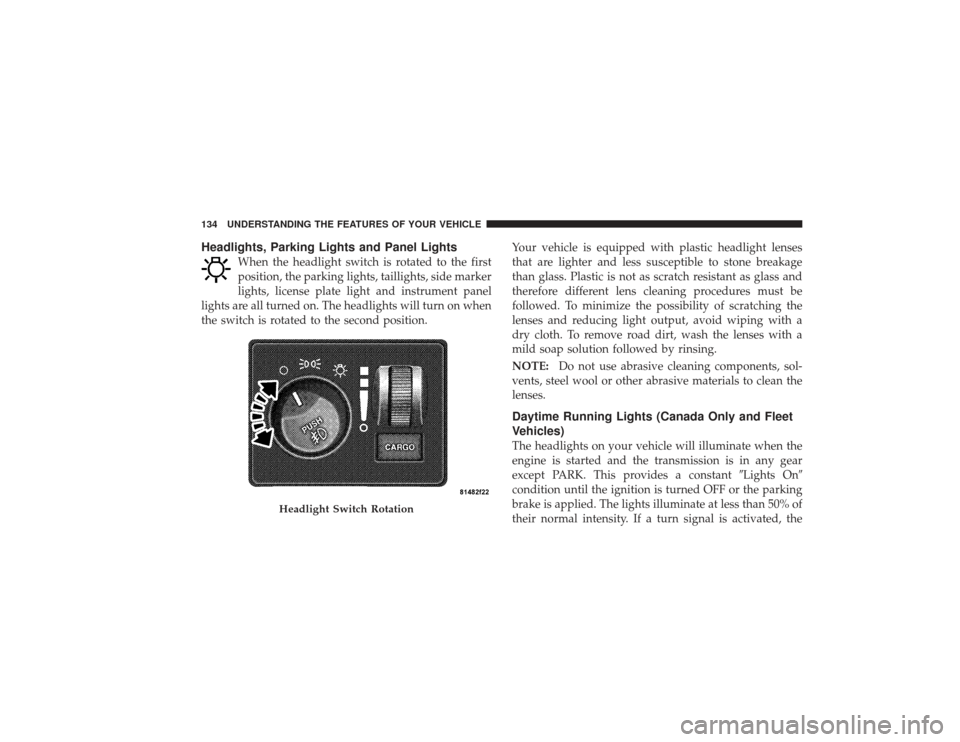
Headlights, Parking Lights and Panel Lights
When the headlight switch is rotated to the first
position, the parking lights, taillights, side marker
lights, license plate light and instrument panel
lights are all turned on. The headlights will turn on when
the switch is rotated to the second position. Your vehicle is equipped with plastic headlight lenses
that are lighter and less susceptible to stone breakage
than glass. Plastic is not as scratch resistant as glass and
therefore different lens cleaning procedures must be
followed. To minimize the possibility of scratching the
lenses and reducing light output, avoid wiping with a
dry cloth. To remove road dirt, wash the lenses with a
mild soap solution followed by rinsing.
NOTE:
Do not use abrasive cleaning components, sol-
vents, steel wool or other abrasive materials to clean the
lenses.
Daytime Running Lights (Canada Only and Fleet
Vehicles)The headlights on your vehicle will illuminate when the
engine is started and the transmission is in any gear
except PARK. This provides a constant �Lights On�
condition until the ignition is turned OFF or the parking
brake is applied. The lights illuminate at less than 50% of
their normal intensity. If a turn signal is activated, the
Headlight Switch Rotation
134 UNDERSTANDING THE FEATURES OF YOUR VEHICLE
Page 186 of 532
INSTRUMENT PANEL FEATURES
RAM TRUCK1 — Headlight Switch 6 — Passenger Airbag11 — TPMS “Light Load” Reset Switch* 16 — Transfer Case Control Switch*
2 — Air Outlets 7 — Glove Compartment 12 — Power Sliding Back Glass Switch* 17 — Parking Brake Release Lever
3 — Instrument Cluster 8 — Passenger Airbag On/Off Switch* 13 — Cupholders 18 — Adjustable Pedal Control Switch*
4 — Climate Controls 9 — Power Outlet 14 — ESP Off Switch** If Equipped
5 — Radio 10 — Heated Seat Switch 15 — Cigar Lighter184 UNDERSTANDING YOUR INSTRUMENT PANEL
Page 187 of 532
POWER WAGON1 — Headlight Switch6 — Passenger Airbag* 11 — Cup Holders
2 — Air Outlets 7 — Glove Compartment 12 — Cigar Lighter
3 — Instrument Cluster 8 — Power Outlet 13 — Electronic Axle Locker and Disconnecting
Sway Bar Switch
4 — Climate Controls 9 — Heated Seat Switch 14 — Parking Brake Release Lever
5 — Radio 10 — TPMS “Light Load” Reset Switch* 15 — Adjustable Pedal Control Switch*
* If Equipped UNDERSTANDING YOUR INSTRUMENT PANEL 185
4
Page 196 of 532

18. Malfunction Indicator Light (MIL)The Malfunction Indicator Light (MIL) is part of
an onboard diagnostic system, called OBD II, that
monitors engine and automatic transmission con-
trol systems. The light will illuminate when the key is in
the ON position, before engine start. If the bulb does not
come on when turning the key from OFF to ON, have the
condition checked promptly.
Certain conditions such as a loose or missing gas cap,
poor fuel quality, etc., may illuminate the MIL after
engine start. The vehicle should be serviced if the light
stays on through several of your typical driving cycles. In
most situations, the vehicle will drive normally and will
not require towing.
If the MIL flashes when the engine is running, serious
conditions may exist that could lead to immediate loss of
power or severe catalytic converter damage. The vehicle
should be serviced as soon as possible if this occurs. 19. Brake Warning Light
This light monitors various brake functions,
including brake fluid level and parking brake
application. If the brake light turns on, it may
indicate that the parking brake is applied, that
the brake fluid level is low, or that there is a problem with
the anti-lock brake system reservoir.
If the light remains on when the parking brake has been
disengaged, and the fluid level is at the full mark on the
master cylinder reservoir, it indicates a possible brake
hydraulic system malfunction or that a problem with the
Brake Booster has been detected by the Anti-Lock Brake
System (ABS) / Electronic Stability Program (ESP) sys-
tem. In this case, the light will remain on until the
condition has been corrected. If the problem is related to
the brake booster, the ABS pump will run when applying
the brake and a brake pedal pulsation may be felt during
each stop.194 UNDERSTANDING YOUR INSTRUMENT PANEL