Page 399 of 532

WARNING!
Attaching a snowplow to this vehicle could adversely
affect performance of the airbag system in an acci-
dent. Do not expect that the airbag will perform as
described earlier in this manualRECREATIONAL TOWING (BEHIND
MOTORHOME, ETC.)
CAUTION!
Front or rear wheel lifts should not be used. Internal
damage to the transmission or transfer case will occur
if a front or rear wheel lift is used when recreational
towing.
Recreational Towing – Two-Wheel Drive ModelsRecreational towing of two-wheel drive models is not
allowed.Towing with the rear wheels on the ground can
result in severe transmission damage.Recreational Towing – Four-Wheel Drive Models
CAUTION!
Failure to follow these requirements can cause severe
damage to the transmission and/or transfer case.
NOTE: Both the manual shift and electronic shift trans-
fer cases must be shifted into NEUTRAL for recreational
towing. Automatic transmissions must be shifted into the
PARK position for recreational towing. Refer to the
following for the proper transfer case NEUTRAL shifting
procedure for your vehicle.
STARTING AND OPERATING 397
5
Page 412 of 532

3. Place the shift lever into PARK. On four-wheel drive
vehicles, shift the transfer case to the 4L position.
4. Turn the ignition OFF.
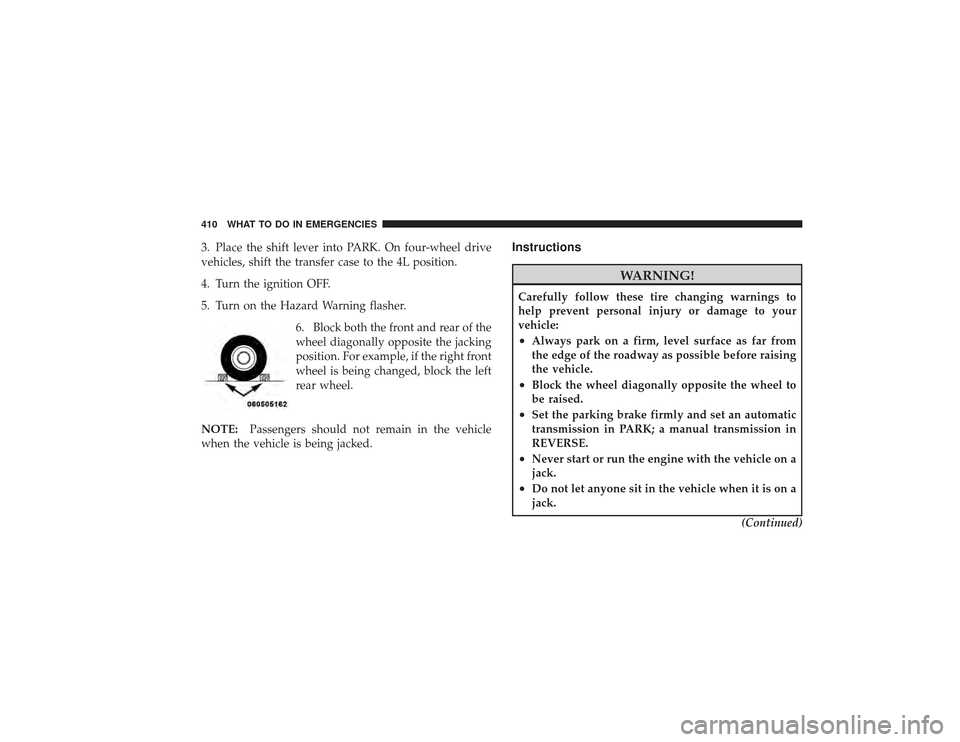
5. Turn on the Hazard Warning flasher.6. Block both the front and rear of the
wheel diagonally opposite the jacking
position. For example, if the right front
wheel is being changed, block the left
rear wheel.
NOTE: Passengers should not remain in the vehicle
when the vehicle is being jacked.
Instructions
WARNING!
Carefully follow these tire changing warnings to
help prevent personal injury or damage to your
vehicle:•
Always park on a firm, level surface as far from
the edge of the roadway as possible before raising
the vehicle.
•
Block the wheel diagonally opposite the wheel to
be raised.
•
Set the parking brake firmly and set an automatic
transmission in PARK; a manual transmission in
REVERSE.
•
Never start or run the engine with the vehicle on a
jack.
•
Do not let anyone sit in the vehicle when it is on a
jack.
(Continued)
410 WHAT TO DO IN EMERGENCIES
Page 422 of 532

2. Park the booster vehicle within cable reach but with-
out letting the vehicles touch. Set the parking brake on
both vehicles, place the automatic transmission in PARK
and turn the ignition OFF.
3. Turn off the heater, radio, and all unnecessary electri-
cal loads.
4. Connect one end of a jumper cable to the positive
terminal of the booster battery. Connect the other end of
the same cable to the positive terminal of the discharged
battery.
WARNING!
Do not permit vehicles to touch each other as this
could establish a ground connection and personal
injury could result.5. Connect the other cable; first to the negative terminal
of the booster battery, and then to the engine of the
vehicle with the discharged battery. Make sure you have
a good contact on the engine.
WARNING!
•
You should not try to start your vehicle by pushing
or towing.
•
Do not connect the cable to the negative post of the
discharge battery. The resulting electrical spark
could cause the battery to explode.
•
During cold weather when temperatures are be-
low freezing point, electrolyte in a discharged
battery may freeze. Do not attempt jump-starting
because the battery could rupture or explode. The
battery temperature must be brought up above
freezing point before attempting jump-start.
420 WHAT TO DO IN EMERGENCIES
Page 428 of 532

▫Cooling System .................... 441
▫ Brake System ...................... 447
▫ Rear Axle And 4X4 Front Driving Axle Fluid
Level ............................. 448
▫ Transfer Case ...................... 449
▫ Automatic Transmission .............. 449
▫ Appearance Care And Protection From
Corrosion .......................... 452
� Fuses ............................. 458
▫ Integrated Power Module ............. 458
� Vehicle Storage ...................... 463
� Replacement Light Bulbs ............... 464
� Bulb Replacement .................... 465
▫ Headlight (Halogen)/Front Park And Turn
Lights ............................ 465 ▫
Fog Lights ........................ 468
▫ Tail, Stop, Turn And Backup Lights ...... 469
▫ Center High-Mounted Stoplight (CHMSL)
With Cargo Light .................... 472
▫ Cab Top Clearance Lights — If Equipped . . 473
▫ Tailgate ID Lights (Dual Rear Wheels) —
If Equipped ........................ 475
▫ Rear Light Bar ID Marker
(Dual Rear Wheel) — If Equipped ........ 476
▫ Side Marker Lights (Dual Rear Wheels) . . . 477
� Fluids And Capacities ................. 478
� Fluids, Lubricants And Genuine Parts ...... 479
▫ Engine ........................... 479
▫ Chassis .......................... 480
426 MAINTAINING YOUR VEHICLE
Page 429 of 532
ENGINE COMPARTMENT— 5.7L1 — Air Cleaner Filter7 — Power Steering Fluid Reservoir
2 — Automatic Transmission Dipstick 8 — Engine Oil Dipstick
3 — Engine Oil Fill 9 — Washer Fluid Reservoir
4 — Brake Fluid Reservoir 10 — Engine Coolant Reservoir
5 — Battery 11 — Coolant Pressure Cap
6 — Integrated Power Module MAINTAINING YOUR VEHICLE 427
7
Page 430 of 532

ONBOARD DIAGNOSTIC SYSTEM (OBD II)Your vehicle is equipped with a sophisticated onboard
diagnostic system called OBDII. This system monitors
the performance of the emissions, engine, and automatic
transmission control systems. When these systems are
operating properly, your vehicle will provide excellent
performance and fuel economy, as well as engine emis-
sions well within current government regulations.
If any of these systems require service, the OBD II system
will turn on the Malfunction Indicator Light (MIL). It will
also store diagnostic codes and other information to
assist your service technician in making repairs. Al-
though your vehicle will usually be drivable and not
need towing, see your authorized dealer for service as
soon as possible.
CAUTION!
•
Prolonged driving with the MIL on could cause
further damage to the emission control system. It
could also affect fuel economy and drivability. The
vehicle must be serviced before any emissions
tests can be performed.
•
If the MIL is flashing, severe catalytic converter
damage and power loss will soon occur. Immedi-
ate service is required.
Loose Fuel Filler Cap MessageIf the vehicle’s diagnostic system determines that the fuel
filler cap in loose, improperly installed, or damaged, a
GASCAP message will be displayed in the instrument
cluster. Tighten the gas cap until a “clicking” sound is
heard. This is an indication that the gas cap is properly
tightened. Press the odometer reset button to turn the
message off. If the problem persists, the message will
428 MAINTAINING YOUR VEHICLE
Page 451 of 532

NOTE:The presence of water in the gear lubricant will
result in corrosion and possible failure of differential
components. Operation of the vehicle in water, as may be
encountered in some off-highway types of service, will
require draining and refilling the axle to avoid damage.
2500/3500 Model Axles DO NOT REQUIREany limited
slip oil additive (friction modifiers).Transfer Case
Drain And RefillRefer to the “Maintenance Schedule” in Section 8 for the
proper maintenance intervals.Lubricant SelectionRefer to “Fluids, Lubricants, and Genuine Parts” in this
section for the correct fluid type.
Fluid Level CheckThis fluid level can be checked by removing the filler
plug. The fluid level should be to the bottom edge of the
filler plug hole with the vehicle in a level position.Automatic Transmission
Selection Of LubricantIt is important that the proper lubricant is used in the
transmission to assure optimum transmission perfor-
mance. Use only the manufacturer ’s recommended trans-
mission fluid. Refer to “Fluids, Lubricants, and Genuine
Parts” in this section for the correct fluid type. It is
important that the transmission fluid be maintained at
the prescribed level using the recommended fluid. No
chemical flushes should be used in any transmission;
only the approved lubricant may be used.
MAINTAINING YOUR VEHICLE 449
7
Page 452 of 532

CAUTION!
Using a transmission fluid other than the manufac-
turer’s recommended fluid may cause deterioration
in transmission shift quality and/or torque converter
shudder. Using a transmission fluid other than the
manufacturer’s recommended fluid will result in
more frequent fluid and filter changes. Refer to
“Fluids, Lubricants, and Genuine Parts” in this sec-
tion for correct fluid type.Fluid Level CheckIf your vehicle is equipped with a dipstick, use the
following procedure. If your vehicle has a capped dip-
stick tube, it is sealed and should not be tampered with.
Your authorized dealer has the proper tools to ensure that
the fluid level is set properly. The fluid level should be
checked when the engine is fully warmed up and thefluid in the transmission is at normal operating tempera-
ture. Operation of the transmission with an improper
fluid level will greatly reduce the life of the transmission
and of the fluid. Check the fluid level whenever the
vehicle is serviced.
Fluid Level Check – 545RFECheck the fluid level while the transmission is at normal
operating temperature 82°C (180°F). This occurs after at
least 15 miles (25 km) of driving. At normal operating
temperature the fluid cannot be held comfortably be-
tween the fingertips.
To check the automatic transmission fluid level properly,
the following procedure must be used:
1. Operate the engine at idle speed and normal operating
temperature.
2. The vehicle must be on level ground.
450 MAINTAINING YOUR VEHICLE