Page 155 of 532

RESET button approximately five seconds. The last vari-
ance zone number will be displayed. Press the STEP
button to select the new variance zone and press the
RESET button to resume normal operation.Outside TemperatureBecause the ambient temperature sensor is located under
the hood, engine temperature can influence the displayed
temperature, therefore, temperature readings are slowly
updated when the vehicle speed is below 20 mph
(30 km/h) or during stop and go driving.GARAGE DOOR OPENER — IF EQUIPPEDHomeLink�replaces up to three remote controls (hand-
held transmitters) that operate devices such as garage
door openers, motorized gates, lighting, or home security
systems. The HomeLink� unit operates off of your vehi-
cle’s battery. The HomeLink�
buttons are located in the overhead
console, and contain one, two, or three dots/lines desig-
nating the different HomeLink� channels.
NOTE: HomeLink� is disabled when the Vehicle Theft
Alarm is active.
HomeLink Buttons
UNDERSTANDING THE FEATURES OF YOUR VEHICLE 153
3
Page 184 of 532

▫Operation Instructions - (CD Mode For MP3
Audio Play) ........................ 214
▫ Load/Eject Button
(CD Mode For MP3 Play) .............. 214
� Sales Code REF — AM/FM/CD (Single-Disc)
Radio With Optional uconnect� studios
(Satellite Radio) And uconnect� phone
Capability ........................... 216
▫ Operating Instructions - Radio Mode ...... 216
▫ Operating Instructions - CD Mode ........ 220
▫ Operating Instructions - Auxiliary Mode .... 222
▫ Operating Instructions - uconnect� phone —
If Equipped ........................ 223
▫ Operating Instructions - uconnect� studios
(Satellite Radio) — If Equipped .......... 223�
Sales Code REC — AM/FM/CD (6–Disc)
Radio With uconnect� gps (Navigation)...... 224
▫ Operating Instructions — uconnect� studios
(Satellite Radio) — If Equipped .......... 224
▫ REC Setting The Clock ................ 224
� uconnect� studios (Satellite Radio) —
If Equipped .......................... 227
▫ System Activation .................... 227
▫ Electronic Serial Number/Sirius
Identification Number (ESN/SID) ......... 227
▫ Selecting uconnect� studios (Satellite) Mode
In REF, RAQ, And RAK Radios .......... 228
▫ Selecting A Channel .................. 229
▫ Storing And Selecting Preset Channels ..... 229
182 UNDERSTANDING YOUR INSTRUMENT PANEL
Page 186 of 532
INSTRUMENT PANEL FEATURES
RAM TRUCK1 — Headlight Switch 6 — Passenger Airbag11 — TPMS “Light Load” Reset Switch* 16 — Transfer Case Control Switch*
2 — Air Outlets 7 — Glove Compartment 12 — Power Sliding Back Glass Switch* 17 — Parking Brake Release Lever
3 — Instrument Cluster 8 — Passenger Airbag On/Off Switch* 13 — Cupholders 18 — Adjustable Pedal Control Switch*
4 — Climate Controls 9 — Power Outlet 14 — ESP Off Switch** If Equipped
5 — Radio 10 — Heated Seat Switch 15 — Cigar Lighter184 UNDERSTANDING YOUR INSTRUMENT PANEL
Page 187 of 532
POWER WAGON1 — Headlight Switch6 — Passenger Airbag* 11 — Cup Holders
2 — Air Outlets 7 — Glove Compartment 12 — Cigar Lighter
3 — Instrument Cluster 8 — Power Outlet 13 — Electronic Axle Locker and Disconnecting
Sway Bar Switch
4 — Climate Controls 9 — Heated Seat Switch 14 — Parking Brake Release Lever
5 — Radio 10 — TPMS “Light Load” Reset Switch* 15 — Adjustable Pedal Control Switch*
* If Equipped UNDERSTANDING YOUR INSTRUMENT PANEL 185
4
Page 194 of 532

15. Shift Lever Indicator (Automatic Transmission
Only)
This display indicator shows the automatic transmission
shift lever selection.
NOTE:You must apply the brakes before shifting from
PARK.
16. Odometer/Trip Odometer
The odometer shows the total distance the vehicle has
been driven. U.S. federal regulations require that upon
transfer of vehicle ownership, the seller certify to the
purchaser the correct mileage that the vehicle has been
driven. Therefore, if the odometer reading is changed
during repair or replacement, be sure to keep a record of
the reading before and after the service so that the correct
mileage can be determined.
The two trip odometers show individual trip mileage. To
switch from odometer to trip odometers, press and
release the Trip Odometer button. To reset a trip odometer, display the desired trip odom-
eter to be reset then push and hold the button until the
display resets (approximately two seconds).
Vehicle Warning Messages
When the appropriate conditions exist, messages such as
“door” (indicates that a door(s) may be ajar), “hood” (if
the hood is open or ajar, on vehicles with remote start),
“gASCAP” (indicates that your gas cap is possibly loose
or damaged), “LoW tirE” (indicates low tire pressure),
CHANgE OIL” (indicates that the engine oil should be
change), “LoWASH” (low washer fluid), “ESPOFF” (in-
dicates that ESP is turned off), and “noFUSE” (indicates
that the IOD fuse is removed from the Integrated Power
Module), will display in the odometer.
NOTE:
There is also an engine hour function. This
indicates the total number of hours the engine has been
running. To display the engine hours perform the follow-
ing: Place the ignition in RUN, but do not start the192 UNDERSTANDING YOUR INSTRUMENT PANEL
Page 195 of 532

engine. With the odometer value displayed, hold the trip
button down for a period of six seconds. The odometer
will change to trip value first, then it will display the
engine hour value. The engine hours will be displayed
for a period of 30 seconds until the ignition is turned OFF
or the engine is started.
CHANgE OIL Message
Your vehicle is equipped with an engine oil change
indicator system. The “CHANgE OIL” message will flash
in the instrument cluster odometer for approximately
12 seconds after a single chime has sounded to indicate
the next scheduled oil change interval. The engine oil
change indicator system is duty cycle based, which
means the engine oil change interval may fluctuate
dependent upon your personal driving style.
Unless reset, this message will continue to display each
time you turn the ignition switch to the ON/RUN
position. To turn off the message temporarily, press andrelease the Trip Odometer button on the instrument
cluster. To reset the oil change indicator system (after
performing the scheduled maintenance), refer to the
following procedure:
1. Turn the ignition switch to the ON position (Do not
start the engine).
2. Fully depress the accelerator pedal slowly three
times within 10 seconds.
3. Turn the ignition switch to the OFF/LOCK position.
NOTE: If the indicator message illuminates when you
start the engine, the oil change indicator system did not
reset. If necessary repeat this procedure.
17. Front Fog Light Indicator — If Equipped This indicator will illuminate when the front fog
lights are on.
UNDERSTANDING YOUR INSTRUMENT PANEL 193
4
Page 201 of 532

CAUTION!
The TPMS has been optimized for the original
equipment tires and wheels. TPMS pressures and
warning have been established for the tire size
equipped on your vehicle. Undesirable system opera-
tion or sensor damage may result when using re-
placement equipment that is not of the same size,
type, and/or style. Aftermarket wheels can cause
sensor damage. Do not use tire sealant from a can, or
balance beads if your vehicle is equipped with a
TPMS, as damage to the sensors may result.
26. Electronic Stability Program (ESP) Indicator Light/
Traction Control System (TCS) Indicator Light — If
Equipped If this indicator light flashes during accelera-
tion, apply as little throttle as possible. While
driving, ease up on the accelerator. Adapt your speed and driving to the prevailing road conditions, and
do not switch off the Electronic Stability Program (ESP),
or Traction Control System (TCS).
27. Transmission Temperature Indicator (Automatic
Transmissions Only)
This light indicates that there is excessive trans-
mission fluid temperature that might occur
with severe usage such as trailer towing. It may
also occur when operating the vehicle in a high
torque converter slip condition, such as 4-wheel-drive
operation (e.g., snow plowing, off- road operation). If this
light comes on, stop the vehicle and run the engine at idle
or faster, with the transmission in NEUTRAL until the
light goes off.
28. Odometer/Trip Odometer Button
Press this button to toggle between the odometer and the
trip odometer display. Holding the button in resets the
trip odometer reading when in trip mode.
UNDERSTANDING YOUR INSTRUMENT PANEL 199
4
Page 209 of 532

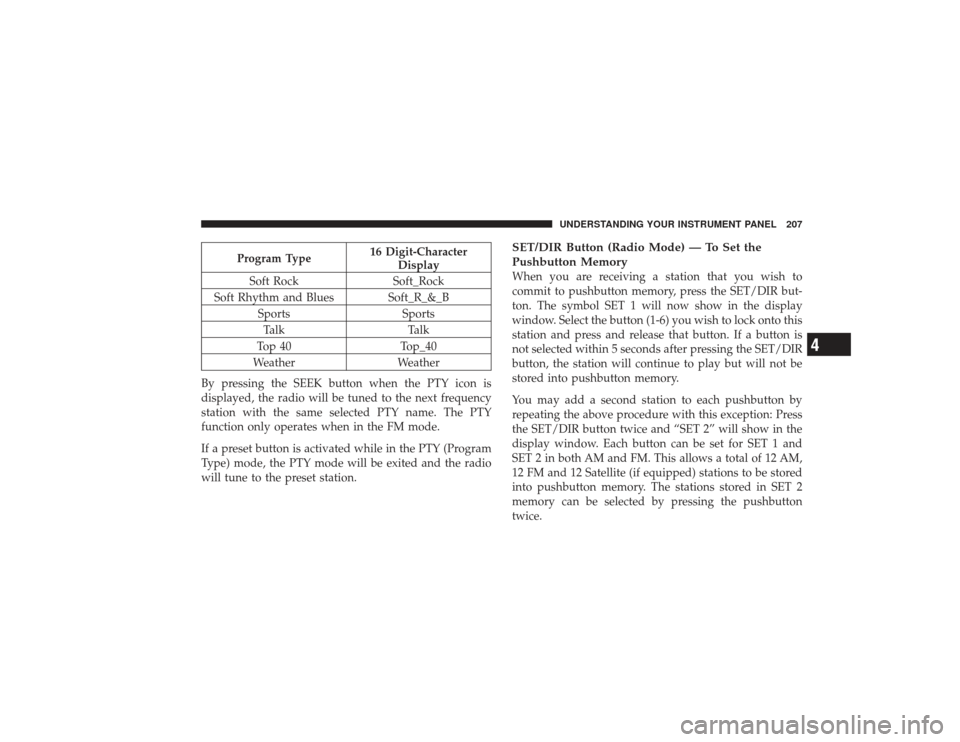
Program Type16 Digit-Character
Display
Soft Rock Soft_Rock
Soft Rhythm and Blues Soft_R_&_B Sports SportsTalk Talk
Top 40 Top_40
Weather Weather
By pressing the SEEK button when the PTY icon is
displayed, the radio will be tuned to the next frequency
station with the same selected PTY name. The PTY
function only operates when in the FM mode.
If a preset button is activated while in the PTY (Program
Type) mode, the PTY mode will be exited and the radio
will tune to the preset station.
SET/DIR Button (Radio Mode) — To Set the
Pushbutton MemoryWhen you are receiving a station that you wish to
commit to pushbutton memory, press the SET/DIR but-
ton. The symbol SET 1 will now show in the display
window. Select the button (1-6) you wish to lock onto this
station and press and release that button. If a button is
not selected within 5 seconds after pressing the SET/DIR
button, the station will continue to play but will not be
stored into pushbutton memory.
You may add a second station to each pushbutton by
repeating the above procedure with this exception: Press
the SET/DIR button twice and “SET 2” will show in the
display window. Each button can be set for SET 1 and
SET 2 in both AM and FM. This allows a total of 12 AM,
12 FM and 12 Satellite (if equipped) stations to be stored
into pushbutton memory. The stations stored in SET 2
memory can be selected by pressing the pushbutton
twice.
UNDERSTANDING YOUR INSTRUMENT PANEL 207
4