Page 43 of 484
Trunk Emergency Release
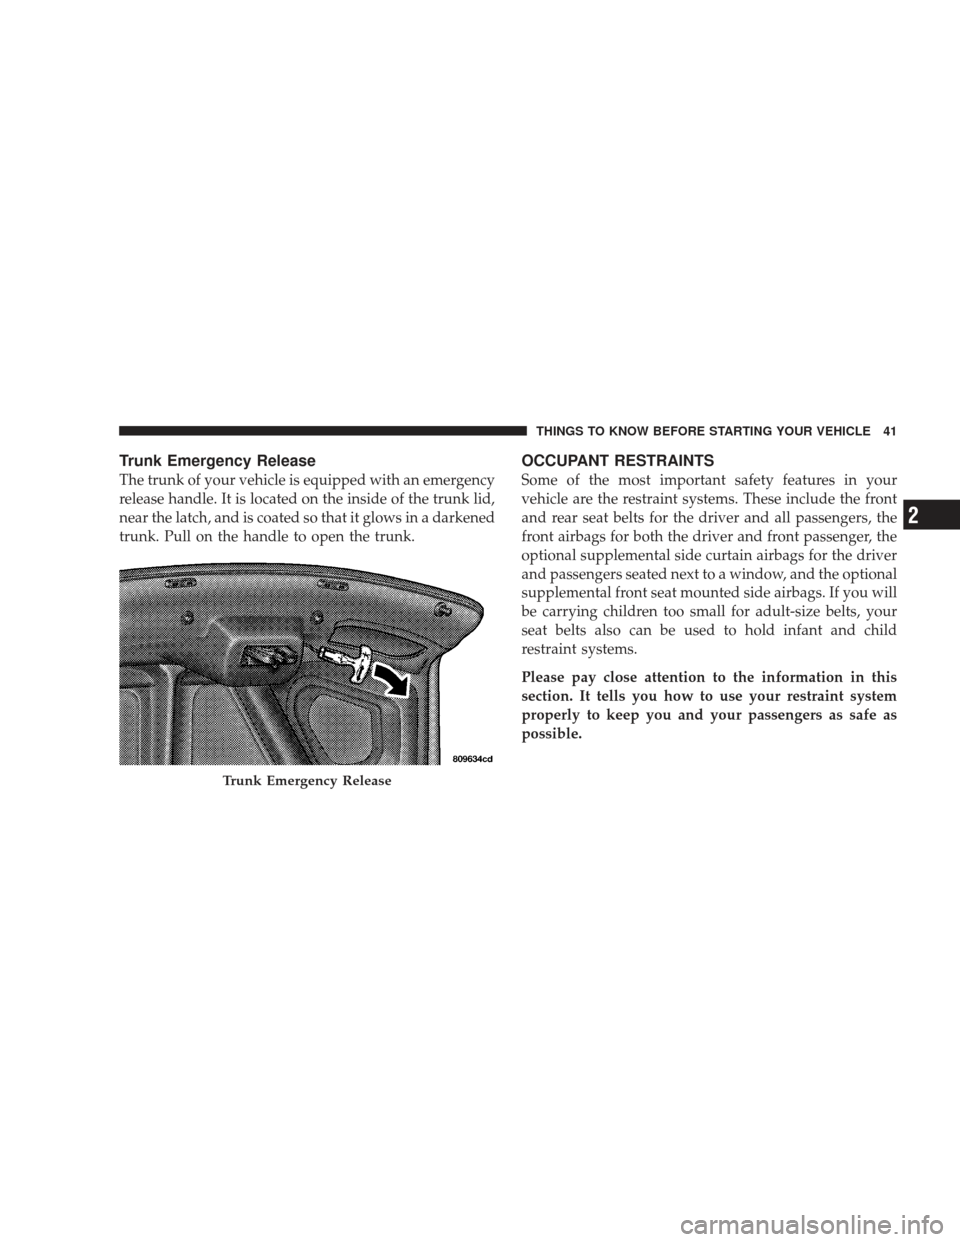
The trunk of your vehicle is equipped with an emergency
release handle. It is located on the inside of the trunk lid,
near the latch, and is coated so that it glows in a darkened
trunk. Pull on the handle to open the trunk.
OCCUPANT RESTRAINTS
Some of the most important safety features in your
vehicle are the restraint systems. These include the front
and rear seat belts for the driver and all passengers, the
front airbags for both the driver and front passenger, the
optional supplemental side curtain airbags for the driver
and passengers seated next to a window, and the optional
supplemental front seat mounted side airbags. If you will
be carrying children too small for adult-size belts, your
seat belts also can be used to hold infant and child
restraint systems.
Please pay close attention to the information in this
section. It tells you how to use your restraint system
properly to keep you and your passengers as safe as
possible.
Trunk Emergency Release
THINGS TO KNOW BEFORE STARTING YOUR VEHICLE 41
2
Page 81 of 484
If you are required to drive with the trunk/liftgate open,
make sure that all windows are closed and the climate
control BLOWER switch is set at high speed. DO NOT
use the recirculation mode.
The best protection against carbon monoxide entry into
the vehicle body is a properly maintained engine exhaust
system.
Whenever a change is noticed in the sound of the exhaust
system, when exhaust fumes can be detected inside the
vehicle, or when the underside or rear of the vehicle is
damaged, have a competent mechanic inspect the com-
plete exhaust system and adjacent body areas for broken,
damaged, deteriorated, or mispositioned parts. Open
seams or loose connections could permit exhaust fumes
to seep into the passenger compartment. In addition,
inspect the exhaust system each time the vehicle is raised
for lubrication or oil change. Replace as required.Safety Checks You Should Make Inside The
Vehicle
Seat Belts
Inspect the belt system periodically, checking for cuts,
frays, and loose parts. Damaged parts must be replaced
immediately. Do not disassemble or modify the system.
Front seat belt assemblies must be replaced after a
collision. Rear seat belt assemblies must be replaced after
a collision if they have been damaged (i.e., bent retractor,
torn webbing, etc.). If there is any question regarding belt
or retractor condition, replace the belt.
Airbag Warning Light
The light should come on and remain on for six to eight
seconds as a bulb check when the ignition switch is first
turned ON. If the light is not lit during starting, see your
authorized dealer. If the light stays on, flickers, or comes
on while driving, have the system checked by an autho-
rized dealer.
THINGS TO KNOW BEFORE STARTING YOUR VEHICLE 79
2
Page 138 of 484
because a door is open. This includes the glove box light,
but not the trunk light. To restore interior light operation,
either turn the ignition switch ON or cycle the light
switch.
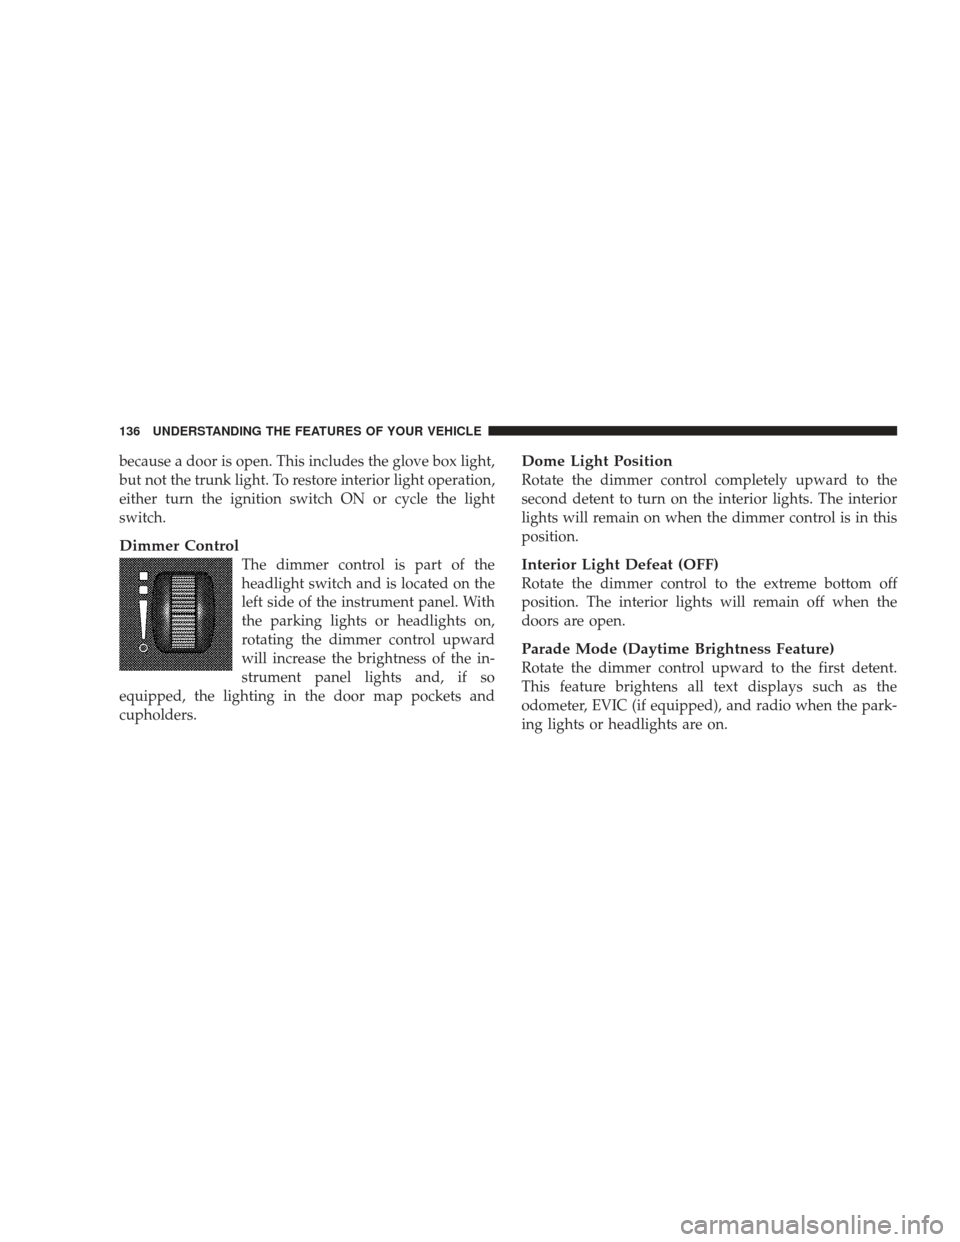
Dimmer Control
The dimmer control is part of the
headlight switch and is located on the
left side of the instrument panel. With
the parking lights or headlights on,
rotating the dimmer control upward
will increase the brightness of the in-
strument panel lights and, if so
equipped, the lighting in the door map pockets and
cupholders.
Dome Light Position
Rotate the dimmer control completely upward to the
second detent to turn on the interior lights. The interior
lights will remain on when the dimmer control is in this
position.
Interior Light Defeat (OFF)
Rotate the dimmer control to the extreme bottom off
position. The interior lights will remain off when the
doors are open.
Parade Mode (Daytime Brightness Feature)
Rotate the dimmer control upward to the first detent.
This feature brightens all text displays such as the
odometer, EVIC (if equipped), and radio when the park-
ing lights or headlights are on.
136 UNDERSTANDING THE FEATURES OF YOUR VEHICLE
Page 171 of 484
INSTRUMENT PANEL FEATURES
1 — Air Outlet7 — Climate Control13 — Hood Release
2 — Instrument Cluster 8 — Heated Seat Switch*14 — Trunk Release Switch
3 — Hazard Switch 9 — Power Outlet15 — Headlight Switch
4 — Electronic Stability Program OFF Button* /
Traction Control System OFF Button* 10 — Ash Tray*
* If Equipped
5 — Glove Compartment 11 — Storage Compartment*
6 — Radio 12 — Ignition SwitchUNDERSTANDING YOUR INSTRUMENT PANEL 169
4
Page 188 of 484
![DODGE CHARGER 2009 6.G Owners Manual •Left/Right Front Door Ajar (one or more, with a single
chime if speed is above 1 mph [1.6 km/h])
•Left/Right Rear Door Ajar (one or more, with a single
chime if speed is above 1 mph [1.6 km/h])
� DODGE CHARGER 2009 6.G Owners Manual •Left/Right Front Door Ajar (one or more, with a single
chime if speed is above 1 mph [1.6 km/h])
•Left/Right Rear Door Ajar (one or more, with a single
chime if speed is above 1 mph [1.6 km/h])
�](/manual-img/12/5563/w960_5563-187.png)
•Left/Right Front Door Ajar (one or more, with a single
chime if speed is above 1 mph [1.6 km/h])
•Left/Right Rear Door Ajar (one or more, with a single
chime if speed is above 1 mph [1.6 km/h])
•Door(s) Ajar (with a single chime if vehicle is in
motion)
•Trunk Ajar (with a single chime)
•Low Washer Fluid (with a single chime)
•Low Tire Pressure
•SERVICE AWD SYSTEM — All Wheel Drive (AWD)
system is not functioning properly and service is
required.
•Channel # Transmit
•Channel # Training
•Channel # Trained
•Clearing Channels
•Channels Cleared
•Did Not Train
•Insert Key/Turn To Run (refer to “Remote Starting
System” in Section 2)
•Check Gascap (refer to “Adding Fuel” in Section 5)
•Oil Change Required (with a single chime)
Oil Change Required
Your vehicle is equipped with an engine oil change
indicator system. The “Oil Change Required” message
will flash in the EVIC display for approximately 10 sec-
onds after a single chime has sounded to indicate the next
scheduled oil change interval. The engine oil change
indicator system is duty cycle based, which means the
engine oil change interval may fluctuate dependent upon
your personal driving style.
186 UNDERSTANDING YOUR INSTRUMENT PANEL
Page 245 of 484
Selecting uconnect�studios (Satellite) Mode
Press the SAT button until �SAT�appears in the display. A
CD may remain in the radio while in the Satellite radio
mode.
Satellite Antenna
To ensure optimum reception, do not place items on the
roof around the rooftop antenna location or strap items to
the trunk lid around the trunk lid antenna (if equipped).
Metal objects placed within the line of sight of the
antenna will cause decreased performance. Larger lug-
gage items such as bikes should be placed as far rearward
as possible, within the loading design of the rack. Do not
place items directly on or above the antenna.
Reception Quality
Satellite reception may be interrupted due to one of the
following reasons:
•The vehicle is parked in an underground parking
structure or under a physical obstacle.
•Dense tree coverage may interrupt reception in the
form of short audio mutes.
•Driving under wide bridges or along tall buildings can
cause intermittent reception.
•Placing objects over or too close to the antenna can
cause signal blockage.
Operating Instructions — uconnect �studios
(Satellite) Mode
NOTE: The ignition switch must be in the ON or ACC
position to operate the radio.
SEEK Buttons
Press and release the SEEK buttons to search for the next
channel in Satellite mode. Press the right switch to seek
up and the left switch to seek down. The radio will
remain tuned to the new channel until you make another
selection. Holding either button will bypass channels
without stopping until you release it.
UNDERSTANDING YOUR INSTRUMENT PANEL 243
4
Page 338 of 484
•The use of fuel additives, which are now being sold as
octane enhancers, is not recommended. Most of these
products contain high concentrations of methanol.
Fuel system damage or vehicle performance problems
resulting from the use of such fuels or additives is not
the responsibility of the manufacturer.
NOTE: Intentional tampering with the emissions con-
trol system can result in civil penalties being assessed
against you.
Carbon Monoxide Warnings
WARNING!
Carbon monoxide (CO) in exhaust gases is deadly.
Follow the precautions below to prevent carbon
monoxide poisoning:
•Do not inhale exhaust gases. They contain carbon
monoxide, a colorless and odorless gas, which can kill.
Never run the engine in a closed area, such as a
garage, and never sit in a parked vehicle with the
engine running for an extended period. If the vehicle is
stopped in an open area with the engine running for
more than a short period, adjust the ventilation system
to force fresh, outside air into the vehicle.
•Guard against carbon monoxide with proper mainte-
nance. Have the exhaust system inspected every time
the vehicle is raised. Have any abnormal conditions
repaired promptly. Until repaired, drive with all side
windows fully open.
•Keep the trunk closed when driving your vehicle to
prevent carbon monoxide and other poisonous ex-
haust gases from entering the vehicle.
336 STARTING AND OPERATING
Page 360 of 484
WARNING! (Continued)
•The jack is designed to use as a tool for changing
tires only. The jack should not be used to lift the
vehicle for service purposes. The vehicle should
be jacked on a firm level surface only. Avoid ice or
slippery areas.
Jack Location/Spare Tire Stowage
The jack and spare tire are both stowed under an access
cover in the trunk. Follow these steps to access the jack
and spare tire.
NOTE:The spare tire must be removed in order to
access the jack.
1. Open the trunk.
2. Lift the access cover using the pull strap. 3. Remove the fastener securing the spare tire.
Opening The Access Panel
358 WHAT TO DO IN EMERGENCIES