Page 152 of 484
Gate Operator/Canadian Programming
Canadian radio-frequency laws require transmitter sig-
nals to “time-out” (or quit) after several seconds of
transmission – which may not be long enough for
HomeLink�to pick up the signal during programming.
Similar to this Canadian law, some U.S. gate operators are
designed to “time-out” in the same manner.
It may be helpful to unplug the device during the cycling
process to prevent possible overheating of the garage
door or gate motor.
If you are having difficulties programming a garage door
opener or a gate operator, replace “Programming
HomeLink” Step 3 with the following:
3. Continue to press and hold the HomeLink� button
while you press and release - every two seconds
(“cycle”) your hand-held transmitter until HomeLink �has successfully accepted the frequency signal. The
EVIC display will change from “CHANNEL # TRAIN-
ING” to “CHANNEL # TRAINED.”
If you unplugged the device for training, plug it back in
at this time.
Then proceed with Step 4 under “Programming
HomeLink�” earlier in this section.
Using HomeLink�
To operate, simply press and release the programmed
HomeLink�
button. Activation will now occur for the
trained device (i.e., garage door opener, gate operator,
security system, entry door lock, home/office lighting,
etc.) The hand-held transmitter of the device may also be
used at any time.
150 UNDERSTANDING THE FEATURES OF YOUR VEHICLE
Page 153 of 484
Reprogramming A Single HomeLink�Button
To reprogram a channel that has been previously trained,
follow these steps:
1. Turn the ignition switch to the ON/RUN position.
2. Press and hold the desired HomeLink� button for
20 seconds until the EVIC display states “CHANNEL #
TRAINING.” Do not release the button.
3. Without releasing the button, proceed with Program-
ming HomeLink� Step 2 and follow all remaining steps.
Security
It is advised to erase all channels before you sell or turn
in your vehicle.
To do this, press and hold the two outside buttons for
20 seconds until the EVIC message states “CHANNELS
CLEARED.” Note that all channels will be erased. Indi-
vidual channels cannot be erased. The HomeLink�
Universal Transceiver is disabled when
the Vehicle Security Alarm is active.
Troubleshooting Tips
If you are having trouble programming HomeLink�, here
are some of the most common solutions:
•Replace the battery in the original transmitter.
•Press the learn button on the garage door opener to
complete the training for rolling code.
•Did you unplug the device for training, and remember
to plug it back in?
If you are having any problems or require assistance,
please call toll-free 1–800–355–3515 or, on the Internet at
www.HomeLink.com for information or assistance.
UNDERSTANDING THE FEATURES OF YOUR VEHICLE 151
3
Page 167 of 484
UNDERSTANDING YOUR INSTRUMENT PANEL
CONTENTS
�Instrument Panel Features ............... 169
� Instrument Cluster – Base ............... 170
� Instrument Cluster – Premium ............ 171
� Instrument Cluster Descriptions ........... 172
� Electronic Vehicle Information Center (EVIC) –
If Equipped .......................... 183
▫ Electronic Vehicle Information Center (EVIC)
Displays ........................... 185
▫ Oil Change Required .................. 186
▫ Trip Functions ...................... 187 ▫
Automatic All Wheel Drive (AWD) Displays
— If Equipped ...................... 189
▫ Compass Display .................... 190
▫ Driver-Selectable Surround Sound (DSS) – If
Equipped .......................... 192
▫ uconnect� gps (Navigation) — If Equipped . . 193
▫ Personal Settings (Customer-Programmable
Features) .......................... 193
� Sales Code REQ — AM/FM Stereo Radio And
6–Disc CD/DVD Changer (MP3/WMA AUX
Jack) ............................... 1974
Page 174 of 484
INSTRUMENT CLUSTER DESCRIPTIONS
1. Fuel Gauge
The pointer shows the level of fuel in the fuel tank when
the ignition switch is in the ON position.
2. Trip Odometer Button
Base Cluster
The word�TRIP�will appear when this button is pressed.
Push in and hold the button for two seconds when the
trip odometer displays to reset it to 0 miles (km). A
second press of the button will display the outside
temperature in the odometer.
Premium Cluster
Press this button to change the display from odometer to
either of two trip odometer settings. The letter “A” or “B”
will appear when in the trip odometer mode. Push in and hold the button for two seconds to reset the trip odometer
to 0 miles (km). The odometer must be in TRIP mode to
reset it.
3. Speedometer
Indicates vehicle speed.
4. Electronic Speed Control Indicator Light — If
Equipped
This light will turn on when the electronic
speed control is ON.
5. Tachometer
The red segments indicate the maximum permissible
engine revolutions per minute (RPM x 1000) for each gear
range. Ease up on the accelerator before reaching the red
area.
172 UNDERSTANDING YOUR INSTRUMENT PANEL
Page 179 of 484
19. Odometer/Trip Odometer Display / Electronic
Vehicle Information Center (EVIC) Display — If
Equipped
The odometer shows the total distance the vehicle has
been driven. The trip odometer shows individual trip
mileage. Refer to “Trip Odometer Button” for additional
information.
NOTE:U.S. Federal regulations require upon transfer of
vehicle ownership, the seller certify the mileage the
vehicle has been driven. Therefore, if the odometer
reading is changed because of repair or replacement, be
sure to keep a record of the reading before and after the
service so that the correct mileage can be determined.
Rear Wheel Drive (RWD) / All Wheel Drive (AWD)
Displays (Base Cluster)
On vehicles equipped with a Base Instrument Cluster, the
odometer will display “2drivE” when the vehicle is in
Rear Wheel Drive (RWD), and “4drivE” when All Wheel
Drive (AWD) is activated. If the odometer displays the “tCASE” warning message
after engine start up, or during driving, the AWD system
is not functioning properly and service is required.
NOTE:
Vehicles equipped with Electronic Vehicle Infor-
mation Center (EVIC) will display SERVICE AWD SYS-
TEM if the system is not functioning properly and service
is required. Refer to Electronic Vehicle Information Cen-
ter (EVIC) in this section for more information.
Change Oil Message (Base Cluster)
Your vehicle is equipped with an engine oil change
indicator system. The “Change Oil” message will flash in
the instrument cluster odometer for approximately
12 seconds after a single chime has sounded to indicate
the next scheduled oil change interval. The engine oil
change indicator system is duty cycle based, which
means the engine oil change interval may fluctuate
dependent upon your personal driving style.
UNDERSTANDING YOUR INSTRUMENT PANEL 177
4
Page 180 of 484
Unless reset, this message will continue to display each
time you turn the ignition switch to the ON position. To
turn off the message temporarily, press and release the
TRIP ODOMETER button on the instrument cluster. To
reset the oil change indicator system (after performing
the scheduled maintenance) perform the following pro-
cedure:1. Turn the ignition switch to the ON position. (Do not
start the engine).
2. Fully depress the accelerator pedal slowly three
times within 10 seconds.
3. Turn the ignition switch to the LOCK position.
NOTE: If the indicator message illuminates when you
start the vehicle, the oil change indicator system did not
reset. If necessary, repeat this procedure. On vehicles equipped with a Premium Instrument Clus-
ter, this display shows the Electronic Vehicle Information
Center (EVIC) messages when the appropriate conditions
exist.
Lo tirE
When the appropriate condition exists the odometer
display will toggle between Lo and tirE for three cycles.
Loose Fuel Filler Cap Message
If the vehicle diagnostic system determines that the fuel
filler cap is loose, improperly installed, or damaged, a
“Check Gascap” message will display in the EVIC.
Tighten the fuel filler cap properly and press the TRIP
ODOMETER button to turn off the message. If the
problem continues, the message will appear the next time
the vehicle is started.
A loose, improperly installed, or damaged fuel filler cap
may also turn on the Malfunction Indicator Light (MIL).
178 UNDERSTANDING YOUR INSTRUMENT PANEL
Page 185 of 484
25. Malfunction Indicator Light (MIL)The Malfunction Indicator Light (MIL) is part of
an onboard diagnostic system called OBD. The
OBD system monitors engine and automatic
transmission control systems. The MIL will turn on when
the key is in the ON position before engine start. If the
MIL does not come on when turning the key from LOCK
to ON, have the condition checked promptly.
Certain conditions such as a loose or missing gas cap,
poor fuel quality, etc., may illuminate the MIL after
engine start. The vehicle should be serviced if the MIL
stays on through several of your typical driving cycles. In
most situations, the vehicle will drive normally and will
not require towing.
The MIL flashes to alert you to serious conditions that
could lead to immediate loss of power or severe catalytic
converter damage. The vehicle should be serviced as
soon as possible if this occurs.ELECTRONIC VEHICLE INFORMATION CENTER
(EVIC) – IF EQUIPPED
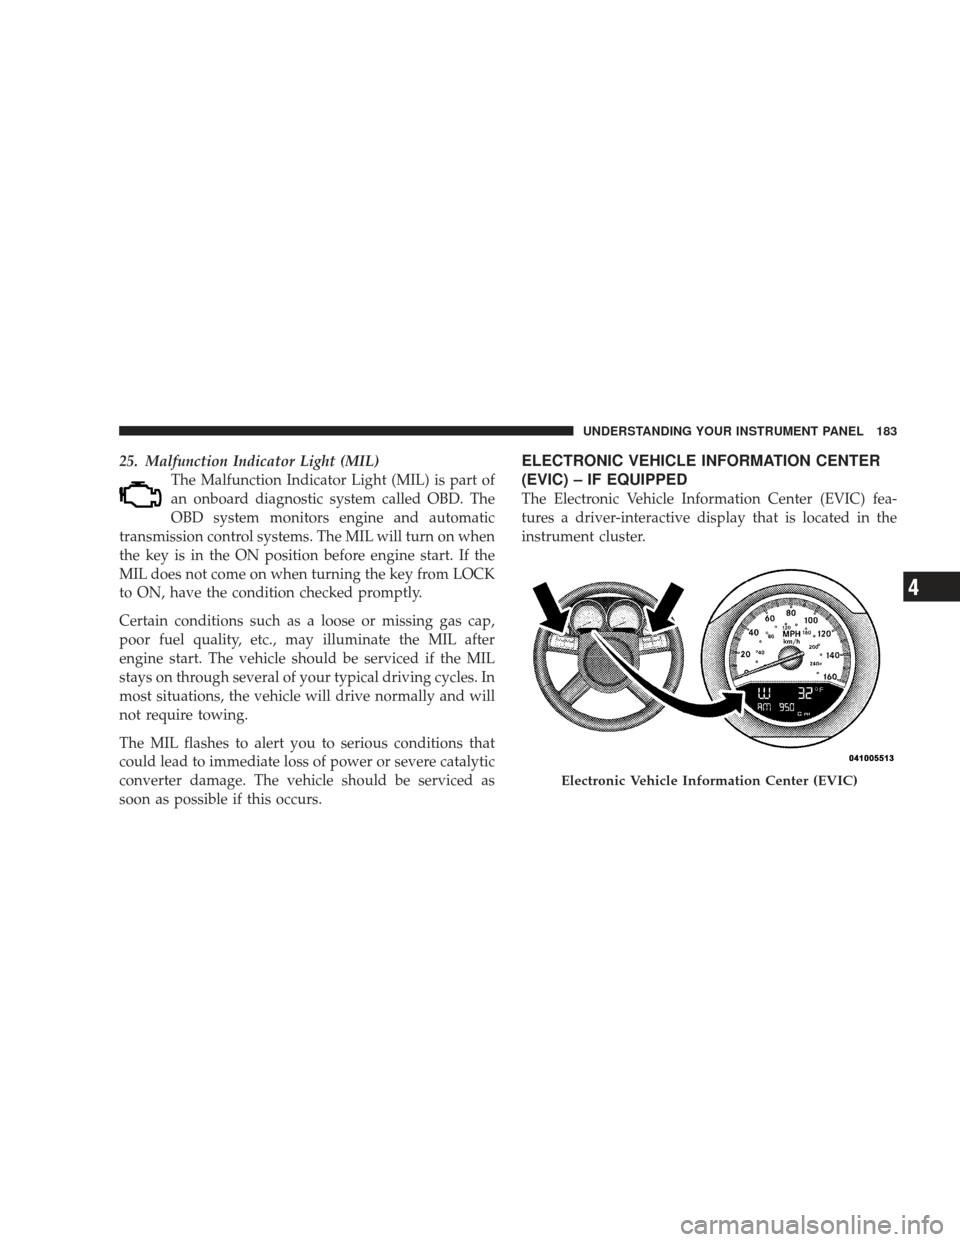
The Electronic Vehicle Information Center (EVIC) fea-
tures a driver-interactive display that is located in the
instrument cluster.
Electronic Vehicle Information Center (EVIC)
UNDERSTANDING YOUR INSTRUMENT PANEL 183
4
Page 186 of 484
This system allows the driver to select a variety of useful
information by pressing the switches mounted on the
steering wheel. The EVIC consists of the following:
•System status
•Vehicle information warning message displays
•Personal settings (customer programmable features)
•Compass display
•Outside temperature display
•Trip computer functions
•uconnect�phone displays (if equipped)
•uconnect�gps system screens (if equipped)
•Audio mode display
•Surround Sound Modes (If Equipped with Driver-
Selectable Surround [DSS]) The system allows the driver to select information by
pressing the following buttons mounted on the steering
wheel.
Press and release the MENU button and the
mode displayed will change between Trip
Functions, uconnect� gps (if equipped), System
Status, and Personal Settings.
Press the FUNCTION SELECT button to accept
a selection. The FUNCTION SELECT button
also functions as a remote sound system con-
trol. Refer to “Remote Sound System Controls”
in this section.
MENU
Button
FUNC- TION
SELECT Button
184 UNDERSTANDING YOUR INSTRUMENT PANEL