Page 30 of 469
equipped). Then, prior to the end of the 15 minute cycle,
press and release the START/STOP button. If the
START/STOP button is not present, insert the key into
the ignition switch and turn the switch to the ON
position.
NOTE:
•For vehicles not equipped with Keyless Go feature, the
ignition switch must be in the ON position in order to
drive the vehicle.
•For vehicles not equipped with Keyless Go feature, the
message “Insert Key/Turn To On” will display in the
EVIC until you insert the key. Once inserted, the
message “Turn To On” will display in the EVIC until
you turn the key to ON.
•For vehicles equipped with Keyless Go feature, the
message “Push Button/Insert Key” will display in the
EVIC until you push the START button.
DOOR LOCKS
Manual Door Locks
To lock each door, push the door lock plunger on each
door trim panel downward. To unlock each door, pull the
door lock plunger on each door trim panel upward.
Door Lock Plunger
28 THINGS TO KNOW BEFORE STARTING YOUR VEHICLE
Page 32 of 469

locking the key in the vehicle. Removing the key or
closing the door will allow the locks to operate. If a door
is open, the key is in the ignition, and the ignition is in the
LOCK or ACC position, a chime will sound as a reminder
to remove the key.
Automatic Door Locks
The doors will lock automatically if all of the following
conditions are met:
1. The Automatic Door Locks feature is enabled
2. The transmission is in gear
3. All doors are closed
4. The throttle is pressed
5. The vehicle speed is above 15 mph (24 km/h), and
6. The doors were not previously locked using the power
door lock switch or Remote Keyless Entry (RKE)
transmitter.
Automatic Door Locks — If Equipped
The auto door lock feature can be enabled or disabled by
your authorized dealer. See your authorized dealer for
programming.
Automatic Unlock Doors on Exit
The doors will unlock automatically if:
1. The Automatic Unlock Doors On Exit feature is en-
abled
2. The transmission was in gear and the vehicle speed
returned to 0 mph (0 km/h)
3. The transmission is in NEUTRAL or PARK
4. The driver door is opened
5. The doors were not previously unlocked, and
6. The vehicle speed is 0 mph (0 km/h).
30 THINGS TO KNOW BEFORE STARTING YOUR VEHICLE
Page 34 of 469
WINDOWS
Power Windows
The window controls on the driver’s door control both of
the door windows.There is a single window control on the passenger’s door
trim panel that operates the window on the passenger’s
door. The window controls will operate only when the
ignition switch is in the ON or ACC position.
NOTE:
•The door window will lower slightly if it is closed
completely when opening the door. The window will
return to its fully closed position after closing the door.
This action allows the door to open without resistance
and prevents window and seal damage.
•You can remotely lower both the driver side and
passenger side windows at the same time. Refer to
“Remote Keyless Entry/Express Down Window Fea-
ture” in this section.
Power Window Switches
32 THINGS TO KNOW BEFORE STARTING YOUR VEHICLE
Page 36 of 469
TRUNK LOCK AND RELEASE
The trunk lid can be released from inside the vehicle by
pressing the Trunk Release button. The button is located
on the instrument panel to the left of the steering wheel.
NOTE:The transmission must be in PARK before the
button will operate. If equipped with a manual transmis-
sion, the vehicle speed must be under 5 mph (8 km/h)
before the button will operate.
The trunk lid can be released from
outside the vehicle by pressing the
Trunk Release button on the Re-
mote Keyless Entry (RKE) trans-
mitter twice within five seconds.With the ignition switch in the ON position, the Trunk
Open symbol will display in the instrument cluster
indicating that the trunk is open. The odometer display
will reappear once the trunk is closed.
With the ignition switch in the LOCK position or the key
removed from the ignition switch, the Trunk Open sym-
bol will display until the trunk is closed.
Trunk Release
Button
34 THINGS TO KNOW BEFORE STARTING YOUR VEHICLE
Page 125 of 469

High Beam/Low Beam Select Switch
Push the multifunction lever away from you to switch
the headlights to high beam. Pull the multifunction lever
toward you to switch the headlights back to low beam.
Flash-to-Pass
You can signal another vehicle with your headlights by
lightly pulling the multifunction lever toward you. This
will turn on the high beam headlights until the lever is
released.
Overhead Console Map/Reading Lights
These lights are mounted between the sun visors on the
overhead console. Each light is turned on by pressing the
lens. Press the lens a second time to turn off the light.
These lights also turn on when a door is opened, or when
the UNLOCK button on the Remote Keyless Entry (RKE)
transmitter is pressed, or when the dimmer control is
turned fully upward, past the second detent.
Interior Lights
The interior lights come on when a door is opened.
To protect the battery, the interior lights will turn off
automatically 10 minutes after the ignition switch is
moved to the LOCK position. This will occur if the
interior lights were switched on manually or are on
Overhead Console
3
UNDERSTANDING THE FEATURES OF YOUR VEHICLE 123
Page 134 of 469
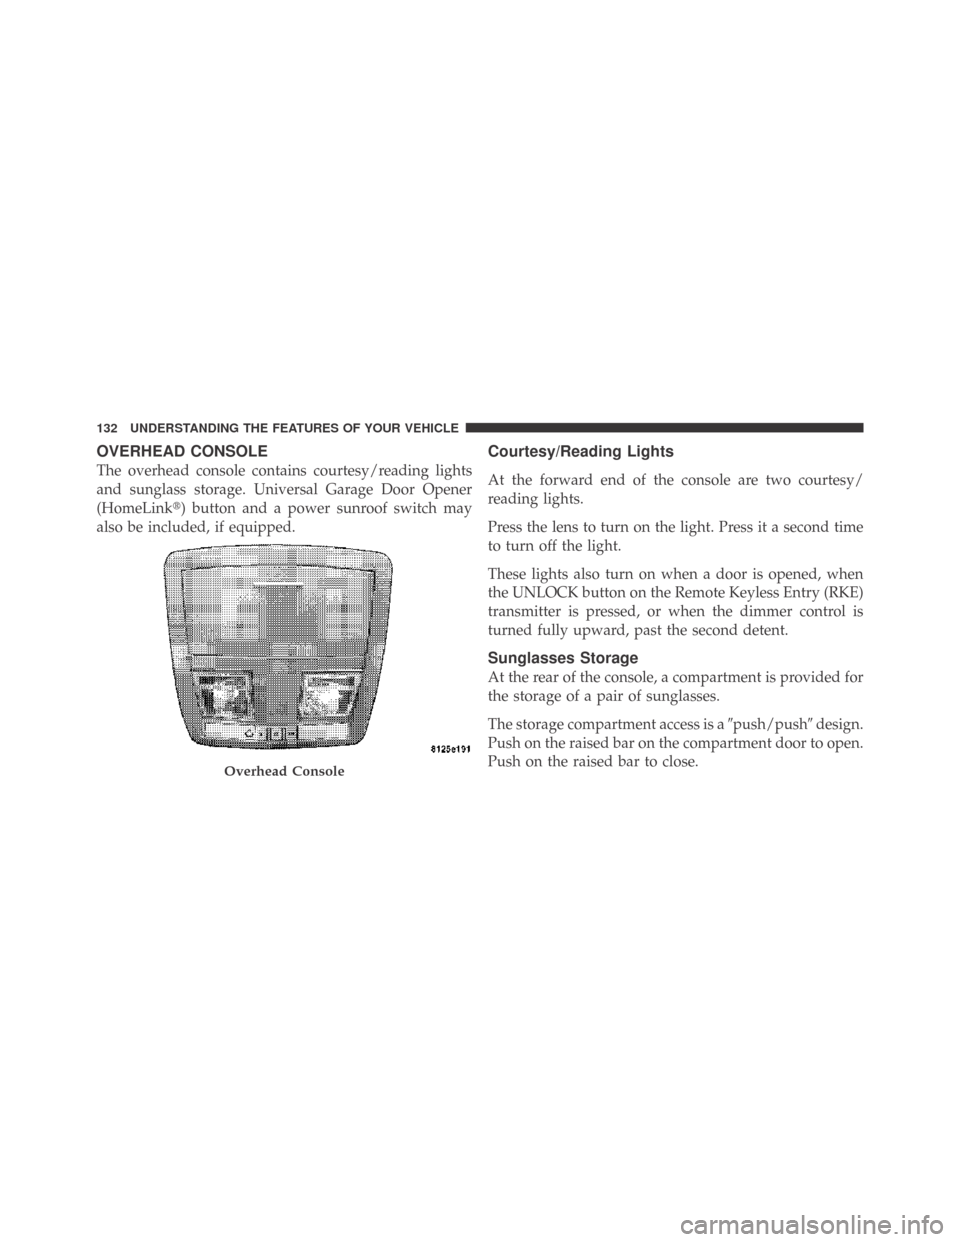
OVERHEAD CONSOLE
The overhead console contains courtesy/reading lights
and sunglass storage. Universal Garage Door Opener
(HomeLink�) button and a power sunroof switch may
also be included, if equipped.
Courtesy/Reading Lights
At the forward end of the console are two courtesy/
reading lights.
Press the lens to turn on the light. Press it a second time
to turn off the light.
These lights also turn on when a door is opened, when
the UNLOCK button on the Remote Keyless Entry (RKE)
transmitter is pressed, or when the dimmer control is
turned fully upward, past the second detent.
Sunglasses Storage
At the rear of the console, a compartment is provided for
the storage of a pair of sunglasses.
The storage compartment access is a�push/push�design.
Push on the raised bar on the compartment door to open.
Push on the raised bar to close.
Overhead Console
132 UNDERSTANDING THE FEATURES OF YOUR VEHICLE
Page 151 of 469
UNDERSTANDING YOUR INSTRUMENT PANEL
CONTENTS
�Instrument Panel Features............... 153
�Instrument Cluster – Base............... 154
�Instrument Cluster – Premium............ 155
�Instrument Cluster Description............ 156
�Electronic Vehicle Information Center (EVIC) . . 168
▫Electronic Vehicle Information Center (EVIC)
Displays........................... 170
▫Engine Oil Change Indicator System....... 171
▫Trip Functions...................... 172▫Keyless Go Display — If Equipped........ 175
▫Compass Display.................... 175
▫Driver-Selectable Surround Sound (DSS) –
If Equipped........................ 177
▫System Warnings (Customer Information
Features).......................... 178
▫Personal Settings (Customer-Programmable
Features).......................... 178
�Sales Code REQ — AM/FM Stereo Radio And
6–Disc CD Changer (MP3/WMA AUX Jack) . . . 182
4
149
Page 173 of 469

•Right Rear Low Pressure (with a single chime)
•Check TPM System (with a single chime)
•ESP Off – Electronic Stability Program is deactivated")
•Right Front Low Pressure (with a single chime)
•Right Rear Low Pressure (with a single chime)
•Check TPM System (with a single chime)
•ESP Off – Electronic Stability Program is deactivated
•ECO – Fuel Saver Indicator
•Check Gascap
•Key FOB Battery Low
•Service Keyless System
•Wrong Key
•Push Button or Insert Key/Turn To Run (refer to
“Remote Starting System” in Section 2)
•1–4 SKIPSHIFT
•Stereo (If Equipped with Driver-Selectable Surround
Sound [DSS])
•Audio Surround (If Equipped with Driver-Selectable
Surround Sound [DSS])
Engine Oil Change Indicator System
Oil Change Required
Your vehicle is equipped with an engine oil change
indicator system. The “Oil Change Required” message
will flash in the EVIC display for approximately 10 sec-
onds after a single chime has sounded, to indicate the
next scheduled oil change interval. The engine oil change
indicator system is duty cycle based, which means the
engine oil change interval may fluctuate, dependent
upon your personal driving style.
Unless reset, this message will continue to display each
time you turn the ignition switch to the ON/RUN
position. To turn off the message temporarily, press and
release the MENU button. To reset the oil change indica-
tor system (after performing the scheduled maintenance)
refer to the following procedure.
4
UNDERSTANDING YOUR INSTRUMENT PANEL 171
. Then, prior to the end of the 15 minute cycle,
press and release the START/STOP button. If the
START/STOP button is not present, insert the key into
the ignition switch and turn the switch")