Page 245 of 411
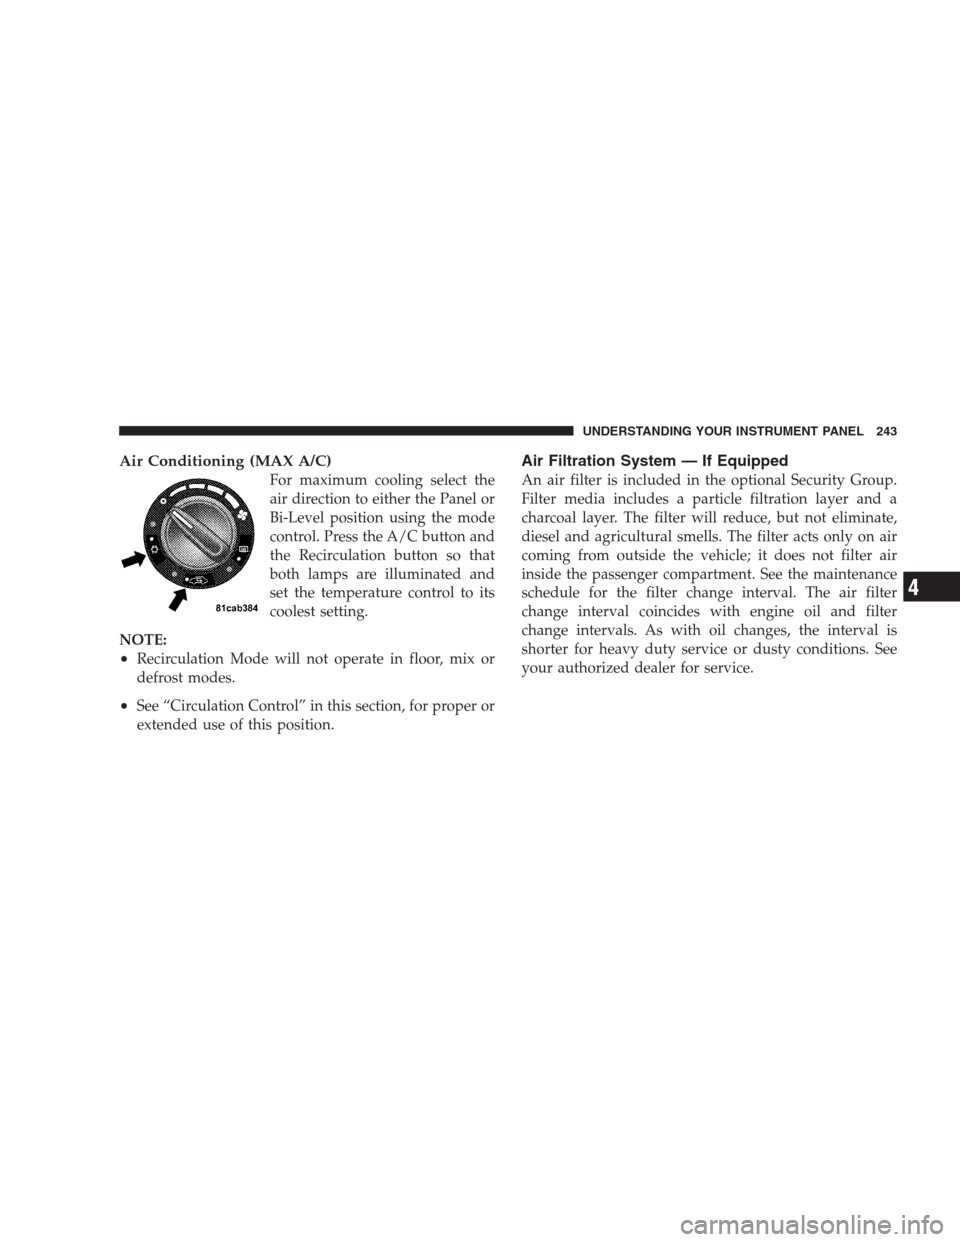
Air Conditioning (MAX A/C)
For maximum cooling select the
air direction to either the Panel or
Bi-Level position using the mode
control. Press the A/C button and
the Recirculation button so that
both lamps are illuminated and
set the temperature control to its
coolest setting.
NOTE:
•Recirculation Mode will not operate in floor, mix or
defrost modes.
•See “Circulation Control” in this section, for proper or
extended use of this position.
Air Filtration System — If Equipped
An air filter is included in the optional Security Group.
Filter media includes a particle filtration layer and a
charcoal layer. The filter will reduce, but not eliminate,
diesel and agricultural smells. The filter acts only on air
coming from outside the vehicle; it does not filter air
inside the passenger compartment. See the maintenance
schedule for the filter change interval. The air filter
change interval coincides with engine oil and filter
change intervals. As with oil changes, the interval is
shorter for heavy duty service or dusty conditions. See
your authorized dealer for service.
UNDERSTANDING YOUR INSTRUMENT PANEL 243
4
Page 247 of 411
Window Fogging
Vehicle side windows tend to fog on the inside in mild
rainy or humid weather. To clear the windows, set mode
to the mix or defrost position. Direct the panel outlets
toward the side windows. Do not use recirculate without
A/C for long periods as fogging may occur.
Interior fogging on the windshield can be quickly re-
moved by using the defrost position.
If the fogging problem persists, clean the inside window
surfaces. The cause of undue fogging may be dirt collect-
ing on the inside surface of the glass
NOTE:In cold weather, the use of the recircu-
late position will cause windows to fog on the
inside because of moisture build up inside the
vehicle. Moisture and ice can also accumulate
on the inside of the sheet metal and may result inheadliner and/or electronic component damage. For
maximum defogging, press the Recirculation button until
recirculate is off.
Summer Operation
Air conditioned vehicles must be protected with a high-
quality antifreeze coolant to provide proper corrosion
protection and to raise the boiling point of the coolant for
protection against overheating. A 50% concentration is
recommended.
Outside Air Intake
When operating the system during the Winter months,
make sure the air intake, directly in front of the wind-
shield, is free of ice, slush, snow or other obstructions
such as leaves. Leaves collected in the air-intake plenum
may reduce airflow and plug the plenum water drains.
The blower air will heat faster in cold weather if you use
only a low blower speed for the first few minutes of
vehicle operation.
UNDERSTANDING YOUR INSTRUMENT PANEL 245
4
Page 258 of 411

CAUTION!
•Always check the depth of the standing water
before driving through it. Never drive through
standing water that is deeper than the bottom of
the tire rims mounted on the vehicle.
•Determine the condition of the road or the path
that is under water and if there are any obstacles in
the way before driving through the standing wa-
ter.
•Do not exceed 5 mph (8 km/h) when driving
through standing water. This will minimize wave
effects.
(Continued)
CAUTION! (Continued)
•Driving through standing water may cause dam-
age to your vehicle’s drivetrain components. Al-
ways inspect your vehicle’s fluids (i.e., engine oil,
transmission/transaxle, axle, etc.) for signs of con-
tamination (i.e., fluid that is milky or foamy in
appearance) after driving through standing water.
Do not continue to operate the vehicle if any fluid
appears contaminated, as this may result in further
damage. Such damage is not covered by the New
Vehicle Limited Warranty.
•Getting water inside your vehicle’s engine can
cause it to lock up and stall out, and cause serious
internal damage to the engine. Such damage is not
covered by the New Vehicle Limited Warranty.
256 STARTING AND OPERATING
Page 286 of 411
Many states have laws requiring tire replacement at this
point.
Life of Tire
The service life of a tire is dependent upon varying
factors, including, but not limited to:
•Driving style
•Tire pressure
•Distance driven
WARNING!
The tires and the spare tire should be replaced after
six years, regardless of the remaining tread. Failure to
follow this warning can result in sudden tire failure.
You could lose control and have an accident resulting
in serious injury or death.Keep dismounted tires in a cool, dry place with as little
exposure to light as possible. Protect tires from contact
with oil, grease and gasoline.
Replacement Tires
The tires on your new vehicle provide a balance of many
characteristics. They should be inspected regularly for
wear and correct cold tire inflation pressure. The manu-
facturer strongly recommends that you use tires equiva-
lent to the originals in size, quality and performance
when replacement is needed. Please see “Tread Wear
Indicators” and “Tire and Loading Information” placard
for the size designation of your tire. The service descrip-
tion and load identification will be found on the original-
equipment tire. Failure to use equivalent replacement
tires may adversely affect the safety, handling, and ride of
your vehicle. We recommend that you contact your
original-equipment manufacturer, or an authorized tire
dealer, with any questions you may have on tire specifi-
cations or capability.
284 STARTING AND OPERATING
Page 300 of 411

Problems that result from using methanol/gasoline or
E85 Ethanol blends are not the responsibility of the
manufacturer. While MTBE is an oxygenate made from
Methanol, it does not have the negative effects of
Methanol.
E-85 Usage In Non-Flex Fuel Vehicles
Non-FFV vehicles are compatible with gasoline contain-
ing 10% ethanol (E10). Gasoline with higher ethanol
content may void the vehicle’s warranty.
If a Non-FFV vehicle is inadvertently fueled with E-85
fuel, the engine will have some or all of these symptoms:
•operate in a lean mode
•OBD II “Malfunction Indicator Light” on
•poor engine performance
•poor cold start and cold drivability
•increased risk for fuel system component corrosionTo fix a Non-FFV vehicle inadvertently fueled once with
E-85 perform the following:
•drain the fuel tank (see your authorized dealer)
•change the engine oil and oil filter
•disconnect and reconnect the battery to reset the
engine controller memory
More extensive repairs will be required for prolonged
exposure to E-85 fuel.
MMT In Gasoline
MMT is a manganese containing metallic additive that is
blended into some gasoline to increase the octane num-
ber. Gasolines blended with MMT offer no performance
advantage beyond gasolines of the same octane number
without MMT. Gasolines blended with MMT have shown
to reduce spark plug life and reduce emissions system
performance in some vehicles. The manufacturer recom-
mends using gasolines without MMT. Since the MMT
298 STARTING AND OPERATING
Page 310 of 411
WARNING!
A hot engine cooling system is dangerous. You or
others could be badly burned by steam or boiling
coolant. You may want to call a service center if your
vehicle overheats. If you decide to look under the
hood yourself, refer to Section 7, Maintenance, of this
manual. Follow the warnings under the Cooling
System Pressure Cap paragraph.
TIREFIT KIT
Small punctures in the tire tread can be sealed with
TIREFIT. Foreign objects (e.g., screws or nails) should not
be removed from the tire. TIREFIT can be used in outside
temperatures down to approximately -4°F (-20°C).
TIREFIT Storage
The TIREFIT kit is located in the trunk.
TIREFIT Usage Precautions
NOTE:
•Replace the TIREFIT Sealant Bottle prior to the expi-
ration date (printed on the bottle label) to assure
optimum operation of the system.
TIREFIT Location
308 WHAT TO DO IN EMERGENCIES
Page 314 of 411
Using the Air Pump Power Button
Push and release the button (3) once to turn
ON the TIREFIT kit. Push and release the
button (3) again to turn OFF the TIREFIT kit.
Sealing a Tire with TIREFIT
(A) Whenever You Stop to Use TIREFIT:
1. Turn ON the vehicle’s hazard warning flashers.
2. Verify that the valve stem (on the wheel with the
deflated tire) is in a position that is near to the ground.
This will allow the TIREFIT Hoses (6) and (7) to reach the
valve stem and keep the TIREFIT kit flat on the ground.
This will provide the best positioning of the kit when
injecting the sealant into the deflated tire and running the
air pump. Move the vehicle as necessary to place the
valve stem in this position before proceeding.3. Place the transmission in PARK (auto transmission) or
in Gear (manual transmission) and turn OFF the ignition.
4. Set the parking brake.
(B) Setting Up to Use TIREFIT:
1. Remove the gloves from the Accessory Storage Com-
partment (8) and place them on your hands.
2. Turn the Mode Select knob (4) to the
Sealant/Air Mode position.
3. Uncoil the Clear Sealant Hose (7) and then remove the
Yellow Cap from the fitting at the end of the hose.
4. Place the TIREFIT kit flat on the ground next to the
deflated tire.
312 WHAT TO DO IN EMERGENCIES
Page 315 of 411
5. Remove the cap from the valve stem and then screw
the fitting at the end of the Sealant Hose (7) onto the
valve stem.
6. Uncoil the Power Plug and Cable (5) and then insert
the plug into the vehicle’s power outlet.
NOTE:Do not remove foreign objects (e.g., screws or
nails) from the tire.
(C) Injecting TIREFIT Sealant into the deflated
tire:
1. Always start the engine before turning ON the TIRE-
FIT kit.
2. After pressing the Air Pump Power Button
(3), the air pump should start to inflate the tire
and the sealant (white fluid) will flow from the
Sealant Bottle (1) through the Sealant Hose (7)
and into the tire.NOTE:Some sealant may leak out
through the puncture in the tire.3.If the sealant Does Not Flow Through the Clear
Sealant Hose (7):
•Press the Air Pump Power Button (3) to turn OFF
the TIREFIT kit. Disconnect the Clear Sealant Hose
(7) from the valve stem. Make sure the valve stem is
free of debris. Reconnect the Clear Sealant Hose (7)
to the valve stem. Press the Air Pump Power Button
(3) to turn ON the TIREFIT kit.
•Turn the Mode Select knob to the Sealant/Air Mode.
•Connect the Power Plug (5) to a different power
outlet in your vehicle or another vehicle, if available.
Make sure the engine is running before turning ON
the TIREFIT kit.
•The Sealant Bottle (1) may be empty due to previous
use. Call for assistance.
WHAT TO DO IN EMERGENCIES 313
6