Page 113 of 473

Voice Training
For users experiencing difficulty with the system recog-
nizing their voice commands or numbers, the UConnect�
system Voice Training feature may be used. To enter this
training mode, follow one of the two following proce-
dures:
From outside the UConnect�mode (e.g., from radio
mode):
•Press and hold the VOICE RECOGNITION button for
five seconds until the session begins, or,
•Press the VOICE RECOGNITION button and say the
�Setup, Voice Training�command.
Repeat the words and phrases when prompted by the
UConnect�system. For best results, the Voice Training
session should be completed when the vehicle is parked
with the engine running, all windows closed, and the
blower fan switched off.This procedure may be repeated with a new user. The
system will adapt to the last trained voice only.
To restore the Voice Recognition system to factory default
settings, enter the Voice Training session via the above
procedure and follow the prompts.
Voice Recognition (VR)
•
For best performance, adjust the rearview mirror to
provide at least1�2in (1 cm) gap between the overhead
console (if equipped) and the mirror.
•Always wait for the beep before speaking.
•Speak normally, without pausing, just as you would
speak to a person sitting a few feet/meters away from
you.
•Make sure that no one other than you is speaking
during a voice recognition period.
UNDERSTANDING THE FEATURES OF YOUR VEHICLE 111
3
Page 114 of 473

•Performance is maximized under:
•low-to-medium blower setting,
•low-to-medium vehicle speed,
•low road noise,
•smooth road surface,
•fully closed windows,
•dry weather condition.
•Even though the system is designed for users speaking
in North American English, French, and Spanish ac-
cents, the system may not always work for some.
•When navigating through an automated system such
as voice mail, or when sending a page, at the end of
speaking the digit string, make sure to say�Send.�
•Storing names in the phonebook when the vehicle is
not in motion is recommended.
•It is not recommended to store similar sounding
names in the UConnect�phonebook.
•Phonebook (Downloaded and UConnect�Local) name
recognition rate is optimized when the entries are not
similar.
•You can say�O�(letter�O�) for�0�(zero).�800�must be
spoken�eight-zero-zero.�
•Even though international dialing for most number
combinations is supported, some shortcut dialing
number combinations may not be supported.
•In a convertible vehicle, system performance may be
compromised with the convertible top down.
112 UNDERSTANDING THE FEATURES OF YOUR VEHICLE
Page 115 of 473

Far End Audio Performance
•
Audio quality is maximized under:
•low-to-medium blower setting,
•low-to-medium vehicle speed,
•low road noise,
•smooth road surface,
•fully closed windows,
•dry weather conditions, and
•operation from the driver’s seat.
•Performance, such as audio clarity, echo, and loudness
to a large degree rely on the phone and network, and
not the UConnect�system.
•Echo at the far end can sometimes be reduced by
lowering the in-vehicle audio volume.
•In a convertible vehicle, system performance may be
compromised with the convertible top down.
Bluetooth�Communication Link
Cellular phones have been found to lose connection to
the UConnect�system. When this happens, the connec-
tion can generally be re-established by switching the
phone off/on. Your cellular phone is recommended to
remain in Bluetooth�ON mode.
Power-Up
After switching the ignition key from OFF to either the
ON or ACC position, or after a language change, you
must wait at least five seconds prior to using the system.
UNDERSTANDING THE FEATURES OF YOUR VEHICLE 113
3
Page 126 of 473
Voice Training
For users experiencing difficulty with the system recog-
nizing their voice commands or numbers, the UConnect�
system Voice Training feature may be used.
1. Press the VR hard-key, say “System Setup” and once
you are in that menu then say “Voice Training.” This will
train your own voice to the system and will improve
recognition.
2. Repeat the words and phrases when prompted by the
UConnect�System. For best results, the Voice Training
session should be completed when the vehicle is parked,
engine running, all windows closed, and the blower fan
switched off. This procedure may be repeated with a new
user. The system will adapt to the last trained voice only.
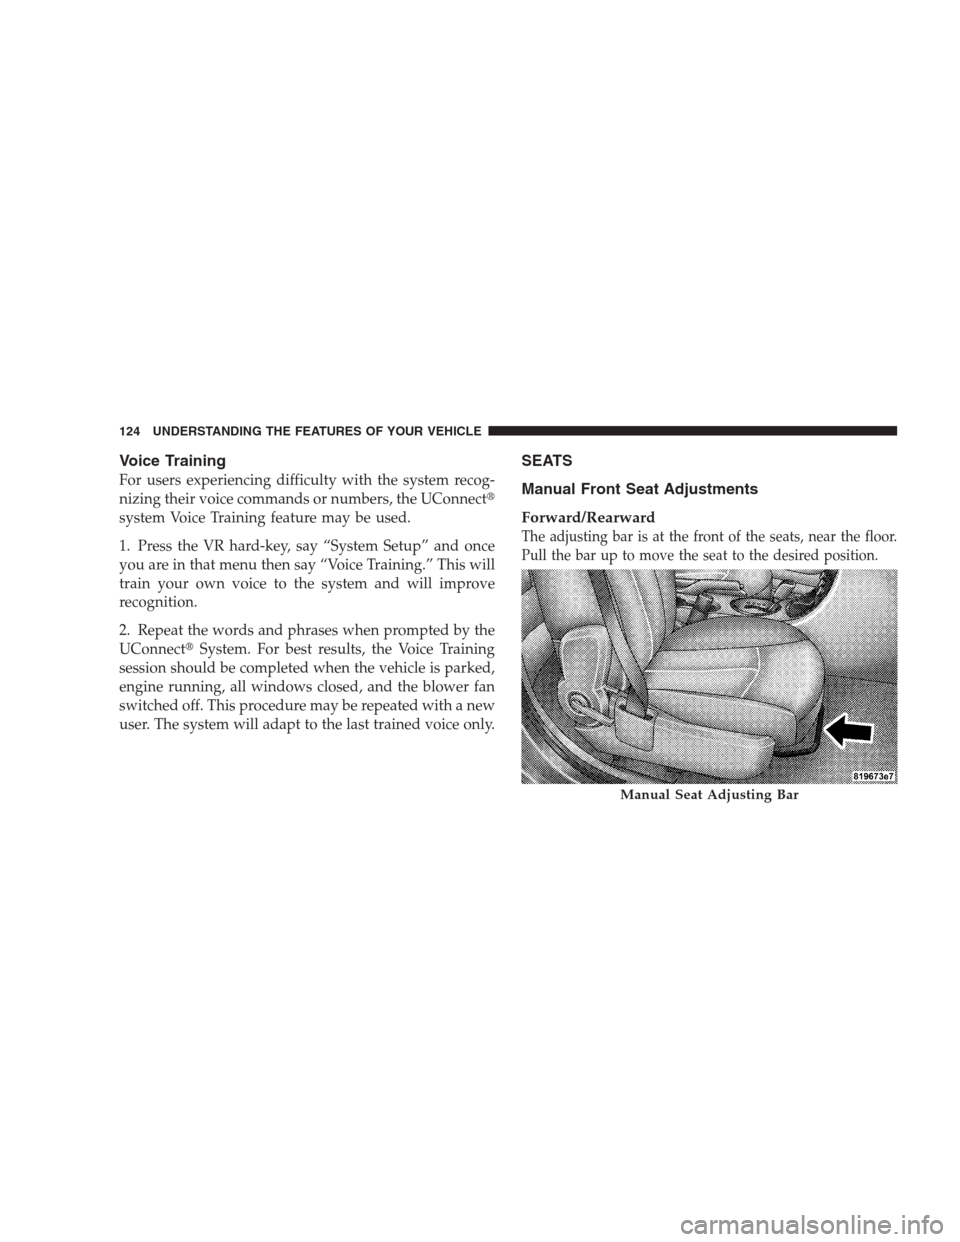
SEATS
Manual Front Seat Adjustments
Forward/Rearward
The adjusting bar is at the front of the seats, near the floor.
Pull the bar up to move the seat to the desired position.
Manual Seat Adjusting Bar
124 UNDERSTANDING THE FEATURES OF YOUR VEHICLE
Page 157 of 473

Venting Sunroof - Express
Press and release the�V�button, and the sunroof will
open to the vent position. This is called Express Vent.
Closing Sunroof - Express
Press the switch forward and release, and the sunroof
will close automatically from any position. The sunroof
will close fully, then stop automatically. This is called
Express Close. During Express Close operation, any
movement of the sunroof switch will stop the sunroof.
Auto Sunroof Express With Anti-Pinch Protection
— If Equipped
During express closing, anytime an obstacle that restricts
glass movement is detected, the motor will stop and
reverse travel to avoid pinching the object.
Sunshade Operation
The sunshade can be opened manually. However, the
sunshade will open automatically as the sunroof opens.NOTE:The sunshade cannot be closed if the sunroof is
open.
Wind Buffeting
Wind buffeting can be described as the perception of
pressure on the ears or a helicopter-type sound in the
ears. Your vehicle may exhibit wind buffeting with the
windows down, or the sunroof (if so equipped) in certain
open or partially open positions. This is a normal occur-
rence and can be minimized. If the buffeting occurs with
the rear windows open, then open the front and rear
windows together to minimize the buffeting. If the
buffeting occurs with the sunroof open, adjust the sun-
roof opening to minimize the buffeting.
Sunroof Maintenance
Use only a nonabrasive cleaner and a soft cloth to clean
the glass panel.
UNDERSTANDING THE FEATURES OF YOUR VEHICLE 155
3
Page 169 of 473
REAR WINDOW FEATURES
Rear Window Defroster — If Equipped
The electric rear window defroster switch is lo-
cated on the climate control. Press this button to
turn on the rear window defroster and the heated side
mirrors (if equipped). An LED in the button will illumi-
nate when the rear window defroster is on. The rear
window defroster automatically turns off after approxi-
mately 10 minutes of operation for the first push of the
button, and will turn off after approximately five minutes
for the second push of the button.
CAUTION!
•To avoid damaging the electrical conductors of the
rear window defroster, do not use scrapers, sharp
instruments, or abrasive window cleaners on the
interior surface of the window.
•Labels can be peeled off after soaking with warm
water.
UNDERSTANDING THE FEATURES OF YOUR VEHICLE 167
3
Page 176 of 473
INSTRUMENT PANEL FEATURES
1 - Air Outlet 5 - Upper Glove Compartment/Beverage
Cooler – If Equipped9 - Power Supply
2 - Side Window Demister Outlet 6 - Lower Glove Compartment 10 - Climate Controls
3 - Instrument Cluster 7 - Heated Seat Switch — If Equipped 11 - Trunk Release Switch
4 - Radio 8 - Hazard Switch 174 UNDERSTANDING YOUR INSTRUMENT PANEL
Page 180 of 473
, the fuel symbol will light and a
single chime will sound.
NOTE:This light will remain on until a minimum of
app")
5. Low Fuel Light
When the fuel level drops to approximately 2.0 gal-
lons (7.6 Liters), the fuel symbol will light and a
single chime will sound.
NOTE:This light will remain on until a minimum of
approximately 3.0 gallons of fuel is added.
6. Charging System Light
This light shows the status of the electrical charg-
ing system. The light should come on briefly when
the ignition is first turned on and remain on briefly as a
bulb check. If the light stays on or comes on while
driving, turn off some of the vehicle’s electrical devices,
such as the Front Fog Lights or Rear Window Defroster.
If the Charging System Light remains on, it means that
the vehicle is experiencing a problem with the charging
system. Obtain SERVICE IMMEDIATELY. See your local
authorized dealer.7. Airbag Warning Light
The light comes on and remains on for six to
eight seconds as a bulb check when the ignition
switch is first turned ON. If the light does not
turn on during starting, stays on, or turns on
while driving, have the system inspected by an autho-
rized dealer.
8. Vehicle Security Light — If Equipped
This light will flash rapidly for approximately
16 seconds when the alarm system is arming.
The light will begin to flash slowly indicating
that the system is armed. The light will stop
flashing when the vehicle is disarmed.
178 UNDERSTANDING YOUR INSTRUMENT PANEL