Page 86 of 543

•Buckle the child into the seat according to the child
restraint manufacturer’s directions.
•When your child restraint is not in use, secure it in the
vehicle with the seat belt or remove it from the vehicle.
Don’t leave it loose in the vehicle. In a sudden stop or
collision, it could strike the occupants or seatbacks and
cause serious personal injury.
Installing the LATCH-Compatible Child Restraint
System:
Each vehicle, except commercial cargo vehicles, is
equipped with the child restraint anchorage system
called LATCH, which stands for Lower Anchors and
Tether for CHildren. Two LATCH child restraint anchor-
age systems are installed on all second-row seats and in
the center position on all third row fold-in-floor seats.
Second-row seats also feature tether strap anchorages,
located in the rear surface of the seatback. In addition, allthird row fold-in-floor seats are equipped with a child
restraint tether anchor at the center seating position.
We urge you to follow the manufacturer ’s directions
carefully when installing your child restraint. Many, but
not all restraint systems will be equipped with separate
straps on each side, with each having a hook or connec-
tor, and a means for adjusting the tension in the strap.
Forward facing toddler restraints and some rearward
facing infant restraints will also be equipped with a tether
strap, a hook and means for adjusting the tension in the
strap. Not all child restraint systems will be installed as
described here. Again, carefully follow the installation
instructions that are provided with the child restraint
system.
NOTE:
•When using the LATCH attaching system to install a
child restraint, please ensure that all seat belts not
being used for occupant restraints are stowed and out
84 THINGS TO KNOW BEFORE STARTING YOUR VEHICLE
Page 165 of 543
3. From behind the seat, lift up on the rear of the seat
cushion while pulling the seat in a rearward direction.
4. Remove the seat from vehicle through the liftgate.
Rollers are part of the seat frame and will ease the
removal process.5. Lower the release handle located at the bottom front
edge of the seat.
Each seat weighs about 90 lbs (81 kg).
NOTE:
Electrical contacts for the available heated seats
automatically disengage or engage as the seat is removed
or installed. The contacts slide past each other as the seat
is rolled to and from the strikers.
When reinstalling the seat, make certain to lower the
release handle to ensure the seat is latched securely.
WARNING!
In a collision, you or others in your vehicle could be
injured if seats are not properly latched to their floor
attachments. Always be sure the seats are fully
latched.
Release Bar
3
UNDERSTANDING THE FEATURES OF YOUR VEHICLE 163
Page 166 of 543
Swivel ’n Go�Premium Seating Table — If
Equipped
The Swivel ’n Go� Seating Table consists of an easily
assembled post and top.
The table and leg are stored beneath the floor when not in
use. To install the table follow these steps: 1. Open the floor storage cover in front of the second row
seats.
2. Remove the pole and table top by loosening the hook
and loop straps.
3. Swivel the second row seats so they are facing the rear.
Second Row Seating and Table
Table and Leg Storage
164 UNDERSTANDING THE FEATURES OF YOUR VEHICLE
Page 168 of 543
WARNING! (Continued)
•DO NOT place liquid drinks on the table, use
available cupholders.
•Second row seats must be locked in the rearward
facing position before installing the table.
To separate the table top from the pole, follow these
steps:
1. Locate the release latch on the underside of the table
top.
2. Pull horizontally on the latch to activate the release
from the pole.
3. While pulling on the latch, pull upward to remove the
table top from the pole.
Table Top Release
166 UNDERSTANDING THE FEATURES OF YOUR VEHICLE
Page 169 of 543
NOTE:The table top should be removed from the leg
prior to removing the leg from its mounting base.
4. Locate the release button on the pole. Press the release
button firmly to activate the release from the base.
5. While pressing the release button, twist the pole in a
counterclockwise rotation until it stops. Pull upward to
remove the pole from the base.
6. Place the pole on the underside of the table top and
secure with the hook and loop straps.
7. Once the pole and table top are secured, you may
place them in the floor storage bin in front of the second
row seats.
NOTE: Always store the table and pole in the floor
storage bin when not in use.Plastic Grocery Bag Retainer Hooks
Retainer hooks which will hold plastic grocery bag
handles are built into the seatbacks of all rear seats and
some front seats. The floor supports the partial weight of
the bagged goods.
Second Row Bench Seat — If Equipped
While the bench seat does not stow in the floor, it is
removable for added cargo space. Release levers are
located on the rear leg assemblies, near the floor. To
remove the seat, squeeze each release handle and rotate
downwards to deploy the wheels. A lock indicator button
pops up when the seat is unlocked. The seat assembly
can now be removed from the vehicle and moved on its
Easy Out� Rollers.
3
UNDERSTANDING THE FEATURES OF YOUR VEHICLE 167
Page 172 of 543
Left and right third row seats can be folded individually
or together. The third row power folding seat adjusts to
the following positions using the switch bank located on
the left rear trim panel:NOTE:
The third row power seat system includes
obstacle detection for safe operation. When the system
detects an obstacle, the motors will stop and reverse the
motion a short distance to move the seat away from the
obstacle. Should this occur, remove the obstacle and press
the button again, for the desired position.
To Fold Third Row Seats Manually — If Equipped
1. Lower the head restraint to its full down position.
2. Pull release strap marked “1” located on the rear of the
seat to lower the seatback.
3. Pull release strap marked “2” to release the anchors.
Rear Panel Power Switch Bank
1 — Open to Normal 4 — Fold Flat
2 — Stow 5 — Right/Left Seats
3 — Tailgate 5 — Both Seats
170 UNDERSTANDING THE FEATURES OF YOUR VEHICLE
Page 230 of 543
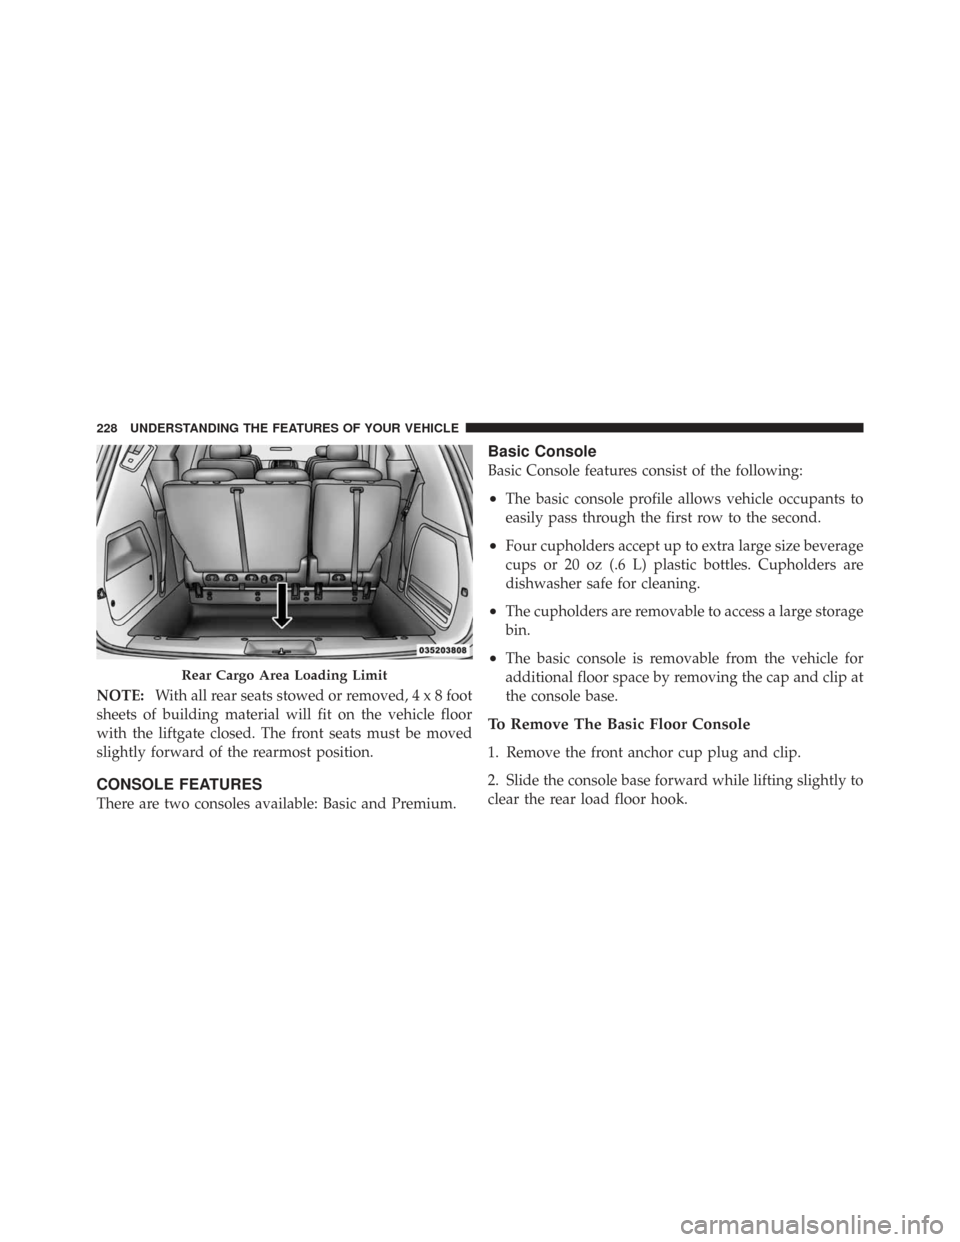
NOTE:With all rear seats stowed or removed,4x8foot
sheets of building material will fit on the vehicle floor
with the liftgate closed. The front seats must be moved
slightly forward of the rearmost position.
CONSOLE FEATURES
There are two consoles available: Basic and Premium.
Basic Console
Basic Console features consist of the following:
•The basic console profile allows vehicle occupants to
easily pass through the first row to the second.
•Four cupholders accept up to extra large size beverage
cups or 20 oz (.6 L) plastic bottles. Cupholders are
dishwasher safe for cleaning.
•The cupholders are removable to access a large storage
bin.
•The basic console is removable from the vehicle for
additional floor space by removing the cap and clip at
the console base.
To Remove The Basic Floor Console
1. Remove the front anchor cup plug and clip.
2. Slide the console base forward while lifting slightly to
clear the rear load floor hook.
Rear Cargo Area Loading Limit
228 UNDERSTANDING THE FEATURES OF YOUR VEHICLE
Page 397 of 543

If the problem continues, the message will appear the
next time the vehicle is started. See your authorized
dealer as soon as possible.
VEHICLE LOADING
As required by National Highway Traffic Safety Admin-
istration regulations, your vehicle has a certification label
affixed to the driver’s side door or B-Pillar.
If seats are removed for carrying cargo, do not exceed the
specified GVWR and GAWR.
Vehicle Certification Label
Your vehicle has a Vehicle Certification Label attached to
the driver’s door B-Pillar.
The label contains the following information:
•Name of manufacturer
•Month and year of manufacture
•Gross Vehicle Weight Rating (GVWR)
•Gross Axle Weight Rating (GAWR) — Front
•Gross Axle Weight Rating (GAWR) — Rear
•Vehicle Identification Number (VIN)
•Type of Vehicle
•Month, Day and Hour of Manufacture (MDH)
The bar code allows a computer scanner to read the
Vehicle Identification Number (VIN).
Gross Vehicle Weight Rating (GVWR)
The GVWR is the total allowable weight of your vehicle.
This includes driver, passengers, and cargo. The total
load must be limited so that you do not exceed the
GVWR.
5
STARTING AND OPERATING 395


