Page 12 of 493
▫Using The Panic Alarm................. 22
▫Programming Additional Transmitters...... 23
▫RKE Transmitter Battery Service........... 23
▫General Information................... 24
�Remote Starting System — If Equipped....... 25
▫How To Use Remote Start............... 25
�Door Locks........................... 27
▫Manual Door Locks................... 27
▫Power Door Locks.................... 28
▫Passive Entry System — If Equipped....... 31
▫To Place An RKE Transmitter In The Vehicle
For Safekeeping – Vehicles Equipped With
Keyless Go Only...................... 32
▫Child Protection Door Lock.............. 33�Windows............................ 35
▫Power Windows...................... 35
▫Wind Buffeting....................... 39
�Trunk Lock And Release................. 39
�Trunk Safety Warning................... 40
▫Trunk Emergency Release............... 40
�Occupant Restraints..................... 41
▫Lap/Shoulder Belts.................... 42
▫Lap/Shoulder Belt Untwisting Procedure.... 48
▫Seat Belt Pretensioners................. 48
▫Enhanced Seat Belt Reminder System
(BeltAlert�) ......................... 49
▫Automatic Locking Mode — If Equipped.... 50
10 THINGS TO KNOW BEFORE STARTING YOUR VEHICLE
Page 24 of 493
Turn Headlights On with Remote Key Unlock
This feature activates the headlights for up to 90 seconds
when the doors are unlocked with the RKE transmitter.
The time for this feature is programmable. Refer to “Turn
Headlights On with Remote Key Unlock,” under “Per-
sonal Settings (Customer-Programmable Features),” un-
der “Electronic Vehicle Information Center (EVIC)” in
Section 4.
To Lock the Doors
Press and release the LOCK button on the RKE transmit-
ter to lock all doors. The turn signal lights will flash and
the horn will chirp to acknowledge the signal.
Sound Horn with Remote Key Lock
This feature will cause the horn to chirp when the doors
are locked with the RKE transmitter. This feature can be
turned on or turned off. Refer to “Sound Horn withRemote Key Lock,” under “Personal Settings (Customer-
Programmable Features),” under “Electronic Vehicle In-
formation Center (EVIC)” in Section 4.
To Unlatch the Trunk
Press the TRUNK button on the RKE transmitter two
times within five seconds to unlatch the trunk.
Using the Panic Alarm
To turn the Panic Alarm feature on or off, press and hold
the PANIC button on the RKE transmitter for at least one
second and release. When the Panic Alarm is on, the
headlights and park lights will flash, the horn will pulse
on and off, and the interior lights will turn on.
The Panic Alarm will stay on for three minutes unless
you turn it off by either pressing the PANIC button a
second time or drive the vehicle at a speed of 15 mph
(24 km/h) or greater.
22 THINGS TO KNOW BEFORE STARTING YOUR VEHICLE
Page 41 of 493
1. Pull the window switch up to close window com-
pletely and continue to hold the switch up for an
additional two seconds after the window is closed.
2. Push the window switch down firmly to the second
detent to open the window completely and continue to
hold the switch down for an additional two seconds after
the window is fully open.
Wind Buffeting
Wind buffeting can be described as the perception of
pressure on the ears or a helicopter type sound in the
ears. Your vehicle may exhibit wind buffeting with the
windows down, or the sunroof (if equipped) in certain
open or partially open positions. This is a normal occur-
rence and can be minimized. If the buffeting occurs with
the rear windows open, then open the front and rear
windows together to minimize the buffeting. If the
buffeting occurs with the sunroof open, then adjust the
sunroof opening to minimize the buffeting.
TRUNK LOCK AND RELEASE
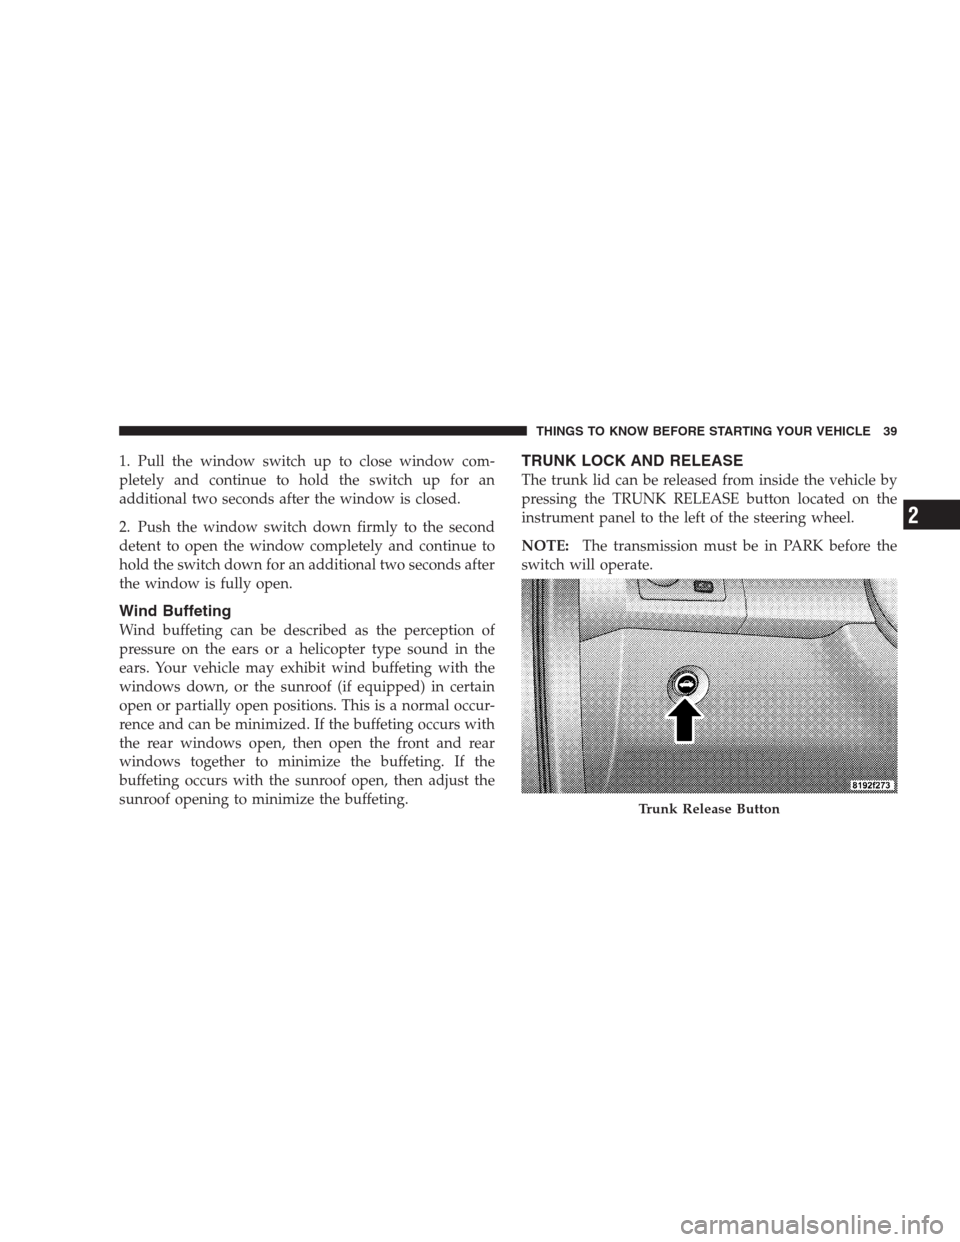
The trunk lid can be released from inside the vehicle by
pressing the TRUNK RELEASE button located on the
instrument panel to the left of the steering wheel.
NOTE:The transmission must be in PARK before the
switch will operate.
Trunk Release Button
THINGS TO KNOW BEFORE STARTING YOUR VEHICLE 39
2
Page 42 of 493
The trunk lid can be released from outside the vehicle by
pressing the TRUNK button on the Remote Keyless Entry
(RKE) transmitter twice within five seconds.
With the ignition switch in the ON position, the Trunk
Open symbol will display in the instrument cluster
indicating that the trunk is open. The odometer display
will reappear once the trunk is closed.
With the ignition switch in the LOCK position or the key
removed from the ignition switch, the Trunk Open sym-
bol will display until the trunk is closed.TRUNK SAFETY WARNING
WARNING!
Do not allow children to have access to the trunk,
either by climbing into the trunk from outside, or
through the inside of the vehicle. Always close the
trunk lid when your vehicle is unattended. Once in
the trunk, young children may not be able to escape,
even if they entered through the rear seat. If trapped
in the trunk, children can die from suffocation or
heat stroke.
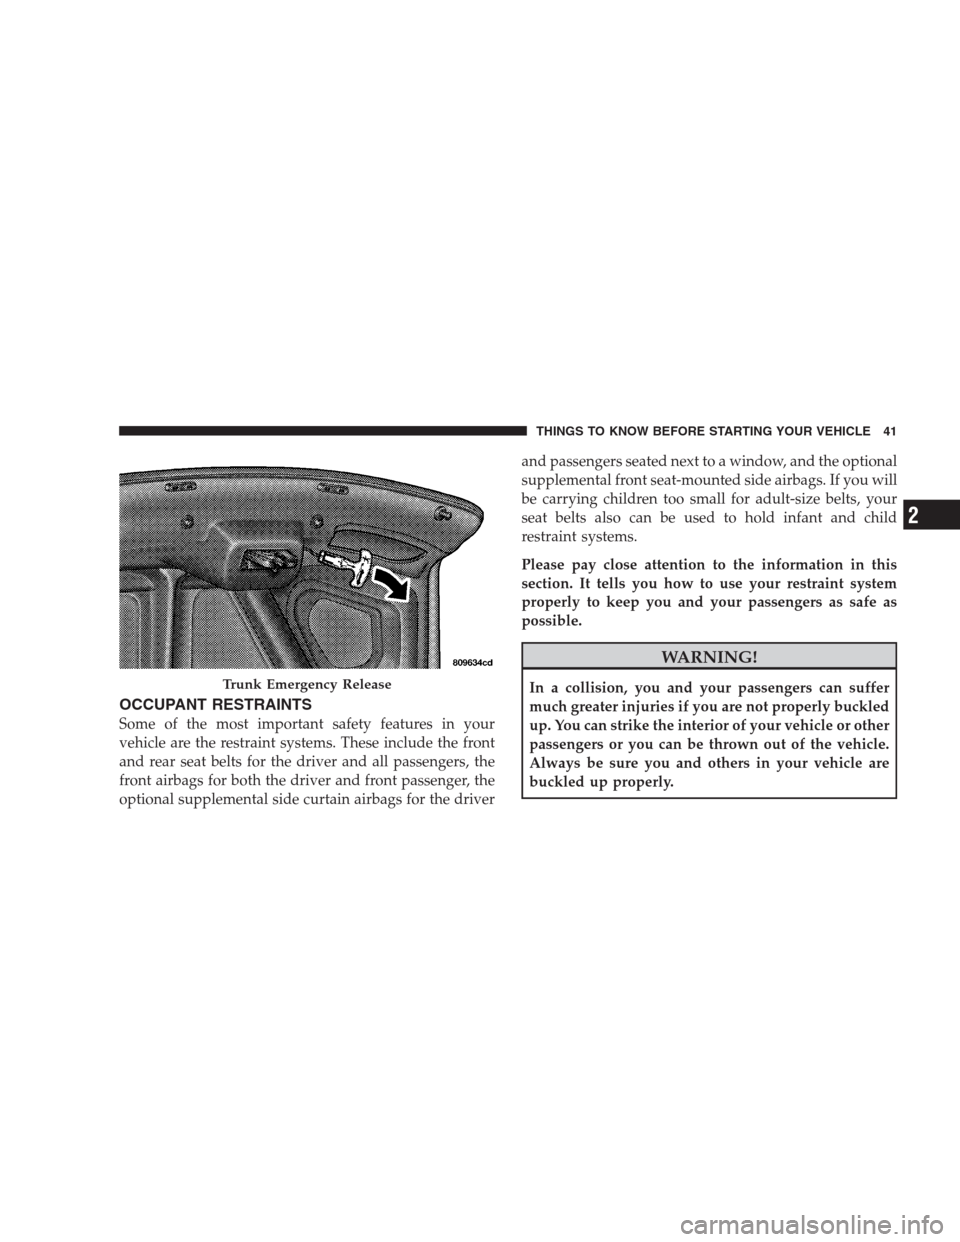
Trunk Emergency Release
The trunk of your vehicle is equipped with an emergency
release handle. It is located on the inside of the trunk lid,
near the latch, and is coated so that it glows in a darkened
trunk. Pull on the handle to open the trunk.
40 THINGS TO KNOW BEFORE STARTING YOUR VEHICLE
Page 43 of 493
OCCUPANT RESTRAINTS
Some of the most important safety features in your
vehicle are the restraint systems. These include the front
and rear seat belts for the driver and all passengers, the
front airbags for both the driver and front passenger, the
optional supplemental side curtain airbags for the driverand passengers seated next to a window, and the optional
supplemental front seat-mounted side airbags. If you will
be carrying children too small for adult-size belts, your
seat belts also can be used to hold infant and child
restraint systems.
Please pay close attention to the information in this
section. It tells you how to use your restraint system
properly to keep you and your passengers as safe as
possible.
WARNING!
In a collision, you and your passengers can suffer
much greater injuries if you are not properly buckled
up. You can strike the interior of your vehicle or other
passengers or you can be thrown out of the vehicle.
Always be sure you and others in your vehicle are
buckled up properly.Trunk Emergency Release
THINGS TO KNOW BEFORE STARTING YOUR VEHICLE 41
2
Page 205 of 493
INSTRUMENT PANEL FEATURES
1 - Air Outlet 7 - Radio 13 - Ignition Switch
2 - Instrument Cluster 8 - Climate Control 14 - Hood Release
3 - HAZARD Switch 9 - HEATED SEAT Switch* 15 - TRUNK RELEASE Switch
4 - Analog Clock 10 - Power Outlet 16 - HEADLIGHT Switch
5 - Electronic Stability Program OFF Button* 11 - Ash Tray* * If Equipped
6 - Glove Compartment 12 - Storage Compartment*UNDERSTANDING YOUR INSTRUMENT PANEL 203
4
Page 237 of 493

“Passive Entry”
When ON is selected, the Passive Entry System allows
you to unlock the vehicle’s door(s) and trunk without
using the RKE transmitter unlock button, or the unlock
button located on the vehicle’s interior door panel. To
make your selection, press and release the FUNCTION
SELECT button until “ON” or “OFF” appears.
“Display Units of Measure in”
The EVIC, odometer, and navigation system (if
equipped) can be changed between English and Metric
units of measure. To make your selection, press and
release the FUNCTION SELECT button until “US” or
“METRIC” appears.
“Automatic High Beams” — If Equipped
When this feature is selected, the high beam headlights
will deactivate automatically under certain conditions. To
make your selection, press and release the FUNCTION
SELECT button until “ON” or “OFF” appears. Refer to
“SmartBeams” in Section 3.
SETTING THE ANALOG CLOCK
To set the analog clock at the top center of the instrument
panel, press and hold the button until the setting is
correct.
Analog Clock
UNDERSTANDING YOUR INSTRUMENT PANEL 235
4
Page 284 of 493
Sirius ID number will display. The Sirius ID number
display will time out in two minutes. Press any button on
the radio to exit this screen.
ESN/SID Access With REN/RER Radios
While in SAT mode, press the MENU button on the radio
faceplate.
Next, touch the SUBSCRIPTION tab on the touch screen.
All the ESNs that apply to your vehicle will display.
ESN/SID Access With REU Radio
While in SAT mode, press the MENU button on the radio
faceplate.
Next, turn the knob surrounding the joystick in the center
of the radio to scroll to Subscription, and then press and
release the joystick. All of the ESNs that apply to your
vehicle will display.
Selecting Satellite Mode
Press the SAT button until�SAT�appears in the display. A
CD may remain in the radio while in the Satellite radio
mode.
Satellite Antenna
To ensure optimum reception, do not place items on the
roof around the rooftop antenna location or strap items to
the trunk lid around the trunk lid antenna (if equipped).
Metal objects placed within the line of sight of the
antenna will cause decreased performance. Larger lug-
gage items such as bikes should be placed as far rearward
as possible, within the loading design of the rack. Do not
place items directly on or above the antenna.
Reception Quality
Satellite reception may be interrupted due to one of the
following reasons:
•The vehicle is parked in an underground parking
structure or under a physical obstacle.
282 UNDERSTANDING YOUR INSTRUMENT PANEL