Page 27 of 493

If your transmitter fails to operate from a normal dis-
tance, check for these two conditions:
1. A weak battery in the transmitter. The expected life of
the battery is a minimum of three years.
2. Closeness to a radio transmitter such as a radio station
tower, airport transmitter, and some mobile or CB radios.
REMOTE STARTING SYSTEM — IF EQUIPPED
This system uses the Remote Keyless Entry (RKE) trans-
mitter to start the engine conveniently from outside the
vehicle while still maintaining security. The system has a
targeted range of 328 ft (100 m).
NOTE:The vehicle must be equipped with an auto-
matic transmission to be equipped with Remote Start.
How to Use Remote Start
All of the following conditions must be met before the
engine will remote start:
•Shift lever in PARK
•Doors closed
•Hood closed
•Trunk closed
•Hazard switch off
•Brake switch inactive (brake pedal not pressed)
•Ignition key removed from ignition switch
•Battery at an acceptable charge level, and
•RKE PANIC button not pressed.
THINGS TO KNOW BEFORE STARTING YOUR VEHICLE 25
2
Page 31 of 493

If you press the power door lock switch while the key is
in the ignition, and any front door is open, the power
locks will not operate. This prevents you from acciden-
tally locking the key in the vehicle. Removing the key or
closing the door will allow the locks to operate. If a door
is open, the key is in the ignition, and the ignition is in the
LOCK or ACC position, a chime will sound as a reminder
to remove the key.
Automatic Door Locks
The doors will lock automatically on vehicles with power
door locks if all of the following conditions are met:
1. The Automatic Door Locks feature is enabled.
2. The transmission is in gear.
3. All doors are closed.
4. The throttle is pressed.
5. The vehicle speed is above 15 mph (24 km/h), and6. The doors were not previously locked using the power
door lock switch or Remote Keyless Entry (RKE)
transmitter.
Automatic Door Locks Programming
The Automatic Door Locks feature can be enabled or
disabled as follows:
•For vehicles equipped with the Electronic Vehicle
Information Center (EVIC), refer to “Lock Doors Au-
tomatically at 15 mph (24 km/h)” under “Personal
Settings (Customer-Programmable Features)” under
“Electronic Vehicle Information Center (EVIC) – If
Equipped” in Section 4.
•For vehicles not equipped with the EVIC, perform the
following procedure:
1. Close all doors and place the key in the ignition
switch.
THINGS TO KNOW BEFORE STARTING YOUR VEHICLE 29
2
Page 32 of 493

2. Cycle the ignition switch between LOCK and ON and
then back to LOCK four times ending up in the LOCK
position.
3. Depress the power door LOCK switch to lock the
doors.
4. A single chime will indicate the completion of the
programming.
5. Repeat these steps if you want to return this feature to
its previous setting.
NOTE:Use the Automatic Door Locks feature in accor-
dance with local laws.
Automatic Unlock Doors on Exit
The doors will unlock automatically on vehicles with
power door locks if:
1. The Automatic Unlock Doors On Exit feature is en-
abled.2. The transmission was in gear and the vehicle speed
returned to 0 mph (0 km/h).
3. The transmission is in NEUTRAL or PARK.
4. The driver door is opened.
5. The doors were not previously unlocked, and
6. The vehicle speed is 0 mph (0 km/h).
Automatic Unlock Doors on Exit Programming
The Automatic Unlock Doors On Exit feature can be
enabled or disabled as follows:
•For vehicles equipped with the EVIC, refer to “Unlock
Doors Automatically on Exit” under “Personal Set-
tings (Customer-Programmable Features)” under
“Electronic Vehicle Information Center (EVIC) – If
Equipped” in Section 4.
30 THINGS TO KNOW BEFORE STARTING YOUR VEHICLE
Page 41 of 493

1. Pull the window switch up to close window com-
pletely and continue to hold the switch up for an
additional two seconds after the window is closed.
2. Push the window switch down firmly to the second
detent to open the window completely and continue to
hold the switch down for an additional two seconds after
the window is fully open.
Wind Buffeting
Wind buffeting can be described as the perception of
pressure on the ears or a helicopter type sound in the
ears. Your vehicle may exhibit wind buffeting with the
windows down, or the sunroof (if equipped) in certain
open or partially open positions. This is a normal occur-
rence and can be minimized. If the buffeting occurs with
the rear windows open, then open the front and rear
windows together to minimize the buffeting. If the
buffeting occurs with the sunroof open, then adjust the
sunroof opening to minimize the buffeting.
TRUNK LOCK AND RELEASE
The trunk lid can be released from inside the vehicle by
pressing the TRUNK RELEASE button located on the
instrument panel to the left of the steering wheel.
NOTE:The transmission must be in PARK before the
switch will operate.
Trunk Release Button
THINGS TO KNOW BEFORE STARTING YOUR VEHICLE 39
2
Page 68 of 493

Child Restraints
Everyone in your vehicle needs to")
•Transmission gear selection
•Cruise control status
•Traction/stability control status
•Tire Pressure Monitoring System status (if equipped)
Child Restraints
Everyone in your vehicle needs to be buckled up all the
time, including babies and children. Every state in the
United States and all Canadian provinces require that
small children ride in proper restraint systems. This is the
law, and you can be prosecuted for ignoring it.
Children 12 years and younger should ride properly
buckled up in a rear seat, if available. According to crash
statistics, children are safer when properly restrained in
the rear seats rather than in the front.
WARNING!
In a collision, an unrestrained child, even a tiny baby,
can become a missile inside the vehicle. The force
required to hold even an infant on your lap could
become so great that you could not hold the child, no
matter how strong you are. The child and others
could be badly injured. Any child riding in your
vehicle should be in a proper restraint for the child’s
size.
There are different sizes and types of restraints for
children from newborn size to the child almost large
enough for an adult safety belt. Always check the child
seat Owner’s Manual to ensure you have the correct seat
for your child. Use the restraint that is correct for your
child.
66 THINGS TO KNOW BEFORE STARTING YOUR VEHICLE
Page 87 of 493

to center on the adjacent lane of traffic and a slight
overlap of the view obtained from the inside mirror.
NOTE:The passenger-")
Outside Mirrors
To receive maximum benefit, adjust the outside mirror(s)
to center on the adjacent lane of traffic and a slight
overlap of the view obtained from the inside mirror.
NOTE:The passenger-side convex outside mirror will
give a much wider view to the rear, and especially of the
lane next to your vehicle.
WARNING!
Vehicles and other objects seen in the passenger-side
convex mirror will look smaller and farther away
than they really are. Relying too much on your
passenger-side convex mirror could cause you to
collide with another vehicle or other object. Use your
inside mirror when judging the size or distance of a
vehicle seen in the passenger-side convex mirror.
Outside Mirrors Folding Feature — If Equipped
Some models have exterior mirrors that are hinged. The
hinge allows the mirror to pivot forward and rearward to
resist damage. The hinge has three detent positions, full
forward, full rearward and normal.
Driver Side Outside Mirror Auto Dimmer
This mirror automatically adjusts for annoying headlight
glare from vehicles behind you. You can turn this feature
on or off by pressing the button at the base of the inside
rearview mirror.
Tilt In Reverse Feature
The�Tilt in Reverse�feature tilts the outside rearview
mirrors downward when the ignition switch is in the ON
position and the transmission is in the REVERSE posi-
tion. This feature provides the driver with a better view
of the ground and vehicle in the area of the rear tires
UNDERSTANDING THE FEATURES OF YOUR VEHICLE 85
3
Page 88 of 493
when backing up. The mirrors will move back to their
previous position when the transmission is shifted out of
REVERSE.
The�Tilt in Reverse�feature can be enabled or disabled.
Refer to “Tilt Mirrors Down in Reverse,” under “Personal
Settings (Customer-Programmable Features)” under
“Electronic Vehicle Information Center (EVIC)” in
Section 4.
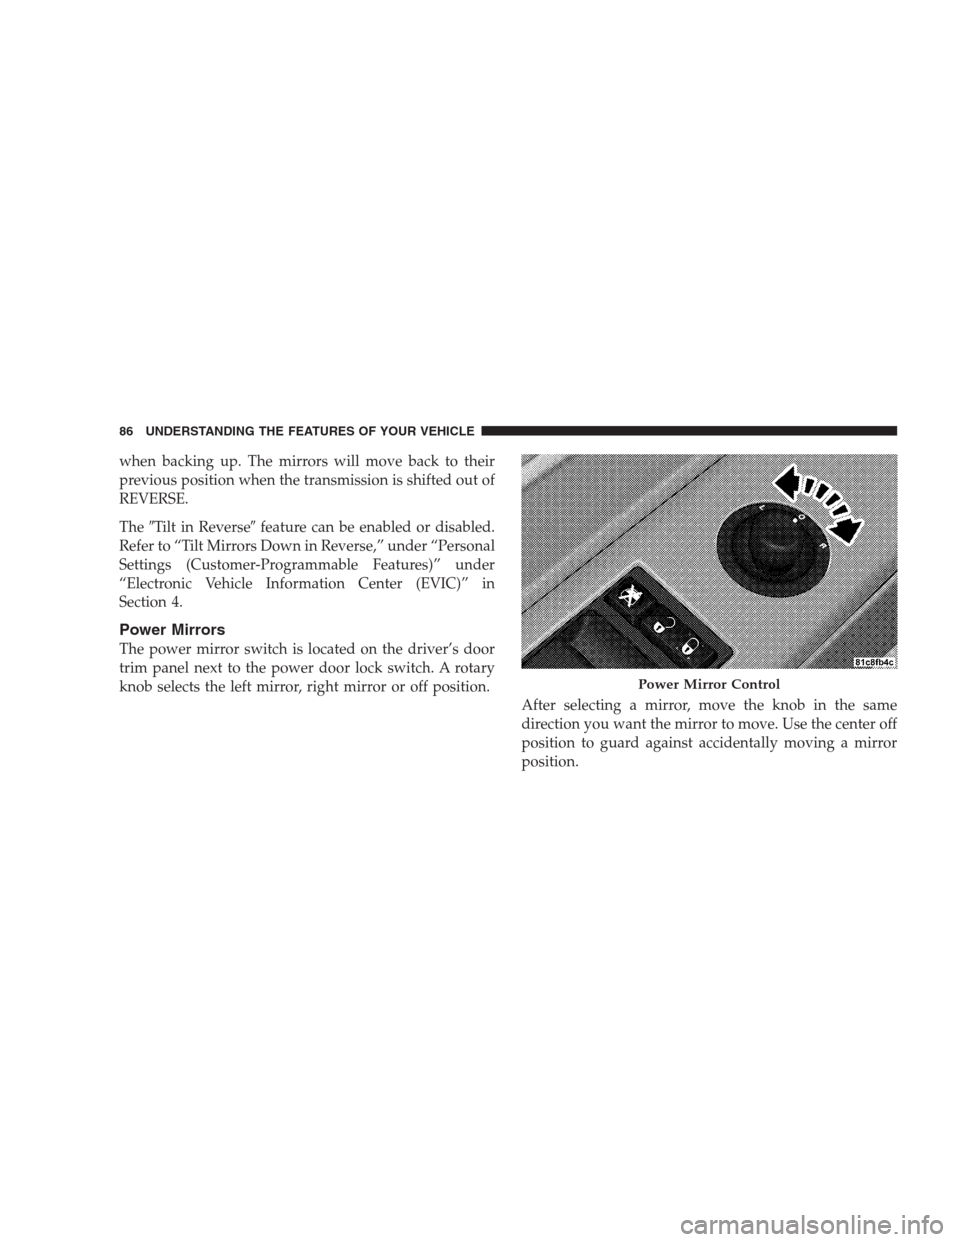
Power Mirrors
The power mirror switch is located on the driver’s door
trim panel next to the power door lock switch. A rotary
knob selects the left mirror, right mirror or off position.
After selecting a mirror, move the knob in the same
direction you want the mirror to move. Use the center off
position to guard against accidentally moving a mirror
position.
Power Mirror Control
86 UNDERSTANDING THE FEATURES OF YOUR VEHICLE
Page 153 of 493
 speed
increase. Each time the Electronic Speed Control lever is
tapped speed increases, so tapping the")
Tapping the Electronic Speed Control lever to RESUME
ACCEL once will result in a 1 mph (1.6 km/h) speed
increase. Each time the Electronic Speed Control lever is
tapped speed increases, so tapping the Electronic Speed
Control lever three times will increase speed by 3 mph
(4.8 km/h), etc.
To decrease speed while Electronic Speed Control is set,
push down and hold the Electronic Speed Control lever
in SET DECEL. Release the Electronic Speed Control
lever when the desired speed is reached, and a new set
speed will be established.
Tapping the Electronic Speed Control lever to SET DE-
CEL once will result in a 1 mph (1.6 km/h) speed
decrease. Each time the Electronic Speed Control lever is
tapped, speed decreases.To Accelerate For Passing
Depress the accelerator as you would normally. When the
pedal is released, the vehicle will return to the set speed.
Using Electronic Speed Control on Hills
NOTE:The Electronic Speed Control system maintains
speed up and down hills. A slight speed change on
moderate hills is normal.
The automatic transmission will downshift while climb-
ing uphill or descending downhill. This downshift is
necessary to maintain vehicle set speed.
On steep hills, a greater speed loss or gain may occur, so
it may be preferable to drive without Electronic Speed
Control.
UNDERSTANDING THE FEATURES OF YOUR VEHICLE 151
3