2009 CHEVROLET TRAIL BLAZER sunroof
[x] Cancel search: sunroofPage 1 of 484

Seats and Restraint System............................. 1-1
Front Seats
............................................... 1-2
Rear Seats
..............................................1-11
Safety Belts
.............................................1-13
Child Restraints
.......................................1-32
Airbag System
.........................................1-55
Restraint System Check
............................1-70
Features and Controls..................................... 2-1
Keys
........................................................ 2-3
Doors and Locks
....................................... 2-7
Windows
.................................................2-14
Theft-Deterrent Systems
............................2-17
Starting and Operating Your Vehicle
...........2-21
Mirrors
....................................................2-40
OnStar
®System
......................................2-45
Universal Home Remote System
................2-48
Storage Areas
.........................................2-53
Sunroof
..................................................2-57
Instrument Panel............................................. 3-1
Instrument Panel Overview
.......................... 3-4
Climate Controls
......................................3-20
Warning Lights, Gages, and Indicators
........3-28
Driver Information Center (DIC)
..................3-47
Audio System(s)
.......................................3-62Driving Your Vehicle....................................... 4-1
Your Driving, the Road, and the Vehicle
....... 4-2
Towing
...................................................4-40
Service and Appearance Care.......................... 5-1
Service
..................................................... 5-3
Fuel
......................................................... 5-5
Checking Things Under the Hood
...............5-10
All-Wheel Drive
........................................5-48
Rear Axle
...............................................5-49
Four-Wheel Drive
.....................................5-50
Front Axle
...............................................5-51
Headlamp Aiming
.....................................5-52
Bulb Replacement
....................................5-52
Windshield Wiper Blade Replacement
.........5-55
Tires
......................................................5-58
Appearance Care
...................................5-109
Vehicle Identi�cation
...............................5-117
Electrical System
....................................5-118
Capacities and Speci�cations
...................5-125
Maintenance Schedule..................................... 6-1
Maintenance Schedule
................................ 6-2
Customer Assistance Information.................... 7-1
Customer Assistance and Information
........... 7-2
Reporting Safety Defects
...........................7-15
Vehicle Data Recording and Privacy
...........7-17
Index................................................................ 1
2009 Chevrolet TrailBlazer Owner ManualM
Page 78 of 484

Outside Manual Mirrors..................................2-43
Outside Power Mirrors...................................2-44
Outside Convex Mirror...................................2-44
Outside Heated Mirrors..................................2-44
OnStar
®System.............................................2-45
Universal Home Remote System......................2-48
Universal Home Remote System Operation
(With One Triangular LED)...........................2-49Storage Areas................................................2-53
Glove Box...................................................2-53
Overhead Console........................................2-53
Center Console Storage.................................2-54
Luggage Carrier...........................................2-54
Rear Floor Storage Cover..............................2-55
Convenience Net..........................................2-56
Cargo Cover................................................2-56
Cargo Tie Downs..........................................2-57
Sunroof.........................................................2-57
Section 2 Features and Controls
2-2
Page 99 of 484

Retained Accessory Power (RAP)
These vehicle accessories can be used for up to
20 minutes after the engine is turned off:
Audio System
Power Windows
Overhead Console
Sunroof (if equipped)
These features will work when the key is in ON/RUN
or ACC/ACCESSORY. Once the key is turned from
ON/RUN to LOCK/OFF, these features continue to
work for up to 20 minutes, or until a door is opened.
Starting the Engine
Move the shift lever to P (Park) or N (Neutral). The
engine will not start in any other position. To restart
the engine when the vehicle is already moving,
use N (Neutral) only.
Notice:Do not try to shift to P (Park) if the
vehicle is moving. If you do, you could damage
the transmission. Shift to P (Park) only when
the vehicle is stopped.
Starting Procedure
1. With your foot off the accelerator pedal, turn the
ignition to START. When the engine starts, let go of
the key. The idle speed will slow down as the engine
warms. Do not race the engine immediately after
starting it. Operate the engine and transmission
gently to allow the oil to warm up and lubricate all
moving parts.
The vehicle has a Computer-Controlled Cranking
System. This feature assists in starting the engine
and protects components. If the ignition key is turned
to the START position, and then released when the
engine begins cranking, the engine will continue
cranking for a few seconds or until the vehicle starts.
If the engine does not start and the key is held in
START, cranking will be stopped after 15 seconds to
prevent cranking motor damage. To prevent gear
damage, this system also prevents cranking if the
engine is already running. Engine cranking can be
stopped by turning the ignition switch to the ACC/
ACCESSORY or LOCK/OFF position.
Notice:Cranking the engine for long periods of
time, by returning the key to the START position
immediately after cranking has ended, can overheat
and damage the cranking motor, and drain the
battery. Wait at least 15 seconds between each try,
to let the cranking motor cool down.
2-23
Page 129 of 484

Using Universal Home Remote
Press and hold the appropriate Universal Home Remote
button for at least half of a second. The indicator light
will come on while the signal is being transmitted.
Erasing Universal Home Remote
Buttons
The programmed buttons should be erased when the
vehicle is sold or the lease ends.
To erase all programmed buttons on the Universal
Home Remote device:
1. Press and hold down the two outside buttons until
the indicator light begins to �ash, after 20 seconds.
2. Release both buttons.
Reprogramming a Single Universal
Home Remote Button
To reprogram any of the three Universal Home Remote
buttons, repeat the programming instructions earlier
in this section, beginning with Step 2.
For help or information on the Universal Home Remote
System, call the customer assistance phone number
underCustomer Assistance Offices on page 7-6.
Storage Areas
Glove Box
Lift the glove box handle up to open it. Use the key to
lock and unlock the glove box.
Overhead Console
Your vehicle may have this feature. The overhead
console may include reading lamps, a Universal
Home Remote and a sunroof switch. SeeSunroof
on page 2-57andUniversal Home Remote System
on page 2-48for more information.
2-53
Page 133 of 484

Cargo Tie Downs
Four cargo tie-downs are located in the rear compartment
of the vehicle. The tie-downs can be used to secure small
loads.
Sunroof
The vehicle may have a power sliding sunroof. To open
or close the sunroof, the ignition must be turned to
ON/RUN, ACC/ACCESSORY, or Retained Accessory
Power (RAP) must be active. SeeRetained Accessory
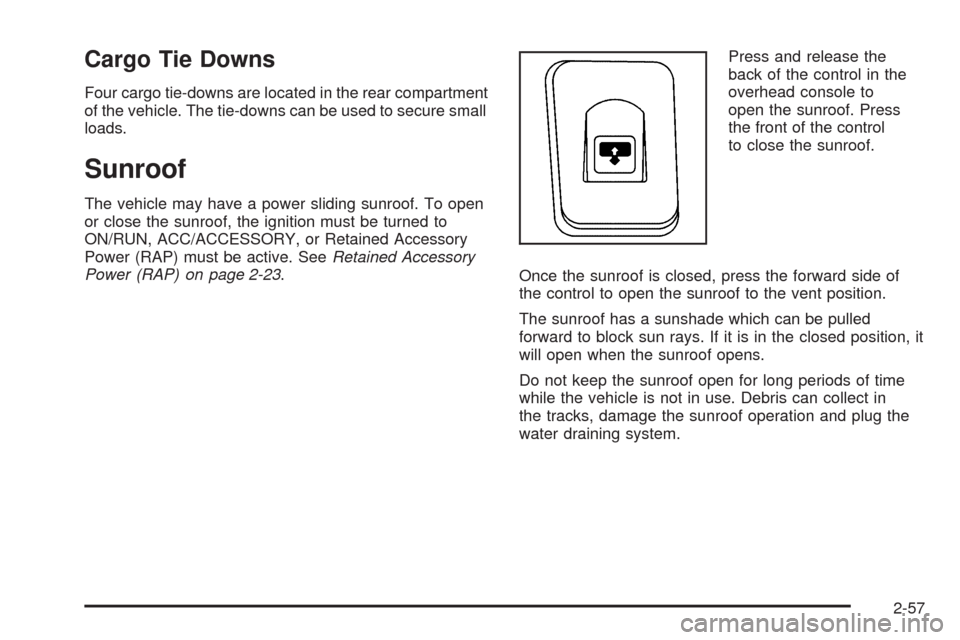
Power (RAP) on page 2-23.Press and release the
back of the control in the
overhead console to
open the sunroof. Press
the front of the control
to close the sunroof.
Once the sunroof is closed, press the forward side of
the control to open the sunroof to the vent position.
The sunroof has a sunshade which can be pulled
forward to block sun rays. If it is in the closed position, it
will open when the sunroof opens.
Do not keep the sunroof open for long periods of time
while the vehicle is not in use. Debris can collect in
the tracks, damage the sunroof operation and plug the
water draining system.
2-57
Page 234 of 484

DVD Player Buttons (Without Sunroof)
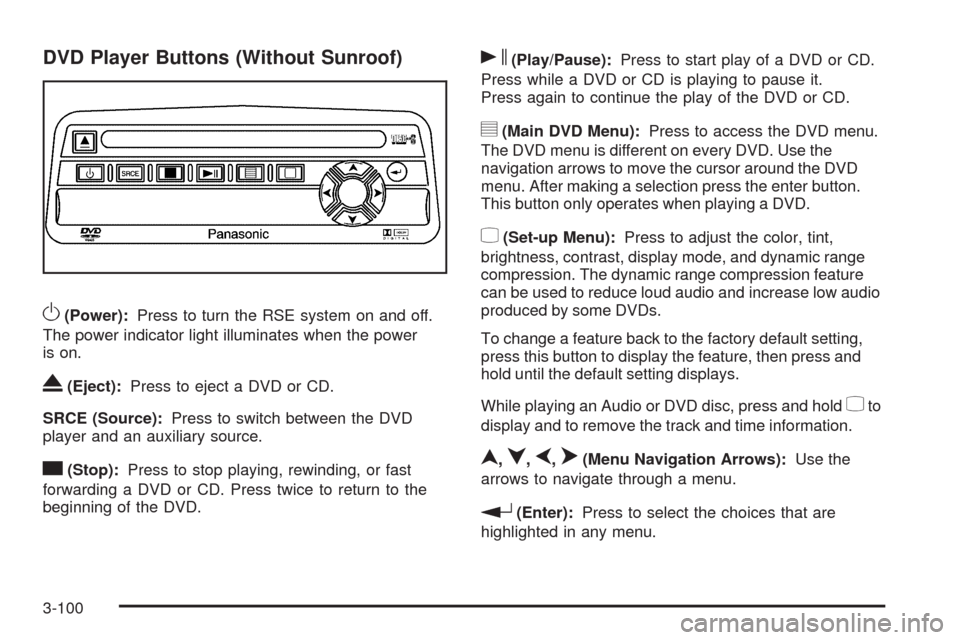
O(Power):Press to turn the RSE system on and off.
The power indicator light illuminates when the power
is on.
X(Eject):Press to eject a DVD or CD.
SRCE (Source):Press to switch between the DVD
player and an auxiliary source.
c(Stop):Press to stop playing, rewinding, or fast
forwarding a DVD or CD. Press twice to return to the
beginning of the DVD.
s(Play/Pause):Press to start play of a DVD or CD.
Press while a DVD or CD is playing to pause it.
Press again to continue the play of the DVD or CD.
y(Main DVD Menu):Press to access the DVD menu.
The DVD menu is different on every DVD. Use the
navigation arrows to move the cursor around the DVD
menu. After making a selection press the enter button.
This button only operates when playing a DVD.
z(Set-up Menu):Press to adjust the color, tint,
brightness, contrast, display mode, and dynamic range
compression. The dynamic range compression feature
can be used to reduce loud audio and increase low audio
produced by some DVDs.
To change a feature back to the factory default setting,
press this button to display the feature, then press and
hold until the default setting displays.
While playing an Audio or DVD disc, press and hold
zto
display and to remove the track and time information.
n,q,p,o(Menu Navigation Arrows):Use the
arrows to navigate through a menu.
r(Enter):Press to select the choices that are
highlighted in any menu.
3-100
Page 235 of 484

DVD Player Buttons (With Sunroof)
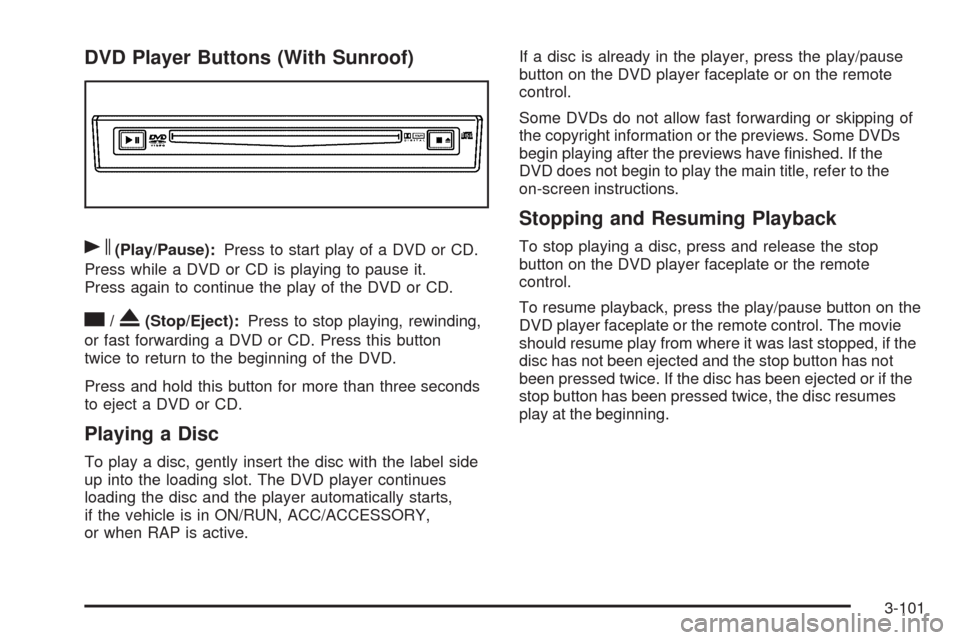
s(Play/Pause):Press to start play of a DVD or CD.
Press while a DVD or CD is playing to pause it.
Press again to continue the play of the DVD or CD.
c/X(Stop/Eject):Press to stop playing, rewinding,
or fast forwarding a DVD or CD. Press this button
twice to return to the beginning of the DVD.
Press and hold this button for more than three seconds
to eject a DVD or CD.
Playing a Disc
To play a disc, gently insert the disc with the label side
up into the loading slot. The DVD player continues
loading the disc and the player automatically starts,
if the vehicle is in ON/RUN, ACC/ACCESSORY,
or when RAP is active.If a disc is already in the player, press the play/pause
button on the DVD player faceplate or on the remote
control.
Some DVDs do not allow fast forwarding or skipping of
the copyright information or the previews. Some DVDs
begin playing after the previews have �nished. If the
DVD does not begin to play the main title, refer to the
on-screen instructions.
Stopping and Resuming Playback
To stop playing a disc, press and release the stop
button on the DVD player faceplate or the remote
control.
To resume playback, press the play/pause button on the
DVD player faceplate or the remote control. The movie
should resume play from where it was last stopped, if the
disc has not been ejected and the stop button has not
been pressed twice. If the disc has been ejected or if the
stop button has been pressed twice, the disc resumes
play at the beginning.
3-101
Page 236 of 484

Ejecting a Disc (DVD Player without
Sunroof)
Press thec/Xbutton on the DVD player faceplate
to eject the disc. There is not an eject button on
the remote control.
If a disc is ejected from the player, but is not removed,
the DVD player reloads the disc after a short period
of time. The disc is stored in the DVD player. The DVD
player does not resume play of the disc automatically.
Ejecting a Disc (DVD Player with Sunroof)
Press and hold thec/Xbutton for more than
two seconds on the DVD player faceplate to eject the
disc. There is not an eject button on the remote control.
If a disc is ejected from the player, but is not removed,
the DVD player reloads the disc after a short period
of time. The disc is stored in the DVD player. The DVD
player does not resume play of the disc automatically.
Remote Control
To use the remote control, aim it at the transmitter
window below the video screen and press the desired
button. Direct sunlight or very bright light can affect
the ability of the RSE system to receive signals from
the remote control. If the remote control does not seem
to be working, the batteries may need to be replaced.
See “Battery Replacement” later in this section.
Objects blocking the line of sight can also affect the
function of the remote control.
Notice:Storing the remote control in a hot area or
in direct sunlight can damage it, and the repairs will
not be covered by the warranty. Storage in extreme
cold can weaken the batteries. Keep the remote
control stored in a cool, dry place.
3-102