2009 CHEVROLET TRAIL BLAZER start stop button
[x] Cancel search: start stop buttonPage 105 of 484

3 (Third):This position is also used for normal driving.
It reduces vehicle speed more than D (Drive) without
using the brakes. You might choose 3 (Third) instead of
D (Drive) when driving on hilly, winding roads, when
towing a trailer, so there is less shifting between gears
and when going down a steep hill.
To shift to the 3 (Third) position, you must �rst press the
large button on the shift handle. While the button is
pressed, move the shifter in the 3 (Third) position.
2 (Second):This position reduces vehicle speed even
more than 3 (Third) without using the brakes. You
can use 2 (Second) on hills. It can help you control
vehicle speed as you go down steep mountain roads,
as you use your brakes off and on.
To shift to the 2 (Second) position, you must �rst press
the large button on the shift handle. While the button
is pressed, move the shifter in the 2 (Second) position.
You can also use 2 (Second) for starting the vehicle
from a stop on slippery road surfaces.1 (First):This position reduces vehicle speed even
more than 2 (Second) without using the brakes. You
can use it on very steep hills, or in deep snow or mud.
If the shift lever is put in 1 (First) while the vehicle is
moving forward, the transmission will not shift into �rst
gear until the vehicle is going slowly enough.
To shift to the 1 (First) position, you must �rst press the
large button on the shift handle. While the button is
pressed, move the shifter in the 1 (First) position.
Notice:Spinning the tires or holding the vehicle
in one place on a hill using only the accelerator
pedal may damage the transmission. The repair
will not be covered by the vehicle warranty. If you
are stuck, do not spin the tires. When stopping on
a hill, use the brakes to hold the vehicle in place.
2-29
Page 183 of 484

Trip Information Button
3
(Trip Information):Press the trip information
button to scroll through the ODOMETER, TRIP A,
TRIP B, TIRE PRESSURES, and TIMER.
Odometer:Press the trip information button until
ODOMETER appears on the display. This mode shows
the total distance the vehicle has been driven in either
miles or kilometers. Pressing the reset stem located on
the instrument cluster with the vehicle off will also display
the odometer.
Trip A:Press the trip information button until TRIP A
appears on the display. This mode shows the current
distance traveled since the last reset for TRIP A in either
miles or kilometers.
Trip B:Press the trip information button until TRIP B
appears on the display. This mode shows the current
distance traveled since the last reset for TRIP B in either
miles or kilometers.
To reset TRIP A or TRIP B information, press and hold
the select button for one second while in one of the trip
modes. This will reset the information for TRIP A or
TRIP B.
You can also reset the TRIP A or TRIP B while they are
displayed by pressing the reset stem on the cluster. If you
press and hold the reset stem or the select button for
more than four seconds, the display will show the
distance traveled since the last ignition cycle for
TRIP A or TRIP B.Tire Pressures:On vehicles with the Tire Pressure
Monitor System (TPMS), press the trip information
button until TIRE PRESSURES appears on the display.
This mode shows the tire pressure in pounds per
square inch (psi) or kilopascals (kPa). Press the select
button to scroll through the following information:
LF TIRE shows the tire pressure for the front
driver’s side tire.
RF TIRE shows the tire pressure for the front
passenger’s side tire.
LR TIRE shows the tire pressure for the rear
driver’s side tire.
RR TIRE shows the tire pressure for the rear
passenger’s side tire.
Timer:The DIC can be used as a timer. Press the
select button while TIMER is displayed to start the timer.
The display will show the amount of time that has
passed since the timer was last reset, not including time
the ignition is off. Time will continue to be counted as
long as the ignition is on, even if another display is being
shown on the DIC. The timer will record up to 99 hours,
59 minutes and 59 seconds (99:59:59) after which
the display will roll back to zero.
To stop the counting of time, press the select button
brie�y while TIMER is displayed.
To reset the timer to zero, press and hold the select
button while TIMER is displayed.
3-49
Page 206 of 484

Radio Messages
CAL ERR (Calibration Error):Displays if the radio is
no longer calibrated properly for the vehicle. The vehicle
must be returned to your dealer/retailer for service.
LOCKED:Displays when the THEFTLOCK
®system
has activated. Take the vehicle to your dealer/retailer for
service.
If any error occurs repeatedly, or if an error cannot be
corrected, contact your dealer/retailer.
XM™ Satellite Radio Service
XM is a satellite radio service that is based in the
48 contiguous United States and 10 Canadian provinces.
XM Satellite Radio has a wide variety of programming
and commercial-free music, coast-to-coast, and in
digital-quality sound. During your trial or when you
subscribe, you will get unlimited access to XM Radio
Online for when you are not in the vehicle. A service
fee is required to receive the XM service. For more
information, contact XM at xmradio.com or call
1-800-929-2100 in the U.S. and xmradio.ca or
call 1-877-438-9677 in Canada.
Radio Messages for XM Only
SeeXM Radio Messages on page 3-84later in this
section for further detail.
Playing a CD
Insert a CD partway into the slot, label side up.
The player pulls it in and the CD should begin playing.
For the Base Radio, �rst press the eject button or
the INFO knob to insert a CD with the ignition off.
If the ignition or radio is turned off, with a CD in the
player, it stays in the player. When the ignition or radio
is turned on, the CD starts playing where it stopped,
if it was the last selected audio source.
When a CD is inserted, the CD symbol displays. As
each new track starts to play, the track number displays.
The CD player can play the smaller 3 inch (8 cm)
single CDs with an adapter ring. Full-size CDs and
the smaller CDs are loaded in the same manner.
3-72
Page 210 of 484

To use repeat, do the following:
To repeat a track, press and release the
RPT button. RPT displays. Press again to
turn off repeat play.
To repeat the CD, press and hold the RPT button for
two seconds. RPT displays. Press again to turn off
repeat play.
6 RDM (Random) (Base Radio or MP3 Radio):Press
to hear the tracks in random, rather than sequential,
order. RDM ON displays. RDM T or RDM and the track
number displays when each track starts to play. Press
again to turn off random play. RDM OFF displays.
RDM (Random):With the random setting, tracks
can be listened to in random, rather than sequential,
order, on one CD or on all of the CDs. To use random,
do one of the following:
To play the tracks on the CD in random order,
press and release the RDM button. RANDOM ONE
displays. Press again to turn off random play.
To play the tracks on all of the CDs that are loaded
in random order, press and hold RDM for more
than two seconds. A beep sounds and RANDOM
ALL displays. Press again to turn off random play.AUTO EQ (Automatic Equalization):Press to
select the equalization setting while playing a CD.
The equalization is stored when a CD is played.
For more information on AUTO EQ, see “AUTO EQ”
listed previously in this section.
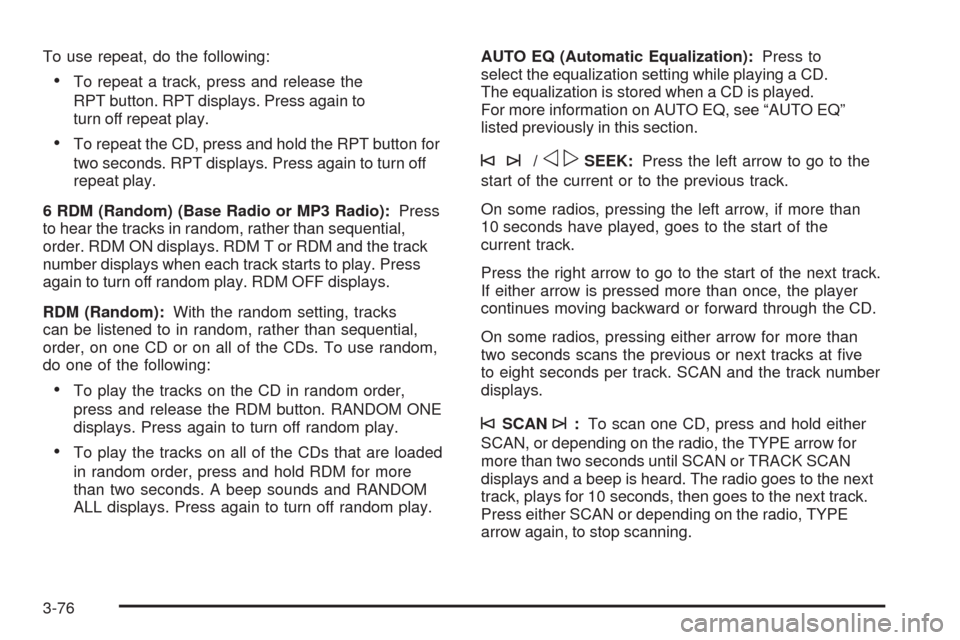
©¨/opSEEK:Press the left arrow to go to the
start of the current or to the previous track.
On some radios, pressing the left arrow, if more than
10 seconds have played, goes to the start of the
current track.
Press the right arrow to go to the start of the next track.
If either arrow is pressed more than once, the player
continues moving backward or forward through the CD.
On some radios, pressing either arrow for more than
two seconds scans the previous or next tracks at �ve
to eight seconds per track. SCAN and the track number
displays.
©SCAN¨:To scan one CD, press and hold either
SCAN, or depending on the radio, the TYPE arrow for
more than two seconds until SCAN or TRACK SCAN
displays and a beep is heard. The radio goes to the next
track, plays for 10 seconds, then goes to the next track.
Press either SCAN or depending on the radio, TYPE
arrow again, to stop scanning.
3-76
Page 216 of 484

Playing an MP3/WMA
Insert a CD partway into the slot, label side up. The
player pulls it in, and READING displays. The CD should
begin playing and the CD symbol displays. To insert a
CD while the ignition is off, �rst press the
Zbutton
or the DISPL knob.
If the ignition or radio is turned off with a CD in the
player it stays in the player. When the ignition or radio
is turned on, the CD starts to play where it stopped,
if it was the last selected audio source.
As each new track starts to play, the track number and
song title displays.
1 FLD
x(Previous Folder):Press to go to the �rst
track in the previous folder. Press 1 FLD
xwhile
in folder random mode to go to the �rst track in the
previous folder and random the tracks in that folder.
2 FLD
w(Next Folder):Press to go to the �rst track
in the next folder. Press 2 FLD
wwhile in folder random
mode to go to the �rst track in the next folder and random
the tracks in that folder.3 REV (Reverse):Press and hold to reverse quickly
within a track. Press and hold 3 REV for less than
two seconds to reverse at 10 times the normal playing
speed. Press and hold 3 REV for more than two seconds
to reverse at 20 times the normal playing speed. Release
3 REV to play the passage. REV and the elapsed time of
the track displays.
4 FWD (Forward):Press and hold to advance quickly
within a track. Press and hold 4 FWD for less than
two seconds to advance at 10 times the normal playing
speed. Press and hold 4 FWD for more than two seconds
to advance at 20 times the normal playing speed.
Release 4 FWD to play the passage. FWD and the
elapsed time of the track displays.
6 RDM (Random):Press and release to play the
tracks of a current folder or playlist, in random order.
FLDR RDM displays. Once all of the tracks a current
folder or playlist have played the system moves on to
the next folder or playlist and play all of the tracks in
random order.
To play all tracks on the CD in random order, press and
hold 6 RDM for two seconds. A beep sounds and DISC
RDM displays. This feature does not work with playlists.
When in random, press and release either SEEK arrow to
go to the next or previous random track.
Press and release 6 RDM again to turn off random play.
NO RDM displays.
3-82
Page 217 of 484

oSEEKp:Press the left SEEK arrow to go to the
start of the previous track. Press the right SEEK arrow to
go to the start of the next track. Press either SEEK arrow
for more than two seconds to search the previous or next
tracks at two tracks per second. Release the button to
stop searching and to play the track.
oTUNEp:Turn to fast track reverse or
advance through the tracks in all folders or playlists.
The track number and �le name displays for each track.
Turn
oTUNEpwhile in random to fast track reverse or
advance the tracks in sequential order.
DISPL (Display):Press to switch between track mode,
folder/playlist mode, and time of day mode. The display
shows only eight characters, but there can be up to
four pages of text. If there are more than eight characters
in the song, folder, or playlist name, they are displayed
if DISPL is not pressed again, pressing DISPL within
two seconds goes to the next display mode.
Track mode displays the current track number and
the ID3 tag song name.
Folder/playlist mode displays the current folder or
playlist number and the folder/playlist name.
Time of day mode displays the time of day and the
ID3 tag song name.To change the default on the display, press the DISPL
knob until the desired display appears, then press and
hold this knob for two seconds. The radio produces
one beep and the selected display becomes the default.
INFO (Information):INFO displays when a current
track has ID3 tag information. Press INFO to display
the artist name and album contained in the tag. INFO
disappears from the display when the information in the
ID3 tag has �nished.
BAND:Press to listen to the radio when a CD is
playing. The inactive CD remains inside the radio for
future listening.
CD AUX (Auxiliary):Press to play a CD when listening
to the radio. The CD symbol displays when a CD is
loaded.
Z(Eject):Press to eject a CD. Eject can activate
while either the ignition or the radio is off. CDs can be
loaded while the ignition and the radio is off if this button
is pressed �rst.
3-83
Page 234 of 484

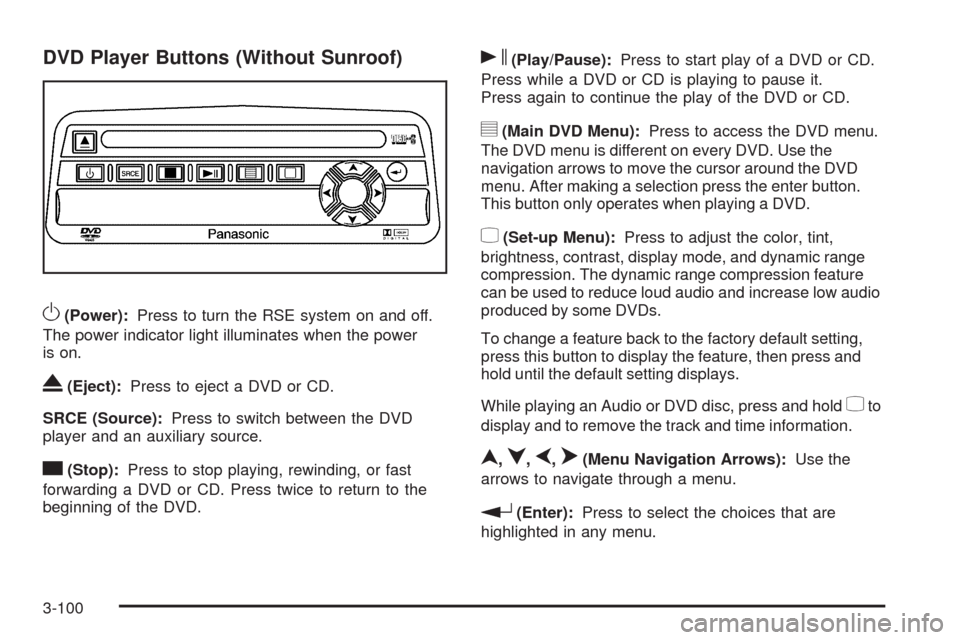
DVD Player Buttons (Without Sunroof)
O(Power):Press to turn the RSE system on and off.
The power indicator light illuminates when the power
is on.
X(Eject):Press to eject a DVD or CD.
SRCE (Source):Press to switch between the DVD
player and an auxiliary source.
c(Stop):Press to stop playing, rewinding, or fast
forwarding a DVD or CD. Press twice to return to the
beginning of the DVD.
s(Play/Pause):Press to start play of a DVD or CD.
Press while a DVD or CD is playing to pause it.
Press again to continue the play of the DVD or CD.
y(Main DVD Menu):Press to access the DVD menu.
The DVD menu is different on every DVD. Use the
navigation arrows to move the cursor around the DVD
menu. After making a selection press the enter button.
This button only operates when playing a DVD.
z(Set-up Menu):Press to adjust the color, tint,
brightness, contrast, display mode, and dynamic range
compression. The dynamic range compression feature
can be used to reduce loud audio and increase low audio
produced by some DVDs.
To change a feature back to the factory default setting,
press this button to display the feature, then press and
hold until the default setting displays.
While playing an Audio or DVD disc, press and hold
zto
display and to remove the track and time information.
n,q,p,o(Menu Navigation Arrows):Use the
arrows to navigate through a menu.
r(Enter):Press to select the choices that are
highlighted in any menu.
3-100
Page 235 of 484

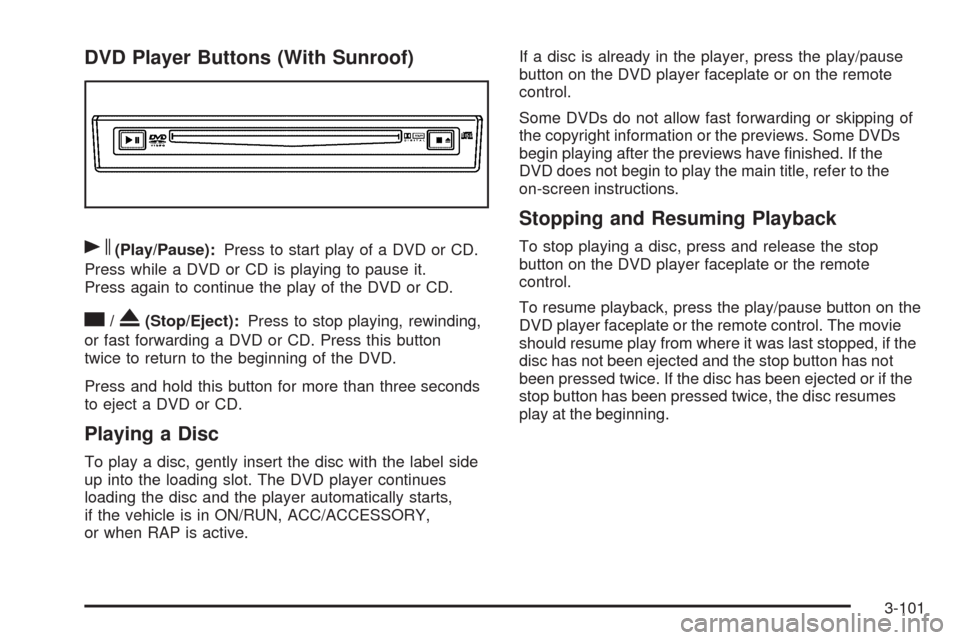
DVD Player Buttons (With Sunroof)
s(Play/Pause):Press to start play of a DVD or CD.
Press while a DVD or CD is playing to pause it.
Press again to continue the play of the DVD or CD.
c/X(Stop/Eject):Press to stop playing, rewinding,
or fast forwarding a DVD or CD. Press this button
twice to return to the beginning of the DVD.
Press and hold this button for more than three seconds
to eject a DVD or CD.
Playing a Disc
To play a disc, gently insert the disc with the label side
up into the loading slot. The DVD player continues
loading the disc and the player automatically starts,
if the vehicle is in ON/RUN, ACC/ACCESSORY,
or when RAP is active.If a disc is already in the player, press the play/pause
button on the DVD player faceplate or on the remote
control.
Some DVDs do not allow fast forwarding or skipping of
the copyright information or the previews. Some DVDs
begin playing after the previews have �nished. If the
DVD does not begin to play the main title, refer to the
on-screen instructions.
Stopping and Resuming Playback
To stop playing a disc, press and release the stop
button on the DVD player faceplate or the remote
control.
To resume playback, press the play/pause button on the
DVD player faceplate or the remote control. The movie
should resume play from where it was last stopped, if the
disc has not been ejected and the stop button has not
been pressed twice. If the disc has been ejected or if the
stop button has been pressed twice, the disc resumes
play at the beginning.
3-101