2009 CHEVROLET TAHOE change time
[x] Cancel search: change timePage 3 of 574
GENERAL MOTORS, GM, the GM Emblem,
CHEVROLET, the CHEVROLET Emblem, and the
names TAHOE, SUBURBAN, and Z71 are registered
trademarks of General Motors Corporation.
This manual includes the latest information at the time it
was printed. GM reserves the right to make changes
in the product after that time without notice. For vehicles
�rst sold in Canada, substitute the name “General
Motors of Canada Limited” for Chevrolet Motor Division
wherever it appears in this manual.
This manual describes features that may or may not be
on your speci�c vehicle.
Read this manual from beginning to end to learn about
the vehicle’s features and controls. Pictures, symbols,
and words work together to explain vehicle operation.If your vehicle is a Two-mode Hybrid, see the Two-mode
Hybrid manual for more information.
Keep this manual in the vehicle for quick reference.
Canadian Owners
A French language copy of this manual can be obtained
from your dealer/retailer or from:
Helm, Incorporated
P.O. Box 07130
Detroit, MI 48207
1-800-551-4123
helminc.com
Propriétaires Canadiens
On peut obtenir un exemplaire de ce guide en français
auprès de concessionnaire ou à l’adresse suivante:
Helm Incorporated
P.O. Box 07130
Detroit, MI 48207
1-800-551-4123
helminc.com
Litho in U.S.A.
Part No. 15911385 A First Printing
©2008 General Motors Corporation. All Rights Reserved.
iii
Page 124 of 574
Manual Operation of Power Liftgate
To change the liftgate to manual operation, press the
switch on the overhead console to the OFF position.
With the power liftgate disabled and all of the doors
unlocked, the liftgate can be manually opened and
closed.
To open the liftgate, press the touchpad on the handle
on the outside of the liftgate, and lift the gate open.
To close the liftgate, use the pull cup to lower the liftgate
and close. The liftgate latch will power close. Always
close the liftgate before driving.
If the RKE button or the power close button on the liftgate
is pressed while power operation is disabled, the lights
will �ash three times, but the liftgate will not move.
It is not recommended that you drive with the liftgate
open, however, if you must drive with the liftgate open,
the liftgate should be set to manual operation by
pressing the OFF switch on the center console.
The liftgate has an electric latch. If the battery is
disconnected or has low voltage, the liftgate will not
open. The liftgate will resume operation when the battery
is reconnected and charged.
If the battery is properly connected with adequate
voltage, the switch is not disabled, and the liftgate still will
not function, your vehicle should be taken to a dealer/
retailer for service.
Power Assist Steps
Your vehicle may have power assist steps.
The power assist steps automatically extend from
beneath the vehicle on the side in which the door has
been opened. Once the door is closed, the assist steps
automatically move back under the vehicle after a
brief delay. The vehicle must not be moving for the
assist steps to extend or retract.
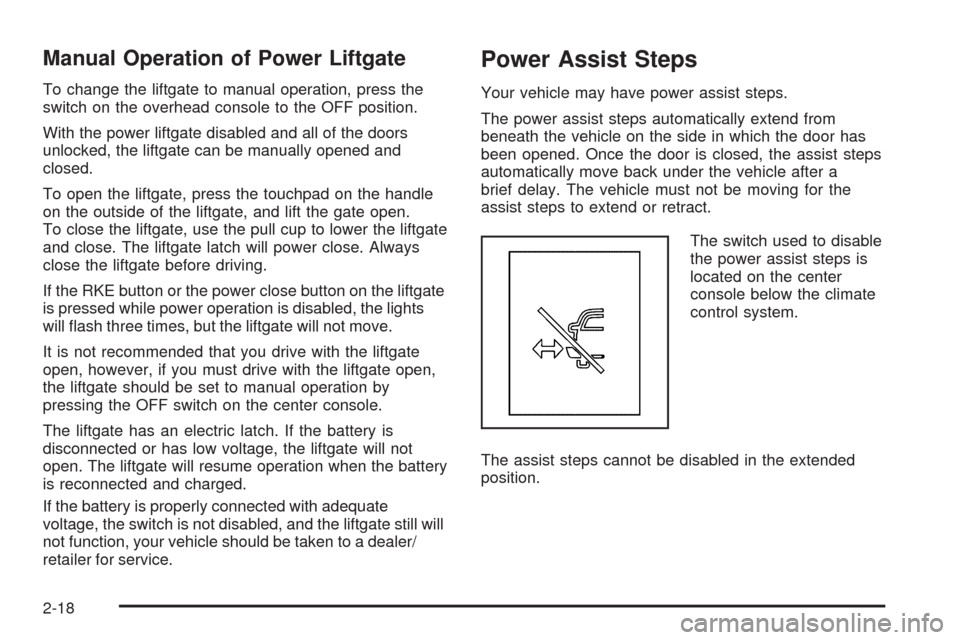
The switch used to disable
the power assist steps is
located on the center
console below the climate
control system.
The assist steps cannot be disabled in the extended
position.
2-18
Page 135 of 574

Starting Procedure
1. With your foot off the accelerator pedal, turn the
ignition key to START. When the engine starts,
let go of the key. The idle speed will go down as the
engine gets warm. Do not race the engine
immediately after starting it. Operate the engine and
transmission gently to allow the oil to warm up
and lubricate all moving parts.
The vehicle has a Computer-Controlled Cranking
System. This feature assists in starting the engine
and protects components. If the ignition key is turned
to the START position, and then released when the
engine begins cranking, the engine will continue
cranking for a few seconds or until the vehicle starts.
If the engine does not start and the key is held in
START for many seconds, cranking will be stopped
after 15 seconds to prevent cranking motor damage.
To prevent gear damage, this system also prevents
cranking if the engine is already running. Engine
cranking can be stopped by turning the ignition
switch to the ACC/ACCESSORY or LOCK/OFF
position.
Notice:Cranking the engine for long periods of
time, by returning the key to the START position
immediately after cranking has ended, can overheat
and damage the cranking motor, and drain the
battery. Wait at least 15 seconds between each try,
to let the cranking motor cool down.2. If the engine does not start after 5-10 seconds,
especially in very cold weather (below 0°F or
−18°C), it could be �ooded with too much gasoline.
Try pushing the accelerator pedal all the way to
the �oor and holding it there as you hold the key in
START for up to a maximum of 15 seconds.
Wait at least 15 seconds between each try, to allow
the cranking motor to cool down. When the
engine starts, let go of the key and accelerator. If
the vehicle starts brie�y but then stops again, do the
same thing. This clears the extra gasoline from
the engine. Do not race the engine immediately
after starting it. Operate the engine and
transmission gently until the oil warms up and
lubricates all moving parts.
Notice:The engine is designed to work with the
electronics in the vehicle. If you add electrical parts
or accessories, you could change the way the
engine operates. Before adding electrical equipment,
check with your dealer/retailer. If you do not, the
engine might not perform properly. Any resulting
damage would not be covered by the vehicle
warranty.
2-29
Page 160 of 574
Manually fold the mirrors inward to prevent damage
when going through an automatic car wash. To
fold, push the mirror toward the vehicle. Push the mirror
outward, to return to its original position.
Outside Power Foldaway Mirrors
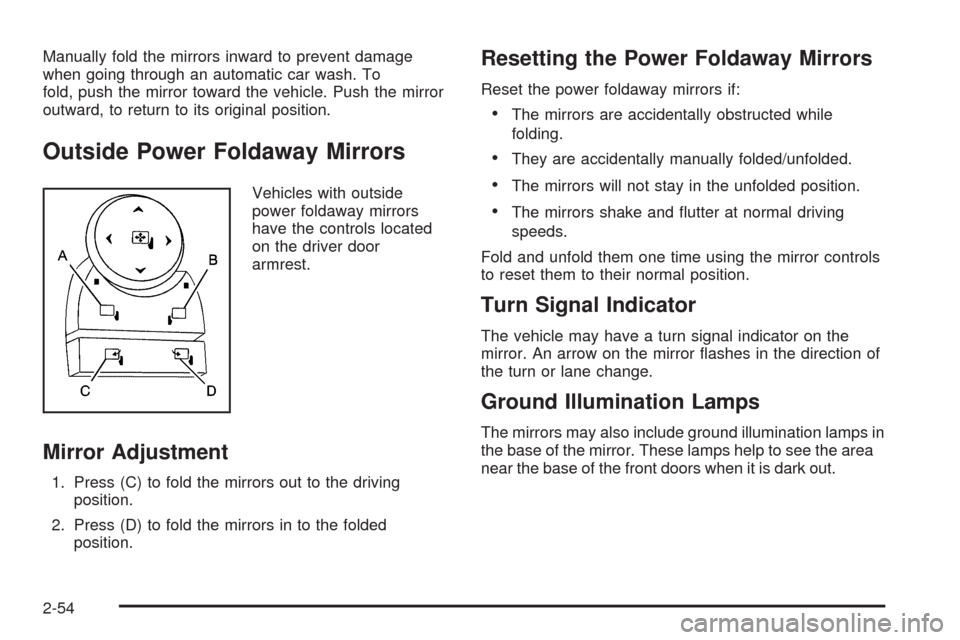
Vehicles with outside
power foldaway mirrors
have the controls located
on the driver door
armrest.
Mirror Adjustment
1. Press (C) to fold the mirrors out to the driving
position.
2. Press (D) to fold the mirrors in to the folded
position.
Resetting the Power Foldaway Mirrors
Reset the power foldaway mirrors if:
The mirrors are accidentally obstructed while
folding.
They are accidentally manually folded/unfolded.
The mirrors will not stay in the unfolded position.
The mirrors shake and �utter at normal driving
speeds.
Fold and unfold them one time using the mirror controls
to reset them to their normal position.
Turn Signal Indicator
The vehicle may have a turn signal indicator on the
mirror. An arrow on the mirror �ashes in the direction of
the turn or lane change.
Ground Illumination Lamps
The mirrors may also include ground illumination lamps in
the base of the mirror. These lamps help to see the area
near the base of the front doors when it is dark out.
2-54
Page 173 of 574
When the System Does Not Seem To
Work Properly
The rear vision camera system might not work properly
or display a clear image if:
The RVC is turned off. See “Turning the Rear
Camera System On or Off” earlier in this section.
It is dark.
The sun or the beam of headlights is shining
directly into the camera lens.
Ice, snow, mud, or anything else builds up on the
camera lens. Clean the lens, rinse it with water,
and wipe it with a soft cloth.
The back of the vehicle is in an accident, the
position and mounting angle of the camera
can change or the camera can be affected. Be sure
to have the camera and its position and mounting
angle checked at your dealer/retailer.
There are extreme temperature changes.The rear vision camera system display in the rearview
mirror may turn off or not appear as expected due to one
of the following conditions. If this occurs the left
indicator light on the mirror will �ash.
A slow �ash may indicate a loss of video signal, or
no video signal present during the reverse cycle.
A fast �ash may indicate that the display has been
on for the maximum allowable time during a
reverse cycle, or the display has reached an Over
Temperature limit.
The fast �ash conditions are used to protect the
video device from high temperature conditions. Once
conditions return to normal the device will reset
and the green indicator will stop �ashing.
During any of these fault conditions, the display will be
blank and the indicator will continue to �ash as long
as the vehicle is in R (Reverse) or until the conditions
return to normal.
Pressing and holding
zwhen the left indicator light is
�ashing will turn off the video display along with the
left indicator light.
2-67
Page 177 of 574
Location information about the vehicle is only available
if the GPS satellite signals are unobstructed and
available.
The vehicle must have a working electrical system,
including adequate battery power, for the OnStar
equipment to operate. There are other problems OnStar
cannot control that may prevent OnStar from providing
OnStar service at any particular time or place. Some
examples are damage to important parts of the vehicle
in a crash, hills, tall buildings, tunnels, weather or
wireless phone network congestion.
Your Responsibility
Increase the volume of the radio if the OnStar advisor
cannot be heard. If the light next to the OnStar buttons is
red, the system may not be functioning properly.
Press the OnStar button and request a vehicle
diagnostic. If the light appears clear (no light is
appearing), your OnStar subscription has expired and
all services have been deactivated. Press the OnStar
button to con�rm that the OnStar equipment is active.
Universal Home Remote
System
The Universal Home Remote System provides a way to
replace up to three hand-held Radio-Frequency (RF)
transmitters used to activate devices such as garage
door openers, security systems, and home lighting.
This device complies with Part 15 of the FCC Rules.
Operation is subject to the following two conditions:
1. This device may not cause harmful interference.
2. This device must accept any interference received,
including interference that may cause undesired
operation.
This device complies with RSS-210 of Industry Canada.
Operation is subject to the following two conditions:
1. This device may not cause interference.
2. This device must accept any interference received,
including interference that may cause undesired
operation of the device.
Changes or modi�cations to this system by other than
an authorized service facility could void authorization to
use this equipment.
2-71
Page 189 of 574

Instrument Panel Overview...............................3-4
Hazard Warning Flashers................................3-6
Horn .............................................................3-6
Tilt Wheel.....................................................3-6
Turn Signal/Multifunction Lever.........................3-7
Turn and Lane-Change Signals........................3-7
Headlamp High/Low-Beam Changer..................3-8
Flash-to-Pass.................................................3-8
Windshield Wipers..........................................3-9
Rainsense™ II Wipers.....................................3-9
Windshield Washer.......................................3-10
Rear Window Wiper/Washer...........................3-11
Cruise Control..............................................3-12
Exterior Lamps.............................................3-14
Headlamps on Reminder................................3-15
Daytime Running Lamps (DRL).......................3-16
Automatic Headlamp System..........................3-16
Fog Lamps ..................................................3-17
Auxiliary Roof Mounted Lamp.........................3-18
Instrument Panel Brightness...........................3-18
Dome Lamps ...............................................3-18
Dome Lamp Override....................................3-19
Entry Lighting...............................................3-19
Exit Lighting.................................................3-19
Reading Lamps............................................3-19
Electric Power Management...........................3-19
Battery Run-Down Protection..........................3-20Accessory Power Outlet(s).............................3-20
Ashtray(s) and Cigarette Lighter......................3-21
Climate Controls............................................3-22
Climate Control System.................................3-22
Dual Automatic Climate Control System...........3-24
Outlet Adjustment.........................................3-30
Rear Air Conditioning and Heating System.......3-31
Rear Air Conditioning and Heating System
and Electronic Climate Controls
...................3-32
Warning Lights, Gages, and Indicators............3-34
Instrument Panel Cluster................................3-35
Speedometer and Odometer...........................3-36
Trip Odometer..............................................3-36
Tachometer.................................................3-36
Safety Belt Reminders...................................3-36
Airbag Readiness Light..................................3-37
Passenger Airbag Status Indicator...................3-38
Charging System Light..................................3-39
Voltmeter Gage............................................3-39
Brake System Warning Light..........................3-40
Antilock Brake System (ABS) Warning Light.....3-41
StabiliTrak
®Indicator Light.............................3-42
Engine Coolant Temperature Gage..................3-42
Tire Pressure Light.......................................3-43
Malfunction Indicator Lamp.............................3-43
Oil Pressure Gage........................................3-46
Section 3 Instrument Panel
3-1
Page 195 of 574

Turn Signal/Multifunction Lever
The lever on the left side of the steering column
includes the following:
G:Turn and Lane Change Signals
53:Headlamp High/Low-Beam Changer
N:Windshield Wipers
L:Windshield Washer
5:Rear Wiper Delay
Z:Rear Wiper
=:Rear Wiper Wash
Flash-to-Pass.
Information for these features is on the pages following.
Turn and Lane-Change Signals
An arrow on the instrument
panel cluster �ashes in the
direction of the turn or
lane change.
Move the lever all the way up or down to signal a turn.
Raise or lower the lever for less than one second
until the arrow starts to �ash to signal a lane change.
This causes the turn signals to automatically �ash three
times. It will �ash six times if tow-haul mode is active.
Holding the turn signal lever for more than one second
will cause the turn signals to �ash until you release
the lever.
The lever returns to its starting position whenever it is
released.
3-7