2009 CHEVROLET TAHOE tow
[x] Cancel search: towPage 157 of 574

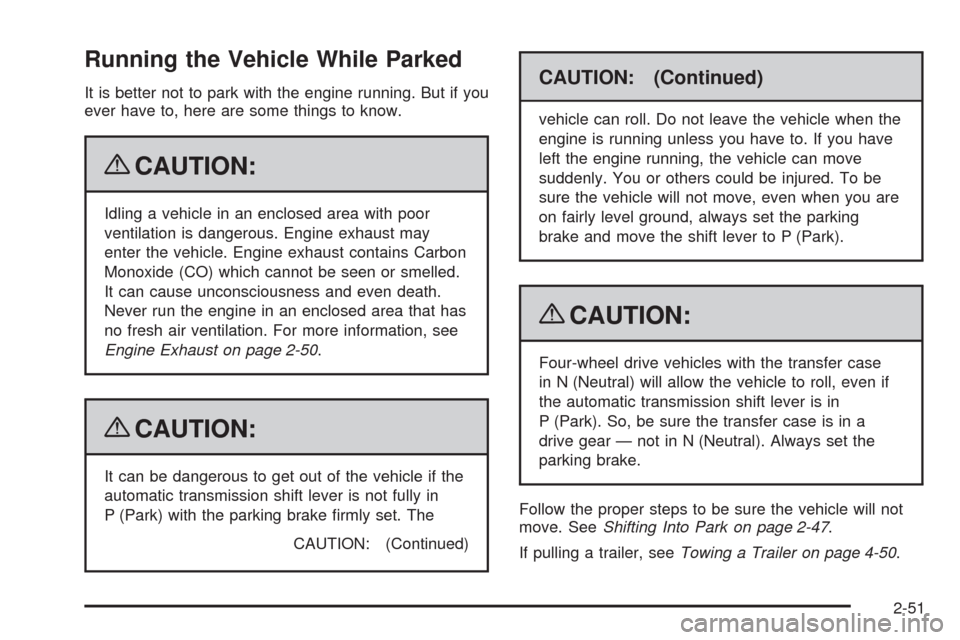
Running the Vehicle While Parked
It is better not to park with the engine running. But if you
ever have to, here are some things to know.
{CAUTION:
Idling a vehicle in an enclosed area with poor
ventilation is dangerous. Engine exhaust may
enter the vehicle. Engine exhaust contains Carbon
Monoxide (CO) which cannot be seen or smelled.
It can cause unconsciousness and even death.
Never run the engine in an enclosed area that has
no fresh air ventilation. For more information, see
Engine Exhaust on page 2-50.
{CAUTION:
It can be dangerous to get out of the vehicle if the
automatic transmission shift lever is not fully in
P (Park) with the parking brake �rmly set. The
CAUTION: (Continued)
CAUTION: (Continued)
vehicle can roll. Do not leave the vehicle when the
engine is running unless you have to. If you have
left the engine running, the vehicle can move
suddenly. You or others could be injured. To be
sure the vehicle will not move, even when you are
on fairly level ground, always set the parking
brake and move the shift lever to P (Park).
{CAUTION:
Four-wheel drive vehicles with the transfer case
in N (Neutral) will allow the vehicle to roll, even if
the automatic transmission shift lever is in
P (Park). So, be sure the transfer case is in a
drive gear — not in N (Neutral). Always set the
parking brake.
Follow the proper steps to be sure the vehicle will not
move. SeeShifting Into Park on page 2-47.
If pulling a trailer, seeTowing a Trailer on page 4-50.
2-51
Page 158 of 574

Mirrors
Manual Rearview Mirror
Hold the inside rearview mirror in the center to move it
for a clearer view behind your vehicle. Adjust the
mirror to avoid glare from the headlamps behind you.
Push the tab forward for daytime use and pull it for
nighttime use.
Automatic Dimming Rearview Mirror
The vehicle has an automatic dimming inside rearview
mirror.
Vehicles with OnStar
®have three additional control
buttons for the OnStar®system. See your dealer/retailer
for more information about OnStar®and how to
subscribe to it. SeeOnStar®System on page 2-68for
more information about the services OnStar®provides.
O(On/Off):Press to turn the dimming feature on
or off.
The vehicle may also have a Rear Vision Camera
(RVC). SeeRear Vision Camera (RVC) on page 2-62
for more information.If the vehicle has RVC, the
O(On/Off) button for
turning the automatic dimming feature on or off will not
be available.
Automatic Dimming Mirror Operation
Automatic dimming reduces the glare from the
headlamps of the vehicle behind you. The dimming
feature comes on and the indicator light illuminates each
time the ignition is turned to start.
Cleaning the Mirror
Do not spray glass cleaner directly on the mirror. Use a
soft towel dampened with water.
Outside Manual Mirrors
Adjust the outside mirrors to see the side of the vehicle
and have a clear view of objects behind you.
Manually fold the mirrors inward to prevent damage
when going through an automatic car wash. To
fold, push the mirror toward the vehicle. Push the mirror
outward, to return to its original position.
Using hood-mounted air de�ectors and add-on convex
mirror attachments could decrease mirror performance.
2-52
Page 159 of 574

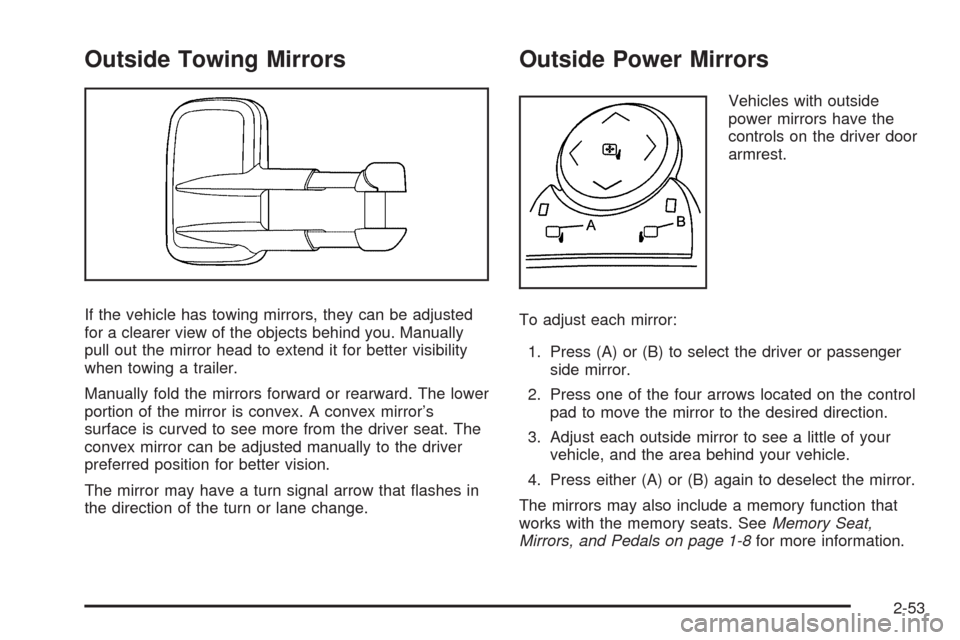
Outside Towing Mirrors
If the vehicle has towing mirrors, they can be adjusted
for a clearer view of the objects behind you. Manually
pull out the mirror head to extend it for better visibility
when towing a trailer.
Manually fold the mirrors forward or rearward. The lower
portion of the mirror is convex. A convex mirror’s
surface is curved to see more from the driver seat. The
convex mirror can be adjusted manually to the driver
preferred position for better vision.
The mirror may have a turn signal arrow that �ashes in
the direction of the turn or lane change.
Outside Power Mirrors
Vehicles with outside
power mirrors have the
controls on the driver door
armrest.
To adjust each mirror:
1. Press (A) or (B) to select the driver or passenger
side mirror.
2. Press one of the four arrows located on the control
pad to move the mirror to the desired direction.
3. Adjust each outside mirror to see a little of your
vehicle, and the area behind your vehicle.
4. Press either (A) or (B) again to deselect the mirror.
The mirrors may also include a memory function that
works with the memory seats. SeeMemory Seat,
Mirrors, and Pedals on page 1-8for more information.
2-53
Page 160 of 574

Manually fold the mirrors inward to prevent damage
when going through an automatic car wash. To
fold, push the mirror toward the vehicle. Push the mirror
outward, to return to its original position.
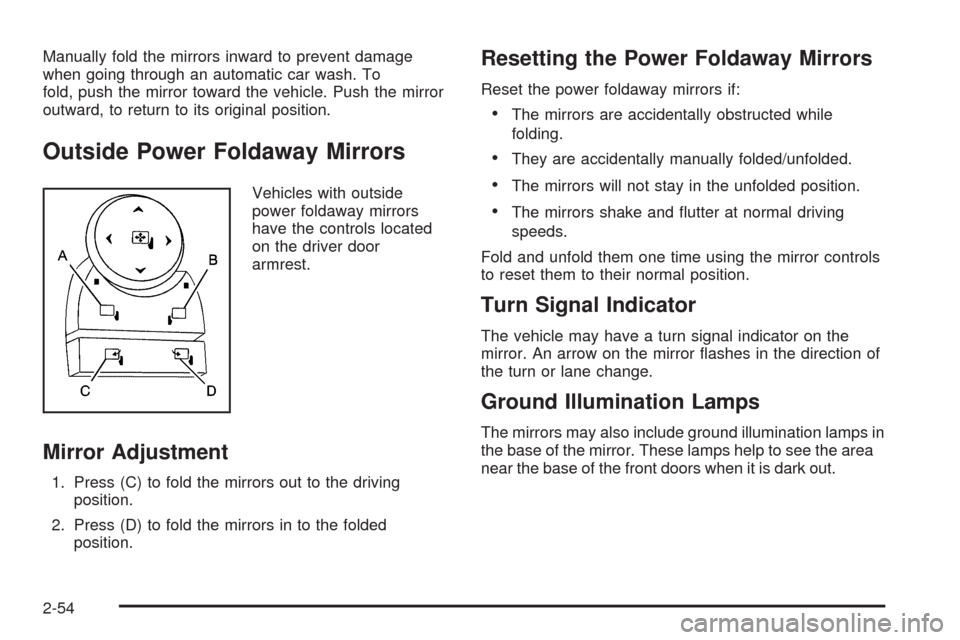
Outside Power Foldaway Mirrors
Vehicles with outside
power foldaway mirrors
have the controls located
on the driver door
armrest.
Mirror Adjustment
1. Press (C) to fold the mirrors out to the driving
position.
2. Press (D) to fold the mirrors in to the folded
position.
Resetting the Power Foldaway Mirrors
Reset the power foldaway mirrors if:
The mirrors are accidentally obstructed while
folding.
They are accidentally manually folded/unfolded.
The mirrors will not stay in the unfolded position.
The mirrors shake and �utter at normal driving
speeds.
Fold and unfold them one time using the mirror controls
to reset them to their normal position.
Turn Signal Indicator
The vehicle may have a turn signal indicator on the
mirror. An arrow on the mirror �ashes in the direction of
the turn or lane change.
Ground Illumination Lamps
The mirrors may also include ground illumination lamps in
the base of the mirror. These lamps help to see the area
near the base of the front doors when it is dark out.
2-54
Page 164 of 574

The system can be
disabled by pressing the
rear park aid disable button
located next to the radio.
The indicator light will come on and PARK ASSIST OFF
displays on the Driver Information Center (DIC) to
indicate that URPA is off, seeDIC Warnings and
Messages on page 3-64for information about clearing
the message.
When the System Does Not Seem to
Work Properly
If the URPA system will not activate due to a temporary
condition, the message PARK ASSIST OFF will be
displayed on the DIC and a red light will be shown on
the rear URPA display when the shift lever is moved into
R (Reverse). This occurs under the following conditions:
The driver disables the system.
The ultrasonic sensors are not clean. Keep the
vehicle’s rear bumper free of mud, dirt, snow,
ice and slush. For cleaning instructions, see
Washing Your Vehicle on page 5-109.
A trailer was attached to the vehicle, or a bicycle or
an object was hanging out of the liftgate during the
last drive cycle, the red light may illuminate in
the rear display. Once the attached object is
removed, URPA will return to normal operation.
A tow bar is attached to the vehicle.
The vehicle’s bumper is damaged. Take the vehicle
to your dealer/retailer to repair the system.
Other conditions may affect system performance,
such as vibrations from a jackhammer or the
compression of air brakes on a very large truck.
If the system is still disabled, after driving forward at
least 15 mph (25 km/h), take the vehicle to your
dealer/retailer.
Side Blind Zone Alert (SBZA)
The vehicle may have a Side Blind Zone Alert (SBZA)
system. Read this entire section before using the
system.
The SBZA system operates on a radio frequency
subject to Federal Communications Commission (FCC)
Rules and with Industry Canada.
2-58
Page 166 of 574

SBZA Detection Zones
The SBZA sensor covers a zone of approximately one
lane over from both sides of the vehicle, 11 ft. or
3.5 m. This zone starts at each side mirror and goes
back approximately 16 ft. (5.0 m). The height of the zone
is approximately between 1.5 ft. (0.5 m) and 6 ft. (2.0 m)
off the ground.
Use caution while changing lanes when towing a trailer,
as the SBZA detection zones do not change when a
trailer is towed.
How the System Works
When the vehicle is started, both outside mirror displays
will brie�y come on to indicate that the system is
operating. When the vehicle is moving forward, the left
or right side mirror SBZA display will light up if a
vehicle is detected in that blind zone. If the turn signal is
activated and a vehicle is also detected on the same
side, the SBZA display will �ash to give you extra
warning not to change lanes.
SBZA displays do not come on while the vehicle is
approaching or passing other vehicles. At speeds
greater then 20 mph (32 km/h), SBZA displays may
come on when a vehicle you have passed remains in or
drops back into the detection zone.
Left Side Mirror DisplayRight Side Mirror
Display
2-60
Page 186 of 574

Rear Seat Armrest
For vehicle with a rear seat armrest, pull the loop at the
top of the armrest down to access the cupholders.
Cargo Cover
{CAUTION:
An improperly stored cargo cover could be thrown
about the vehicle during a collision or sudden
maneuver. Someone could be injured. If the cover
is removed, always store it in the proper storage
location. When it is replaced, always be sure that
it is securely reattached.
To use the cover cover, for vehicles that have it:
1. Pull the cover handle toward the rear of the vehicle.
2. Latch the cover posts into the retaining sockets
on the cargo area trim panels.To return the cover to the retracted position:
1. Pull up on the cover handle to release the cover
posts from the retaining sockets.
2. Let the cover move forward to the full retracted
position.
To remove the cover, from a regular wheelbase model:
1. Let the cover go all the way into the holder.
2. Then, grasping the driver’s side cover end cap,
push the cover end cap toward the passenger
side of the vehicle.
3. Swing the cover rearward and take it out of the
vehicle.
To put the cover in the vehicle:
1. Make sure the cover slot in the holder faces
rearward with the round surface facing down.
2. Then, hold the cover at an angle and place the
cover end cap into the slot in the passenger side
trim panel.
3. Move the other end of the cover forward and hold it
next to the driver’s side trim panel slot.
2-80
Page 190 of 574

Oil Pressure Light.........................................3-48
Security Light...............................................3-48
Fog Lamp Light............................................3-49
Cruise Control Light......................................3-49
Highbeam On Light.......................................3-49
Tow/Haul Mode Light....................................3-49
Fuel Gage...................................................3-50
Low Fuel Warning Light.................................3-51
Driver Information Center (DIC).......................3-51
DIC Operation and Displays
(With DIC Buttons)....................................3-52
DIC Operation and Displays
(Without DIC Buttons)................................3-58
DIC Compass..............................................3-61
DIC Warnings and Messages.........................3-64
DIC Vehicle Customization
(With DIC Buttons)....................................3-74Audio System(s).............................................3-82
Setting the Clock..........................................3-83
Radio(s)......................................................3-85
Using an MP3 (Radio with CD or
Six-Disc CD Player).................................3-104
Using an MP3 (Radio with CD and
DVD Player)...........................................3-108
XM Radio Messages...................................3-113
Navigation/Radio System..............................3-114
Bluetooth
®.................................................3-115
Rear Seat Entertainment (RSE) System.........3-125
Rear Seat Audio (RSA)................................3-135
Theft-Deterrent Feature................................3-137
Audio Steering Wheel Controls......................3-137
Radio Reception.........................................3-138
Rear Side Window Antenna..........................3-139
XM™ Satellite Radio Antenna System............3-139
Section 3 Instrument Panel
3-2