2009 CHEVROLET TAHOE battery
[x] Cancel search: batteryPage 262 of 574

DIC Vehicle Customization
(With DIC Buttons)
Your vehicle may have customization capabilities that
allow you to program certain features to one preferred
setting. Customization features can only be programmed
to one setting on the vehicle and cannot be programmed
to a preferred setting for two different drivers.
All of the customization options may not be available on
your vehicle. Only the options available will be
displayed on the DIC.
The default settings for the customization features were
set when your vehicle left the factory, but may have
been changed from their default state since then.
The customization preferences are automatically
recalled.
To change customization preferences, use the following
procedure.
Entering the Feature Settings Menu
1. Turn the ignition on and place the vehicle in P (Park).
To avoid excessive drain on the battery, it is
recommended that the headlamps are turned off.
2. Press the customization button to scroll through the
available customizable options.
Feature Settings Menu Items
The following are customization features that allow you
to program settings to the vehicle:
DISPLAY IN ENGLISH
This feature will only display if a language other than
English has been set. This feature allows you to change
the language in which the DIC messages appear to
English.
Press the customization button until the PRESS
VTO
DISPLAY IN ENGLISH screen appears on the DIC
display. Press the set/reset button once to display all
DIC messages in English.
DISPLAY LANGUAGE
This feature allows you to select the language in which
the DIC messages will appear.
Press the customization button until the DISPLAY
LANGUAGE screen appears on the DIC display. Press
the set/reset button once to access the settings for
this feature. Then press the customization button
to scroll through the following settings:
ENGLISH (default):All messages will appear in English.
FRANCAIS:All messages will appear in French.
ESPANOL:All messages will appear in Spanish.
3-74
Page 291 of 574
To use a portable audio player, connect a 3.5 mm
(1/8 inch) cable to the radio’s front auxiliary input jack.
When a device is connected, press the radio CD/AUX
button to begin playing audio from the device over
the vehicle speakers.
For optimal sound quality, increase the portable audio
device’s volume to the loudest level.
It is always best to power the portable audio device
through its own battery while playing.
O(Power/Volume):Turn clockwise or
counterclockwise to increase or decrease the volume of
the portable player. Additional volume adjustments
might have to be made from the portable device if the
volume is not loud or soft enough.
BAND:Press to listen to the radio when a portable
audio device is playing. The portable audio device also
continues to play.
CD/AUX (CD/Auxiliary):Press to play a CD when a
portable audio device is playing. Press again and
the system begins playing audio from the connected
portable audio player. If a portable audio player is
not connected, “No Input Device Found” displays.DVD/CD AUX (CD/Auxiliary):Press this button to
cycle through DVD, CD, or Auxiliary when listening to
the radio. The DVD/CD text label and a message
showing track or chapter number displays when a disc
is in either slot. Press this button again and the
system automatically searches for an auxiliary input
device, such as a portable audio player. If a portable
audio player is not connected, “No Aux Input Device”
displays. If a disc is in both the DVD slot and the CD slot
the DVD/CD AUX button cycles between the two
sources and does not indicate “No Aux Input Device”. If
a front auxiliary device is connected, the DVD/CD AUX
button cycles through all available options, such as:
DVD slot, CD slot, Front Auxiliary, and Rear Auxiliary (if
available). See “Using the Auxiliary Input Jack(s)”
later in this section, or “Audio/Video (A/V) Jacks” under,
Rear Seat Entertainment (RSE) System on page 3-125
for more information.
3-103
Page 315 of 574
Push the power button to turn on the headphones. An
indicator light located on the headphones comes
on. If the light comes on but there is intermittent sound
and/or static on the headphones, or if the indicator
light does not come on, the batteries might need to be
replaced. See “Battery Replacement” later in this
section for more information. Switch the headphones to
Off when not in use.
Infrared transmitters are located at the rear of the RSE
overhead console. The headphones shut off
automatically to save the battery power if the RSE
system and RSA are shut off or if the headphones are
out of range of the transmitters for more than
three minutes. If you move too far forward or step out of
the vehicle, the headphones lose the audio signal.
The headphones automatically turn off after four hours
of continuous use.
To adjust the volume on the headphones, use the
volume control located on the right side.
For optimal audio performance, the headphones must
be worn correctly. The symbol L (Left) appears on
the upper left side, above the ear pad and should be
positioned on the left ear. The symbol R (Right) appears
on the upper right side, above the ear pad and should
be positioned on the right ear.Notice:Do not store the headphones in heat or
direct sunlight. This could damage the headphones
and repairs will not be covered by the warranty.
Storage in extreme cold can weaken the batteries.
Keep the headphones stored in a cool, dry place.
If the foam ear pads attached to the headphones
become worn or damaged, the pads can be replaced
separately from the headphone set. See your
dealer/retailer for more information.
Battery Replacement
To change the batteries on the headphones:
1. Turn the screw to loosen the battery door located
on the left side of the headphones. Slide the
battery door open.
2. Replace the two batteries in the compartment.
Make sure that they are installed correctly, using
the diagram on the inside of the battery
compartment.
3. Replace the battery door and tighten the door
screw.
If the headphones are to be stored for a long period of
time, remove the batteries and keep them in a cool,
dry place.
3-127
Page 318 of 574
Remote Control
To use the remote control, aim it at the transmitter
window at the rear of the overhead console and press
the desired button. Direct sunlight or very bright light
could affect the ability of the RSE transmitter to receive
signals from the remote control. If the remote control
does not seem to be working, the batteries might need
to be replaced. See “Battery Replacement” later in
this section. Objects blocking the line of sight could also
affect the function of the remote control.
If a CD or DVD is in the Radio DVD slot, the remote
control power button can be used to turn on the video
screen display and start the disc. The radio can also
turn on the video screen display. SeeRadio(s) on
page 3-85for more information.
Notice:Storing the remote control in a hot area or
in direct sunlight can damage it, and the repairs
will not be covered by the warranty. Storage
in extreme cold can weaken the batteries. Keep the
remote control stored in a cool, dry place.
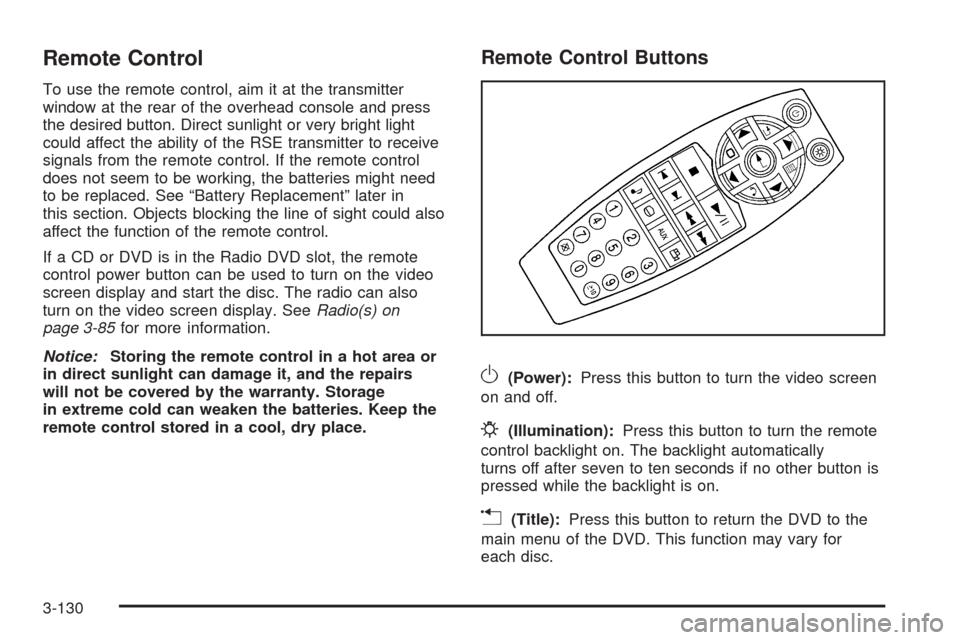
Remote Control Buttons
O(Power):Press this button to turn the video screen
on and off.
P(Illumination):Press this button to turn the remote
control backlight on. The backlight automatically
turns off after seven to ten seconds if no other button is
pressed while the backlight is on.
v(Title):Press this button to return the DVD to the
main menu of the DVD. This function may vary for
each disc.
3-130
Page 321 of 574

Battery Replacement
To change the remote control batteries:
1. Slide the rear cover back on to the remote control.
2. Replace the two batteries in the compartment. Make
sure that they are installed correctly, using the
diagram on the inside of the battery compartment.
3. Replace the battery cover.
If the remote control is to be stored for a long period of
time, remove the batteries and keep them in a cool,
dry place.
Problem Recommended Action
No power. The ignition might not be
turned ON/RUN or in
ACC/ACCESSORY.
The picture does not �ll the
screen. There are black
borders on the top and
bottom or on both sides or
it looks stretched out.Check the display mode
settings in the setup menu
by pressing the display
menu button on the remote
control.
In auxiliary mode, the
picture moves or scrolls.Check the auxiliary input
connections at both
devices.
Problem Recommended Action
The remote control does
not work.Check to make sure there
is no obstruction between
the remote control and the
transmitter window.
Check the batteries to
make sure they are not
dead or installed
incorrectly.
After stopping the player,
I push Play but sometimes
the DVD starts where I left
off and sometimes at the
beginning.If the stop button was
pressed one time, the
DVD player resumes
playing where the DVD
was stopped. If the stop
button was pressed two
times the DVD player
begins to play from the
beginning of the DVD.
The auxiliary source is
running but there is no
picture or sound.Check that the RSE video
screen is in the auxiliary
source mode.
Check the auxiliary input
connections at both
devices.
3-133
Page 326 of 574
¨(Seek):Press to go to the next radio station while in
AM, FM, or XM™. Press
¨to go to the next track
or chapter while sourced to the CD or DVD slot. Press
the
¨if multiple discs are loaded to go to the next
disc while sourced to a CD player.
Radio Reception
Frequency interference and static can occur during
normal radio reception if items such as cell phone
chargers, vehicle convenience accessories, and external
electronic devices are plugged into the accessory
power outlet. If there is interference or static, unplug
the item from the accessory power outlet.
AM
The range for most AM stations is greater than for FM,
especially at night. The longer range can cause
station frequencies to interfere with each other. For
better radio reception, most AM radio stations boost the
power levels during the day, and then reduce these
levels during the night. Static can also occur when
things like storms and power lines interfere with radio
reception. When this happens, try reducing the treble on
the radio.
FM Stereo
FM signals only reach about 10 to 40 miles
(16 to 65 km). Although the radio has a built-in electronic
circuit that automatically works to reduce interference,
some static can occur, especially around tall buildings or
hills, causing the sound to fade in and out.
XM™ Satellite Radio Service
XM Satellite Radio Service gives digital radio reception
from coast-to-coast in the 48 contiguous United
States, and in Canada. Just as with FM, tall buildings or
hills can interfere with satellite radio signals, causing
the sound to fade in and out. In addition, traveling
or standing under heavy foliage, bridges, garages, or
tunnels may cause loss of the XM signal for a period
of time.
Cellular Phone Usage
Cellular phone usage may cause interference with the
vehicle’s radio. This interference may occur when
making or receiving phone calls, charging the phone’s
battery, or simply having the phone on. This interference
causes an increased level of static while listening to
the radio. If static is received while listening to the radio,
unplug the cellular phone and turn it off.
3-138
Page 359 of 574

To save fuel, run the engine for only short periods as
needed to warm the vehicle and then shut the engine off
and close the window most of the way to save heat.
Repeat this until help arrives but only when you
feel really uncomfortable from the cold. Moving about
to keep warm also helps.
If it takes some time for help to arrive, now and then
when you run the engine, push the accelerator
pedal slightly so the engine runs faster than the idle
speed. This keeps the battery charged to restart
the vehicle and to signal for help with the headlamps.
Do this as little as possible to save fuel.
If Your Vehicle is Stuck in Sand,
Mud, Ice, or Snow
Slowly and cautiously spin the wheels to free the
vehicle when stuck in sand, mud, ice, or snow. See
Rocking Your Vehicle to Get It Out on page 4-32.
If the vehicle has a traction system, it can often help to
free a stuck vehicle. Refer to the vehicle’s traction
system in the Index. If stuck too severely for the traction
system to free the vehicle, turn the traction system off
and use the rocking method.
{CAUTION:
If you let your vehicle’s tires spin at high speed,
they can explode, and you or others could be
injured. The vehicle can overheat, causing an
engine compartment �re or other damage. Spin
the wheels as little as possible and avoid going
above 35 mph (55 km/h) as shown on the
speedometer.
For information about using tire chains on the vehicle,
seeTire Chains on page 5-84.
4-31
Page 398 of 574
Trailer Wiring Harness
The vehicle is equipped with the following wiring
harnesses for towing a trailer.
Basic Trailer Wiring
The trailer wiring harness, with a seven-pin connector,
is located at the rear of the vehicle and is tied to
the vehicle’s frame. The harness connector can be
plugged into a seven-pin universal heavy-duty trailer
connector available through your dealer/retailer.
The seven-wire harness contains the following trailer
circuits:
Yellow: Left Stop/Turn Signal
Dark Green: Right Stop/Turn Signal
Brown: Taillamps
White: Ground
Light Green: Back-up Lamps
Red: Battery Feed*
Dark Blue: Trailer Brake*
*The fuses for these two circuits are installed in the
underhood electrical center, but the wires are not
connected. They should be connected by your
dealer/retailer or a quali�ed service center.
Heavy-Duty Trailer Wiring Harness
Package
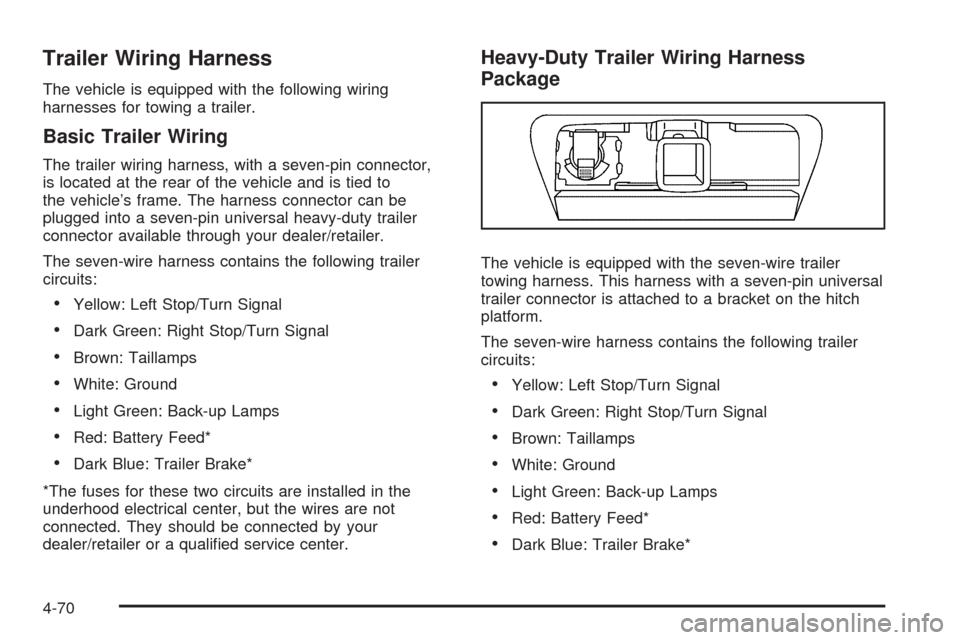
The vehicle is equipped with the seven-wire trailer
towing harness. This harness with a seven-pin universal
trailer connector is attached to a bracket on the hitch
platform.
The seven-wire harness contains the following trailer
circuits:
Yellow: Left Stop/Turn Signal
Dark Green: Right Stop/Turn Signal
Brown: Taillamps
White: Ground
Light Green: Back-up Lamps
Red: Battery Feed*
Dark Blue: Trailer Brake*
4-70