2009 CHEVROLET SUBURBAN wheel
[x] Cancel search: wheelPage 154 of 578
Leaving the Vehicle With the Engine
Running
{CAUTION:
It can be dangerous to leave the vehicle with the
engine running. The vehicle could move suddenly
if the shift lever is not fully in P (Park) with the
parking brake �rmly set.
If you have four-wheel drive and the transfer case is
in N (Neutral), the vehicle will be free to roll, even if
the shift lever is in P (Park). So be sure the transfer
case is in a drive gear — not in N (Neutral).
And, if you leave the vehicle with the engine
running, it could overheat and even catch �re.
You or others could be injured. Do not leave the
vehicle with the engine running unless you have to.If you have to leave the vehicle with the engine running,
be sure your vehicle is in P (Park) and the parking brake
is �rmly set before you leave it. After you move the shift
lever into P (Park), hold the regular brake pedal down.
Then, see if you can move the shift lever away from
P (Park) without �rst pulling it toward you. If you can, it
means that the shift lever was not fully locked into
P (Park).
Torque Lock
If you are parking on a hill and you do not shift your
transmission into P (Park) properly, the weight of
the vehicle may put too much force on the parking pawl
in the transmission. You may �nd it difficult to pull the
shift lever out of P (Park). This is called torque lock.
To prevent torque lock, set the parking brake and
then shift into P (Park) properly before you leave the
driver seat. To �nd out how, seeShifting Into Park
on page 2-47.
When you are ready to drive, move the shift lever out of
P (Park) before you release the parking brake.
If torque lock does occur, you may need to have another
vehicle push yours a little uphill to take some of the
pressure from the parking pawl in the transmission, then
you will be able to pull the shift lever out of P (Park).
2-48
Page 157 of 578
Running the Vehicle While Parked
It is better not to park with the engine running. But if you
ever have to, here are some things to know.
{CAUTION:
Idling a vehicle in an enclosed area with poor
ventilation is dangerous. Engine exhaust may
enter the vehicle. Engine exhaust contains Carbon
Monoxide (CO) which cannot be seen or smelled.
It can cause unconsciousness and even death.
Never run the engine in an enclosed area that has
no fresh air ventilation. For more information, see
Engine Exhaust on page 2-50.
{CAUTION:
It can be dangerous to get out of the vehicle if the
automatic transmission shift lever is not fully in
P (Park) with the parking brake �rmly set.
CAUTION: (Continued)
CAUTION: (Continued)
The vehicle can roll. Do not leave the vehicle
when the engine is running unless you have to.
If you have left the engine running, the vehicle
can move suddenly. You or others could be
injured. To be sure the vehicle will not move, even
when you are on fairly level ground, always set
the parking brake and move the shift lever to
P (Park).
{CAUTION:
Four-wheel drive vehicles with the transfer case in
N (Neutral) will allow the vehicle to roll, even if the
automatic transmission shift lever is in P (Park). So,
be sure the transfer case is in a drive gear — not in
N (Neutral). Always set the parking brake.
Follow the proper steps to be sure the vehicle will not
move. SeeShifting Into Park on page 2-47.
If pulling a trailer, seeTowing a Trailer on page 4-50.
2-51
Page 176 of 578
OnStar Virtual Advisor
OnStar Virtual Advisor is a feature of OnStar
Hands-Free Calling that uses minutes to access
location-based weather, local traffic reports, and
stock quotes. Press the phone button and give a
few simple voice commands to browse through the
various topics. See the OnStar Owner’s Guide for
more information. This feature is only available in
the continental U.S.
OnStar Steering Wheel Controls
This vehicle may have a Talk/Mute button that can
be used to interact with OnStar Hands-Free Calling.
SeeAudio Steering Wheel Controls on page 3-138for
more information.
On some vehicles, the mute button can be used to dial
numbers into voice mail systems, or to dial phone
extensions. See the OnStar Owner’s Guide for more
information.
How OnStar Service Works
The OnStar system can record and transmit vehicle
information. This information is automatically sent to an
OnStar Call Center when the OnStar button is pressed,
the emergency button is pressed, or if the airbags or
AACN system deploy. This information usually includes
the vehicle’s GPS location and, in the event of a crash,
additional information regarding the crash that the vehicle
was involved in (e.g. the direction from which the vehicle
was hit). When the Virtual Advisor feature of OnStar
Hands-Free Calling is used, the vehicle also sends
OnStar the vehicle’s GPS location so they can provide
services where it is located.
OnStar service cannot work unless the vehicle is in a
place where OnStar has an agreement with a wireless
service provider for service in that area. OnStar service
also cannot work unless the vehicle is in a place where
the wireless service provider OnStar has hired for that
area has coverage, network capacity and reception when
the service is needed, and technology that is compatible
with the OnStar service. Not all services are available
everywhere, particularly in remote or enclosed areas, or
at all times.
Location information about the vehicle is only available
if the GPS satellite signals are unobstructed and
available.
2-70
Page 186 of 578
Rear Storage Area
For vehicles with a rear storage area, it is located in the
rear cargo area of the vehicle on the driver’s side trim
panel.
Turn the knobs and swing the storage door to access
the storage compartment. The door can be removed.
Rear Seat Armrest
For vehicle with a rear seat armrest, pull the loop at the
top of the armrest down to access the cupholders.
Cargo Cover
{CAUTION:
An improperly stored cargo cover could be thrown
about the vehicle during a collision or sudden
maneuver. Someone could be injured. If the cover
is removed, always store it in the proper storage
location. When it is replaced, always be sure that it
is securely reattached.To use the cover, for vehicles that have it:
1. Pull the cover handle toward the rear of the vehicle.
2. Latch the cover posts into the retaining sockets
on the cargo area trim panels.
To return the cover to the retracted position:
1. Pull up on the cover handle to release the cover
posts from the retaining sockets.
2. Let the cover move forward to the full retracted
position.
To remove the cover, from a regular wheelbase model:
1. Let the cover go all the way into the holder.
2. Then, grasping the driver’s side cover end cap,
push the cover end cap toward the passenger
side of the vehicle.
3. Swing the cover rearward and take it out of the
vehicle.
2-80
Page 187 of 578
To put the cover in the vehicle:
1. Make sure the cover slot in the holder faces
rearward with the round surface facing down.
2. Then, hold the cover at an angle and place the
cover end cap into the slot in the passenger side
trim panel.
3. Move the other end of the cover forward and hold it
next to the driver’s side trim panel slot.
4. Press the end caps in, to allow the cover to �t into
the trim slot.
5. Pull lightly on the cover holder to make sure it is
secure.
On extended wheelbase models there are two
cover positions. The slots furthest forward allow the
cover to be used if the third seat is removed or
folded down. The cover can be installed and
removed from either side.Sunroof
Your vehicle may be equipped with a power sliding
sunroof. To open or close the sunroof, the ignition needs
to be turned to ON/RUN, or Retained Accessory Power
(RAP) must be active. When RAP is active, the sunroof
will work for 10 minutes after the ignition is turned off, or
until a front door is opened. SeeRetained Accessory
Power (RAP) on page 2-28for more information.
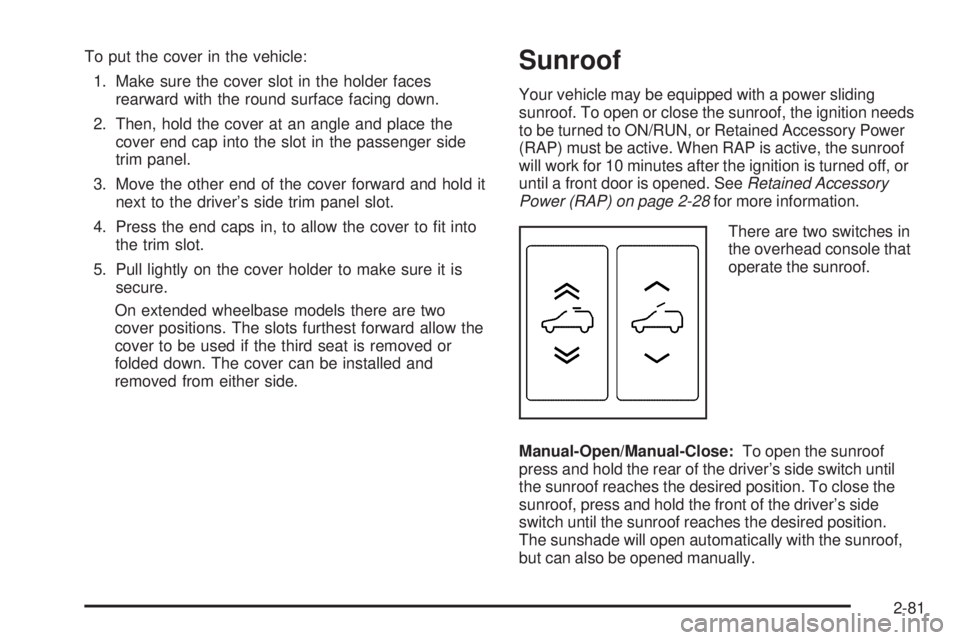
There are two switches in
the overhead console that
operate the sunroof.
Manual-Open/Manual-Close:To open the sunroof
press and hold the rear of the driver’s side switch until
the sunroof reaches the desired position. To close the
sunroof, press and hold the front of the driver’s side
switch until the sunroof reaches the desired position.
The sunshade will open automatically with the sunroof,
but can also be opened manually.
2-81
Page 189 of 578

Instrument Panel Overview...............................3-4
Hazard Warning Flashers................................3-6
Horn .............................................................3-6
Tilt Wheel.....................................................3-6
Turn Signal/Multifunction Lever.........................3-7
Turn and Lane-Change Signals........................3-7
Headlamp High/Low-Beam Changer..................3-8
Flash-to-Pass.................................................3-8
Windshield Wipers..........................................3-9
Rainsense™ II Wipers.....................................3-9
Windshield Washer.......................................3-10
Rear Window Wiper/Washer...........................3-11
Cruise Control..............................................3-12
Exterior Lamps.............................................3-14
Headlamps on Reminder................................3-15
Daytime Running Lamps (DRL).......................3-16
Automatic Headlamp System..........................3-16
Fog Lamps ..................................................3-17
Auxiliary Roof-Mounted Lamp.........................3-18
Instrument Panel Brightness...........................3-18
Dome Lamps ...............................................3-18
Dome Lamp Override....................................3-19
Entry Lighting...............................................3-19
Exit Lighting.................................................3-19
Reading Lamps............................................3-19
Electric Power Management...........................3-19
Battery Run-Down Protection..........................3-20Accessory Power Outlet(s).............................3-20
Ashtray(s) and Cigarette Lighter......................3-21
Climate Controls............................................3-22
Climate Control System.................................3-22
Dual Automatic Climate Control System...........3-24
Outlet Adjustment.........................................3-30
Rear Air Conditioning and Heating System.......3-31
Rear Air Conditioning and Heating System
and Electronic Climate Controls
...................3-32
Warning Lights, Gages, and Indicators............3-34
Instrument Panel Cluster................................3-35
Speedometer and Odometer...........................3-36
Trip Odometer..............................................3-36
Tachometer.................................................3-36
Safety Belt Reminders...................................3-36
Airbag Readiness Light..................................3-37
Passenger Airbag Status Indicator...................3-38
Charging System Light..................................3-39
Voltmeter Gage............................................3-39
Brake System Warning Light..........................3-40
Antilock Brake System (ABS) Warning Light.....3-41
StabiliTrak
®Indicator Light.............................3-42
Engine Coolant Temperature Gage..................3-42
Tire Pressure Light.......................................3-43
Malfunction Indicator Lamp.............................3-43
Oil Pressure Gage........................................3-46
Section 3 Instrument Panel
3-1
Page 190 of 578

Oil Pressure Light.........................................3-48
Security Light...............................................3-48
Fog Lamp Light............................................3-49
Cruise Control Light......................................3-49
Highbeam On Light.......................................3-49
Tow/Haul Mode Light....................................3-49
Fuel Gage...................................................3-50
Low Fuel Warning Light.................................3-51
Driver Information Center (DIC).......................3-51
DIC Operation and Displays
(With DIC Buttons)....................................3-52
DIC Operation and Displays
(Without DIC Buttons)................................3-58
DIC Compass..............................................3-61
DIC Warnings and Messages.........................3-64
DIC Vehicle Customization
(With DIC Buttons)....................................3-74Audio System(s).............................................3-83
Setting the Clock..........................................3-84
Radio(s)......................................................3-86
Using an MP3 (Radio with CD or
Six-Disc CD Player).................................3-105
Using an MP3 (Radio with CD and DVD
Player)...................................................3-109
XM Radio Messages...................................3-114
Navigation/Radio System..............................3-115
Bluetooth
®.................................................3-115
Rear Seat Entertainment (RSE) System.........3-127
Rear Seat Audio (RSA)................................3-136
Theft-Deterrent Feature................................3-138
Audio Steering Wheel Controls......................3-138
Radio Reception.........................................3-139
Rear Side Window Antenna..........................3-140
XM™ Satellite Radio Antenna System............3-140
Section 3 Instrument Panel
3-2
Page 193 of 578
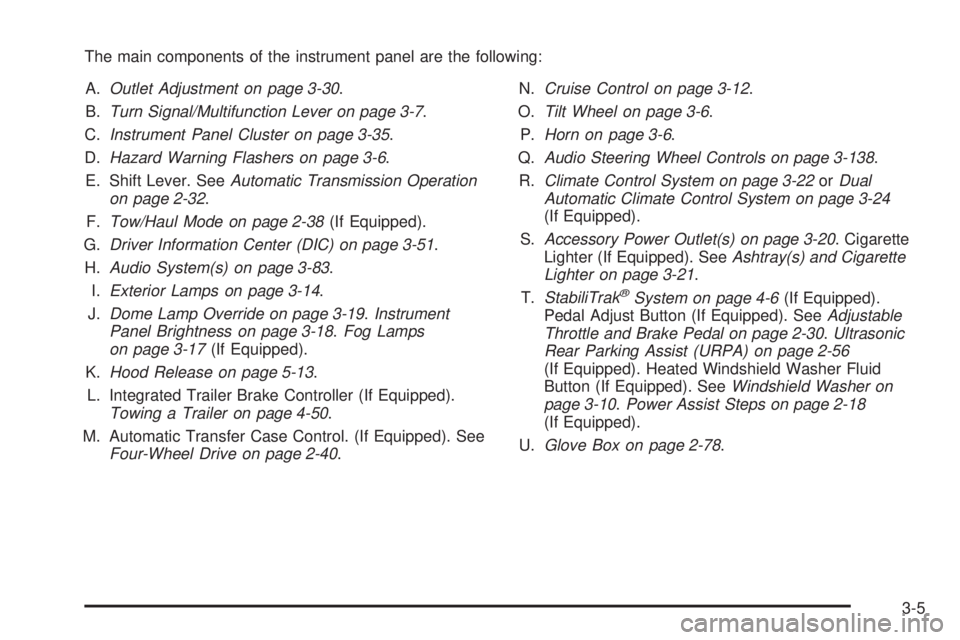
The main components of the instrument panel are the following:
A.Outlet Adjustment on page 3-30.
B.Turn Signal/Multifunction Lever on page 3-7.
C.Instrument Panel Cluster on page 3-35.
D.Hazard Warning Flashers on page 3-6.
E. Shift Lever. SeeAutomatic Transmission Operation
on page 2-32.
F.Tow/Haul Mode on page 2-38(If Equipped).
G.Driver Information Center (DIC) on page 3-51.
H.Audio System(s) on page 3-83.
I.Exterior Lamps on page 3-14.
J.Dome Lamp Override on page 3-19.Instrument
Panel Brightness on page 3-18.Fog Lamps
on page 3-17(If Equipped).
K.Hood Release on page 5-13.
L. Integrated Trailer Brake Controller (If Equipped).
Towing a Trailer on page 4-50.
M. Automatic Transfer Case Control. (If Equipped). See
Four-Wheel Drive on page 2-40.N.Cruise Control on page 3-12.
O.Tilt Wheel on page 3-6.
P.Horn on page 3-6.
Q.Audio Steering Wheel Controls on page 3-138.
R.Climate Control System on page 3-22orDual
Automatic Climate Control System on page 3-24
(If Equipped).
S.Accessory Power Outlet(s) on page 3-20. Cigarette
Lighter (If Equipped). SeeAshtray(s) and Cigarette
Lighter on page 3-21.
T.StabiliTrak
®System on page 4-6(If Equipped).
Pedal Adjust Button (If Equipped). SeeAdjustable
Throttle and Brake Pedal on page 2-30.Ultrasonic
Rear Parking Assist (URPA) on page 2-56
(If Equipped). Heated Windshield Washer Fluid
Button (If Equipped). SeeWindshield Washer on
page 3-10.Power Assist Steps on page 2-18
(If Equipped).
U.Glove Box on page 2-78.
3-5