2009 CHEVROLET SILVERADO fuel
[x] Cancel search: fuelPage 251 of 600
4. Press the trip/fuel button until the vehicle heading,
for example, N for North, is displayed in the DIC.
Or, if the vehicle does not have DIC buttons,
press and hold the trip odometer reset stem for
two seconds to select the next available variance
zone. Repeat this step until the appropriate variance
zone is displayed.
5. If calibration is necessary, calibrate the compass.
See “Compass Calibration Procedure” following.
Compass Calibration
The compass can be manually calibrated. Only calibrate
the compass in a magnetically clean and safe location,
such as an open parking lot, where driving the vehicle in
circles is not a danger. It is suggested to calibrate
away from tall buildings, utility wires, manhole covers, or
other industrial structures, if possible.
If CAL should ever appear in the DIC display, the
compass should be calibrated.
If the DIC display does not show a heading, for example,
N for North, or the heading does not change after
making turns, there may be a strong magnetic �eld
interfering with the compass. Such interference may be
caused by a magnetic CB or cell phone antenna
mount, a magnetic emergency light, magnetic note pad
holder, or any other magnetic item. Turn off the
vehicle, move the magnetic item, then turn on the
vehicle and calibrate the compass.To calibrate the compass, use the following procedure:
Compass Calibration Procedure
1. Before calibrating the compass, make sure the
compass zone is set to the variance zone in
which the vehicle is located. See “Compass
Variance (Zone) Procedure” earlier in this section.
Do not operate any switches such as window,
sunroof, climate controls, seats, etc. during
the calibration procedure.
2. Press the vehicle information button until PRESS
V
TO CALIBRATE COMPAS (Compass) displays.
Or, if the vehicle does not have DIC buttons, press
the trip odometer reset stem until CALIBRATE
COMPASS displays.
3. Press the set/reset button to start the compass
calibration. Or, if the vehicle does not have DIC
buttons, press and hold the trip odometer reset stem
for two seconds to start the compass calibration.
4. The DIC will display CALIBRATING: DRIVE IN
CIRCLES. Drive the vehicle in tight circles at
less than 5 mph (8 km/h) to complete the calibration.
The DIC will display CALIBRATION COMPLETE
for a few seconds when the calibration is
complete. The DIC display will then return to
the previous menu.
3-65
Page 255 of 600
This message also displays when the vehicle’s engine
power is reduced. Reduced engine power can affect the
vehicle’s ability to accelerate. If this message is on,
but there is no reduction in performance, proceed
to your destination. The performance may be reduced
the next time the vehicle is driven. The vehicle may
be driven at a reduced speed while this message is on,
but acceleration and speed may be reduced. Anytime
this message stays on, the vehicle should be taken
to your dealer/retailer for service as soon as possible.
FAST IDLE ON
If your vehicle has this feature, this message displays
when the fast idle feature is on. SeeFast Idle System
on page 2-25for more information.
FUEL LEVEL LOW
This message displays and a chime sounds if the fuel
level is low. Refuel as soon as possible. SeeFuel
Gage on page 3-51andFuel on page 5-6for more
information.
HEATED WASHER FLUID SYSTEM OFF
This message displays when the heated windshield
washer has been turned off. SeeWindshield Washer
on page 3-12for more information.
HEATING WASH FLUID WASH WIPES
PENDING
This message displays when the heated windshield
washer system is heating the �uid. SeeWindshield
Washer on page 3-12for more information.
HOOD OPEN
This message displays and a chime sounds if the
hood is not fully closed. Stop and turn off the vehicle,
check the hood for obstructions, and close the hood
again. Check to see if the message still appears on
the DIC.
ICE POSSIBLE DRIVE WITH CARE
This message displays when ice conditions are possible.
LEFT REAR DOOR OPEN (Crew Cab)
This message displays and a chime sounds if the driver
side rear door is not fully closed and the vehicle is
shifted out of P (Park). Stop and turn off the vehicle,
check the door for obstructions, and close the door
again. Check to see if the message still appears
on the DIC.
3-69
Page 260 of 600
TIGHTEN GAS CAP
This message may display along with the check engine
light on the instrument panel cluster if the vehicle’s
fuel cap is not tightened properly. SeeMalfunction
Indicator Lamp on page 3-45. Reinstall the fuel cap fully.
SeeFilling the Tank on page 5-10. The diagnostic
system can determine if the fuel cap has been left off or
improperly installed. A loose or missing fuel cap allows
fuel to evaporate into the atmosphere. A few driving trips
with the cap properly installed should turn this light
and message off.
TIRE LEARNING ACTIVE
If your vehicle has the Tire Pressure Monitor System
(TPMS), this message displays when the system
is re-learning the tire positions on your vehicle. See “DIC
Operation and Displays (Without DIC Buttons)” earlier
in this section for more information. The tire positions
must be re-learned after rotating the tires or after
replacing a tire or sensor. SeeTire Inspection and
Rotation on page 5-81,Tire Pressure Monitor System
on page 5-76, andInflation - Tire Pressure on page 5-73
for more information.
TRACTION CONTROL OFF
If your vehicle has StabiliTrak, this message displays
when the Traction Control System (TCS) is turned
off. Adjust your driving accordingly. SeeStabiliTrak
®
System on page 4-6for more information.
TRAILER CONNECTED
On vehicles with the Integrated Trailer Brake Control
(ITBC) system, this message displays brie�y when
a trailer with electric brakes is �rst connected to
the vehicle.
This message clears itself after several seconds.
This message also clears if you acknowledge it.
After this message clears, the TRAILER GAIN/OUTPUT
display appears in the DIC.
See “TRAILER GAIN/OUTPUT” underDIC Operation
and Displays (With DIC Buttons) on page 3-53or
DIC Operation and Displays (Without DIC Buttons)
on page 3-59and “Integrated Trailer Brake Control
System” underTowing a Trailer on page 4-51for
more information.
3-74
Page 270 of 600
FACTORY SETTINGS
This feature allows you to set all of the customization
features back to their factory default settings.
Press the customization button until FACTORY
SETTINGS appears on the DIC display. Press the
set/reset button once to access the settings for
this feature. Then press the customization button to
scroll through the following settings:
RESTORE ALL (default):The customization features
will be set to their factory default settings.
DO NOT RESTORE:The customization features will
not be set to their factory default settings.
To select a setting, press the set/reset button while the
desired setting is displayed on the DIC.
EXIT FEATURE SETTINGS
This feature allows you to exit the feature settings menu.
Press the customization button until PRESS
VTO EXIT
FEATURE SETTINGS appears in the DIC display.
Press the set/reset button once to exit the menu.
If you do not exit, pressing the customization button
again will return you to the beginning of the feature
settings menu.
Exiting the Feature Settings Menu
The feature settings menu will be exited when any of
the following occurs:
The vehicle is no longer in ON/RUN.
The trip/fuel or vehicle information DIC buttons are
pressed.
The end of the feature settings menu is reached
and exited.
A 40 second time period has elapsed with no
selection made.
3-84
Page 329 of 600
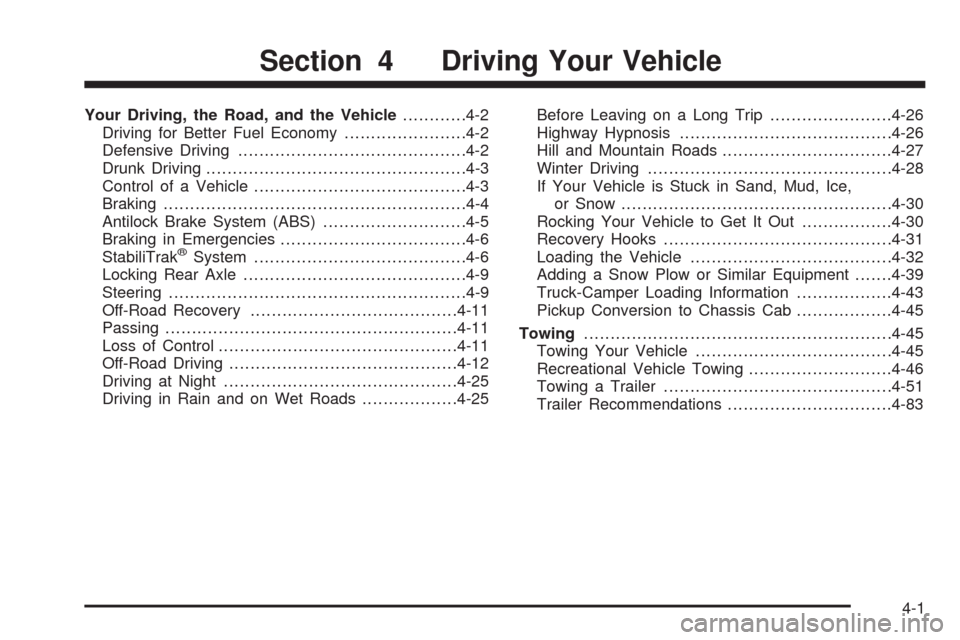
Your Driving, the Road, and the Vehicle............4-2
Driving for Better Fuel Economy.......................4-2
Defensive Driving...........................................4-2
Drunk Driving.................................................4-3
Control of a Vehicle........................................4-3
Braking.........................................................4-4
Antilock Brake System (ABS)...........................4-5
Braking in Emergencies...................................4-6
StabiliTrak
®System........................................4-6
Locking Rear Axle..........................................4-9
Steering........................................................4-9
Off-Road Recovery.......................................4-11
Passing.......................................................4-11
Loss of Control.............................................4-11
Off-Road Driving...........................................4-12
Driving at Night............................................4-25
Driving in Rain and on Wet Roads..................4-25Before Leaving on a Long Trip.......................4-26
Highway Hypnosis........................................4-26
Hill and Mountain Roads................................4-27
Winter Driving..............................................4-28
If Your Vehicle is Stuck in Sand, Mud, Ice,
or Snow...................................................4-30
Rocking Your Vehicle to Get It Out.................4-30
Recovery Hooks...........................................4-31
Loading the Vehicle......................................4-32
Adding a Snow Plow or Similar Equipment.......4-39
Truck-Camper Loading Information..................4-43
Pickup Conversion to Chassis Cab..................4-45
Towing..........................................................4-45
Towing Your Vehicle.....................................4-45
Recreational Vehicle Towing...........................4-46
Towing a Trailer...........................................4-51
Trailer Recommendations...............................4-83
Section 4 Driving Your Vehicle
4-1
Page 330 of 600
Your Driving, the Road, and
the Vehicle
Driving for Better Fuel Economy
Driving habits can affect fuel mileage. Here are some
driving tips to get the best fuel economy possible.
Avoid fast starts and accelerate smoothly.
Brake gradually and avoid abrupt stops.
Avoid idling the engine for long periods of time.
When road and weather conditions are appropriate,
use cruise control, if equipped.
Always follow posted speed limits or drive more
slowly when conditions require.
Keep vehicle tires properly in�ated.
Combine several trips into a single trip.
Replace the vehicle’s tires with the same TPC Spec
number molded into the tire’s sidewall near the size.
Follow recommended scheduled maintenance.
Defensive Driving
Defensive driving means “always expect the
unexpected.” The �rst step in driving defensively is to
wear your safety belt — SeeSafety Belts: They Are for
Everyone on page 1-16.
{CAUTION:
Assume that other road users (pedestrians,
bicyclists, and other drivers) are going to be
careless and make mistakes. Anticipate what they
might do and be ready. In addition:
Allow enough following distance between you
and the driver in front of you.
Focus on the task of driving.
Driver distraction can cause collisions resulting in
injury or possible death. These simple defensive
driving techniques could save your life.
4-2
Page 341 of 600
Drinking and driving can be very dangerous on any road
and this is certainly true for off-road driving. At the
very time you need special alertness and driving skills,
your re�exes, perceptions, and judgment can be
affected by even a small amount of alcohol. You could
have a serious — or even fatal — accident if you
drink and drive or ride with a driver who has been
drinking.
Off-roading can be great fun but has some de�nite
hazards. The greatest of these is the terrain itself. When
off-road driving, traffic lanes are not marked, curves
are not banked, and there are no road signs. Surfaces
can be slippery, rough, uphill, or downhill.
Avoid sharp turns and abrupt maneuvers. Failure to
operate the vehicle correctly off-road could result in loss
of vehicle control or vehicle rollover.
Off-roading involves some new skills. That is why it is
very important that you read these driving tips and
suggestions to help make off-road driving safer
and more enjoyable.Before You Go Off-Roading
Have all necessary maintenance and service
work done.
Make sure there is enough fuel, that �uid levels are
where they should be, and that the spare tire is fully
in�ated.
Be sure to read all the information about
four-wheel-drive vehicles in this manual.
Make sure all underbody shields, if the vehicle has
them, are properly attached.
Know the local laws that apply to off-roading where
you will be driving or check with law enforcement
people in the area.
Be sure to get the necessary permission if you will
be on private land.
If you think you will need some more ground clearance
at the front of your vehicle, you can remove the front
fascia lower air dam. The air dam is held in place by
two bolts and 10 snaps accessible from underneath the
front fascia.
4-13
Page 352 of 600
Driving in Water
{CAUTION:
Driving through rushing water can be dangerous.
Deep water can sweep your vehicle downstream
and you and your passengers could drown. If it is
only shallow water, it can still wash away the
ground from under your tires, and you could lose
traction and roll the vehicle over. Do not drive
through rushing water.
Heavy rain can mean �ash �ooding, and �ood waters
demand extreme caution.
Find out how deep the water is before driving through it.
Do not try it if it is deep enough to cover the wheel
hubs, axles, or exhaust pipe — you probably will not get
through. Deep water can damage the axle and other
vehicle parts.If the water is not too deep, drive slowly through it. At
faster speeds, water splashes on the ignition system and
the vehicle can stall. Stalling can also occur if you get
the tailpipe under water. If the tailpipe is under
water, you will never be able to start the engine. When
going through water, remember that when the brakes
get wet, it might take longer to stop. SeeDriving in Rain
and on Wet Roads on page 4-25.
After Off-Road Driving
Remove any brush or debris that has collected on the
underbody, chassis, or under the hood. These
accumulations can be a �re hazard.
After operation in mud or sand, have the brake linings
cleaned and checked. These substances can cause
glazing and uneven braking. Check the body structure,
steering, suspension, wheels, tires, and exhaust
system for damage and check the fuel lines and cooling
system for any leakage.
The vehicle requires more frequent service due to
off-road use. Refer to the Maintenance Schedule for
additional information.
4-24