2009 CHEVROLET IMPALA remote start
[x] Cancel search: remote startPage 117 of 406
4. Immediately, within one second, release the button
when the garage door moves. The indicator light
will blink rapidly until programming is complete.
5. Press and release the same button again. The
garage door should move, con�rming that
programming is successful and complete.
To program another Rolling Code device such as an
additional garage door opener, a security device,
or home automation device, repeat Steps 1-5, choosing
a different function button in Step 3 than what was
used for the garage door opener.
If these instructions do not work, the garage door
opener is probably a Fixed Code unit. Follow the
Programming instructions that follow for a Fixed Code
garage door opener.
Programming Universal Home
Remote — Fixed Code
For questions or help programming the Universal Home
Remote System, call 1-866-572-2728 or go to
www.learcar2u.com.
Most garage door openers sold before 1996 are Fixed
Code units.
Programming a garage door opener involves
time-sensitive actions, so read the entire procedure
before starting. Otherwise, the device will time out and
the procedure will have to be repeated.To program up to three devices:
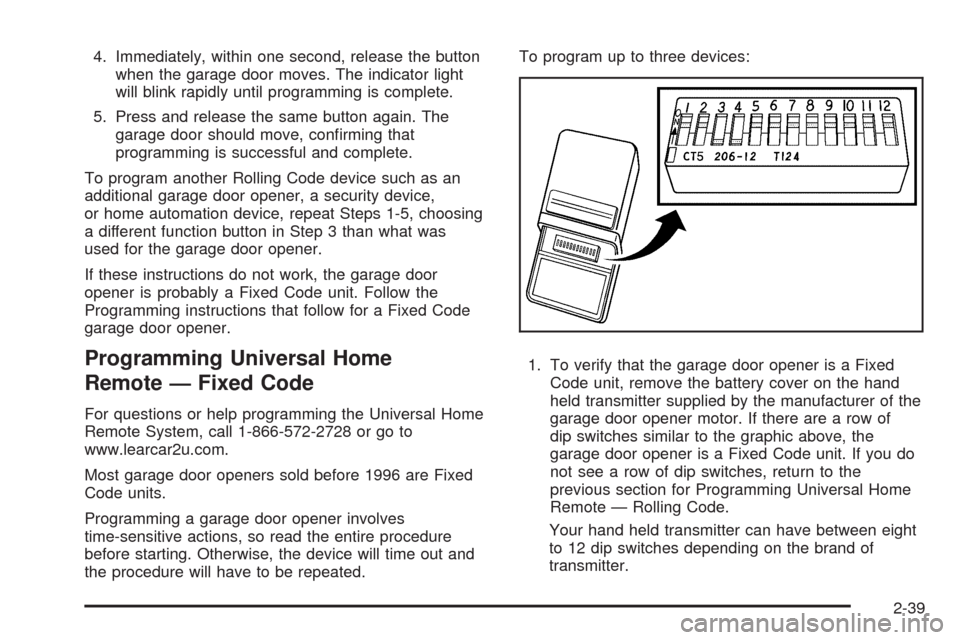
1. To verify that the garage door opener is a Fixed
Code unit, remove the battery cover on the hand
held transmitter supplied by the manufacturer of the
garage door opener motor. If there are a row of
dip switches similar to the graphic above, the
garage door opener is a Fixed Code unit. If you do
not see a row of dip switches, return to the
previous section for Programming Universal Home
Remote — Rolling Code.
Your hand held transmitter can have between eight
to 12 dip switches depending on the brand of
transmitter.
2-39
Page 151 of 406
Passenger Airbag Status Indicator
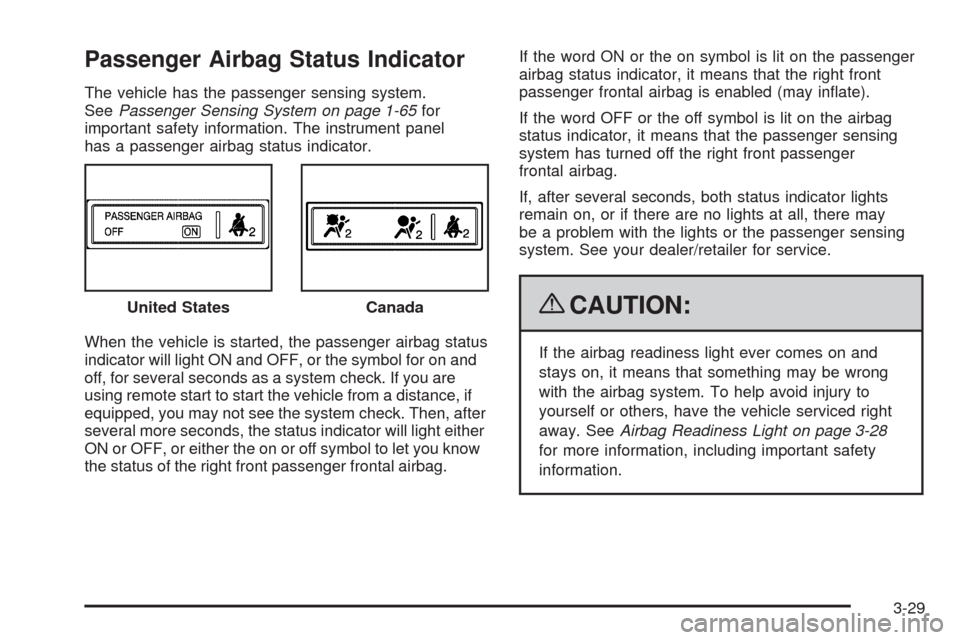
The vehicle has the passenger sensing system.
SeePassenger Sensing System on page 1-65for
important safety information. The instrument panel
has a passenger airbag status indicator.
When the vehicle is started, the passenger airbag status
indicator will light ON and OFF, or the symbol for on and
off, for several seconds as a system check. If you are
using remote start to start the vehicle from a distance, if
equipped, you may not see the system check. Then, after
several more seconds, the status indicator will light either
ON or OFF, or either the on or off symbol to let you know
the status of the right front passenger frontal airbag.If the word ON or the on symbol is lit on the passenger
airbag status indicator, it means that the right front
passenger frontal airbag is enabled (may in�ate).
If the word OFF or the off symbol is lit on the airbag
status indicator, it means that the passenger sensing
system has turned off the right front passenger
frontal airbag.
If, after several seconds, both status indicator lights
remain on, or if there are no lights at all, there may
be a problem with the lights or the passenger sensing
system. See your dealer/retailer for service.
{CAUTION:
If the airbag readiness light ever comes on and
stays on, it means that something may be wrong
with the airbag system. To help avoid injury to
yourself or others, have the vehicle serviced right
away. SeeAirbag Readiness Light on page 3-28
for more information, including important safety
information. United States
Canada
3-29
Page 165 of 406
T(Vehicle Information):Press this button to display
the oil life, units, tire pressure readings, compass zone
and compass calibration on vehicles with this feature, and
Remote Keyless Entry (RKE) transmitter programming.
U(Customization):Press this button to customize
the feature settings on your vehicle. SeeDIC Vehicle
Customization on page 3-57for more information.
V(Set/Reset):Press this button to set or reset certain
functions and to turn off or acknowledge messages
on the DIC.
Trip/Fuel Menu Items
3
(Trip/Fuel):Press this button to scroll through the
following menu items:
Odometer
Press the trip/fuel button until ODOMETER displays.
This display shows the distance the vehicle has been
driven in either miles (mi) or kilometers (km).
Trip A and Trip B
Press the trip/fuel button until TRIP A or TRIP B
displays. This display shows the current distance
traveled in either miles (mi) or kilometers (km) since the
last reset for each trip odometer. Both trip odometers
can be used at the same time.
Each trip odometer can be reset to zero separately
by pressing the set/reset button while the desired trip
odometer is displayed.
The trip odometer has a feature called the retro-active
reset. This can be used to set the trip odometer to the
number of miles (kilometers) driven since the ignition
was last turned on. This can be used if the trip odometer
is not reset at the beginning of the trip.
To use the retro-active reset feature, press and hold
the set/reset button for at least four seconds. The trip
odometer will display the number of miles (mi) or
kilometers (km) driven since the ignition was last turned
on and the vehicle was moving. Once the vehicle begins
moving, the trip odometer will accumulate mileage.
For example, if the vehicle was driven 5 miles (8 km)
before it is started again, and then the retro-active reset
feature is activated, the display will show 5 miles (8 km).
As the vehicle begins moving, the display will then
increase to 5.1 miles (8.2 km), 5.2 miles (8.4 km), etc.
3-43
Page 174 of 406
ENGINE POWER IS REDUCED
This message displays when the vehicle’s engine
power is reduced. Reduced engine power can affect
the vehicle’s ability to accelerate. If this message is on,
but there is no reduction in performance, proceed to your
destination. The performance may be reduced the next
time the vehicle is driven. The vehicle may be driven at a
reduced speed while this message is on, but acceleration
and speed may be reduced. Anytime this message stays
on, the vehicle should be taken to your dealer/retailer for
service as soon as possible.
ERROR
This message displays while viewing the odometer or
trip odometers if there is a problem with the instrument
panel cluster. See your dealer/retailer for service.
FUEL LEVEL LOW
This message displays when your vehicle is low on fuel.
Re�ll the fuel tank as soon as possible. SeeFuel Gage
on page 3-41andFilling the Tank on page 5-10for more
information.
HOOD OPEN
If your vehicle has the remote start feature, this
message displays when the hood is not closed
properly. Make sure that the hood is closed completely.
SeeHood Release on page 5-13.
ICE POSSIBLE DRIVE WITH CARE
This message displays when the outside air temperature
is cold enough to create icy road conditions. Adjust
your driving accordingly.
LEFT REAR DOOR OPEN
This message displays when the driver side rear door is
not closed properly. Make sure that the door is closed
completely.
OIL PRESSURE LOW STOP ENGINE
Notice:If you drive your vehicle while the engine
oil pressure is low, severe engine damage may occur.
If a low oil pressure warning appears on the Driver
Information Center (DIC), stop the vehicle as soon as
possible. Do not drive the vehicle until the cause of
the low oil pressure is corrected. SeeEngine Oil on
page 5-17for more information.
This message displays when the vehicle’s engine oil
pressure is low. The oil pressure light also appears on
the instrument panel cluster. SeeOil Pressure Light
on page 3-39.
Stop the vehicle immediately, as engine damage can
result from driving a vehicle with low oil pressure.
Have the vehicle serviced by your dealer/retailer as
soon as possible when this message is displayed.
3-52
Page 183 of 406
CHIME VOLUME
This feature allows you to select the volume level of the
chime.
Press the customization button until CHIME VOLUME
appears on the DIC display. Press the set/reset button
once to access the settings for this feature. Then press
the customization button to scroll through the following
settings:
NORMAL:The chime volume will be set to a normal
level.
LOUD:The chime volume will be set to a loud level.
NO CHANGE:No change will be made to this feature.
The current setting will remain.
There is no default for chime volume. The volume will
stay at the last known setting.
To select a setting, press the set/reset button while the
desired setting is displayed on the DIC.
REMOTE START
If your vehicle has this feature, it allows you to turn the
remote start off or on. The remote start feature allows you
to start the engine from outside of the vehicle using the
Remote Keyless Entry (RKE) transmitter. SeeRemote
Vehicle Start on page 2-7for more information.
Press the customization button until REMOTE START
appears on the DIC display. Press the set/reset button
once to access the settings for this feature. Then press
the customization button to scroll through the following
settings:
OFF:The remote start feature will be disabled.
ON (default):The remote start feature will be enabled.
NO CHANGE:No change will be made to this
feature. The current setting will remain.
To select a setting, press the set/reset button while the
desired setting is displayed on the DIC.
3-61
Page 267 of 406
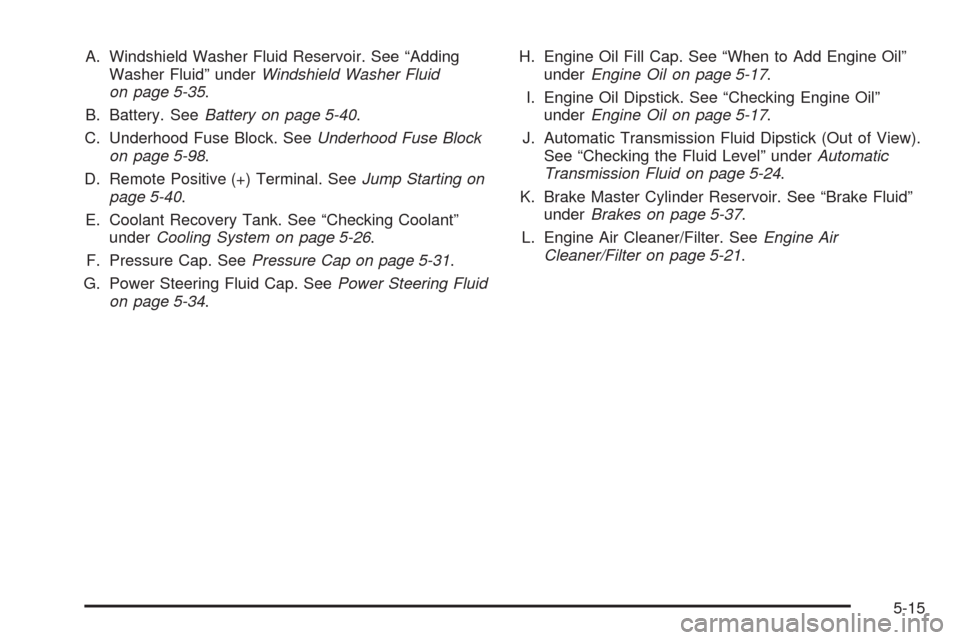
A. Windshield Washer Fluid Reservoir. See “Adding
Washer Fluid” underWindshield Washer Fluid
on page 5-35.
B. Battery. SeeBattery on page 5-40.
C. Underhood Fuse Block. SeeUnderhood Fuse Block
on page 5-98.
D. Remote Positive (+) Terminal. SeeJump Starting on
page 5-40.
E. Coolant Recovery Tank. See “Checking Coolant”
underCooling System on page 5-26.
F. Pressure Cap. SeePressure Cap on page 5-31.
G. Power Steering Fluid Cap. SeePower Steering Fluid
on page 5-34.H. Engine Oil Fill Cap. See “When to Add Engine Oil”
underEngine Oil on page 5-17.
I. Engine Oil Dipstick. See “Checking Engine Oil”
underEngine Oil on page 5-17.
J. Automatic Transmission Fluid Dipstick (Out of View).
See “Checking the Fluid Level” underAutomatic
Transmission Fluid on page 5-24.
K. Brake Master Cylinder Reservoir. See “Brake Fluid”
underBrakes on page 5-37.
L. Engine Air Cleaner/Filter. SeeEngine Air
Cleaner/Filter on page 5-21.
5-15
Page 269 of 406

A. Windshield Washer Fluid Reservoir. See “Adding
Washer Fluid” underWindshield Washer Fluid
on page 5-35.
B. Battery. SeeBattery on page 5-40.
C. Underhood Fuse Block. SeeUnderhood Fuse Block
on page 5-98.
D. Remote Positive (+) Terminal. SeeJump Starting on
page 5-40.
E. Pressure Cap. SeePressure Cap on page 5-31.
F. Power Steering Fluid Cap. SeePower Steering Fluid
on page 5-34.
G. Engine Oil Dipstick. See “Checking Engine Oil”
underEngine Oil on page 5-17.
H. Engine Oil Fill Cap. See “When to Add Engine Oil”
underEngine Oil on page 5-17.
I. Automatic Transmission Fluid Dipstick. See
“Checking the Fluid Level” underAutomatic
Transmission Fluid on page 5-24.
J. Brake Master Cylinder Reservoir. See “Brake Fluid”
underBrakes on page 5-37.
K. Engine Air Cleaner/Filter. SeeEngine Air
Cleaner/Filter on page 5-21.
L. Coolant Recovery Tank. See “Checking Coolant”
underCooling System on page 5-26.Engine Oil
Checking Engine Oil
It is a good idea to check the engine oil level at each
fuel �ll. In order to get an accurate reading, the oil must
be warm and the vehicle must be on level ground.
The engine oil dipstick handle is a yellow loop. See
Engine Compartment Overview on page 5-14for
the location of the engine oil dipstick.
1. Turn off the engine and give the oil several minutes
to drain back into the oil pan. If this is not done, the
oil dipstick might not show the actual level.
2. Pull out the dipstick and clean it with a paper towel
or cloth, then push it back in all the way. Remove it
again, keeping the tip down, and check the level.
5-17
Page 294 of 406
Notice:If you leave the radio or other accessories
on during the jump starting procedure, they could be
damaged. The repairs would not be covered by the
warranty. Always turn off the radio and other
accessories when jump starting the vehicle.
3. Turn off the ignition on both vehicles. Unplug
unnecessary accessories plugged into the cigarette
lighter or the accessory power outlets. Turn off
the radio and all lamps that are not needed. This
will avoid sparks and help save both batteries. And
it could save the radio!
4. Open the hoods and locate the batteries. Find the
positive (+) and negative (−) terminal locations on
each vehicle.
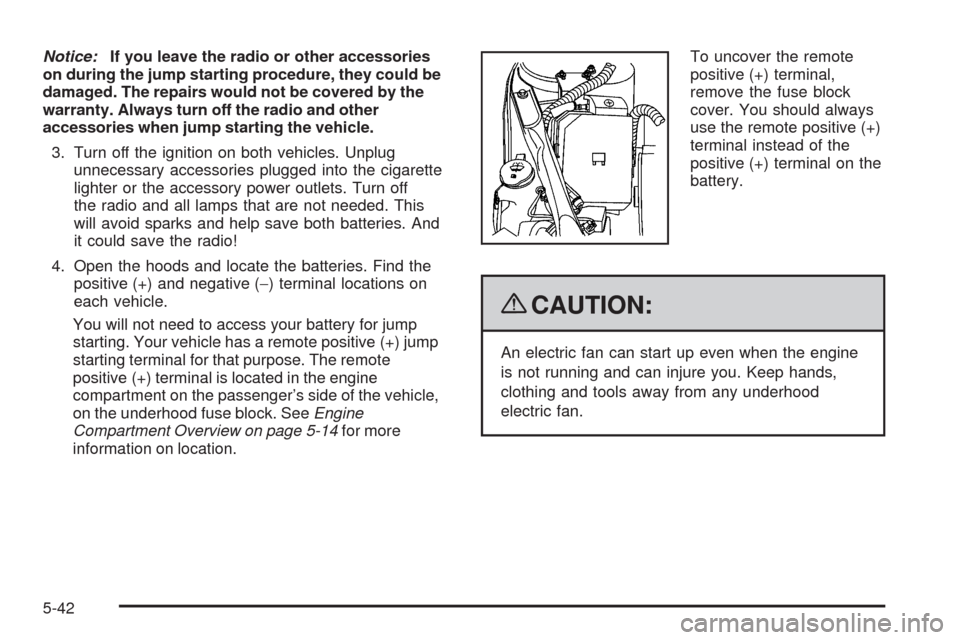
You will not need to access your battery for jump
starting. Your vehicle has a remote positive (+) jump
starting terminal for that purpose. The remote
positive (+) terminal is located in the engine
compartment on the passenger’s side of the vehicle,
on the underhood fuse block. SeeEngine
Compartment Overview on page 5-14for more
information on location.To uncover the remote
positive (+) terminal,
remove the fuse block
cover. You should always
use the remote positive (+)
terminal instead of the
positive (+) terminal on the
battery.
{CAUTION:
An electric fan can start up even when the engine
is not running and can injure you. Keep hands,
clothing and tools away from any underhood
electric fan.
5-42